Knowing how to grow various herbs is important when you’re aiming for self-sufficiency. Once you’ve learned how to grow cannabis (which is one of the most beneficial medicinal plants out there), there’s another vital step to learn: how to preserve it. Drying and curing cannabis isn’t difficult, but there are some subtleties to the process.
Read on for some helpful advice that’ll help you get the most out of your plants!
Why is Drying and Curing Cannabis Important?
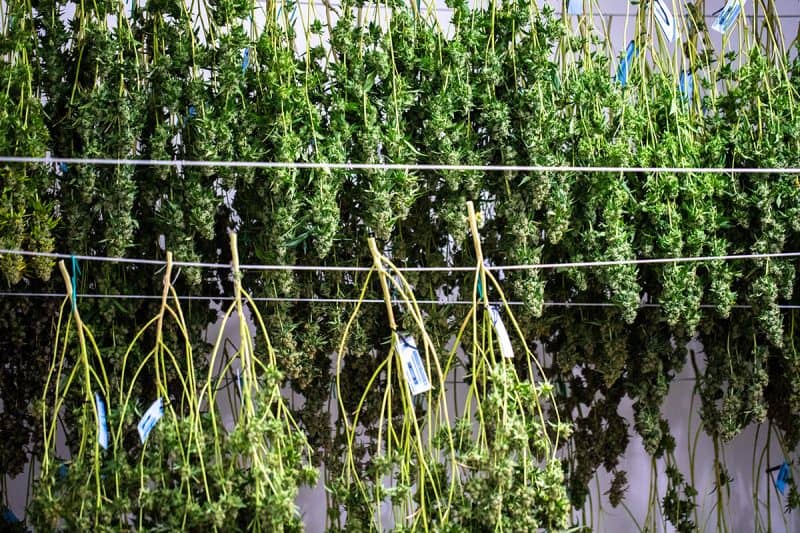
Cannabis, like so many other plants, can of course be tinctured when fresh. Most people, however, use it in its dried form. Some smoke it, others use it dry in tinctures and salves.
Most importantly, cannabis that has been dried properly can be stored for years. It may lose potency over time—like all dried plant matter—but it should still retain a significant amount of its beneficial properties.
When this plant is completely dry, it can be stored in plastic bags or glass jars for years. In contrast, if there’s too much moisture left in it, it’ll get moldy and unusable pretty quickly. Furthermore, if it’s cured properly after the drying process, it’ll retain more of its fragrance and potency.
Are you going through a ton of trouble to stock your pantry with food and your cupboards with herbal medicine? Then you probably want to invest as much time and effort as possible into making sure none of your hard work goes to waste. Wet cannabis is a veritable dance party for all kinds of mold, bacteria, etc.
If you (or those you share it with) will be using it for medicine, you really don’t want to inhale or ingest any of that. High-quality herbs = high-quality health.
Invest a bit of extra time into drying your plant matter properly. Your future self will thank you.
Set Up a Drying Room
First things first: you need a space in which to dry your crop thoroughly. Professional growers have rooms especially set aside for top-grade drying. The rest of us mortals, however, often have to make do with what’s available. This might be a spare room or attic, or another building on the property. A clean, dry, large shed is ideal, as is a barn or dry garage.
Ultimately, the main things needed for drying and curing cannabis properly are:
- A room that will be undisturbed by children and other animals
- That space needs to be dry, fairly warm, and very well ventilated
The room you dry the buds in should be well ventilated, dry, and fairly warm. You don’t want to flash bake it: if it’s in a super hot room, it’ll dry inconsistently. Aim for 68–73°F/20–23°C. If you’re drying quite a lot, get a few fans in there. If you live in a location where it’s usually damp, or if it’s been raining a lot, invest in a good dehumidifier.
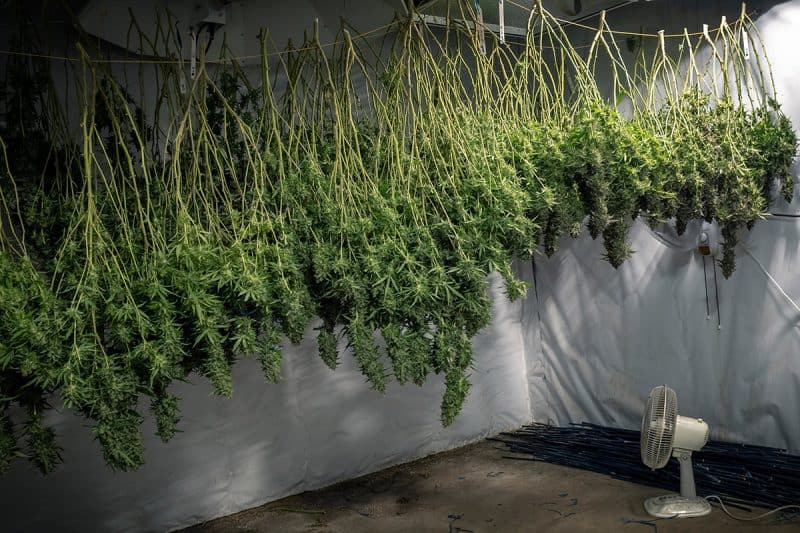
Actually, dehumidifiers (or humidifiers, depending on your location) are a great idea in general. Try to keep the room’s humidity between 45% and 55%. Lower than that and your buds will dry out too quickly. In contrast, moisture levels higher than that might encourage mold to flourish. If you live somewhere that’s super hot and dry (looking at you, Arizona), then use a humidifier instead.
If you’re wondering how you’ll know what the humidity is like in that room, no worries. Just get yourself a digital hygrometer/thermometer and install it on a wall.
What You’ll Need for Drying and Curing
- Protective gloves (like latex or other disposable types)
- Manicure scissors
- A hanging mesh herb-drying rack with zippered compartments OR lengths of wire mesh lattice + hooks to hang it
- The aforementioned fans, humidifier/dehumidifier
- Glass mason jars with lids
- Cardboard box
- The first decision to make is whether you’ll dry your plants whole (hanging the entire stem), or if you’ll trim the plant down into smaller branches. Since most of the plant’s moisture is stored in the stem, drying happens more quickly if you trim at this stage. It is recommended to wear gloves for this step, to avoid covering your hands in a sticky mess!
- With either method don’t crowd the plants: be sure there is room for air to circulate around them
- As the plants dry, you’ll notice them getting smaller and denser. Check on your buds daily and rotate them often to ensure uniform drying.
Prepare Your Cannabis for Drying
The way you’ve harvested your buds will often determine your drying method. If you’ve cut long stems, then you can hang them from a lattice. In contrast, if you’ve mostly cut the buds off, you’ll need to dry them in a hanging mesh bag.
In the future, decide on your drying method before harvesting. This way you can decide whether to cut higher up the stems, or just cut the buds off.
Wear protective gloves whenever handling cannabis. They release a lot of sticky resin, and it’s hard to remove that stuff. Use manicure or other fine scissors to trim off any remaining leaf bits that may still be sticking out of the buds.
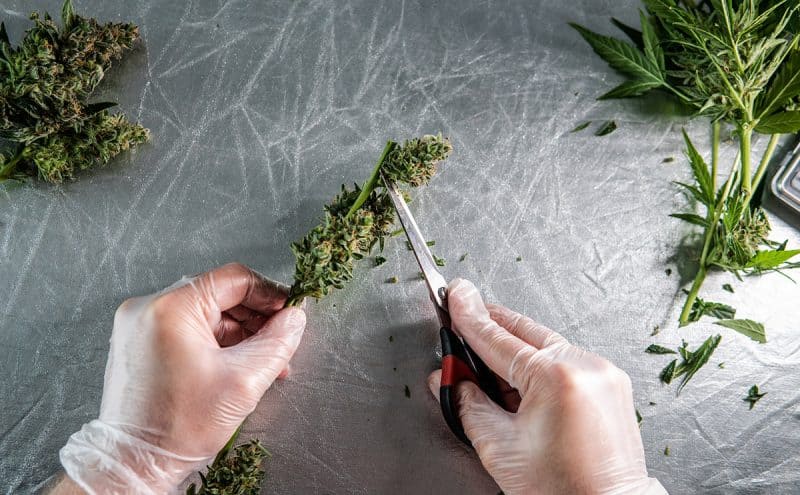
When you’re clipping it down, run your eyes and fingers through the weed carefully. Go through the different nodes, looking for any mildew. It’s better to clip/cut your buds to a fairly small size rather than falling to the temptation of keeping them big, thereby harboring a chunk of mold somewhere hidden within them.
Sure, big buds are aesthetically pleasing, but well-dried cannabis is far more important than chunky buds.
Option 1: Using Hanging Mesh Drying Racks
These mesh drying racks are pretty much ideal. They allow you to dry a lot of plant matter in one contained space, without creating a mess on the floor. Get the ones with zippered compartments whenever possible. Not only do the zippers help to keep anything from falling out, but they also keep insects and other critters from getting in.
Do you want mice or flies dancing around on your buds? Didn’t think so.
Okay, when you’re preparing the hanging dry racks, be sure to space the buds out well. Spread them out generously on each tray, but make sure you neither under- nor over-load each section. There should be enough room for air to circulate.
Also, if you have different types of cannabis and not enough space in the turkey trays, label the different layers. This way you won’t get confused, and won’t get disappointed when you’re aiming to smoke Jedi Ghost OG instead of Wedding Cake. That’ll just lead to sadness.
Option 2: Hang a Trellis
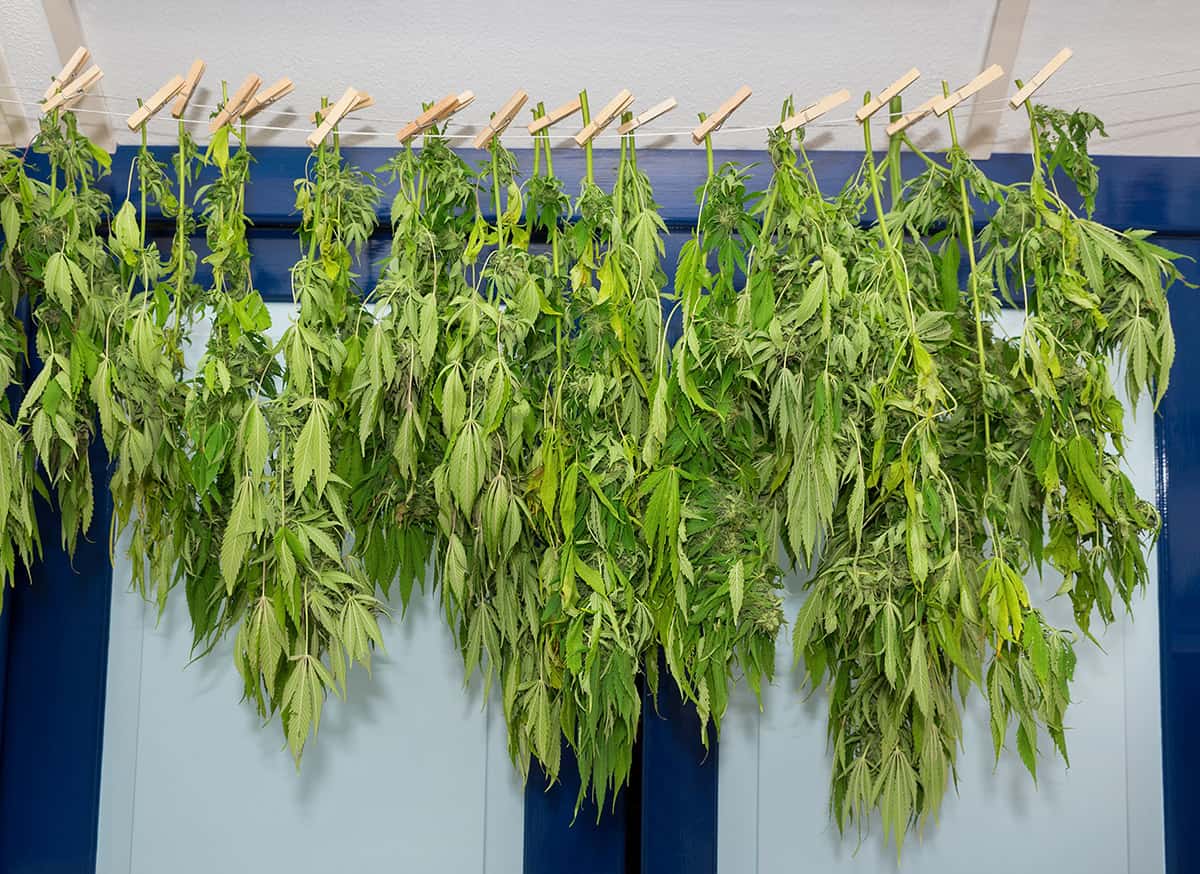
If you don’t have these drying racks available and have quite a lot of bud to dry, there’s an alternative. Drill and anchor some big hooks on the walls about a foot down from the ceiling. Then hang wire mesh netting across the entire room.
By doing this, you’ll be able to hang your cannabis branches vertically. Most branches will still have little nubs on them after they’ve had their leaves trimmed off. Just poke the stem ends up through the mesh spaces and let the nubs “hook” so they can be hung up.
Alternatively, if the branches you’ve cut don’t have nubs left, that’s okay. Just use metal springs or binder clips and a bit of wire or twine to suspend them.
How Long Does it Take Cannabis to Dry?
That depends a lot on the strain, as well as the size of the buds. Generally, it takes an average of seven to 14 days for the buds to dry to perfection. This varied time means that it’s important for you to check your plants’ drying progress constantly.
At the very least, check on your buds three times a day. This should be once every morning, then again around midday, and once in the evening. You’re encouraged to be neurotic about checking it more often. This is especially important when the drying process is nearly complete.
There’s a good way to check whether weed is at the optimal moisture/dryness level or not. When you squeeze a bud, you don’t want it to feel crispy. It needs to “give” a little bit when you press into it, but not feel “squidgy” or wet. You want elasticity rather than moisture.
Final Curing (Optional)
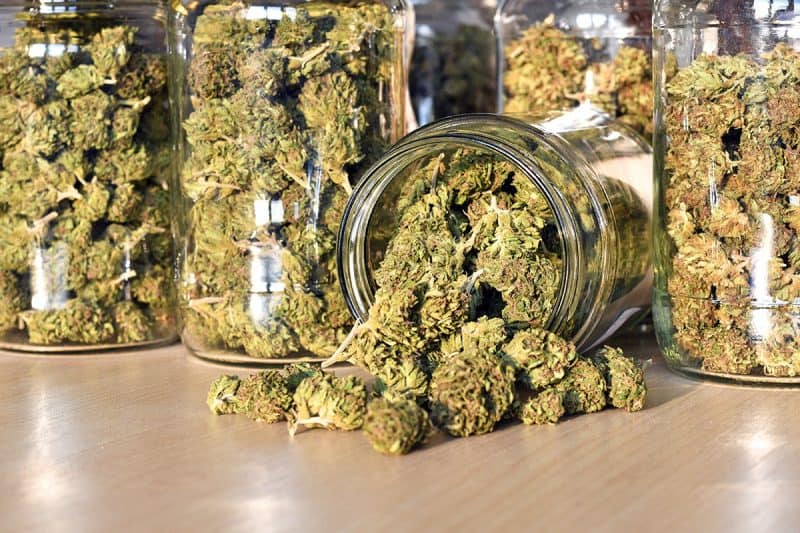
Now, you can absolutely store your dried buds as they are at this point. That said, a final curing often enhances the flavor, fragrance, etc. as mentioned earlier. Those who spend a lot of time drying and curing cannabis will often skip this step, but it’s a good method to try at least once, just to see how you like it.
Break down any large buds into smaller pieces, and pop them into your Mason jars. You don’t want to pack these too full: aim for 1/2 to 3/4 filled. If you have a few buds that have a lot of juicy trichomes on them, crush those up a tiny bit. They’ll release terpenes, which will spread around to the other buds, making them more fragrant.
Once you’ve filled the jars, pack them into that cardboard box you’ve set aside. Don’t tape the box shut or anything: just close it up lightly. You’re aiming for a dark environment, not a claustrophobic one.
Over the first three days, make sure to open the jars for a few minutes, two to three times over the course of the day. This is known as “burping”. It’ll allow your cannabis bud babies to release moisture, and take in fresh oxygen.
If you notice that some of the jars are accumulating moisture inside, or that the buds are getting moldy, attend to that immediately. It means that at least some of the plant matter wasn’t dried sufficiently before being popped into the jar. Remove this immediately, and discard any fuzzy bits. If there’s anything salvageable, transfer it to a clean new jar and restart this process.
Additional Notes:
As a final note, don’t freak out if you’ve over-dried your buds. Drying and curing cannabis is an art that’s constantly evolving. You’ll learn a lot more about this process the more you do it, and you’ll develop an intuitive sense of when things feel right. Besides, it’s better to have buds that are slightly on the dry side, than risk contaminating them with moisture and mold.
If, after the drying process is complete, you find that the bud is too dry, you can fix that a bit. Simply put it into a plastic bag and add some fruit peel to moisten it up a bit. Some finely shaved or chopped orange peel is ideal for this. Just pop a small spoonful of this into the bag and leave it for a few days. That should re-hydrate the buds just enough.
At this point, transfer the buds to a glass jar, and compost the fruit peel. You can use this trick to re-moisture overly dry tobacco, mullein, coltsfoot, and other smoking herbs as well.
