It’s summertime. The plants are in full bloom, and your garden harvest is in full swing. You look out over your lush garden, and you see that your zucchini plants are abundantly producing.
So you pick them and eat them for a few meals.
Then you pick them again and eat a few more meals with them.
However, eventually, you eat so much zucchini you think you are going to turn into one. So you must find a new way to preserve them.
Well, if this has been you in summers past, then you’ve come to the right place because I’m going to share with you how you can freeze your zucchini harvest and use it all year long.

How to Freeze Zucchini:
1. Pick Your Zucchini
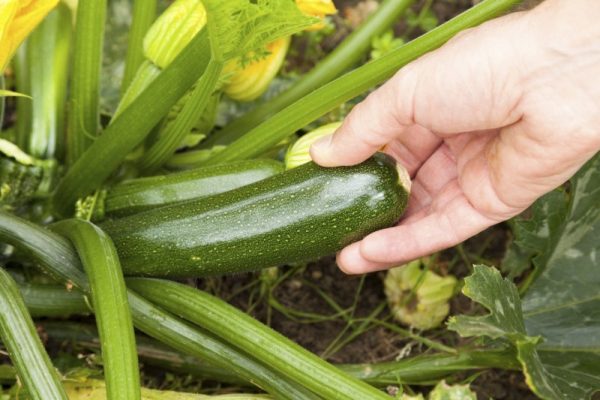
You’ll begin this preservation process by picking your zucchini. You do this by browsing through your garden. You’ll have to look under the leaves of the zucchini plant daily because it is easy to miss them as they blend in with the plant.
Also, you’ll want to make sure that every zucchini is covered by the leaves of the plant. Those leaves help protect your harvest from being damaged by too much sun.
Anyway, you’ll want to walk through your zucchini patch every day, gently lifting the big leaves to see if any zucchini are large enough to pick. You want them to be about 4-5-inches long when picking. You don’t want them to hang on the plant too long or they’ll get big and tough.
So just look daily to see what is available. If you find that you’ve left one too long don’t fret. You can still bring it inside and use it. You just don’t want to leave them like that on purpose. That is my opinion at least.
When you find the zucchini you are looking for, you can gently cut the top of the stem loose from the plant. You don’t want to damage the plant in the picking process.
Then you place the zucchini in a bucket or basket gently so you don’t damage or bruise the vegetable. Once you’ve gathered them all, you are good to go.
2. Wash and Slice Them
After you’ve gathered your harvest of zucchini, it is time to get to work on them. You’ll start by washing each zucchini by hand. You can do this in 2 ways.
First, you can run cold water in a large sink and place the zucchini in the tub. You then rub them around gently and cause them to bump into one another to loosen the dirt.
Secondly, you could pull them out of the basket or bucket and wash them gently by hand. You do this by running them under cold water and rubbing your hands over them to loosen any dirt that may be on them. The method is really up to you. Some prefer the first because it is faster. While others prefer the second to ensure cleanliness.
Again, it is a personal preference. You just want to make sure that the zucchini is clean. That is the goal.
After you’ve gotten the zucchini as clean as you are comfortable with, you’ll need to slice them. Use a sharp knife so you are less likely to cut yourself. The harder you have to saw through things, the more pressure that requires.
If your finger is in the way, you’ll definitely cut yourself. Whereas with a sharp knife, you don’t have to apply as much pressure. This means you are less likely to have your finger in the way in the first place.
So moral of the story, sharpen your knives before you get started so you can avoid nicking your fingers when slicing the zucchini.
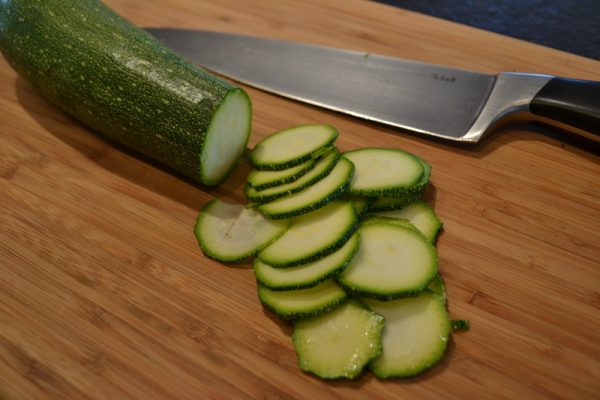
Once your knives are ready, you’ll need to place the zucchini on a cutting board. Then place it long ways and make sure you have a firm grip on one end of the zucchini that is opposite of where you will begin cutting.
Then you can just cut round circles of zucchini as you go down the vegetable.
However, some people prefer to have wedges of zucchini. If that is the case, then you’ll need to cut the zucchini in half longways.
Next, you’ll need to cut each half into thirds or fourths longways so you can create wedges.
Finally, others prefer to have cubes of zucchini. You’ll cut the zucchini into circles as I first mentioned. Then cut those circles into fourths. This will create smaller cubes of zucchini.
Truthfully, this is all about preference too. Some prefer wedges because of how they will cook the zucchini later. While others prefer cubes over circles because it creates more compact storage.
Then you have people like me that go with circles because it is more efficient in my opinion.
Again, this is all about your storage, slicing, and cooking preferences.
3. Blanch the Zucchini
After you have harvested your zucchini, cleaned the zucchini, and then cut it into the slices you prefer, it is time to roll onwards toward the freezing process.
So you’ll begin by pulling out a soup pot. You’ll then need to place water in the pot and place it on the stove over medium-high heat. Be sure to place the lid on the pot as it will help bring the water to a boil faster.
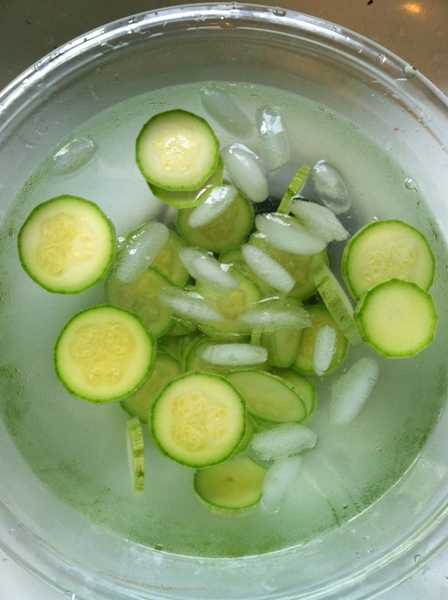
Once the water has boiled, you’ll need to have your zucchini set-up near the stove. However, before you begin blanching the zucchini, you’ll also need to have a large mixing bowl filled with cold water and ice.
Plus, you’ll also need a slotted spoon as well.
Then you’ll be ready to begin blanching the zucchini. You’ll do this by taking the freshly sliced zucchini and placing it in the boiling water for about a minute.
Once the zucchini has boiled for a minute, you’ll use the slotted spoon to pull the zucchini out of the boiling water. Be sure to allow the boiling water to drain off of the zucchini.
Next, you’ll place the zucchini in the ice water and allow it to sit for 2-3 minutes until it has cooled thoroughly. You’ll want to be sure that you drain off as much of the hot water as possible so it doesn’t warm up your ice water.
Then you’ll continue to do this until you have blanched all of the zucchini. When the zucchini is done chilling, you can place it in a colander and allow it to drain completely while you finish blanching and cooling the remainder of the zucchini.
4. Flash Freeze
So after you’ve blanched the zucchini, cooled it, and allowed it to drain, you should flash freeze it. The reason you do this is so that when you go to put it in a bag for long-term storage, it will maintain its shape. This should keep them from sticking together and turning to undesirable mush.
Which leads us up to how to flash freeze. You’ll line a cookie sheet with parchment paper so the zucchini won’t stick to the pan. You can even spray it with non-stick cooking spray if you’d like.
Then you place the zucchini in a single layer on the cookie sheet.
Finally, pop it into the freezer for about 20 or 30 minutes. You don’t want the zucchini to freeze solid. Basically, you are looking for it to freeze just enough for the zucchini to hold its shape.
So once this has been accomplished, you are ready to move on to the next step.
5. Place in Bags and Toss in Freezer
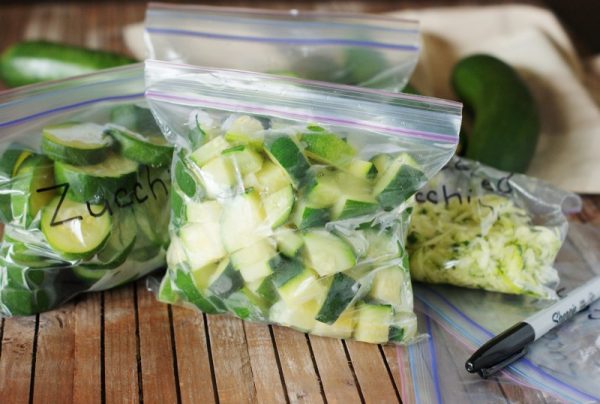
Once you have finished flash freezing the zucchini, you are ready to place them in bags for long-term storage. Remember, when freezing anything, it should be safe to use for 3-6 months.
However, if you go to use it and it has been freezer burned (or if you’ve lost power at some point and the item has thawed) it is always safer to toss it. It is always better to be safe than sorry. Just remember that in any case of you preserving your own food.
However, the same rule should apply to purchased food as well. Probably a little more so since you don’t know the process that was used to preserve it in the first place.
Still, I digress, how you choose to store your zucchini will be up to you. The first option is storing them in store-bought freezer bags with a seal, like these.
So you’ll pack the bags about halfway or so (you don’t want to squoosh the zucchini) and then seal them. Be sure to squeeze as much air out of the bags as you can. Some people will actually close the bag the majority of the way, then suck the air out of the bag with a straw.
Again, this is up to you. I usually just press the bag until I’ve gotten as much air out of it as I possibly can.
The second method you could use is using a vacuum sealer. You’ll just pack the bags as full as the manufacturer says you should, then place it in the vacuum sealer according to the manufacturer instructions.
Finally, you’ll push the button and it will suck all of the air out of the bag for you.
Whichever method you use, be sure to label the bags with what is inside and include the date as well so you know when it is no longer safe to use.
So now that I’ve shared with you how you can preserve your zucchini harvest, you might wonder what you’ll do with all of this frozen zucchini.
Well, don’t worry. I thought of that too and saved you a little work. I searched the internet for a few interesting recipes that might help you with using your zucchini.
Great Frozen Zucchini Recipes:
1. Zucchini Soup

I can’t help it. I love soup, and I love soup that just looks weird. You know, the idea of slurping something down that is all neon green? Is that not intriguing to you?
Well, even if it isn’t, eating different colored foods is very good for us. So when you are looking for a different way to utilize your frozen zucchini, take a glance at this recipe.
Make This Zucchini Recipe2. Mexican Zucchini and Beef Skillet

I’m a huge fan of Mexican cuisine. It is fresh, delicious, and usually pretty healthy too. That is why I love this recipe because it looks like a tasty way to enjoy your zucchini harvest.
So if you are like me and enjoy a fresh Mexican dish, then you might definitely want to try this recipe out.
Make This Zucchini Recipe3. Zucchini Parmesan Waffles
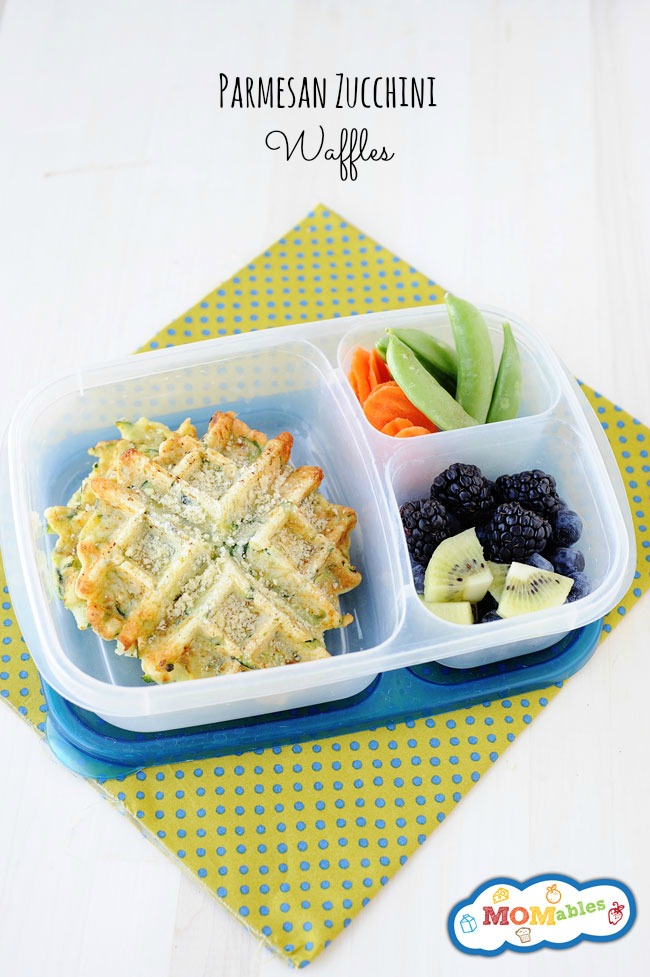
My kids love waffles, but if I’m honest, there comes a point in parenthood where you think, “Can I just eat some adult food? I’m so tired of waffles and chicken nuggets!”
And that is where these jewels come in to play. They are fun waffles that the kids enjoy but with a twist, so the parents can have a tasty meal too.
Make This Zucchini RecipeWell, now you know how to freeze and preserve your Zucchini harvest this year. Plus, you also have 3 great recipes to help you utilize that harvest.
