Has a disaster hit your life only for it to end up being a good thing?
I experienced this a few months ago. If you’ve hung around the blog for long, you know I’m a southern girl.
Where I live, we get small amounts of snow from time to time, but nothing in comparison to what the northern part of the country experiences.
This past December we received approximately two feet of snow. This wreaked major havoc around our homestead because our buildings weren’t built to cope with this type of weight.
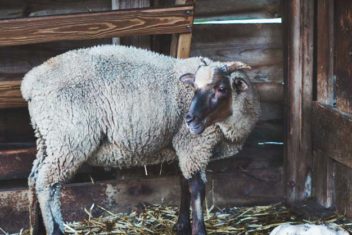
It crushed our goats’ shed and our pigs’ area. What seemed like a disaster, turned into a tremendous blessing.
We were able to file an insurance claim and received enough money for building a barn we’d been hoping to build for a couple of years.
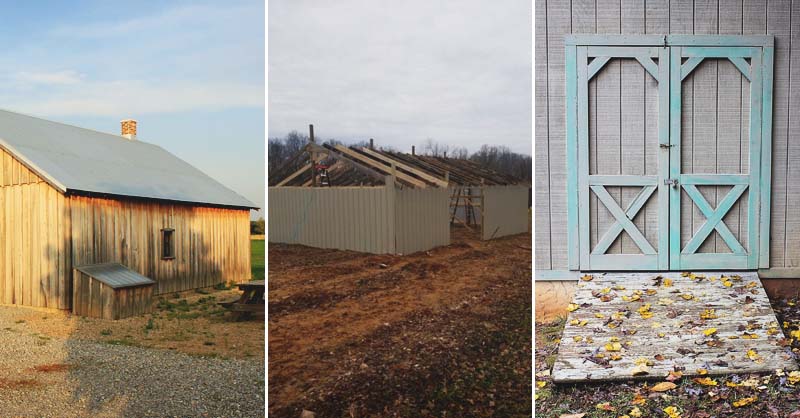
I wanted to share how we were able to build a 24×40 sized barn for less than $3,000. Here’s what we used and how we accomplished this large project of building a barn on such a small budget:
We used:
- 40- 2x6x12s
- 42- 2x6x14s
- 15- 4x4x12s
- 3ft wide x 14ft long metal sheets
- 3ft wide x 8 ft long metal sheets
- Air compressor
- Nail gun
- Screws
- Impact driver
- Nails
- Level
- Post hole diggers
- Chalk line level
- Ladder
1. How to Save From the Start
I’m going to be upfront. If you aren’t a confident carpenter, this isn’t the project for you. My husband worked in construction for 13 years and still deals heavily with construction with his current occupation.
If it weren’t for him, I wouldn’t have attempted this build. Building a barn of this size for this little money is only feasible if you aren’t paying for labor.
Making this a DIY project saved us a ton of money. The other ways we managed to save money was by bargain hunting for the materials.
Instead of going to our local big box store for the lumber, we shopped locally. We have a local lumber mill which allowed us to buy rough-cut lumber at a fraction of the cost for what we would’ve paid anywhere else.
We also have carport factories in our area. They sell metal at these facilities for a fraction of the cost you can purchase metal anywhere else.
Yet, we didn’t walk in and take our pick. Instead, we found the cheapest metal option and used it for the outside of the barn.
Lastly, we had some of the tools mentioned above already. Any tools we had to purchase for this build, we shopped around on local yard sale pages and found second-hand tools which were still in great condition.
Be sure to shop around for your materials before buying to save the most money.
2. Grade the Land
To start building a barn, you should grade the area where your barn is going to be. This step is optional, and we skipped it in our build because we were in such a hurry.
However, if you don’t have to skip it, you shouldn’t. It made our build much harder because we were building on uneven ground.
Whether you rent the equipment to grade the land yourself, hire it done, or use equipment you have on hand, it’s an important step.
Grading the land will make it easier to level the barn and avoid many annoying little things which can sometimes happen when building a barn of this size.
Therefore, it’s better to avoid the extra headache and take the time to level the ground you’re building on.
3. Add Initial Posts
The base of your barn is going to begin with the placement of the 15 4x4x12s in the ground. Decide how large you want the barn to be.
In our case, our barn was 24×40. Mark each of the corners and insert a post at each corner.
Once the posts are in the ground, place the other posts into the ground with even spacing between them and in between each corner post.
The chalk line level makes this job easier to ensure the posts are zigzagging between the corners.
Also, when you’re inserting the posts in the ground, use post hole diggers. If you only have manual post hole diggers, you may have to place concrete in the ground around the posts.
Manual post hole diggers tend to make looser holes and give the posts wiggle room (which you don’t want.)
If you use a motorized post hole digger, the holes are tighter, and we didn’t have to use concrete to secure the posts in the ground.
They were placed into snug holes and packed firmly with the soil the post hole digger had removed.
You should now have four corners, a row of posts forming the perimeter of the barn, and a center row of posts going down the middle of the barn for roofing supports.
When all of your posts are spaced evenly and firmly inserted in the ground, you have the base for your build.
4. Brace Yourself
Once all of the posts are in the ground, it’s time to add the bracing to the posts and start forming the barn.
Use the 2x6x12s to brace the posts. The braces will go horizontally between each vertical post.
Therefore, you’ll place a horizontal post at the top, connecting each vertical post. You’ll place one in the middle and one at the bottom.
Do this all the way around the build. The only place you won’t add the horizontal pieces of lumber is where you’re planning on putting your doorways.
Be sure to have the doorways planned ahead of time to make this part of the process easier. Secure each horizontal piece of lumber to the vertical post using nails and a nail gun.
This bracing should only be done around the perimeter of the building. Don’t connect the posts running through the center of the barn.
5. Add Temporary Indoor Bracing
What surprised me the most about this build was how wobbly the barn felt during the first portion of the building process.
To stop the barn from moving too much, we used scrap wood to secure the inside of it. We ran pieces of wood between each of the initial posts.
They were braced at the halfway point of the 4x4x12s, at the bottom, and we’d run a piece of scrap wood diagonally between those two braces.
We did this throughout the barn to help secure it in the wind until we could get the roof and sides on it.
You can remove the braces once the sides and the roof are on the barn and it feels more secure.
6. Brace the Roof
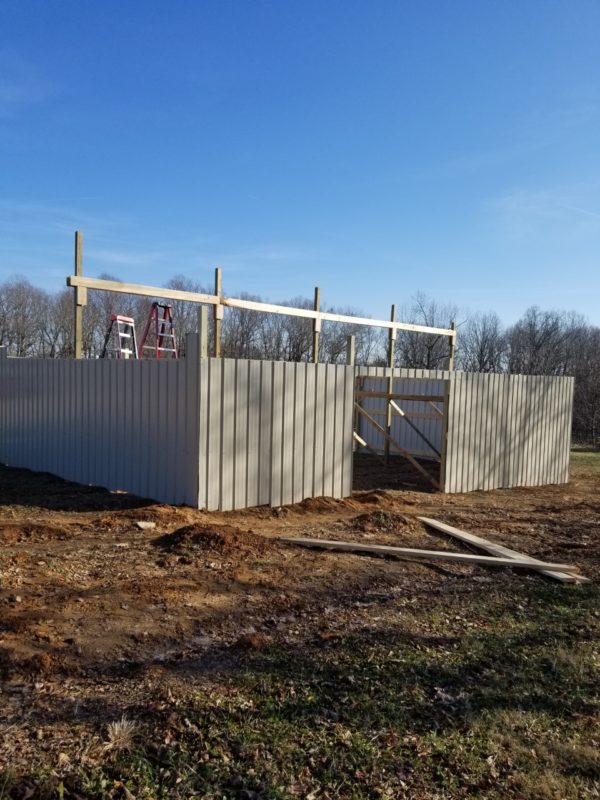
You should look at the outside of your build at this point and start to feel satisfied with your accomplishment so far. What was once a blank space is suddenly beginning to take shape.
It’s now time to brace the roof. This part of the process is simple but requires climbing on a ladder and definitely requires teamwork.
The vertical posts which are standing in the center of the barn are your roof supports. It’s time to climb a ladder and use 2x6x12s to connect the vertical posts at the top.
You’ll run one line of the 2x6x12s along one side (being sure to secure them with nails and a nail gun) and do the same along the opposite side.
This was one of the most nerve-wracking parts to the build for me because I was on the bottom holding the ladder while my husband was swinging around like he was in a circus act securing bracing.
Use extreme caution when doing this portion of the build.
7. Time for the Walls
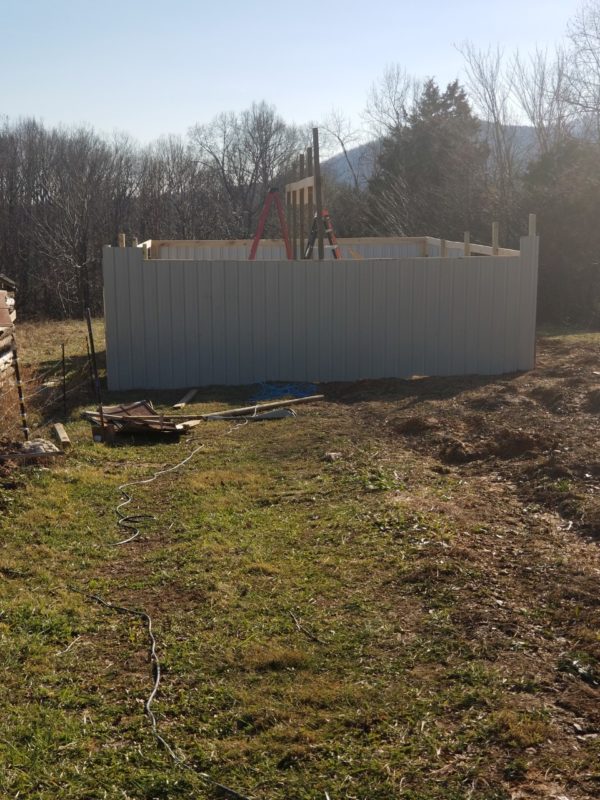
When the building is secure, it’s time to add the metal sheets to the side of the barn. We used standard metal which was three feet wide by eight feet long.
I didn’t list how many we used because this number may vary depending upon your cuts, but if you’re looking to purchase sheets, an approximate number is fifty sheets between the sides and roof both.
We did have some metal leftover for other projects from this purchase as well.
Again, if you buy a different size metal your number could increase or decrease. Keep this in mind if you wish to duplicate this build.
This was my favorite part of building a barn, but my husband’s least favorite. The whole sheets which go on the wall are a breeze. You slide the sheets into place, place the screws through the metal sheet and into the wood bracing behind it, and you have walls.
Be sure to screw the metal at the top, center, and bottom to make sure it won’t go anywhere. This was my job, and I loved it.
My husband had the job of cutting the sheets of metal when a whole piece wouldn’t work. This can be tedious.
You can use regular snips, or you can purchase battery operated metal shears. We started with the manual snips but purchased the battery operated shears later.
When your walls are up, it’ll boost your morale because the barn will begin to take shape.
8. Hang from the Rafters
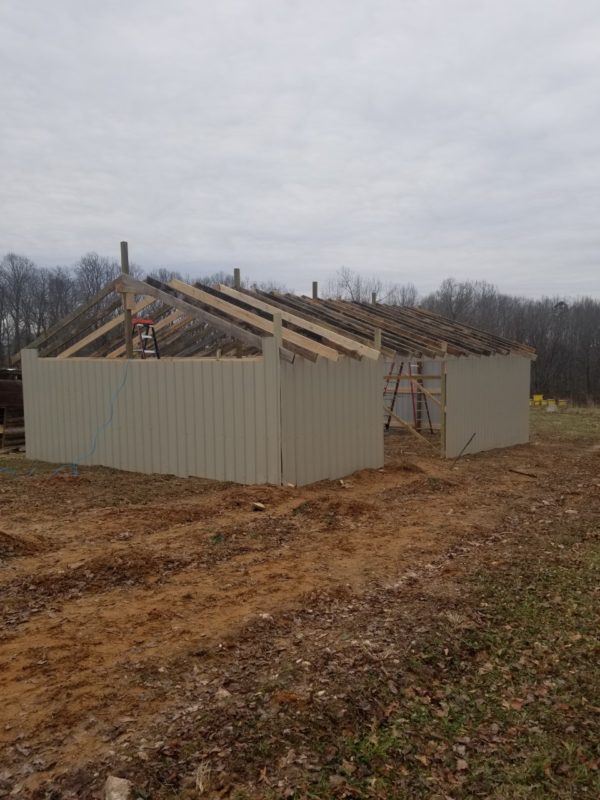
This step is another difficult part of the process of building a barn. We worked on this project as a family which meant I had my husband, two teenage sons, and myself doing much of the heavy lifting.
Our younger son was helpful, but he couldn’t move the large rough-cut lumber around. My oldest son and my husband were up on ladders.
This meant my other teenage son and myself were lugging lumber and passing it up the ladder for them to place the boards vertically to form rafters.
Each rafter was secured with nails and a nail gun. This was a long process because there was a total of approximately 21 rafters per each side of the barn, and we used 2x6x14s for this portion of the build.
It made for a long and heavy day. Be sure you have enough help when doing this portion of building a barn because it can become dangerous rather quickly without help.
9. Time for the Roof
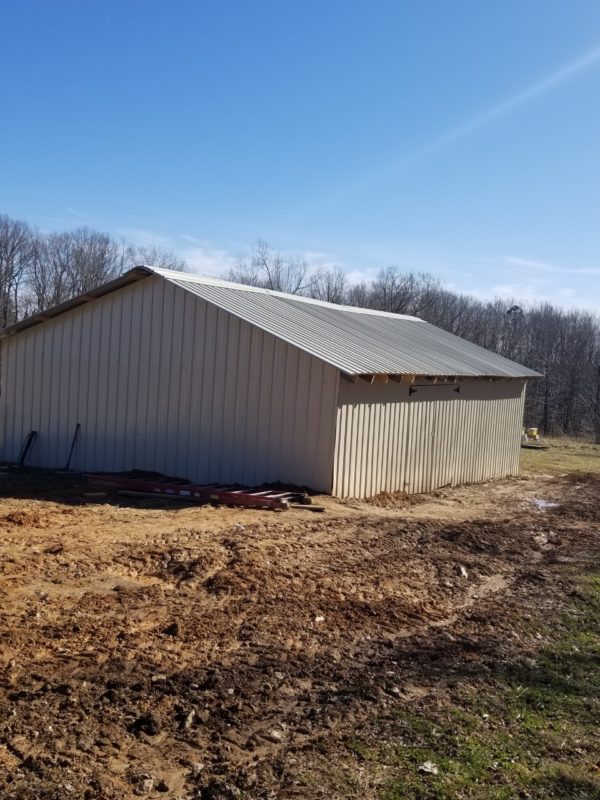
This was my least favorite part of building a barn. My oldest teenage son likes to climb around on the roof, and he looked at this portion as a challenge.
As a mother, it made me extremely nervous. He stayed on the roof while my husband handed him sheets of standard sized metal which measured three feet wide by 14 feet long.
Each sheet of metal was secured into a rafter in at least three different places to secure it. The metal overlaps and forms a waterproof roof.
Instead of purchasing a ridge cap (because they can be more expensive) we saved more money by buying a few extra sheets of metal and folding it over the top of the roof.
Each sheet was secured with screws into other sheets of metal and the wood beneath it, and it sealed the roof off fully.
10. What Kind of Doors Would You Like?
There are many options for barn doors. You could build your own wood doors, make metal doors (as we did), or you can use prefabricated gates.
Take your time and decide which works best for your set-up and also what works best for your budget.
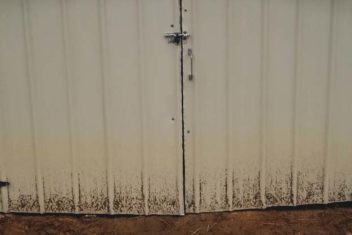
You can also use a sliding barn door, or you can use doors which open inward or outward. We chose to go with DIY metal doors because it allowed us to use what we already had and saved money.
We also chose to use doors which open outward because it gave us enough room to fit our tractor inside the barn and maneuver it easily.
I didn’t go with a sliding barn door because the equipment is more expensive to hang it, and I was working on a tight budget at this point.
Building a barn of this magnitude wasn’t easy. It took us approximately two months to complete because of our work schedules and responsibilities outside of our home.
If you prefer a more finished look, you can add trim to the sides of the building (which I plan on doing in the near future.)
Don’t forget to landscape around your barn either to make it standout on your homestead.
Even if you choose to go with a different design, I hope this tutorial shows you if you have the right skills, you can make big projects happen on small budgets around your homestead too.

