Do you have a barn on your property?
Whether you have a full-blown barn, or you’re using a smaller shed as a barn structure for your animals, including stalls into your design is a good idea.
It helps when your animals begin to give birth, and it helps when it’s time to vaccinate or care for them.
Plus, if an animal gets sick, it’s a good way to quarantine them to stop the spread of the illness to the rest of your livestock.
We built a barn a few months back and were able to create simple, inexpensive stalls. I’m going to walk you through the process of how to build barn stalls and hopefully inspire you for
Here’s how we built our stalls for our barn:
You’ll need:
- Sixteen 4x6x12’s pieces of lumber
- Nails
- Nail gun
- Screws
- Impact driver
- Level
- Sawzall
- Latches for stall doors
1. Create Your Layout
Before any build, it’s important to take the time to plan what you’re building. Otherwise, you’re ‘shooting from the hip’ (as my husband says.)
Building on the fly can work out occasionally, but when planning something as important as the layout of the
In our case, we designed the inside and outside of our barn before we ever began building the barn itself.
Once the barn was built, we marked off our original design inside before we began building stalls to make sure we still liked it.
A few items to take into consideration when designing your stalls:
- Is it functional?
- Will it be easy to get the animals into the stalls?
- Can the animals escape from the stalls?
- Should you incorporate a milking area?
- Does everything ‘flow’ as it should, or will it be challenging to maneuver items around inside your barn?
When you have the answers to these crucial questions squared away, you can begin building your stalls with confidence.
2. Save a Little Money
I’m a money saver. If I can build something for less, I’m going to. When you’re gathering your supplies for this build, make sure you save as much money as you can in the process.
In our case, we already had the tools to build the stalls. When we purchased wood for making the outside of our barn, we went to the local lumber yard and bought rough cut lumber because it was much cheaper.
We had wood left over from the build and utilized it when building our stalls. If you can find wood at a discounted rate, go for it. It will make building the stalls more affordable.
When you feel you’ve saved as much money as possible, and you’ve gathered all you need, it’s time to make your barn dreams a reality.
3. The Stalls Take Shape

We decided to build a total of six stalls – three on each side of our barn. We used the beams inside the barn which support the building to divide the stalls.
It made building stalls a lot easier. We began with placing one of the 4x6x12s on the ground and ran it from the barn wall to the center support beam.
The trick to this first step is to make sure the wood is low enough to the ground to where babies can’t fit under it.
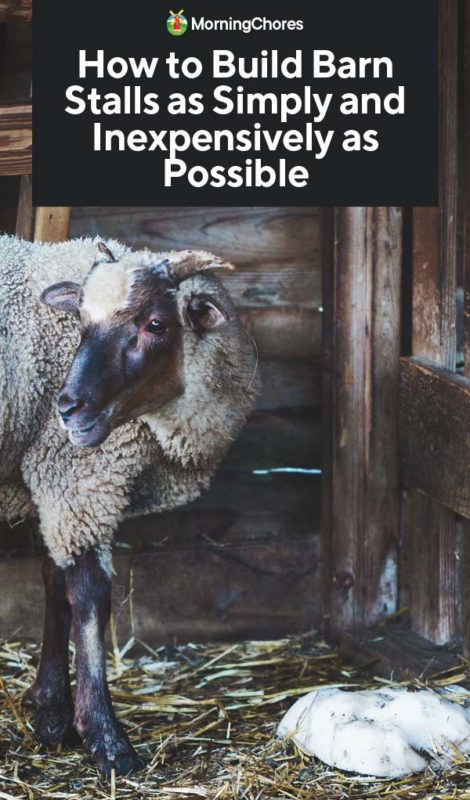
Our barn is used to house our goats which meant the first slat of the stall wall had to be almost touching the ground because baby goats can fit through practically anything if they put their mind to it.
I used the nail gun to secure one end of the lumber to the wall of the barn. From there, I held the loose end up while my husband used the level to make sure the piece of lumber was level.
When it was in the right place, we secured the board to the center beam of the barn using a nail gun.
This process continued for each slat until we reached the top of the stall wall. We made our walls five slats high, and we did this for each of the side slatted walls for each stall in the barn.
Take these items into consideration when looking at the stalls you’re building:
- Make sure your slats are spaced as evenly as possible. You don’t want too much space because boys and girls can mate through the slats if you leave too much room
- Animals can fight through the slats, and you don’t want their heads to become stuck in the slats
- Consider if the stalls are high enough. If the animal can jump over the stall wall, it’ll defeat the whole purpose
Taking these items into consideration may mean you need more or less lumber than mentioned above.
By the end of this process, it should be clear where your stalls are located and the amount of space your animals will have inside each of them.
4. Build the Doors ‘in the Air’
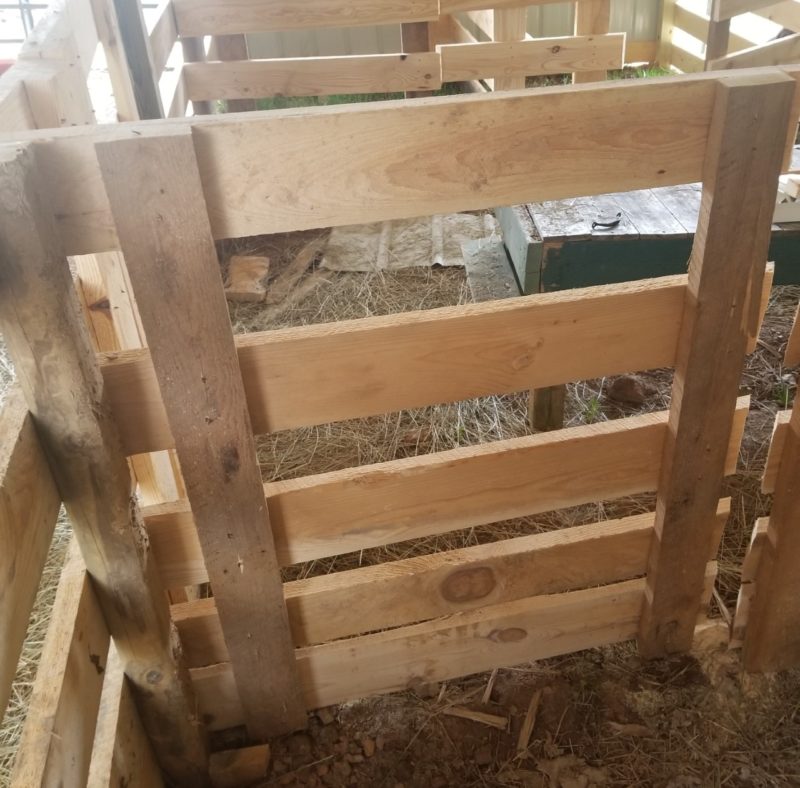
This next step was my husband’s idea, and it was very cool to see it unfold. Instead of building each stall door on its own, we created the doors ‘in the air’ – in the places where they would be.
When the stall walls were complete, we used the same process we did to build the walls and put wooden slats to block off the entrance to the stalls.
As we began doing this part of the process, I thought my husband had gotten ahead of himself, but clearly, I didn’t see what he was seeing.
Once each slat was in place, my husband added a support to where each of the doors would open by attaching two pieces of vertical wood to connect the slats.
He also added a post in the ground which serve as the support for the door.
From there, he added hinges to those vertical pieces of wood. When hinges secured each “door” to the post, he used his Sawzall to slice down the slats to separate the lumber into doors.
If this sounds like too much for you, it’s okay. You can build basic stall doors on the ground and hang them with hinges on the doorposts.
The goal for this step is to have stall doors. If you accomplish this, you’ve done a great job.
5. Secure the Doors
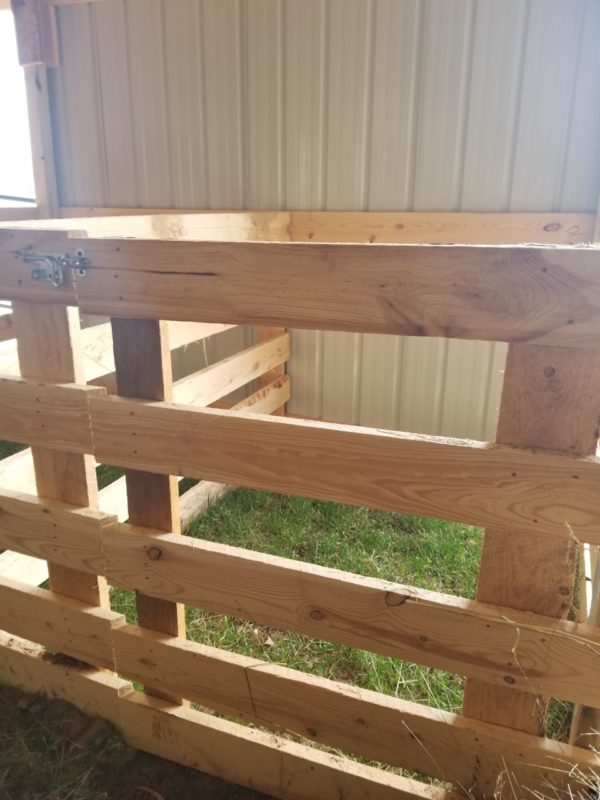
When the stall doors are hung, it’s time to add latches to secure the stall doors shut. You can choose any style of latch you’d like.
No matter what type of latch you choose, the basic idea is to put the fastener on the door itself, and the part of the latch which secures the door when shut, to the door post opposite of the door.
Make sure the latch on the door lines up with the closing mechanism on the door post and secure each piece of the fastener to the wood with screws and an impact driver.
If your door sags (which sometimes happens) use a piece of wood to tighten the door post.
You shove the small piece of wood into the hole of the door post until the post straightens up and makes the door stand erect.
When your latch and door line up, you have secure stall doors. You can also choose to add springs to your stall doors which will help the doors close automatically.
I didn’t add this feature because I didn’t deem it necessary with our layout. If you need doors which will close without you manually closing and latching them, consider adding the springs which will make the door swing shut.
6. Dig Out Your Door Ways
If you leveled the barn floor earlier, you can skip this step of the build.
In our case, we built our barn because a snowstorm flattened our old goat shed. Our goats were without a permanent structure in the dead of winter.
We skipped leveling the ground we built on because we were in a dead rush to get the barn up, but it turned out well.
The downside to skipping the step of leveling the ground is we had to dig certain areas out because the doors would drag on the ground.
This was the case with our stall doors. We had to dig out the earth around the stall doors to where they could fully open.
It didn’t take long, but it did require a shovel and some muscle to get the job done. If you’re building the stalls on unlevel ground, dig out the earth around the doorway to make sure the doors open fully.
Trying to get an animal through a door which won’t open as it should, will detract from the functional space in your barn.
7. Put to Good Use
The last step of the process is to utilize your stalls. As mentioned above, when you have an animal getting ready to deliver a baby, the stall is the best place for it to be.
I love having stalls because it makes treating my animals much easier. Instead of chasing them down to give them vaccinations, trim their hooves, worm them, or treating them for parasites I can place them in a stall, and it gives them less room to run from me.
Lastly, if you have a sick animal or a new animal you’re introducing to your farm, be sure to quarantine it. If the animal is sick, this will help stop the illness from spreading to your other animals.
With a new animal, your barn stall will give you a great place to observe it before introducing it to your other healthy animals.
Adding stalls to your barn can be such a nice addition. It makes farming easier and more functional. Building the stalls don’t have to cost a fortune, nor does it have to be a complicated process.
Hopefully, our stall build will inspire you to build your barn stalls and make life a little easier for yourself when caring for your animals.


