You’ve been able to build your picture-perfect DIY barn. Congratulations!
Have you added all the finishing touches?
Building a barn can be a huge undertaking. You probably didn’t realize how many different parts there are to a barn.
If you haven’t finished creating your barn doors yet, don’t spend a fortune building them or having them made.
Instead, follow these instructions to build simple and easy metal barn doors. Here’s how you go about it:
You’ll need:
- 5- 2x6x8’s per door
- A set of hinges
- 3- 3ft x 8ft metal sheets per door
- A sliding latch
- Handle
- Impact driver
- Screws
- Metal shears
- Thin metal pole
- 1 nail
Steps for Building Metal Barn Doors
1. Frame the Door
Measure your barn opening to determine the size of the doors.
Since these doors are heavy,
To begin building your metal barn doors, place each 2x6x8 piece of lumber in place to form a large rectangle.
Screw each piece of lumber together. You should have an extra piece of lumber left over. Place it horizontally through the center of the door.
This will be where you secure the metal in the middle of the door, and you’ll also have something to screw into when you attach the hinges to the door.
2. Add the Metal
Once you have the frame of the door ready to go, it’s time to add the metal. This part is simple and will bring your door together in a flash.
Place a piece of metal on the far end of the frame. Screw the metal in place at the top, center, and bottom.
Add the next piece of metal to the frame by overlapping it over the first piece of metal. The grooves of the sheets should slide over each other.
Screw this piece of metal into place in the top, center, and bottom. Make sure the screws are hitting the wood; otherwise the metal won’t be attached to the door frame.
Last, add the third piece of metal. You’ll notice it will hang over the edge of the frame of the door. It helps to draw a line where you should cut the metal off and cut it first with a box cutter.
Once the initial cut has been made, use the metal shears to cut the excess metal from the door. When the metal has been cut to size, screw it in place on both corners at the top, center, and bottom.
3. Mark Your Hinges
When you’re ready to add your hinges to the door, it helps to grab a friend and stand the door up in the doorway.
We used a couple of pieces of small wood to stand the door up to the proper height underneath, and I held the door from behind while my husband made sure the door was standing as it would when it hangs.
This gives you a visual of what the door will look like and the opportunity to mark where your hinges should go on the door.
When you figure out where the hinges should be on the door, mark their location with a marker.
Once it’s been marked off, lay the door back down on the ground, and screw the hinges into their proper location.
4. Hang the Door
Now you
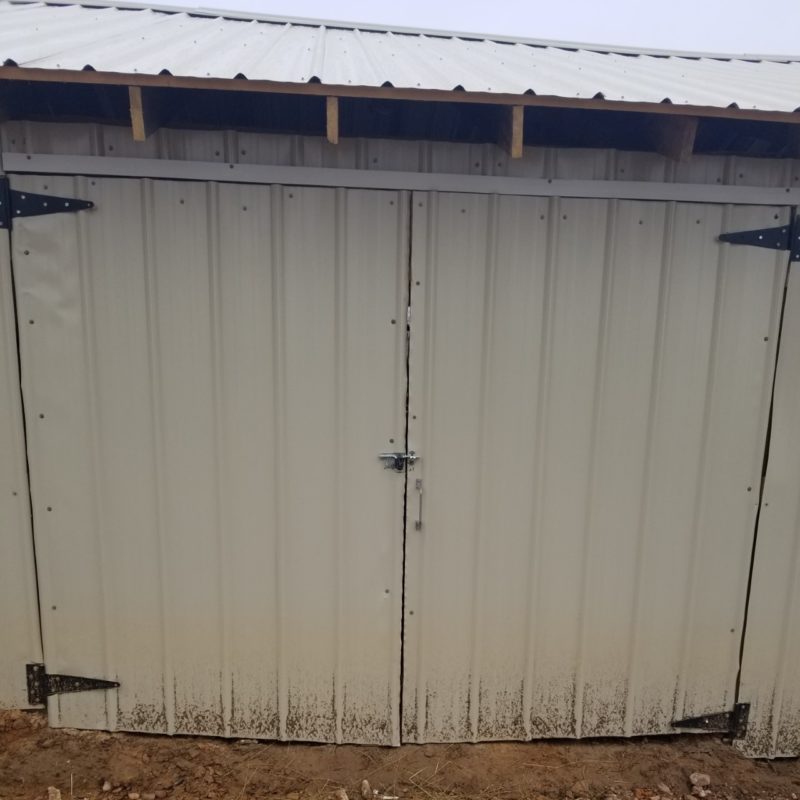
The time has arrived for you to hang the door. Hanging a door can be aggravating. I want to make sure you are warned about this up front.
You begin by hanging the door on the barn. Make sure the door is hanging in a level position. If it is, you’re done.
But if the door isn’t, you may have to use small pieces of wood to support the door where it should be to hang in a level position.
Reposition the screws which are attaching the door to the barn until you find the proper location for the door to be level.
5. Add the Latch on the Outside
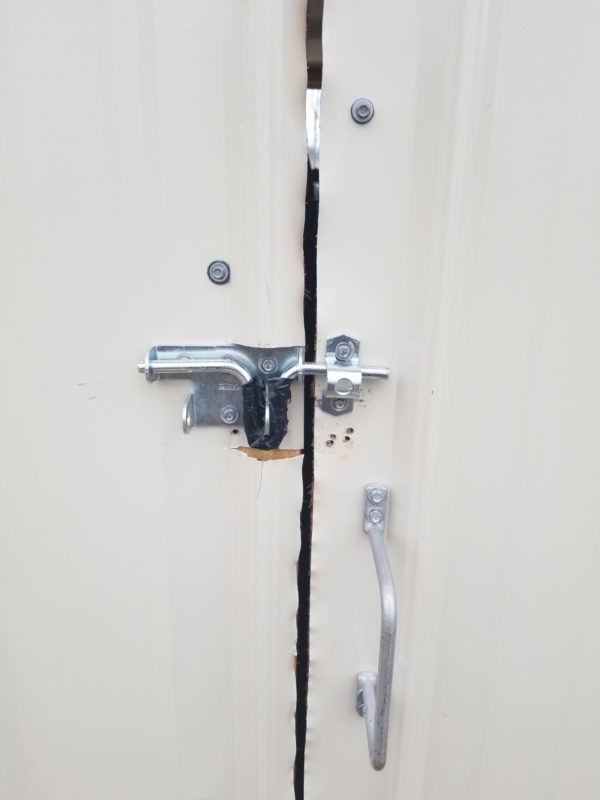
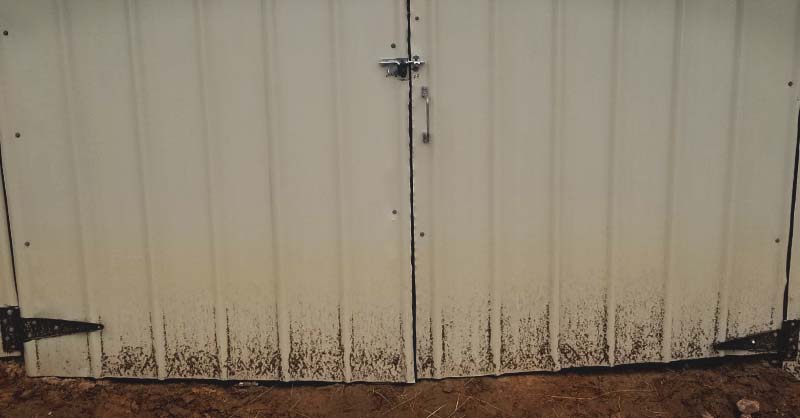
Once the door is hung, it’s time to add your latch to secure the door when you don’t want it open. Place the latch on the side of the door farthest from the hinges.
Decide where the latch should be located before attaching it to the door. When you have the opening clasp attached to the door itself, close the door.
This will show you where to place the corresponding piece of the latch on the other door. Screw each piece in place and make sure they latch correctly.
If the latches don’t come together as they should, loosen the screws and reposition until the latch closes as desired.
Add the handle to the door you would be pulling open.
6. Rinse and Repeat
Some people prefer having only a single door. In our case, we chose double doors because it made life easier when getting our tractor in and out.
If you choose to have a double door set-up, you will do everything as mentioned above for the second door as far as building the frame, creating a door, attaching hinges, and hanging the door.
When adding the latch, each piece will be attached to a door instead of the closure being connected to the barn. It’s important to make sure the doors hang level for them to close properly.
7. Add an Indoor Latch
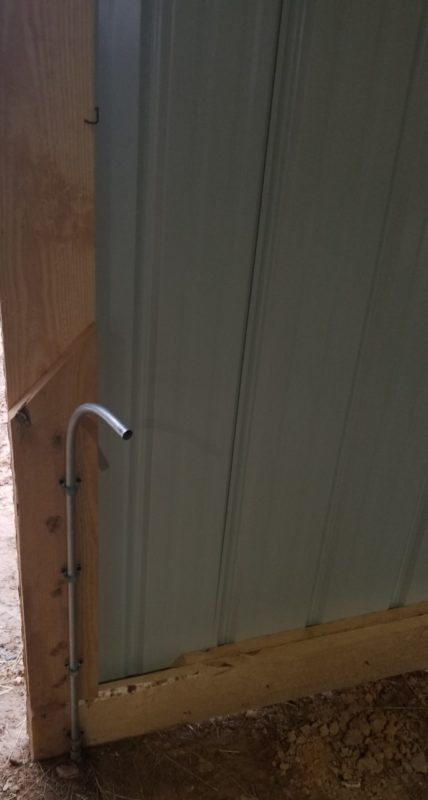
There is a small change when choosing to hang double barn doors. If you live in an area where the winds can pick up (as it does in our area), it’s a good idea to secure one of the doors with an indoor latch.
It will stop the wind from being able to rattle the doors. We chose an easy fix for this. Select which door you will use the most.
The other door will get an indoor latch. We used a thin metal pole and curved it at the top like a shepherd’s hook. A hole was drilled in the floor of the barn to give the pole a place to go into the ground and hold the door securely.
We used ½ inch electrical straps screwed to the bottom inside of the barn door, to attach the thin metal pole and give it a controlled space to slide up and down.
When you pull the pole upwards, there’s a nail we placed in the door to hold the pole up when we needed the door open.
If we choose to lock this door in place, the pole is released and fits into the slot drilled into the ground.
8. A Few Extra Tips
It’s important to make sure the ground is level when building your barn because it makes the build much more manageable from start to finish.
Having level ground will make it easier when hanging barn doors. If you couldn’t build on level ground, be sure you try to open your barn doors before calling the job done.
You may find you have to dig out the earth near the doors to open them fully. You can use a shovel or a tractor to help you get this job done.
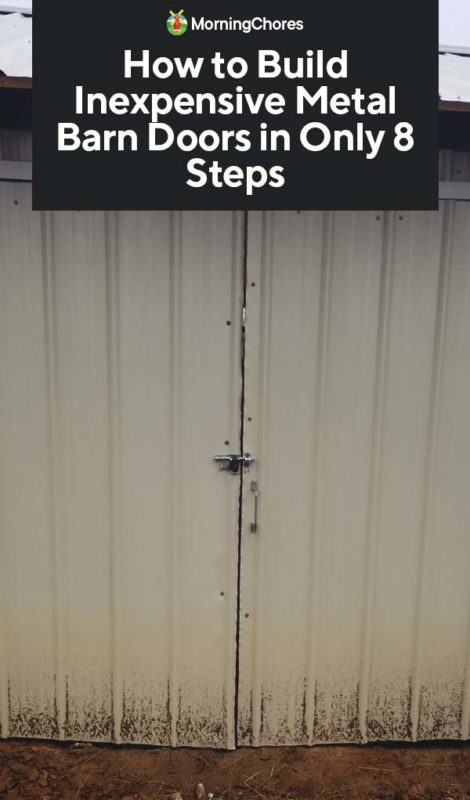
When the doors can be opened as you want them to be, you’re ready to step back and enjoy the gorgeous, inexpensive, and secure doors to your new barn.
We chose to build these barn doors because we were able to use leftover materials from our barn build. This made them budget-friendly for us.
Whether you have the materials or not, these doors are inexpensive and heavy-duty. You can save even more money on building the doors if you choose rough-cut lumber over the prettier cuts.
Hopefully, these doors will be an excellent finish to the barn you’ve wanted and needed for your homestead.
