
Are you looking for an inexpensive way to add some character to your kitchen?
I came up with an idea that was inspired by my friend purchasing a new home. She bought an older brick ranch-style house.
However, man has she turned this outdated home into a showplace! She had an old brick fireplace she breathed new life into merely by painting it white.
The place is gorgeous, which led me to consider incorporating white brick into my home.
I have a small kitchen and no way of incorporating real brick into my home on my current budget. I didn’t give up, though.
With one trip to my hardware store, I figured it out, and the best news is it doesn’t cost much. Talk about budget-friendly.

Here’s how I made my white faux brick backsplash:
You’ll Need:
- Brick particleboard
- Circular Saw
- Sawzall
- White chalkboard paint
- Paintbrushes and pan
- Screws and impact driver
1. Time to Shop
To create this breathtaking faux brick backsplash, you must head to the store (or shop online). Whatever your preference may be, but wherever you’re shopping don’t be afraid of the particleboard.
There was a time where the particle board was as plain as it could be, but those days are gone.
You can now purchase particle board which looks like brick, pallet wood, and much more. I chose the brick one because this was the look I desired.
However, if you find some other pretty particle board ideas, you may want to give them a go too. Make sure you have the chalkboard paint, paintbrushes, and necessary tools before you begin.
When you have all your tools, it’s time to get to work! Also, be sure to measure your backsplash area first. If you have a small kitchen (like me), you may only need one piece of particleboard.
If you have a larger area to cover, it may require more. Therefore, be sure to measure before you buy it.
2. Measure and Cut

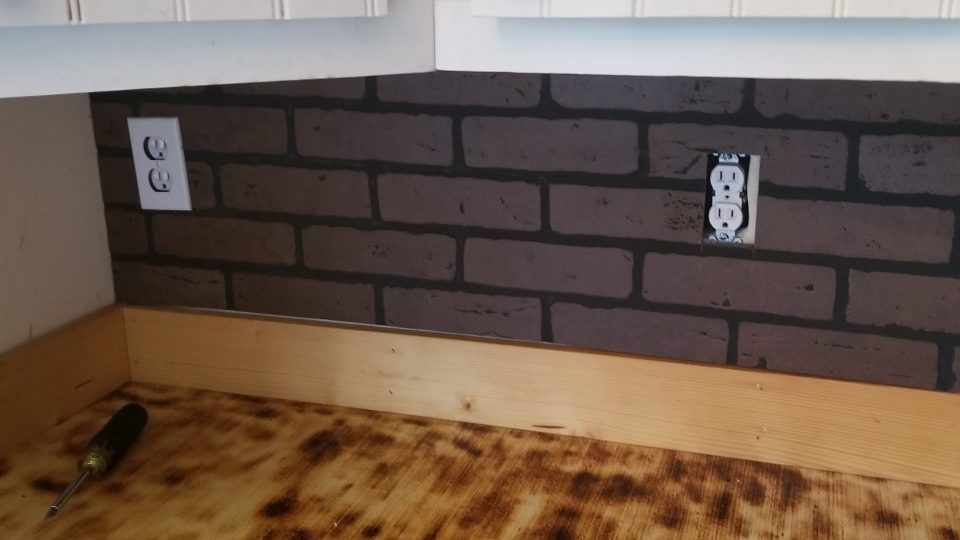
This is the most difficult part of the creative process: measuring. You must measure each section of your wall very accurately. I recommend only cutting one section of wall at a time.
After you’ve measured the first section, measure, and mark where each electrical outlet or light switch should go.
Take these measurements to the cutting board and cut the large perimeter of the particleboard first. Once the board is cut, mark your measurements for switches and outlets.
You’ll use your circular saw to cut the large chunks of particleboard, but the Sawzall to cut out each section for the outlets and switches.
If you’re wanting to move your light switches or outlets now is the perfect time to do this. The faux brick backsplash will cover any old holes in the walls, and you can make new holes for where you’d like to move them.
3. Put in Place Temporarily
My husband is a whiz at measuring and cutting things. While I’m someone who struggles cutting things perfectly the first time.
Which is why I recommend fitting a piece of the backsplash temporarily. You can put the wall plates over an electrical outlet to hold the board in place temporarily.
Now you can see if you need to make any more cuts. If you have windows where you’re adding the backsplash, you must cut around the notches of the windowsill to make the backsplash fit perfectly.
Anywhere your backsplash isn’t fitting well, mark where you should make alterations to the backsplash with a pencil and make small cuts.
Remember, you can make more small cuts, but once you make a cut too large, it’s hard to repair it.
Once everything is sitting on the wall in a way that satisfies you, pat yourself on the back. The hard part is over!
4. Paint and Wait
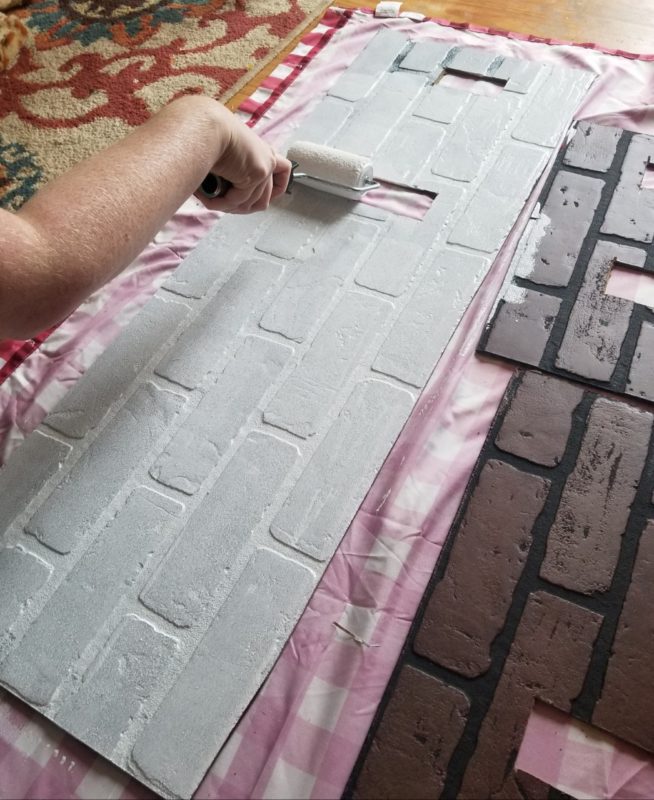
Painting is my favorite part of the process. I enjoy painting simple items, and you don’t get much simpler than this project.
Before painting, use a dry cloth to wipe off any sawdust which may still be on the particle board from the cutting process.
After I knew everything was clean, I laid each piece of cut particle board on an old shower curtain. I used a small roller to apply the paint to each part of particleboard.
Make sure after you apply the paint to the piece of particle board, you check for roller marks before moving to the next one.
After all of the pieces of particle board have been painted, go back over them again with a second coat. I preferred a rustic look which is why I chose chalkboard paint.
The particleboard will soak up some of the paint which is why it’s important to make sure you get the creases where the board tends to be darker.
Also, don’t expect the board to be entirely white.
If you want a pristine white faux brick backsplash, you may prefer to go with white latex paint. I’m satisfied with the way my backsplash turned out which makes this all a matter of preference.
Once all the pieces of particle board are painted, wait for them to dry fully.
5. Lock the Faux Brick Backsplash in Place
After each piece of particle board is dried thoroughly, it’s time to put the backsplash up for good. Use screws and an impact driver to secure each piece of the board on the wall.
If you have cracks between the boards, you can go over them with caulk. In short, don’t panic if it doesn’t look perfect when first put up.
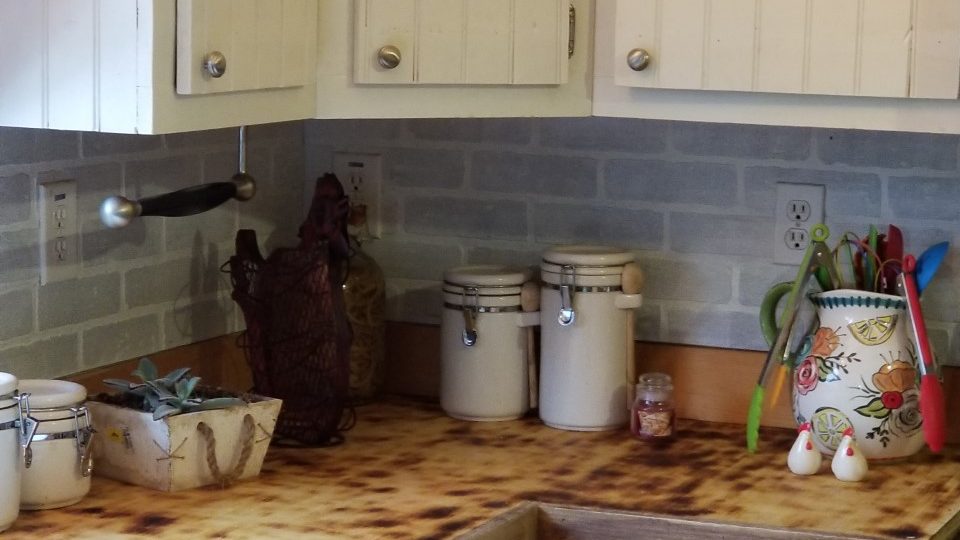
When each piece of board is attached securely to the wall, put each faceplate over the light switches and electrical outlets.
To finish, look for any cracks in your backsplash and apply caulk to seal everything up. Put everything back on your counter, and you’re ready to enjoy life in your new kitchen!
This faux brick backsplash project was simple and an inexpensive way to breathe new life into an old or dated kitchen. My kitchen has been a work in progress for the past few months, but little by little it’s becoming more of what I’m hoping for in my culinary workspace.
I hope you’ll enjoy this small project which will help transform your kitchen in a big way. It’s great for tight budgets and those with basic DIY skills.
Remember, if you’re new to DIY and become frustrated, don’t be afraid to yell for help. You’re learning new skills that can be carried over to transform a variety of spaces in your home. Happy DIYing from one DIY addict to another.


