Remodeling a kitchen can cost thousands of dollars.
When we first purchased our home, we knew we’d have to totally gut our kitchen. However, we put it off for years and kept patching our old kitchen because everyone we spoke to said that it would cost around $10,000 (on the low end) to totally gut our kitchen!
So we put it off until we couldn’t any longer. Then we got creative and were determined to remodel our kitchen for less than $1,000.
This is how we did it:
1. Reuse Anything You Can
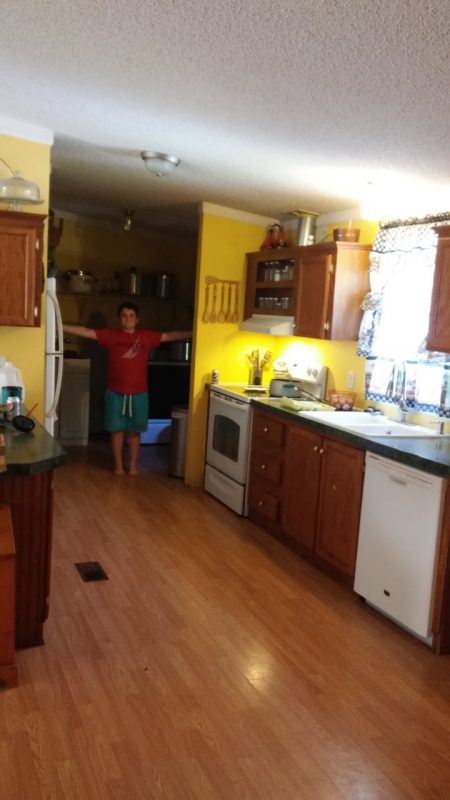
When you are gutting your kitchen, don’t go hog wild. Be careful and see if there is anything that you can reuse.
During our remodel, we were able to salvage our sink, dishwasher, and stove. We purchased them new about 5 years prior to when we moved into our home.
They were still in really good shape. We also saved our refrigerator and freezer. Those were actually purchased used, but they were still in great shape as well.
Just remember, anything that is still in good shape that can be salvaged or repurposed should probably be kept in order to save money.
Plus, you might be surprised that after you change some of the basics and clean up the older items that you’re saving, how great they’ll look in your new kitchen.
2. Discount Your Walls
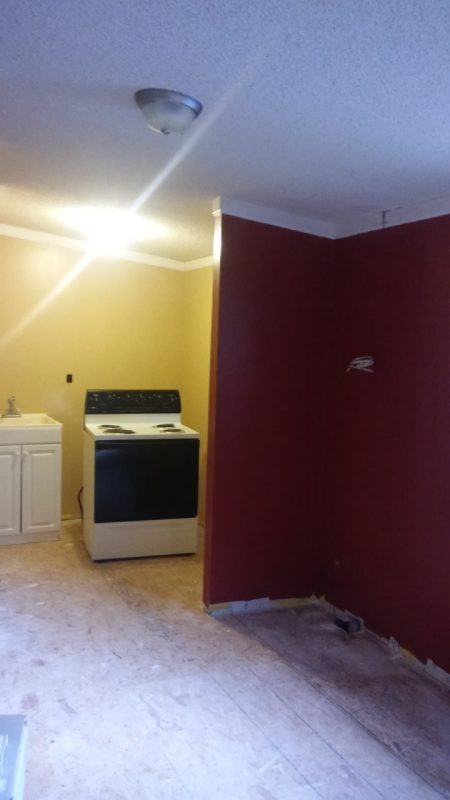
There are multiple ways to have really nice looking walls without spending a lot of money. The first option is to buy really cheap or discounted paint.
A lot of times, stores will put good quality paint on sale. Shop the sales even if you aren’t planning on remodeling for a while. As long as paint doesn’t freeze it will remain good, and you’ll save a lot of cash by shopping when items are on sale.
Other times, people will get paint that was tinted incorrectly. So the stores have to take it back, but they can’t resell it at full price. You can buy it for a fraction of the cost and have great looking walls.
Another option is to make an accent wall from pallets. It looks beautiful and adds a little something extra for very little money. This is one thing I wanted to do in our kitchen but haven’t done so yet.
However, I see it coming in the near future. These are all options that will dress up your walls on a tight budget.
3. DIY Your Cabinets
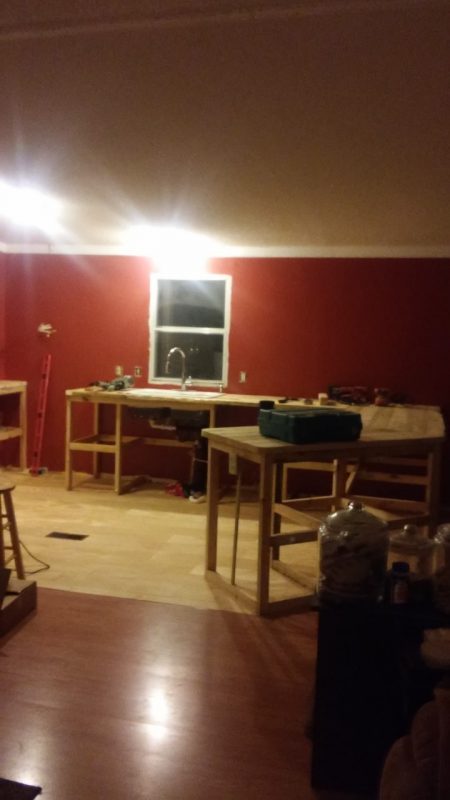
This is the best money saver! If you want to really save money then build your own cabinets. We were able to build our cabinets even cheaper than most because we built them out of scrap wood that someone had given us.
However, if you want to go to the store and buy the wood, buy some of the cheapest wood you can. Our cabinets are built out of untreated wood. We sanded and oiled them down ourselves.
Yes, it will be extra work, but I love our cabinets!
Plus, you can also go with open cabinets and shelves to help save money too. Then you don’t have to use nearly the same amount of wood as closed cabinets, and you don’t have to waste money on cabinet doors either.
Another great tip, if you don’t want your cabinets completely open, go with decorative curtains instead of doors. I was going for the ‘old country kitchen’ look.
I didn’t want people to be able to see under my sink. Instead, I used 2 curtain rods and hung valances to keep under my kitchen sink hidden.
4. Buy Used Appliances
If you aren’t able to salvage your kitchen appliances, then put local yard sale pages and Craig’s List to use. You would be surprised how great some of the used appliances actually are.
Also, sometimes people will list when they are setting things out on their curbs for free. Free is always better in my book.
Keep an eye out and be ready to jump and run if you see a great deal. Also, you can put a listing out on social media that you are looking for certain appliances. You will be surprised at how many people will keep you in mind if they are getting rid of an appliance.
However, though they are cheaper, be sure to fumigate anything that you buy used. You just never know what lives in someone else’s home (even unbeknownst to them.)
So be sure to treat and clean the appliances accordingly so you don’t drag unwanted pests into your newly designed kitchen.
However, there are also 2 other options in locating cheaper appliances. The first is to talk to appliance repair places. They often buy broken appliances, fix them, and then resell them for a very low cost.
Finally, if you don’t like the idea of buying something used (for fear of what you might be bringing into your home), then go to appliance stores and ask to see their ‘scratch and dent’ selection. A lot of times things will be dinged on the back of the appliance.
They can’t sell them at regular price, but no one would know that the appliance is damaged by simply looking at the front of it. You can often find great deals through this method.
5. Make Your Own Floors
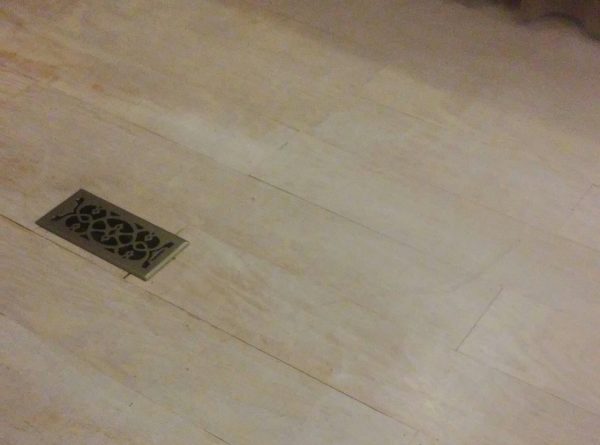
I shared in my article about how to remodel a bathroom on a budget, that you can make your own DIY floors as well.
And here is the article about making your own DIY Farmhouse floors, which we actually did in our kitchen. It is made out of plywood, for our square footage it doesn’t cost much, and it was super easy.
However, if you aren’t a big fan of farmhouse flooring, then you might want to consider these DIY ideas:
– Painted Cement Floors
If you have concrete floors, with a little paint and a few stencils, you could have a very artistic floor. The best part is that it wouldn’t cost very much either.
So if you’d like to salvage the floors you have but give them a little different appearance, then you might want to consider this option.
– Penny Floors
If you’d like to cash in some dollars and get back quite a few pennies, then you could have your new floor. They basically just glued a lot of pennies to the floor and made a really good design in the process.
This is a different option and one that (though tedious) would also be very affordable.
– Paper Bag Floor
This is another flooring option if you have concrete flooring that you’d like to change up. The first time I saw this option I was stunned.
However, she basically lays brown paper bags (or butcher paper) down in really good looking designs. Then she clear coats it.
– Cheaper Laminate Flooring
If you don’t want to do anything seriously DIY but are okay with laying your own laminate flooring, then you could always go with the cheapest laminate floor option available at your local home improvement store.
However, we did this when we first moved into our home because it had no floor. We needed something that would be quick to go down, inexpensive, and easy enough. The only problem we ran into is that the flooring didn’t hold up very well. So keep that in mind.
6. DIY Floor and Ceiling Molding
When we began remodeling our home, it astonished me how expensive basic things were to buy. For instance, a contractor pack of floor molding costs more than I anticipated.
However, over the years, it has now advanced and costs even more. Stuff that you really don’t think much about when you have it.
However, if you don’t have it, you certainly notice the difference between appearance and the cleanliness of your floors.
So there are options to help with floor and ceiling molding. We actually used floor molding for both the floor and ceiling. The reason is that floor molding was cheaper, and we are satisfied with its appearance.
7. DIY Fixtures
Light fixtures, faucets, and lighting are also very expensive to replace. If your old fixtures are salvageable then by all means save them and use them again.
However, what if they aren’t? Well, don’t fear. There are lots of DIY options to help you save some money in the process.
So don’t go out and spend a lot for one light switch cover to have fancier plates. Instead, make your own out of dollar store picture frames.
Plus, if you need new faucets then use these ideas to make them out of plumbing parts. Who needs to spend $100 on one faucet replacement?
Finally, let’s talk about DIY lighting. I was stunned when we went to remodel our kitchen how expensive the lighting was.
We opted for the DIY option. We used mason jars, purchased the lighting kits, and made our own pendant kitchen lights.
8. DIY Counter Tops
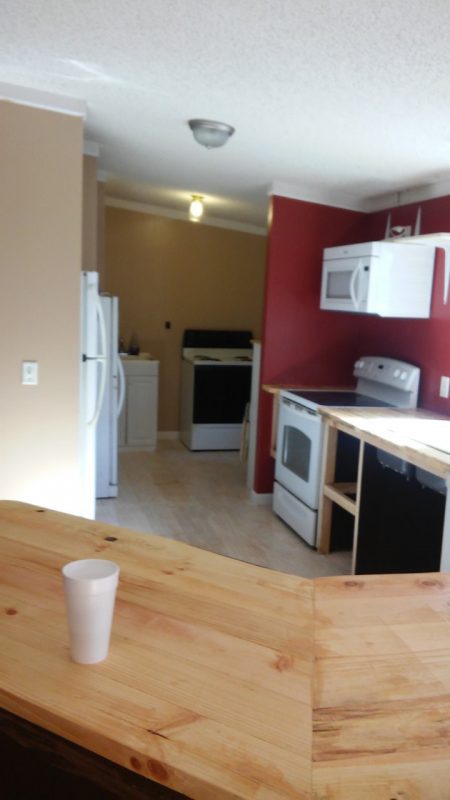
This was the thing I struggled with most when remodeling our kitchen. I wanted really great looking countertops, but the only problem was countertops were super expensive.
However, I could not salvage my old ones.
So what did I do? Well, we had more scrap wood lying around. A few months prior my brother-in-law had given us a bunch of scrap wood from the lumber company he works for. They couldn’t sell it, it was unpressurized, but it was perfect for us.
Which means, we gladly traded a goat for it and put it to good use. And that is how our countertops were born.
So my husband clamped the wood together until we got the width we desired. Then he used a pocket hole drill bit and screwed them together.
Then we placed them on our cabinets and cut them to fit the design. Next, we used a plainer and a sander to make the wood smooth.
Finally, we puttied and oiled the countertops to keep any food or moisture from getting inside the wood.
Just like that, I got butcher block countertops at basically no out of the pocket expense. I am very happy with them, and they have worked wonderfully.
Recap of the Price of Our Kitchen Remodel

Appliances: $0
We were able to salvage our old ones.
Kitchen Sink: $0
We were able to salvage our old one.
Counter Tops: $0
We used scrap wood.
Paneling for the Backside of the Counter: $40
Kitchen Cabinets: $0
We built them ourselves and used scrap wood we already had on hand.
Floors: Around $120
We used DIY Farmhouse Floors
Lighting: Around $60
We made lights ourselves.
Paint: $100
I splurged a little on the paint.
Shelving and Brackets (for our open cabinets and pantry): $90
Decorations: $100
I bought paint cans to hold our utensils, baskets to hold some cooking utensils, kitchen curtains, curtains for under the sink, and new rugs for the kitchen.
Odds and Ends: $200
This includes a transition strip, plumbing materials, and a few other things that I’m sure I’m forgetting.
Total estimated cost of our kitchen remodel: $710
Now, that isn’t too bad, huh? We were really stunned at how inexpensively we were able to completely remodel our kitchen.
However, we are very happy with it, and I’ve already made a lot of good memories in it. Plus, it is a lot more functional in the design than my old kitchen was.
