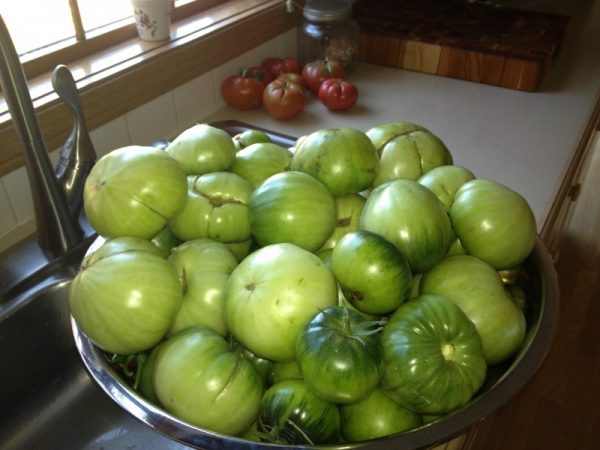
Imagine it’s fall, the frost is coming, and you still have a ton of green tomatoes left on the vine. How do you stop them from going to waste?
Or, you head to the grocery store, and all of their tomatoes still need some serious ripening. What do you do?
Finally, you got overzealous and picked a lot of tomatoes, but some weren’t quite ripe enough. How do you handle this scenario?
Well, if any of these scenarios fit your situation don’t worry because I’m going to share with you how to ripen your tomatoes. There are various methods so let’s take a look at each one.
Method #1: Root Pruning
If fall is quickly approaching, and you still have a lot of tomatoes on your plants that aren’t quite ripe enough, you have 3 options.
One, you can pick them all and make some great recipes out of them.
Two, you can pick them all and use a different ripening method.
Or three, you can leave them right where they are and use this method to ripen your tomatoes. If you choose option three, you’ll need to keep sheets on hand in case a freeze occurs so you don’t lose the whole tomato plant.
Here is how to root prune your tomato plants:
Step 1. Prune the Tomato Plant
You’ll begin this process by cutting off any new blooms on the tomato plant. You want to salvage the tomatoes you have left, not have more tomatoes bloom that you’ll have to work with.
So by cutting off any new blooms, this is getting the tomato prepped for the end of the growing season.
Step 2. Stop Fertilizing and Slow Down on Watering
You’ll also want to stop fertilizing and slow down on watering the tomato plant. This will stop new growth which will make it easier to wrap up the growing season.
Also, the plant will stop trying to produce any more fruit as well.
Step 3. Slice Through the Roots
The final step is to actually slice through the roots. This will send a signal through the plant that says, “Okay, it’s time to ripen the tomatoes.”
So you’ll place your garden spade in the ground about 6 inches down into the soil. Then you’ll make a circle around the plant with this spade that is about a foot away from the stem. This will slice the roots.
And in about a week, you should begin to see your tomatoes ripening. As mentioned, pay attention to the weather because if a frost comes and your plants aren’t protected, then they will easily be lost.
Method #2: The Plastic Bag Method
So you picked tomatoes a little too soon, or you went to the grocery store and had very few options when it came to ripe tomatoes.
Basically, you have quite a few tomatoes that need ripening before they can be used. Now what?
Well, if you have your plastic grocery bags still, you’ll just need to follow these steps:
Step 1. Gather Plastic Bags and Punch Air Holes in Them
You’ll need to begin this process by saving your old plastic grocery bags. You’ll then want to punch little air holes in the bags so air can circulate.
However, you don’t want huge holes in the bag so use a small pen to create these holes.
Step 2. Place a Ripe Banana in the Bag
Since you picked these tomatoes for use, I’m assuming you’d like to use them sooner rather than later. If this is the case, then you’ll need to insert an unripe banana. The greener the better.
Basically, bananas produce a gas called ethylene. This gas helps with the ripening process. When the bananas are green they are making large amounts of ethylene.
So the greener the banana is, the faster your tomatoes will ripen.
Step 3. Add the Tomatoes and Wait
Finally, you’ll add your tomatoes to the bag. You don’t want the tomatoes jam packed as the air needs to circulate so they don’t rot.
Then you’ll wait. You’ll need to check them daily because depending upon the type of banana you used, it could take them fewer or more days to become completely ripe. If you see signs of rot, pull that tomato from the bag as rot will spread and ruin your tomatoes.
Also, be sure to store your tomatoes in a dark location that won’t get a ton of humidity as this could spur on rot as well.
Method #3: The Jar Method
via Wikihow
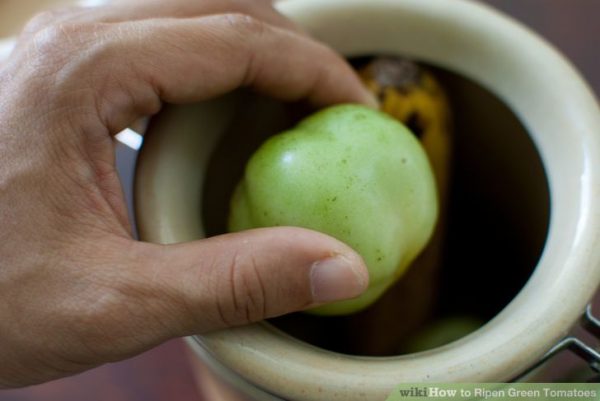
I like this method for smaller tomatoes. It is a great way of ripening your tiny tomatoes without drawing a lot of attention to what you’re doing.
So to complete this method, you’ll just need a glass canister.
Step 1. Clean Your Tomatoes
Okay, so you should probably do this with every off-the-vine method. But in case you didn’t know, clean your tomatoes before you get started just to make sure you aren’t trying to ripen any bugs or dirt along with your tomatoes.
Step 2. Add a Ripe Banana
Next, you’ll want to add a ripe banana to the jar. I wouldn’t go with a super green banana with this method because it usually works best with small tomatoes (as they fit better in the jar.)
So if you use a green banana it could potentially ripen them too quickly, and you could lose them all together.
Step 3. Drop the Tomatoes in the Jar
After the ripened banana has been added to the jar, it is the tomatoes’ turn. You’ll just drop them into an air-tight canister. If it is see through you may have to move the jar. If not, you could potentially leave them right on your counter top.
Step 4. Store, Wait and Check Them
After the tomatoes have been added to the jar with the banana, you’ll need to store them in a dark location with lower humidity so as not to spur on rot inside the jar.
However, be sure to check your tomatoes daily. If you see where some of the tomatoes are rotting, you’ll need to remove them quickly so they don’t contaminate the rest of the tomatoes.
But once they are ripe, pull them from the jar and put them to good use.
Method #4: The Cardboard Box Method
via HGTV
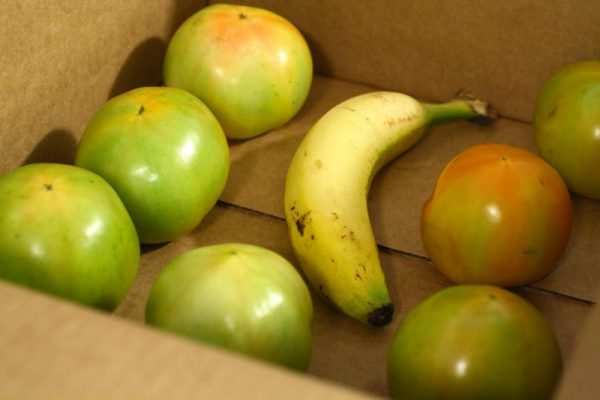
This method is great if you have picked a lot of green tomatoes from your plants trying to save them from frost, and you’d like to have fresh tomatoes heading into the winter months. If this is your scenario, then you’ll definitely want to check out this method.
Step 1. Clean Your Tomatoes
You’ll begin this method the same as the others by cleaning the tomatoes. You’ll want to be sure to remove any dirt or bugs that could potentially be hiding with your tomatoes.
Step 2. Collect Enough Cardboard Boxes
Then you’ll need to collect your cardboard boxes. Often you can ask the grocery store for their leftover produce boxes, and they’ll give them away for free. (At least they do in my area.)
Personally, I like the produce boxes because they have spaces in the box for air to flow through which helps stop the tomatoes from rotting.
Also, they have lids which are great for storage as well.
Step 3. Wrap the Tomatoes in Newspaper
Once you have your boxes on hand, it is time to wrap the tomatoes. Wrapping them keeps them from touching each other which helps deter the tomatoes from rotting.
However, be sure to wrap them in newspaper that has no colored ink. The colored ink of the newspaper contains nasty chemicals that often bleed over into the fruits and veggies they help store. You don’t want to risk consuming them.
So just stick with regular black and white newspaper. If you don’t have that, you could always reuse paper grocery bags to wrap the tomatoes in.
Step 4. Add a Banana to the Mix
Now that your tomatoes are wrapped and stored neatly in the cardboard boxes, it is time to add the banana to the box that does all of the ‘magic ripening’ work.
So with this method, because I’m assuming you’ll want to store them for longer periods of time, you’ll want to choose a ripe banana that has only a little bit of green.
Then your tomatoes will ripen more slowly so you can enjoy them farther into the winter.
Step 5. Store in Cool, Dry Location
After you have your cardboard boxes all packed, it is time to store them in a cool, dry location with no humidity. If you have a root cellar, it would be a good storage place.
If not, you could try a dark closet or a cool, dry corner of a basement. Just whatever space you have available that will allow the tomatoes to stay cool and not have rot form because of heat or humidity.
Step 6. Enjoy!
Finally, you’ll want to check your tomatoes daily. This will ensure you stay on top of any potential problems that could develop so you don’t lose your whole harvest. Be sure to enjoy your tomatoes within a week after they’ve become ripe.
Method #5: The Paper Bag Method
via Wikihow
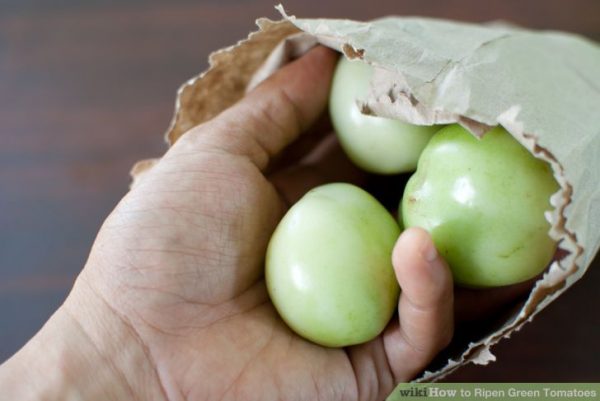
This is another method that works best for smaller batches of tomatoes. If you picked up some green tomatoes from the store, or just picked a few too soon, then you’ll want to consider this ripening method.
Step 1. Wash the Tomatoes
This is our second last method, but we are going to start it like all of the rest. Be sure to wash your tomatoes for sanitary purposes.
Step 2. Add a Banana to the Bag
Then you’ll need to pull out a brown paper bag. This could be a brown paper grocery bag (it would hold more tomatoes.)
But if you have fewer tomatoes, you could actually just use a brown paper lunch sack. They are usually inexpensive to purchase at your local grocery store, or you can purchase them here.
Once you have your bags, you’ll need to add a banana. Depending upon how quickly you want them ripened (and the size of the tomato), that should determine the ripeness of the banana to use. Remember, the greener the banana is the more ethylene it is producing. Which determines how quickly the tomatoes ripen.
Step 3. Place the Tomatoes in the Bag
Next, you’ll need to add your tomatoes to the brown paper bag with the banana. Be sure not to overcrowd the bag as you still need to allow air to circulate between the tomatoes in order to avoid any type of mold or rot from taking place.
Step 4. Store in a Cool, Dry Location
Finally, you’ll want to store the tomatoes in the bag in a cool, dry location with lower humidity. Check the tomatoes daily to make sure that no mold or rot is occurring.
However, if you find that it is, be sure to remove the tomatoes that have been impacted by it in any way.
Method #6: The Old-Fashioned Way
via Garden Aware
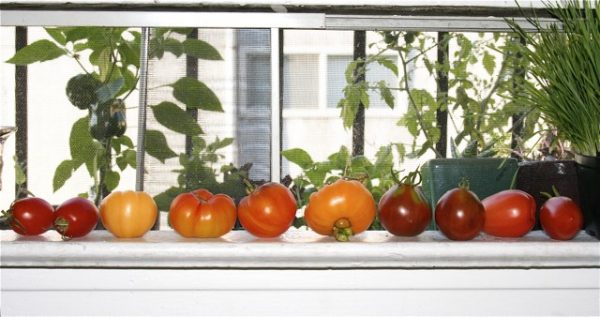
Let’s say you have a handful of tomatoes that aren’t as ripe as you like. You could’ve picked them, or purchased them. It doesn’t matter.
But either way, you’d still like to utilize them. What is a basic way to allow them to ripen?
Well, this one requires no steps. You just find a sunny windowsill and set the tomatoes stem side down so they can ripen. My grandpa did this a lot and it reminds me of him every summer when I usually do a few tomatoes this way.
However, be sure to place it stem side down because it is sturdier so it won’t bruise the tomato which could potentially cause it to rot and ripen simultaneously which means it would be inedible.
Well, now you know 6 different methods of how to ripen tomatoes. Hopefully, this will help you utilize the tomatoes you’ve spent money on a little faster than normal, or help you save your summer harvest so it can be enjoyed during the cooler months.
But I want to hear your thoughts. Have you ever tried these methods? Which is your favorite? Do you use another method to ripen your tomatoes?
We love hearing from you so please leave your comments in the space provided below.

