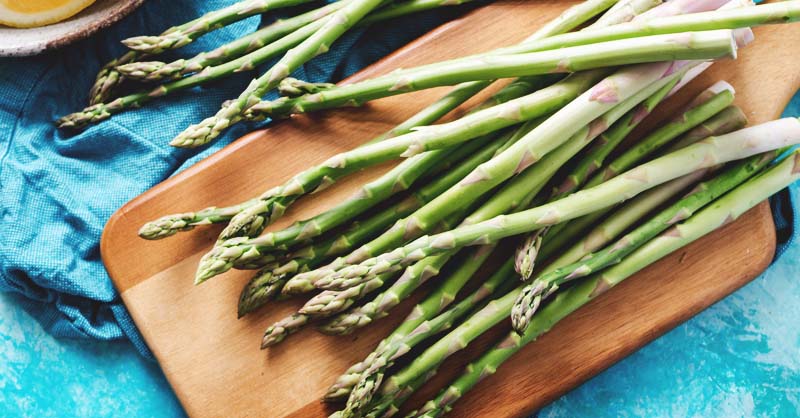
Asparagus is one of those perennial vegetables that people seem to either love or hate. Personally, I fall into the love camp because it’s incredibly tasty and loaded with vitamins and minerals like vitamins A, C, K, folate, iron, copper, and has lots of fiber.
In my experience most of the people who claim to hate asparagus dislike all sorts of delicious, healthy vegetables. Either that or they have an aversion to “asparagusic acid”.
Asparagusic acid is the substance in asparagus that breaks down sulfurous elements during digestion. As Marcel Proust put it, this stuff “transforms my chamber-pot into a flask of perfume”.
For some people, the Eau d’asparagus that comes out in urine is not even detectable. For others, it is so offensive that it makes them avoid asparagus entirely.
If you are reading this, though, I suspect you fall into the love camp too and have a healthy respect for asparagusic acid and all the other awesome qualities asparagus brings to the table.
Well, then I’ve got some good news for you…
Asparagus is pretty easy to grow. It can be grown in almost any climate, including places like Hawaii and California. (Though, it does prefer to live in places with cold, long winters.)
Unfortunately, now I’ve also got some bad news for you…
Many other forms of wildlife also tend to fall into the “loves asparagus camp”. This means you’ll need to take a few precautions to get good returns from your home-grown asparagus patch.
Let’s dig into the details about what it takes to grow great asparagus that you actually get to eat (before the critters do).
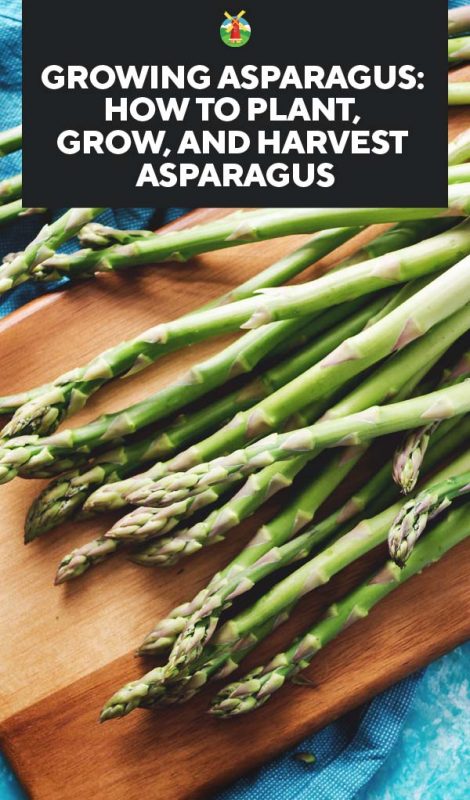
Quick Gardening Facts for Asparagus:
- Hardiness Zones: 3, 4, 5, 6, 7, 8, 9
- Soil: PH between 6.5 to 7.5, well-drained
- Sun Exposure: Full sun
- Planting:
- Start Indoors: 6 to 12 weeks before the last frost date
- Start Indoors (in fall): 4 to 6 weeks before the first frost date
- Hardening Off: 1 to 2 weeks before transplanting
- Transplant Outdoors: 12 to 14 days after indoors
- Spacing: 12 to 15 inches between plants and 2 to 4 feet between rows
- Depth: ¼ to ½ inch seed depth, 8 to 10 inches seedling depth
- Best Companions: Tomato, basil, parsley, grape, beet, lettuce, spinach, dill, coriander, comfrey, rhubarb, strawberry
- Worst Companions: Onion, garlic, potato
- Watering: Heavy watering, after every 10 to 14 days
- Fertilizing: Apply fertilizer rich in potassium and phosphorus before planting and that rich in nitrogen afterwards, use compost manure for first year beds in autumn
- Common Problems: Asparagus beetle, phytophthora crown and spear rot, cercospora blight, asparagus rust, fusarium wilt
- Harvest: When plants are 6 to 8 inches high and spheres ⅜ inches thick
Best Asparagus Varieties to Plant
There are many varieties of asparagus available if you want to start your own from seed. Fancy names like Precoce D’Argenteuil that are excellent for blanching (growing under buckets to produce white spears), almost tempt me to do the work to start my own.
For the most part though, people tend to start with easy to find crowns of Mary Washington, Jersey Knight, and Purple Passion.
1. Mary Washington
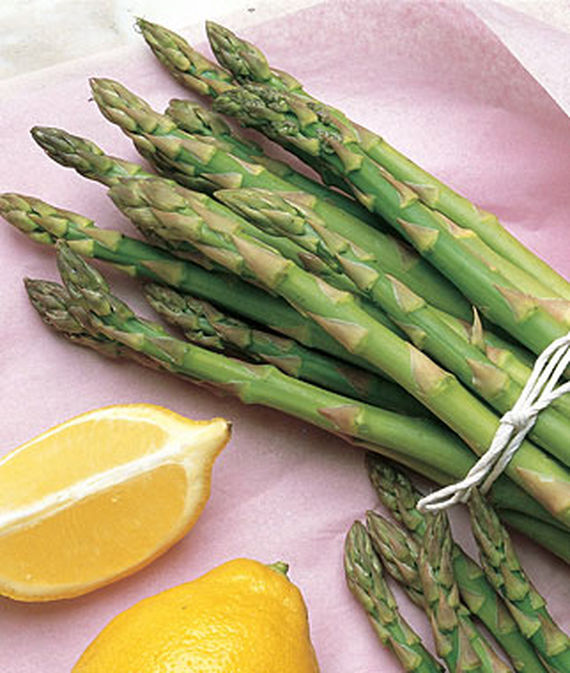
via burpee.com
Mary Washington is an heirloom variety known for its productivity and disease resistance. It is one of the easiest and most rewarding varieties to grow. The spears tend to be thinner and will get stringy if not harvested early. The spears also start to fern quickly in warm weather.
2. Jersey Knight
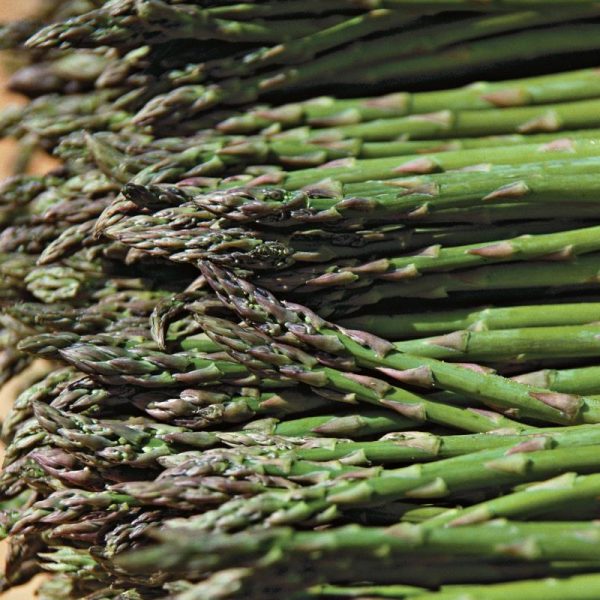
via starkbros.com
Jersey Knight is a hybrid variety of asparagus that produces mostly male plants. The spears tend to be a bit larger and hold out longer before growing into ferns. However, older spears can be tough to chew, so you’ll still want to harvest at peak.
3. Purple Passion
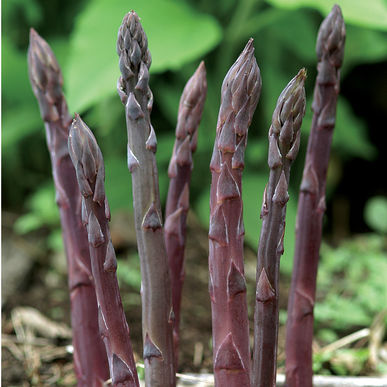
via johhnyseeds.com
Purple passion is a bit less productive than Jersey Knight. However, the spears are gorgeous and purple (like the name implies).
The hybrid varieties tend to be a bit shorter lived (e.g. 10 years rather than 30) and do not produce as many plants by self-seeding as Mary Washington’s do. Hybrid offspring will also not necessarily produce true to form. However, they grow really well in almost all soil types.
How to Plant Asparagus
Asparagus is perennial. With proper maintenance, a single plant can grow for ten years or more. Heirloom varieties also self-seed which means that it can self-propagate in the same location even if the original plants eventually die of old age.
With good care, you can grow asparagus in the same location indefinitely. Once you get it growing, it can also be impossible to remove without a whole lot of work. So choose your asparagus area carefully.
1. Choose the Right Site
Your permanent patch should have good drainage, be protected from wind, and have at least 6-8 hours of sun per day. Ideally, it should also have some reprieve from the scorching summer heat, such as with afternoon shade, in hot climates.
Most herbivores (rabbits, squirrels, deer, voles, marmots, groundhogs, goats…) and most omnivores (poultry, pigs, rats, chipmunks, mice…) also love asparagus. Growing asparagus in a well-fenced garden or in an area with less pest pressure is key.
Unless you have a problem with prolific diggers like rabbits and voles, using temporary fencing or netting during the spear growing season (spring and sometimes fall) can be effective to ensure good plant establishment and eventually a good harvest.
If you have challenges with garden diggers though, you’ll also need to protect with fencing that runs at least 2 feet underground.
2. How Much Space?
Before you start soil preparation, you need to figure out exactly how much space to allocate to grow sufficient asparagus for your needs.
Asparagus should be planted between 12-18 inches apart with plenty of room for you to stand and harvest between your rows.
In dry areas, you can get away with closer plantings. However, in humid areas, wider spacing between plants helps to prevent fungal disorders.
3. How many plants do you need?
On average, ten healthy asparagus plants will produce about 4 pounds of spears, starting after the 4th year of growing.
If you want 10 pounds of asparagus per year, you would need about 25 asparagus plants. With 12 inch spacing, this would take about 25 feet in a garden bed. With 16 inch spacing, this would take a little over 33 feet.
That’s a lot of room for a small garden. That kind of space will also take a lot of soil preparation.
4. Planning Your Asparagus Patch
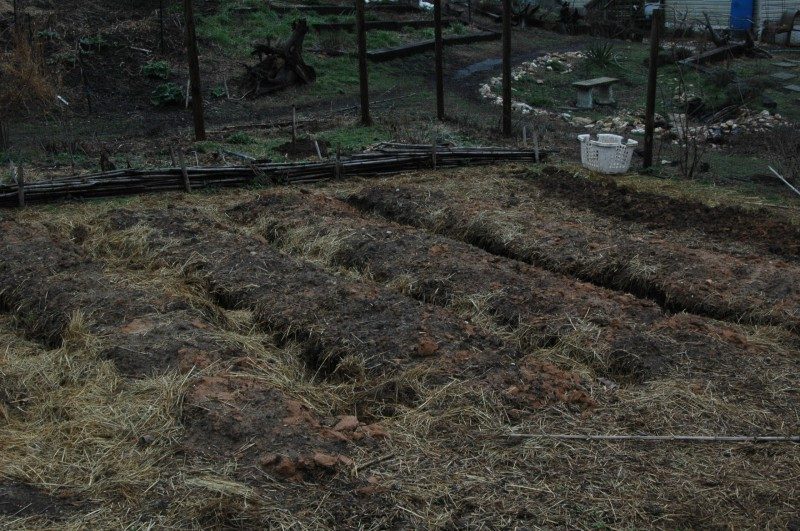
Rather than starting all these plants at once, many growers will begin with ten or twelve plants and then expand their patch a little each year.
Also rather than planting in linear rows, many people prefer to start asparagus in patches. For example, you could create a 10 x 10 plot.

In moderately good soil and dry conditions, you could space your plants 12 inches apart with two feet between each row. With this configuration, you could fit 40 plants in 100 square feet.
If you are willing to do extensive soil preparation and add 4-6 inches of fresh compost and other sources of fertility as needed, you could even get 60 plants in this same space using this configuration.
5. Soil Preparation for Asparagus
You’ve found the perfect place, figured out the amount of space, and are ready to plant. Err…well, not exactly. You’ve still got some work to do!
Asparagus will grow very poorly in just about any soil type. However, if you want good yields in four years, you are going to have to do some serious soil preparation.
Most traditional growers will dig six-inch trenches, plant asparagus crowns, and backfill the trenches with two inches of compost mixed with the original soil. If you have good soil, to begin with, this can work well.
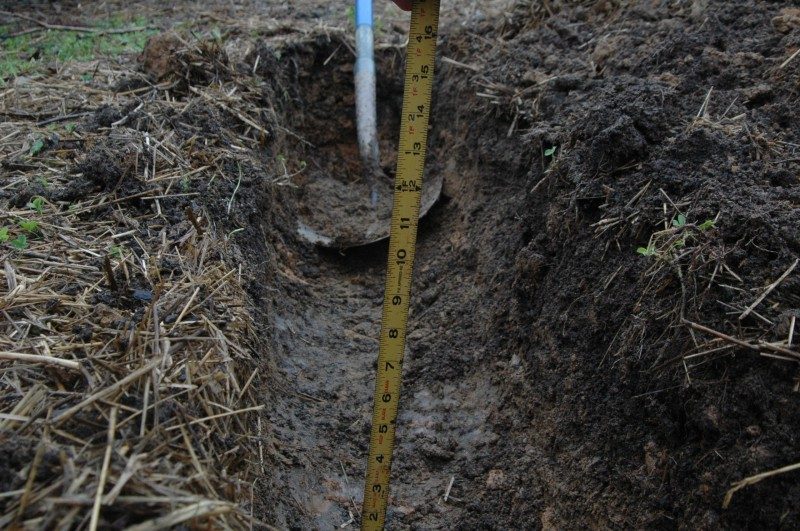
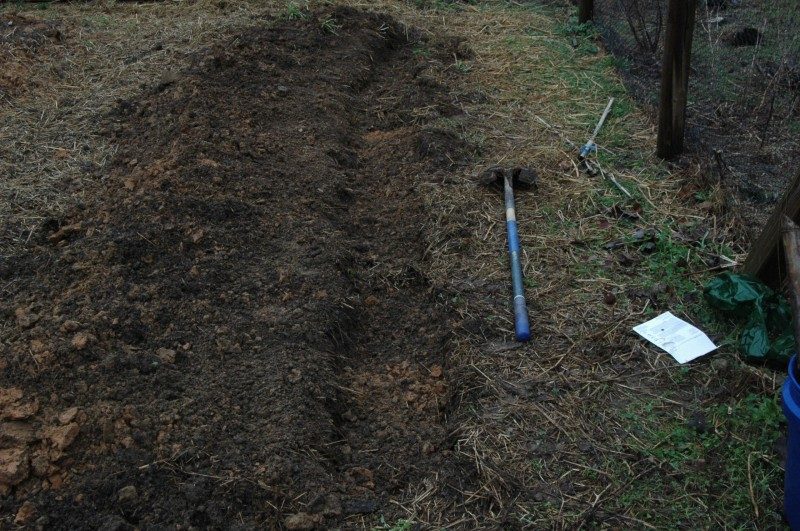
My personal technique is a bit different. I dig a trench that is about 1 foot deep and the width of my shovel (close to 1 foot).
I mix my native soil with about half as much compost. Since we have heavy clay, I usually have to break up some clay clumps as I go.
Then I backfill with 6 inches of the soil mix. This gives the asparagus lose, compost rich soil to start growing in.
Asparagus needs a soil pH of 6.5 to 7.5. If you don’t know your soil pH, consider a soil test to determine whether lime or sulfur products need to be applied to adjust your pH.
6. Planting Your Asparagus
You can start asparagus from seeds in a greenhouse or other protected area. However, it takes about 5 years to start harvesting asparagus. You can also start from plants, though those can be harder to find.
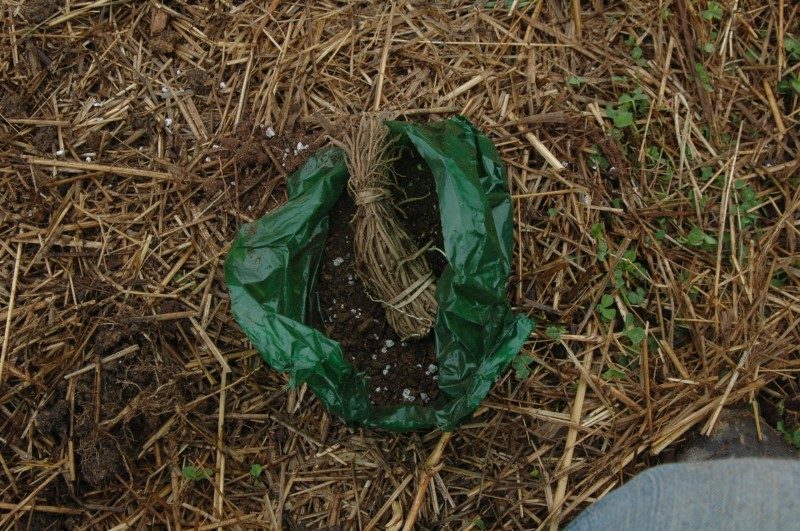
Asparagus is most commonly planted in spring using dormant two-year-old crowns. The crowns often come in bags of three to six crowns. We’ll focus on this method since this is the easiest way to get started.
You can technically plant asparagus at any time of the year that soil can be worked. However, for best results, early spring or fall planting tend to work best. Soil temperatures above 50° F, air temperatures above 40° F and below 70° F, and regular rain really help with plant establishment.
Planting asparagus is very much like planting potatoes.
Once you have decided on your soil preparation method and gathered your materials, plant your asparagus crowns about 6 inches deep.
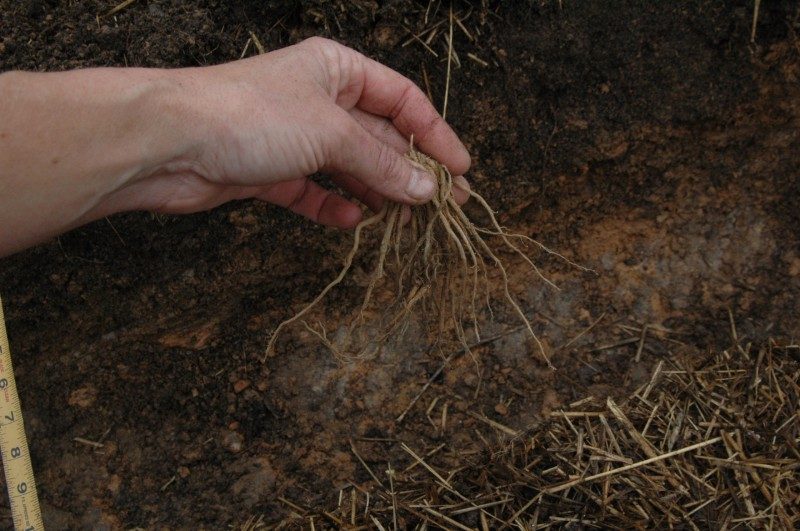
Set the roots on the soil just like putting a crown on a head in your trench. Cover with 2-3 inches of soil mix initially.
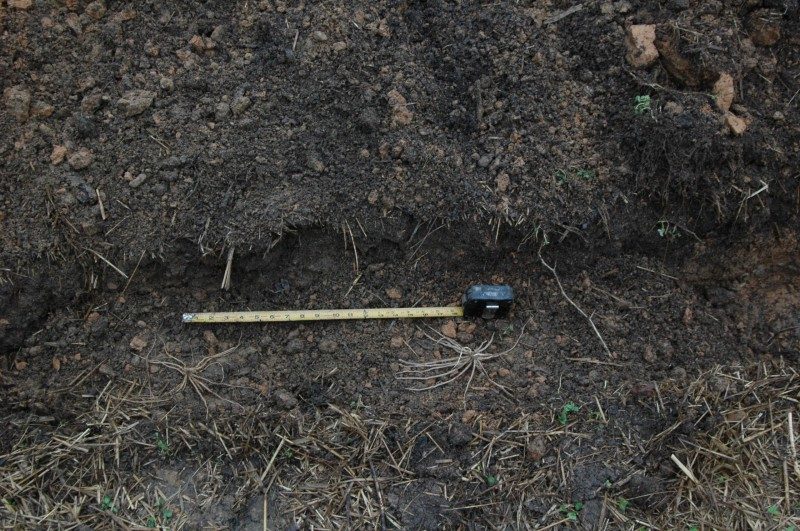
Personally, I cover the soil in my trench with a light layer of hay from the floor of my goat barn. (It’s got bonus urine and manure in it to add some instant fertility to the trench.) This helps keep the soil moist until the plants grow in too.
When the asparagus tips begin poking through, backfill your trench with more soil (and more hay or straw if you have it).
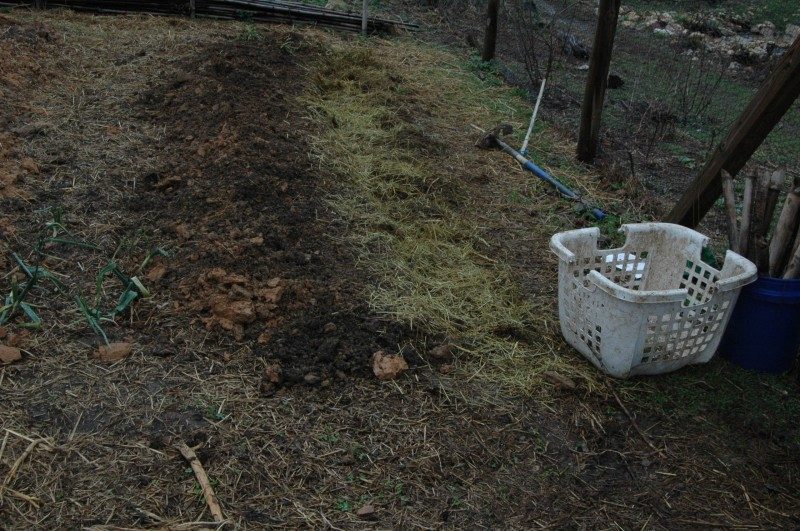
Repeat this process until you have backfilled all your soil to level.
Water deeply at time of planting and keep the soil moist until the soil is back up to grade.
7. Test-Drive Your Asparagus Growing Skills
If you want to try growing asparagus before you totally commit, buy a bag of crowns and plant them in craters near your already landscaped areas that have similar pH planting requirements (e.g. near deciduous flowering trees). I do this under my fruit trees (outside the shade line).
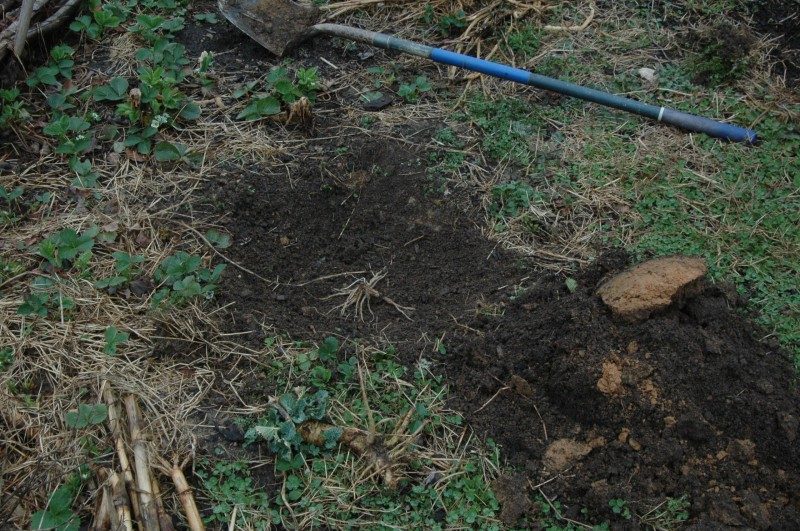
Dig a one-foot diameter hole with a deep crater. Backfill the entire hole with compost instead of soil. Start by filling it with 6 inches of compost, set your crown, and cover with two more inches. Mark it with a stake until the plant parts are visible.
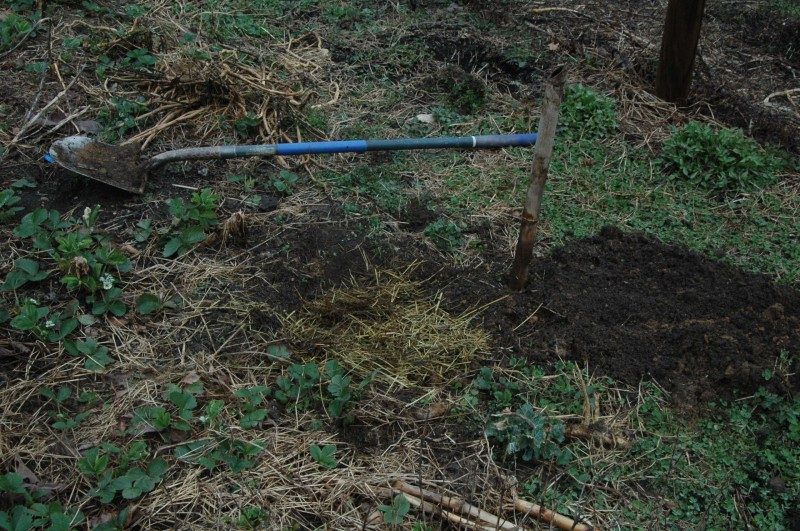
As spears emerge, backfill with more compost until you are back up to grade. Cover with mulch and maintain as you would your other landscaped areas (e.g. regular watering, feeding, and weeding).
After you’ve had a little taste of growing asparagus in your already landscaped areas, I have a feeling you’ll want more. So refer back to the instructions above to start your patch!
How to Care for Asparagus
After your plants emerge, water weekly during periods of insufficient rain (e.g less than an inch or two a week).
As the asparagus spears emerge, they will begin to grow taller. The spearheads will grow outward and become fern-like.
Just like the above-ground parts of other plants, these ferns gather sunlight to help the plant grow deep roots.
For the first two years after planting do not harvest the spears. Allow them to grow to full-size plants. Leave the plants standing until they die back naturally in winter.
If you have no winter die back, then cut out your older fern-like parts as soon as they show signs of aging (e.g. browning tips, partial dieback) to make room for new growth.
Weeding is essential for good plant establishment. Once your plants have a lot of mass above ground, consider adding a few inches of mulch to cut down your workload and keep the soil moist.
Asparagus benefits from regular additions of fertilizers. Watering with compost tea or adding fresh compost or worm castings will keep your plants happy.
Add a couple inches of compost annually for good continued production.
Common Problems with Growing Asparagus
We have already covered the importance of using good fencing for pest protection to keep out diggers like voles or nibblers like deer and chickens. However, there are also some insects that prefer asparagus.
1. The Common Asparagus Beetle
via Luv2garden
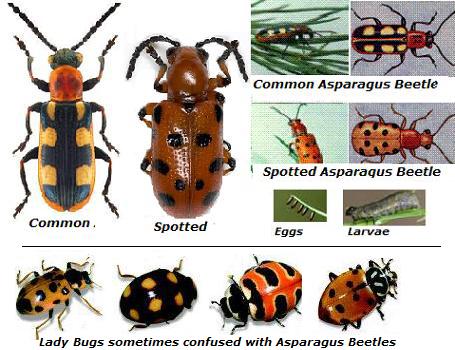
The Common Asparagus Beetle is the most well-known pest of asparagus plants. This adult beetle is hard to miss with its reddish body and black and white cross-like markings on its back. It makes me think of a first aid sign – which is what your asparagus will need if you don’t keep these beetles in check.
The Common Asparagus Beetle can do significant damage to your asparagus by defoliating leaves and damaging stems. This beetle can decimate an asparagus patch in one growing season if not controlled.
Bent spears, damage to the spears tips, ferns, and stems may all be indicators common asparagus beetle feeding.
Solution:
Manually picking these pests and their eggs off the plants into a bowl of soapy water every time you see them is your best solution. The best time to scout for the adult common asparagus beetle is during the afternoon when they are most active.
Eggs can be found on the tips of the asparagus spears. They are small and oval shaped and stand out parallel to the spearhead.
Neem oil can be an effective temporary preventative along with daily manual control.
For severe infestations, chemical control options include carbaryl, malathion, and permethrin and should be used in accordance with package labels.
2. The Spotted Asparagus Beetle
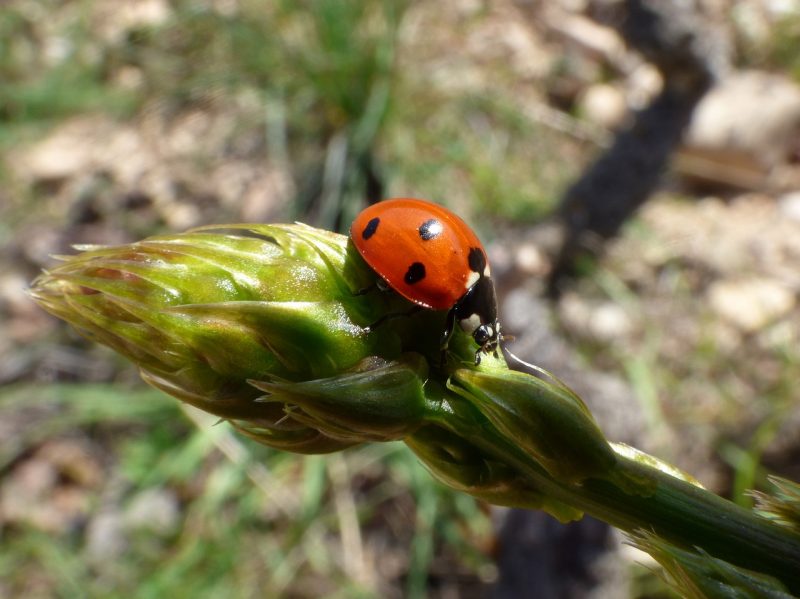
There is also a ladybug look-alike that takes a toll on your asparagus if you are not careful. With similar spots, but a less rounded body than ladybugs, the spotted asparagus beetle often goes unnoticed in an asparagus bed.
This beetle is much less damaging to asparagus plants than the common asparagus beetle. However, it can cause damage to the spear tips making them less attractive.
These insects also feed on seed pods and can make seed collection difficult.
Additionally, insect damage can make asparagus more susceptible to Fusarium (fungal disorders) which may lead to a decline in production and ultimately the death of your plant.
Solution:
Manually picking these insects and their larva off plants on a regular basis is usually sufficient to prevent serious risk to your crops. Also, mild pesticides like neem oil or Diatomaceous Earth (DE) can provide temporary protection.
In the case of a serious infestation, a combination of insecticidal soap and an insecticide like permethrin may be necessary.
3. Crown Rot and Root Rot (Fusarium)
There are two primary forms of Fusarium (a fungal disorder), that can devastate an asparagus patch. These are commonly called crown rot or root rot.
These disorders can reduce production, cause wilt, and browning of the plant parts, and limit the plant’s uptake of nutrients.
Solution:
There is no real treatment for these fungal infections. However, damaged asparagus plants are more susceptible to fungal infections. Humid conditions also make fungal infections more likely.
By policing plants regularly and picking off pests and giving plants plenty of planting space, you can minimize risks and keep plants healthy.
Best Companion Plants for Asparagus
One of the most effective ways of preventing the above-mentioned asparagus pests is to plant a few good friends close to your asparagus patch, such as:
- Tomatoes
- Parsley
Both of these plants are believed to confuse and deter common asparagus pests.
Asparagus also won’t mind a little company from these friends either.
Worst Companion Plants for Asparagus
You’ll want to keep these plants far away from your asparagus. They just don’t seem to like growing together.
How to Harvest Asparagus
It takes at least three years for asparagus to establish. For best results, wait to harvest until year four.
That being said, I know that’s a long time to wait. So, if you’ve taken really great care of your plants and have a spear explosion, in year three, you can harvest 10-30% of your spears.
Allow the rest of your spears to mature and grow.
In year four and beyond, if your plants are growing great, you can harvest all your spears as they emerge for several weeks.
When spear production slows and spears become thinner, stop harvesting and allow your spears to grow to full size.
To harvest use a sharp knife to cut the spear at ground level when it reaches about 8 inches in height. Sometimes fatter spears need to be harvested a bit shorter for best taste.
During the spear growing season, you’ll want to check your patch daily to harvest before spears start to fern.
As with any pruning or cutting of plants, it’s best to cut at an angle so that rain runs off the cut part to reduce fungal risks and rot.
Asparagus is best eaten fresh (raw or cooked) or blanched lightly and frozen for later use. If we have to store ours overnight, I keep it in a cup of water in the refrigerator. This gives it the freshest taste.
We also wrap a bunch in a moist paper towel and store it in the crisper for several days.
Trust me though – fresh is best. If you are going to do the work to grow your own, you deserve to eat asparagus at its peak fresh from the garden.
Is Asparagus Worth all this Work?
Asparagus takes a lot of work and care up front to get good yields. It also takes discipline not to harvest your spears until your plants are well-established.
Yet, when you consider how much work goes into growing annual vegetables with similar soil preparation and maintenance requirements, asparagus starts to look like a bargain in terms of time spent and yields.
You won’t need to buy or save seeds each year.
You won’t need to start new plants and transplant them outside.
You won’t need to cross your fingers and hope your germination rates are good or that your transplants take.
Once asparagus is growing well, then with a little weeding, water, and additional compost, you’ll be rewarded with many happy returns from this perennially-giving, aspargusic-acid-producing, delightful delicacy.
So I say to all the rest of you in the ‘love asparagus’ camp, bring home the love, and grow some asparagus in your own backyard!

