It happens to all of us gardeners at one point or another. Our garden gets out of hand. Unplanted beds get taken over by grasses and more insidious weeds. Sometimes the weeds can get so overwhelming that you feel like it would be easier to start a new garden then recover the one you have.
Don’t despair though! If you have been working on your garden soil for a while and weeds invade, it’s pretty easy to get things on track again with one secret weapon.
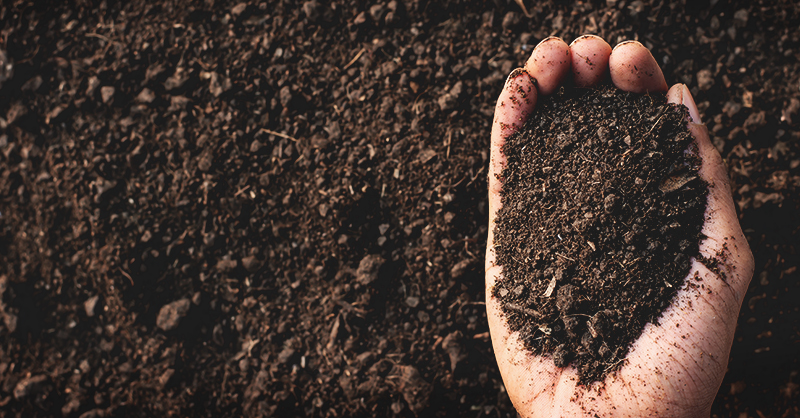
Leaf mold! Some people also call this leaf mulch or leaf compost. Basically, mulched leaves that have been partially decomposed to the point where they are dark colored and loose and airy make the perfect antidote to summertime weed explosions.

Why Leaf Mold?
There are a lot of things I won’t add to my soil in the middle of summer. Like, compost that has been aged for less than a year, for example. That’s because if you add compost that is not sufficiently mellowed and still has measurable rates of nitrogen, phosphorous, and potassium when soil temperatures are high, the micro life goes crazy.
Heat-loving bacteria and fungi start eating up and decomposing all that fresh organic matter; they practically get into a frenzy. As they do, the soil temperature heats up further. And at a time when soil temperatures are already high, that can mean big trouble for your plants.
Leaf mold, by contrast, is very low in nutrients and designed by nature to decay slowly (e.g., on the forest floor over many years). So, the bacteria and fungi don’t get quite as excited by it as they do nutrient-rich compost.
It Adds Water and Air
In fact, most people consider leaf mold as a soil conditioner rather than a fertility source. Its primary function as a soil additive is to increase air space between soil particles and increase water-holding capacity in soil.
Both of these things, more air, and more water help lower soil temperature and minimize plant stress, particularly in hot weather. That makes leaf mold a great choice to use in the garden, even in the middle of a heat streak.
It Breaks Up Compaction
Additionally, part of what makes weeds so hard to manage in the summer is that the heat dries out the soil faster, lowering its water content. Plus, all those active bacteria and fungi use air in the soil for their processes. Since they are more active in warmer soil temperatures, they also reduce the air content in the soil.
Less air and less water leads to more soil compaction. Weeds, like crab or other sprawling grasses, with a preference for compacted soils, have a much easier time getting a foothold. Once they do, they can quickly out-compete your preferred plants in compacted soil conditions.
So, by using leaf mulch in summer, you can break up compaction. That makes it harder for weeds to get going and makes it easier to pull them if they do.
Ways to Use Leaf Mold to Restore Weedy Summer Beds

I have to confess, I have a high tolerance for weeds. Sometimes when I don’t get around to planting a cover crop, I’ll let weeds cover my beds until I get around to using them.
Because I use leaf mold as part of my routine garden management to restore my weedy summer beds, I’m kind of an expert on recovering weedy beds using leaf mold.
Through trial and error, I’ve evolved three basic ways to use this incredible soil conditioner to transform weed beds back into vegetable beds in hot weather.
Method 1: Double Cover
This method works well if you’ll be transplanting or direct seeding vegetables or flowers that don’t have a lot of natural resistance to weed pressure. Slow-growing plants, small-sized plants that don’t create much shade to limit weed growth, and annuals with shallow root systems fall into this category. For example, I use this for planting carrots, eggplant, peppers, beets, turnips, lettuce, dill, cilantro, and more.
Here’s what you need to do.
Step 1: The Low Down Mow Down

On a hot sunny day, use a string weed trimmer to mow down the weeds on your bed as low as you can get them. Let those almost leafless weeds bake in the sun all day long.
This processes stress the plants out and make it more likely that they’ll die when smothered, which brings us to step 2.
Step 2: Cover With Carbon

Now, you’re going to cover your weeds with some high carbon source. The higher the carbon, the better. Cardboard, newspaper, and other kinds of paper have a much higher carbon content than things like straw. So, they are my go-to for this process.
Cover your beds with about 1/6th to 1/4th of an inch of your chosen carbon source. Try to completely cover the bed, so there are no gaps where weeds can grow through. Then, water your carbon materials to weight them down and hold them in place.
Carbon-based materials naturally draw soil decomposers to them. Earthworms, cutworms, pill bugs, and more will relocate right under your carbon materials and start to decompose everything in the area.
By covering your bed with this stuff, those heat-stressed, over-mowed, half-smothered weeds will start to rot. As they do, all those critters I just mentioned will start to eat the rotting weeds and help ensure they don’t survive and resurface.
Basically, by calling those decomposers to the root zone with carbon, you enlist their help to further stress and eventually kill those weeds. When you do, the weeds add organic matter and nutrients back to the soil. They also help create air spaces and hold water just like leaf mold does.
Step 3: Cover with Leaf Mold

Now, to seal the deal, you need to add about 3-4 inches of leaf mold to the top of the bed, right over your carbon source. It may sound like a lot, but once those soil critters get done with your rotting weeds and carbon materials, they’ll get to work incorporating all that leaf mulch down into the soil where it will do its good deeds of adding air spaces and holding water.
Step 4: Water Your Bed Completely
Now, water your bed as deeply as you can. Water until your bed won’t take any more. If your soil was dry underneath, you may want to water as much as you can, wait a day, then water again.
Even before it’s incorporated, the way the water spreads through the leaf mold makes it filter down into your soil indirectly so that it penetrates better than it would in bare soil. The extra water also drops the temperature of the soil and creates a safe working environment for all those critters you invited to eat your weeds.
Step 5: Plant in Potting Soil
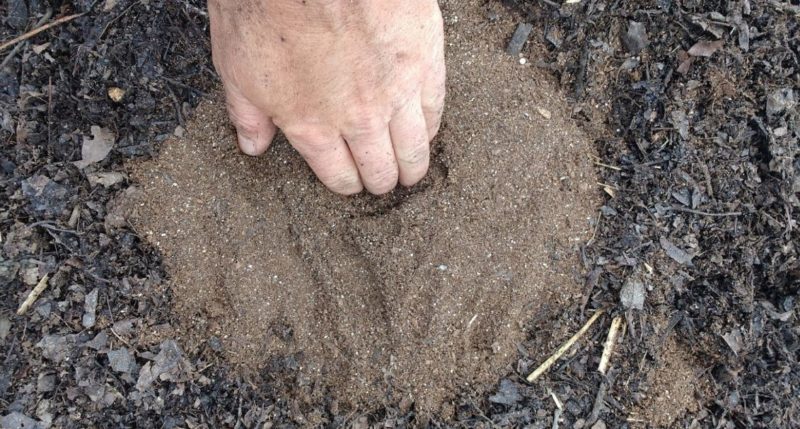
As I said earlier, leaf mold is not a nutrient source. So, if you want to plant right away, then you can dig out appropriately sized divots in your leaf mold. Cut through the carbon source below so plant roots can access soil as they grow in.
Fill your divot with weed-free potting soil. Then, start your plants in those potting soil pockets. Continue to fertilize your plants as needed for health and productivity.
Generally, you’ll want to use the same amount of potting soil and divot size as you would if you were starting seeds in a pot or tray, or potting up to the next-sized container. Then, by the time the roots extend beyond your potting soil pockets, the weeds below will have given up the ghost.
Plus, the bacteria and fungi will have joined the other critters to help decompose the rest of the dead weed matter. So, the soil nutrient zone for your plants will be just below the bottom of the leaf mold and within easy reach of your plants.
Method 2: Leaf Mold Plus Weed Control Plants
Now, if you are going to plant crops that have allelopathic properties or use cover crops on your weedy bed, then your job is a little bit easier.
Follow the same steps as above, except you can skip step number 2. Plants that naturally limit weeds either with their fast growth or by exuding allelopathic compounds to reduce weed pressure in their root zone, just need a little head start over weeds.
The mowing, drowning, and smothering leaf mold cover, even without the extra step of using a carbon source, are sufficient to suppress weeds. After that, your new plantings should be able to hold their own even in a once weedy bed.
Method 3: Till in Leaf Mold

Now, I am generally a no-till gardener. But when I dig up garlic, potatoes, onions, or carrots, the soil is already disturbed. Also because you have to do so much weed control around some of these plants, the soil tends to get compacted from the constant weeding.
So, once you dig out your crop, weeds seem to take over in seconds. In cases where I have already disturbed the soil, or if there’s extreme compaction, then I’ll do the following.
Step 1: Apply Leaf Mold
Apply 3-4 inches of leaf mold on top of the bed.
Step 2: Water Well and Wait
Water the bed thoroughly and let it sit for a day or two.
Step 3: Till Manually
Till the leaf mold in with a manual garden tiller or work it in with your hands. You only need to work it into the top 3-4 inches, so your soil ends up being about a 50/50 mix of leaf mold and soil in the top few inches.
Step 4: Weed As Needed
Pick out any weeds that come loose in the tilling process. Then weed regularly until your crop takes off.
You will have to do a bit of extra weeding when you till rather than simply cover the soil with leaf mold. But, the weeds are much easier to pull after you’ve conditioned the soil in this manner.
Step 5: Direct Plant
Plant your next crop direct in your soil mix. It’s a bit like planting in a potting mix that contains peat. You’ll need to water a bit extra since your soil holds more moisture now. But your plants will thank you for it.
Conclusion
Leaf mold is great for your garden just about any time of year. But, it’s one of the safer amendments you can use to fight weeds and improve soil quality in the middle of summer.
Even if you don’t grow weeds as cover crops, as I do, leaf mold is a must for gardeners who want well-conditioned soil for good plant growth.

