A few years ago, my mother-in-law showed up at our house with a bag of seeds. They were meant for growing gourds.
I had no idea what I was doing, but I put them in the ground and away they went. That’s how easy they are to grow!
Over the years as I’ve improved my gardening skills, I’ve invested in different types of gourds and learned how to appreciate them, but if you’re looking for a good beginner plant, you can’t go wrong with gourds.

Gourd Plant Info
- Hardiness Zones: 3, 4, 5, 6, 7, 8, 9, 10
- Soil: Loam, sandy, clay, PH between 6.0 to 7.5, rich in organic matter, well-drained
- Sun Exposure: Full sun, at least 6 hours a day
- Planting:
- Start Indoors: 4 to 6 weeks before the last frost date
- Hardening Off: 1 to 2 weeks before transplanting
- Transplant Outdoors: When plants have at least 4 leaves after all danger of frost has passed
- Spacing: 4 to 5 feet between plants and 6 to 10 feet between rows
- Depth: ½ to 1-inch seed depth
- Best Companions: Corn, pole beans, datura, sunflower
- Worst Companions: Potato
- Watering: Continuous water supply, water deeply once a week, at least 1 inch per week
- Fertilizing: Side dress with a balanced fertilizer or compost manure when vines start to bloom
- Common Problems: Anthracnose, Alternaria leaf blight, downy mildew, Cercospora leaf spot, gummy stem blight, powdery mildew, scab, septoria leaf spot, angular leaf spot, verticillium wilt, bacterial leaf spot, aster yellows, squash mosaic, cucumber mosaic, watermelon mosaic, crown rot, squash vine borer, cucumber beetle
- Harvest: After 100 to 180 days of planting depending on the variety, when stem and tendrils turn brown
How to Grow Gourds
Ready to learn how to grow gourds in your garden? They’re easy!
Gourd Varieties
There are three main types of gourds. They each have their own purpose, and they can each be equally as useful.
1. Sponge Gourd (Luffa Aegyptiaca)

This variety of gourd is what is used to produce loofah sponges. They are closely related to cucumbers, which explains why they look the way they do.
Unlike cucumbers, the outside is hard-shelled and you have to peel away the outer layer to reach the fluffy inside that makes the famous bath sponge.
This is the type that sucked me into growing gourds because I loved raising my own sponges.
2. Field Pumpkin (Cucurbita Pepo)

A lot of people use gourds in the fall to decorate their homes. It’s a great way to save money on décor by simply growing your own.
If you want to grow gourds for ornamental purposes, then pick this variety, which is closely related to both pumpkins and squashes. They come in a range of interesting colors, shapes, and sizes.
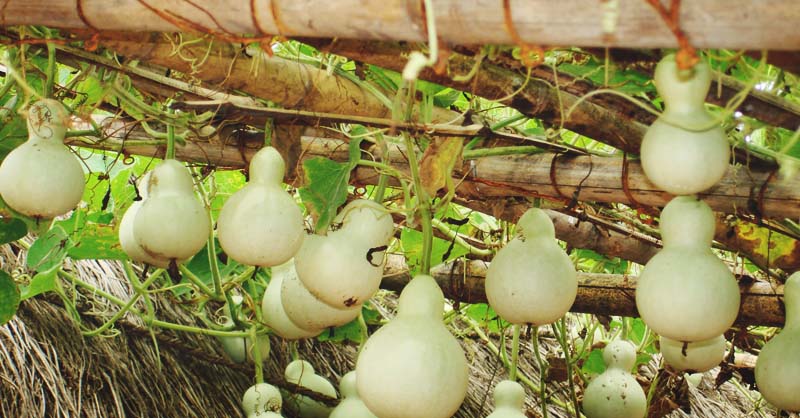
3. Calabash (Lagenaria Siceraria)

This type of gourd is the one you might think of when you see homemade gourd birdhouses. They are larger and harder shelled than the other varieties.
Also, this type of gourd is what you’d grow if you wanted to make a ladle or a container. You can even eat this kind of gourd before it reaches maturity.
Steps to Growing Gourds
Growing gourds is a simple process, but you need to make sure that you plan out your space, because if not, gourds will take over your yard.
The seeds my mother-in-law brought, were planted without any plan. I, therefore, had to battle gourds growing randomly for the rest of my time at that house because gourds are hogs when it comes to space.
Learn from my mistake and choose a spot where they’ll have plenty of room to run. Keep in mind that their vines can extend out 40 feet from the base of the plant.
Sun and Soil Requirements
Gourds are similar to squash in that they prefer areas in the garden that have full sunlight available. They need between 100-180 frost-free days to mature.
Gourds are heavy feeders, and they need soil that is rich and well-draining. It should have plenty of organic material, so make sure you add plenty of compost to the soil before you plant the seeds or seedlings.
Seriously, don’t be shy about adding compost. These plants need abundant amounts of nutrients to keep them thriving and happy.
Starting Gourd Seeds Inside
In most cases, you should direct sow your seeds into the ground, but you can start the seeds inside if you need to give them an early start. Gourds have delicate roots, so it’s possible to damage them during transplanting.
One way to avoid hurting their roots is by growing them in peat pots. With these pots, you can plant the entire pot and the material decomposes in the ground, so the roots can also work through the peat.
Start the seeds 4-6 weeks before you want to set them outside. Keep them warm and moist to help the seeds germinate faster. It typically takes 7-14 days for gourd seeds to germinate.
Planting Gourds in the Garden
Gourds are warm-weather crops, so you need to plant them in your garden after the danger of frost passes. The air temperature should be above 60°F; frost kills gourds, so wait for two weeks after your average last frost date passes.
Sow the seeds edge-down rather than flat. When you plant the seeds this way, the water can run down the sides of the sides and reduce the risk of rotting.
Spacing
Sow the seeds 1-2 inches deep in groups of 4 seeds. Each group should be 5 feet apart. If you’re starting several rows of gourds, make sure the rows are around 8 feet apart.
Once the seeds sprout, thin the seedlings to 2 or 3 in a group. They need a few inches in between each seedling for proper growth.
Once your gourds have sprouted, keep a watchful eye for leaves to develop. When they have, thin them down to one gourd for each spot by plucking the weaker plants.
Give Them Support
While it’s not a requirement, gourds do well when they grow on a trellis or a support system like arches or teepees.
Using a trellis can also save you space. You can train the stems to grow up over wires or any framework. Not only does this allow small-space gardeners the opportunity to grow gourds, but it protects your gourds from insects and keeps them off of the ground.
Believe it or not, gourds are natural climbers, but you do need to consider the weight. For heavy gourds, you’ll need sturdy posts and thick wire. Smaller gourds do well with a wire cage, similar to a tomato cage.
Can You Grow Gourds in Containers?
Just because you don’t have a lot of gardening space doesn’t mean that you can’t grow gourds. Gourds can be planted in containers, but realize that you’ll still need a strong trellis to stop the gourd vines from sprawling everywhere.
You also need a large container, typically a half barrel, to grow a few plants. Make sure the pot is at least 24 inches wide and 24 inches deep, but bigger is better.
Add Some Shape
Finally, you can shape your gourds if you want a specific look. You can put a broomstick on the ground and train the stems to grow around them.
This gives the gourd stems a fun, curved appearance. Also, you can tie the neck of larger gourds in knots for a fun look.
Caring for Gourds in Your Garden
Many gardeners note that gourds can thrive on neglect. They’re low-maintenance plants, so if you have a black thumb, you can still grow these plants.
Why? Because they require little care. If you put a thick layer of compost into the ground before you plant and give them a little water, the gourds should have what they need.
Watering Gourds
Gourds need plenty of water to grow, and that’s especially true during dry and hot periods. Young plants need more watering than established plants. It’s best to do several light waterings, in the beginning, to help the roots grow and establish.
Give your plants 1 inch of water per week. Water at the base of your plant rather than on the leaves which can lead to fungal diseases, such as powdery mildew, developing.
Fertilizing Gourd Plants
Hopefully, you added plenty of compost or manure when you planted your seeds in the garden. It’s not recommended to give your plants too much additional fertilizer. Excess fertilizer can be damaging to their development.
However, be sure to apply compost initially because gourds need the nutrients to produce. As long as you do this, then you shouldn’t have to add more fertilizer.
If you do wish to use a fertilizer every so often because your plants aren’t growing as expected, be sure not to use a high nitrogen fertilizer. This causes the leaves to bush out but will stunt the fruit’s growth.
Trim Back Your Plants
Cut the vines back when they’re 10 feet long. Trimming back the vines encourages your plants to grow side stems, which is where the female blossoms grow.
This practice might seem simple – it really is – but it can cause your plants to grow more gourds than ever before.
Gourd Problems and Solutions
Gourds have few issues, which is what makes them so easy to grow. The few problems they do have can be easily treated.
However, one word of caution. When you raise any plant that belongs to the cucurbits family (i.e. gourds, squash, pumpkins, etc.) they need pollinators to be able to produce their fruit.
This means that honey bees will hang around them a lot. You’ll need to take this into consideration when using insecticides.
Cucumber Beetles

You know that you have this pest on your gourds when you see small holes and wilting yellow leaves. Also, your fruits will become stunted and turn yellow. Keep an eye out for the yellow and black beetles hanging out in your garden.
The best way to treat cucumber beetles is by covering your plants with row covers so the bugs have a hard time moving from plant to plant. Just be sure to hand pollinate your plants or remove the covers when the plant is blooming so pollinators can get to it.
Bacterial Wilt
This disease is brought on by cucumber beetles. When they eat an infected plant and then move on to munch on another plant, they carry the disease from one plant to another.
You’ll know you have it because your plants will suddenly wilt. That’s because the bacteria stops water flowing in your plant.
There is no real way to stop bacterial wilt. You’ll have to destroy the infected plants. Your best shot at deterring the disease is to prevent cucumber beetles.
Squash Bugs
A squash bug looks a lot like a stink bug. They make similar markings on your plant as cucumber beetles do, which means you’ll see holes in your plants and the leaves turn yellow and wilting. Look for the brown shield-shaped bugs.
You can apply diatomaceous earth to the base of your plant to help to rid your garden of squash bugs. Consider using a targeted insecticide, as well, if you have this issue with your gourds.
Cutworms
Cutworms are a common problem for many plants. You’ll know you have them because they feed on the stem and roots of your plants, cutting the stem off and making it fall over. As you can guess, if you have them they are a big problem.
You can apply diatomaceous earth at the base of the plant to get rid of cutworms. Insecticides to help as well.
You can also make a plant collar out of cardboard to prevent them from reaching the stem of your plant.
Aphids

Aphids are a problem in most gardens. They are small bugs that are hard to see with the naked eye.
However, you’ll know you have them if your plants begin to look deformed, you have a sticky residue on your plants, and you start to see wilt as well.
You can try to kick aphids out of your garden by dusting your plants with flour. Also, consider using insecticidal soap or neem oil.
Best and Worst Companion Plants
Some plants provide other plants with much-needed shade, protection of insects and disease. Other plants work well together because they don’t battle each other for nutrients in the soil.
Those are what we call good companion plants. The best companion plants for gourds are:
- Radishes
- Catnip
- Broccoli
- Tansy
- Dill
- Marigolds
Along those same lines, you also have plants that should not be planted near each other because they either draw pests or battle over nutrients in the soil.
For gourds, you should avoid planting potatoes near them. Gourds and potatoes battle over nutrients.
How to Harvest and Store Gourds
Harvesting your gourds is even easier than growing them. An ornamental gourd can be cut from the vine as soon as the stem turns brown.

However, be sure when cutting the gourd from the vine that you leave about two inches of the stem on the vine to ensure that you have a good handle to hang onto your gourd.
Luffa gourds should be left on the vine until the stem is dry and both ends of the gourd have turned brown.
When you’re ready to use a luffa, just peel the outer layer of skin off with a spoon to get to the sponge inside the gourd.
Finally, the hard shell gourds can be left out in the garden for three to six months to finish drying. Even when the vine turns brown and dies, there is still water to keep the gourd alive.
However, you need to remember, if you cut the gourd too early it will rot. The longer you leave it on the vine, the better off you’ll be.
You’ll know that your gourds are fine (even if mold forms) as long as the skin on the gourd doesn’t rot.
When the gourd has turned brown, and the seeds rattle around in it, then you’re ready to take it inside and clean it up.
Storing Gourds Properly
Gourds are awesome to grow because they store so well. They survive well in root cellars, attics, garages, or barns.
For proper storage, pick a well ventilated, dry area with temperatures between 55-65°F. You’ll need to leave the gourds to dry for 1-6 months. It’s necessary to dry them fully if you plan to use gourds for crafts or other projects.
Cleaning Gourds
To clean your gourds, put it in a solution of 1 part bleach to 10 parts water. This kills the mold that has formed on the gourd while drying.
Gourd Projects and Recipes
You can use gourds for all types of different projects and uses around your house. Here are a few tutorials to get you started:
DIY Gourd Soy Candles
If you love fresh scents around your home, then you know how expensive it can be to buy great smelling and fashionable candles.
But if you grow your own gourds, and follow the steps to make gourd soy candles, then you could save money while also indulging in sweet-smelling home décor.
Gourd Birdhouse
Many people grow gourds because they like to make inexpensive, functional, but also pretty birdhouses out of them. This tutorial walks you through each step of the process of a gourd birdhouse.
Bitter Gourd Fry
It isn’t as common to eat gourd in the West, but it is quite common in other countries. You’d be surprised by all of the gourd recipes found on the internet.
This recipe for a bitter gourd fry is a great introduction because when you’re trying something new, it seems fried is usually the best introduction.


