
Do you have one item you’ve particularly wanted around your homestead but haven’t gotten around to getting it?
Well, this is how my root cellar was for me. When we lived on our smaller homestead, we had to use creative ways to store our canned food and other food items. We would use buried trash cans; we would store food under our beds, or place a few things under our house.
Still, I didn’t get to have a walk-in root cellar. When we moved to our larger homestead, I knew I wanted a walk-in root cellar.
Yet, it seemed like a big undertaking with many other projects on the table. My husband came up with a cost-effective way to turn our crawlspace into the root cellar of my dreams.
Here’s how we converted our crawlspace into a root cellar with hardly any out-of-pocket costs:
You’ll Need:
- Shovel
- Bucket
- Concrete
- Handheld power cutter
- Mallet
- Face mask
The Story Behind Turning our Crawlspace into a Root Cellar
For you to understand why we had to accomplish our root cellar using the method we did, you must know our history.
I live in a small home with a finished basement. One side of the basement is bedrooms, while the other side has this awkward hallway.
For whatever reason, when the house was built, the previous owner didn’t make the basement the entire size of the house.
Instead, we had this weird skinny hallway, a cinderblock wall, and a doorway which led to a crawlspace that had vents and lighting in it. It was a nice space.
My husband hates to have unused space. In his mind, this was the perfect root cellar for us. Therefore, we went to work making this awkward, unused crawl space into space which can be used by us.
Creating the Root Cellar
1. Cut Through the Wall
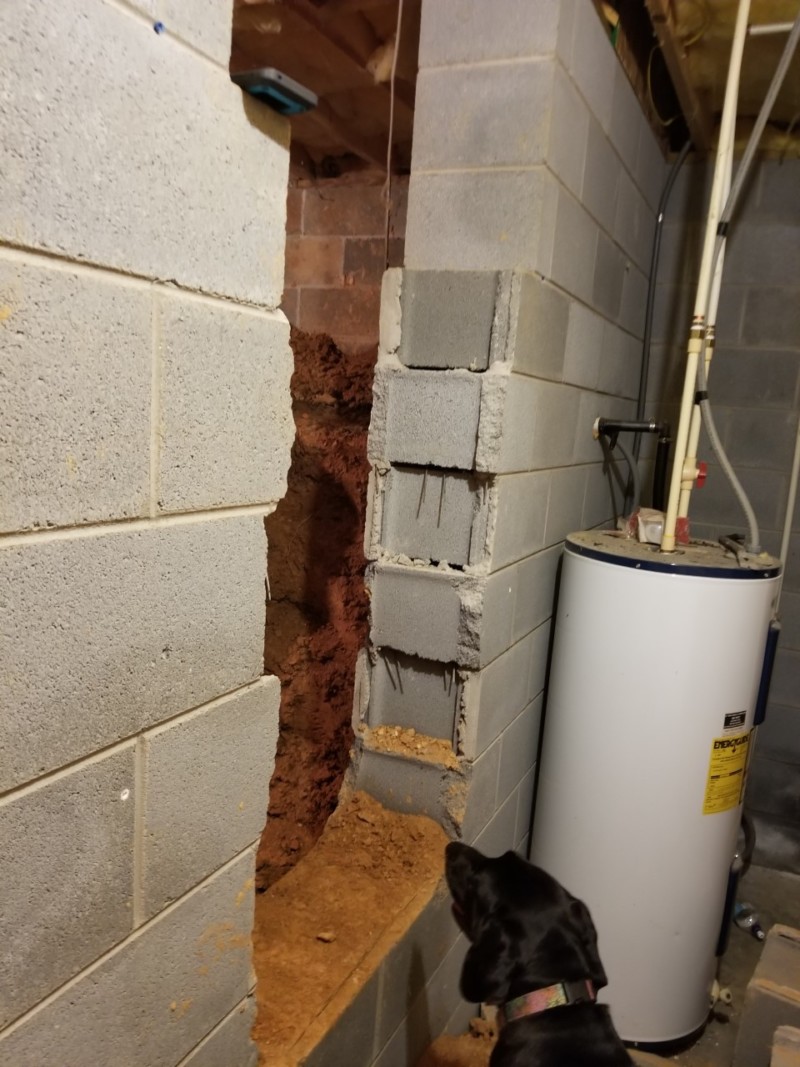
The first thing we had to do to tackle this root cellar was to cut through a cinder block wall. The crawlspace had been filled with loose dirt to a certain point.
We had to remove a few cinder blocks, dig out the dirt until we could get to the next row of cinder blocks, and repeat the process until we could get inside the crawl space.
It was quite the task to get inside the space we wanted to use as a root cellar, but I can say, it was worth every drop of sweat.
When the cinder blocks were removed to where we could climb inside the crawlspace, the fun took off. I should note here that when grinding or knocking out cinder blocks, dust is going to fly.
Be sure to use a safety mask when doing this to keep from filling your lungs with dust.
2. Dig and Dig Some More

My husband recently started a new job. For those of you who have followed this blog for any length of time, you know his old job allowed him to be home early in the day.
Well, his new job (which has been a good thing!) takes him away from home more than his previous job did.
I say this to let you know; this project took us much longer because of how limited our time was to work on it.
All in all, our family of 5 spent 4-5 days digging for approximately 4 hours each day.
However, we only had free days on the weekends which meant this project equated to about a month worth of Saturdays.
We dug the entire root cellar out by hand. The dirt was compact past a certain point which meant it was our only method.
Therefore, my husband would dig and fill a bucket, and we formed an assembly line from the crawlspace to the back door.
We’d wait until the dirt piled high and use the tractor to move the dirt for landscaping purposes around the property.
Truthfully, there were days I regretted starting this project. The job was messy, and I had dirt around my home for a month. Yes, it was hard work and tiring, but in the end entirely worth the mess and aches we had.
If you have a crawlspace that isn’t filled with dirt, a great deal of the work was done for you by whoever built your home. Our case was an odd-ball (go figure!)
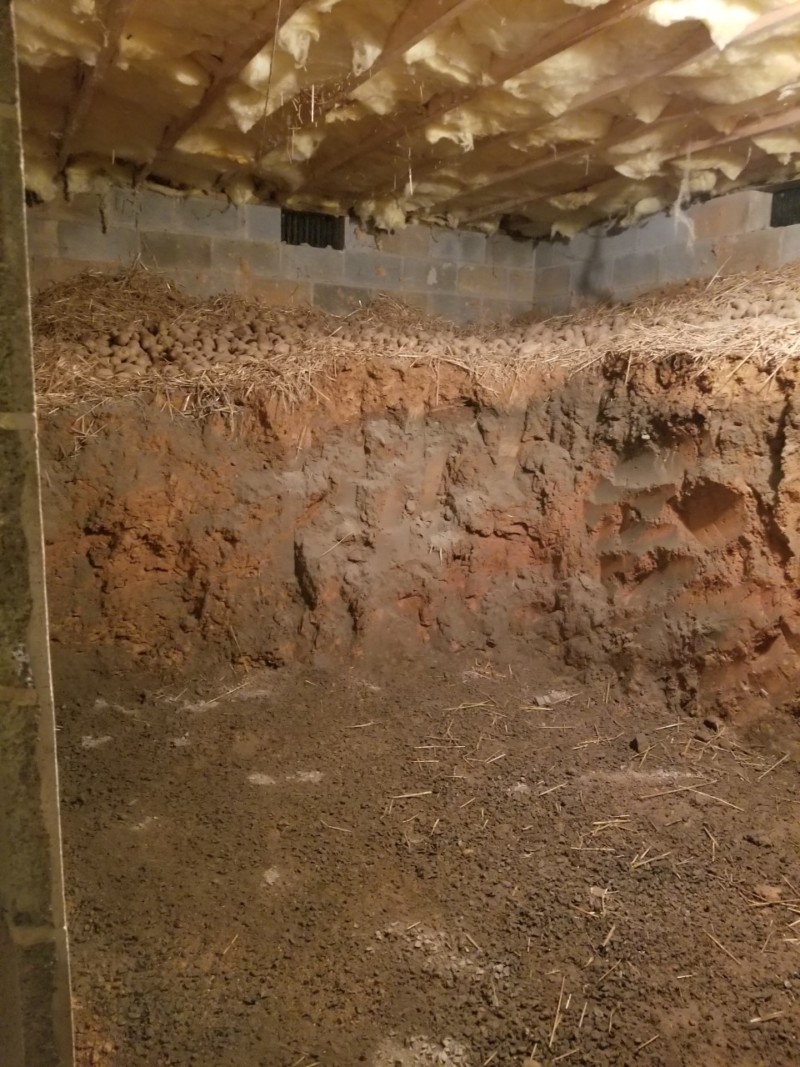
In the event you have to dig out your crawlspace, be sure to leave dirt around the walls about 3-feet deep to make sure the walls are strong and won’t collapse.
3. Level the Floors
When we finally removed all the dirt from the crawlspace, we had to level out the floors. This was a fun job, for me at least.
Any bumpy parts in the floor had a shovel pushed over them to remove the excess dirt. Once the dirt was shaved off, we’d go over the loose dirt with a rake to make sure everything was even.
It may not be as important to you to have level floors. In our case, I already had shelving I was using to hold my jars in the basement.
I needed those same shelves to be transferred to the root cellar. Therefore, the floors had to be level enough for the shelves to have a stable place to rest.
4. Apply Concrete
When the floors were leveled, it was time to add the concrete. In the midst of us building our root cellar, we had a hurricane come through our area.
The vents in the root cellar caught some rain because of how quickly and how hard the rain came down with the hurricane. The water from the hurricane flooded our basement by seeping in through the foundation which hadn’t happened in the 11 years since the house was built.
The long and short of it, we knew we wanted the walls reinforced even though we made them thicker because we didn’t want hurricane type rains ever to cause an issue in the root cellar.
We also chose to work smarter instead of harder. We used the moisture, which had made its way into the crawlspace from the vents during the hurricane, to help form concrete.
Be sure to use a mask during this part of the process because it will get dusty. We sprinkled the concrete on the walls and floors. It took approximately 10 bags of quick setting concrete to get the job done.
Once the concrete was in place, we waited about 20 minutes and pulled the water hose into the crawlspace. We wet the concrete and let it sit for 24 hours.
5. Add Straw and Shelving

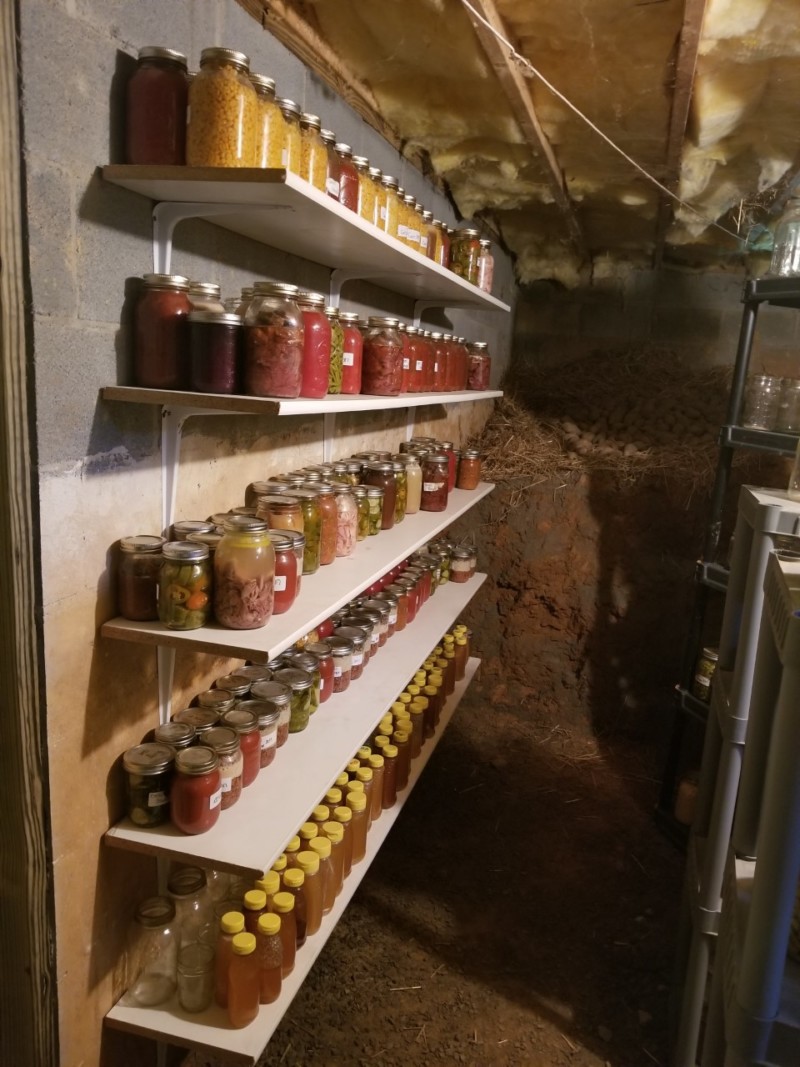
I liked the thick walls because at the top it left a natural shelf. I chose not to put concrete on this shelf because it was a great place to store potatoes.
Instead of making it concrete, we coated the dirt with a thick layer of straw and added our potatoes.
Once the potatoes were in place, we added the shelving for our canned goods. I used thick plastic shelves to hold some canned goods, but I also mounted shelving to the cinder block wall in the root cellar.
This gives me ample storage for many of our canned goods throughout the year.
6. Hang a Door
The last step of the process is to seal the root cellar. Space where our root cellar is now had vents in prior to us repurposing the space.
Be sure to have proper ventilation in your root cellar. It’s also a good idea if the vents can open and close. During the winter months when the temperatures get down to freezing, you may need to shut off the airflow to keep your food from freezing.
Because of our narrow hallway situation, we chose to build a barn door to close the entrance to the root cellar. The barn door allowed us to seal the root cellar but also not take up valuable space by opening and closing a door.
We also had to add a step to get into the root cellar because I was tired of digging. I didn’t want to have to dig the floor down two more layers of cinder block.
You may not need steps depending upon the set-up of your crawlspace. This root cellar required a great deal of manual labor, but little as far as out of pocket costs go.
We built our barn door for less than $100, and we spent approximately $50 on concrete. I already had the shelving we included in the root cellar, and digging was free too.
It was a labor-intensive job, but one I’m extremely grateful we took on. It helps our home and farm function more adequately, and it’s convenient to have a root cellar I don’t even have to walk outside to get to.
If you don’t utilize your crawlspace, this article will give you a great idea as to how you can go about using your crawl space in a practical way.
I also hope your root cellar conversion will require less labor than ours did, but if it doesn’t, it’ll be worth it!


