
In my first garden, I had a small bistro dining area complete with a two-seater bistro dining set snuggled into my herb area. It was my favorite place to have tea, read, and jot notes in my journal. Now, though, I garden on a much grander scale. Instead of a tiny lot in the suburbs, I have 2.5 acres of cleared land surrounded by forest and mountain slopes.
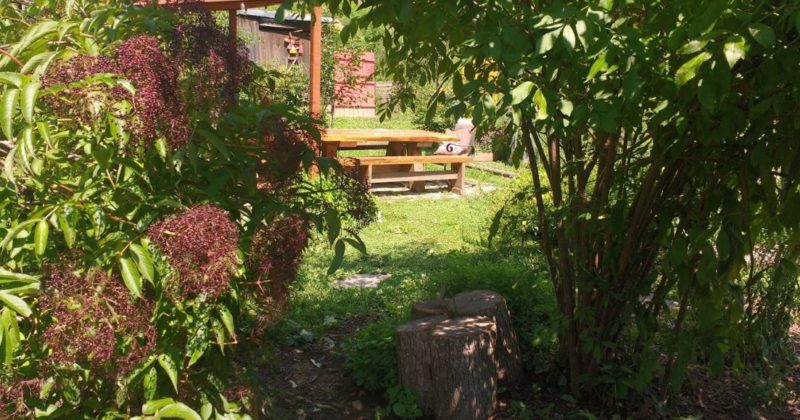
As any good garden designer knows, when working with large areas, you need to plan your furniture and decorative items to scale. Otherwise, they just get lost in the landscape. So, instead of a 2-seater table and chairs, we built a 14 person outdoor dining table. We also added a cob pizza oven and an outdoor living room centered around a chimney to fill the space.
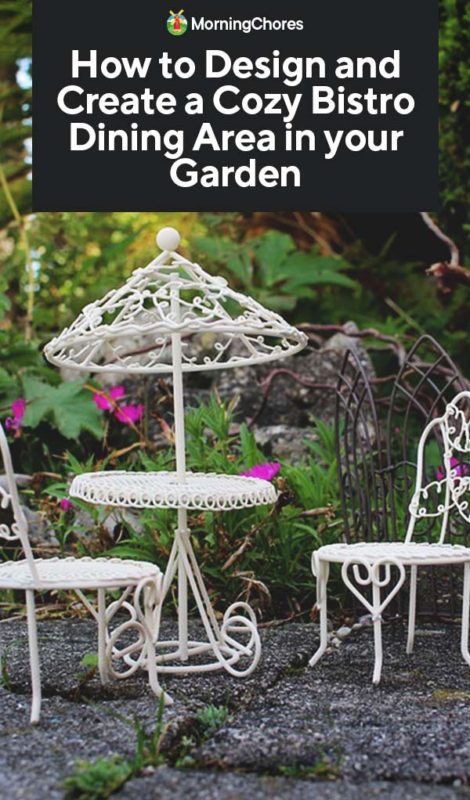
Small Bistro Dining Area – Even Large Landscapes Need Them
The truth is though, as much as I love my big entertaining area, I miss my cozy little tea-sipping, reflection space. There’s something so much more intimate about a table that only seats two. That’s why I decided to create a smaller nook in my potager-style vegetable garden (currently under construction).
In case you also want to create a charming, cozy spot to appreciate all your hard work in your garden, read on for an inside look at the process.
1. Get Inspired
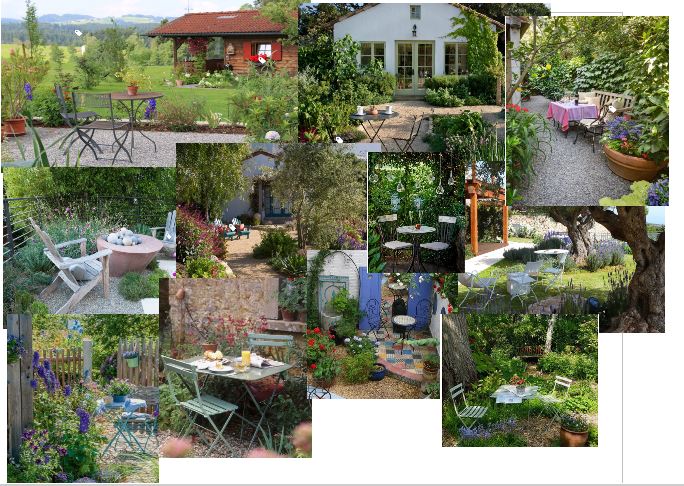
Even though I ultimately make with my own design plan, I like to start with some creative inspiration to help guide and refine my ideas. For this project, I scoured the internet for images of garden bistro dining area ideas to get me started.
I used resources like listicles, Houzz, and Pinterest to source images that appealed to my sense of aesthetics and bookmarked my favorite ideas. Then, a few days later I came back to review my saved images.
First, I made sure those ideas still resonated. Then, for those that did, I tried to narrow down what qualities spoke to me. Was it the color pallet? The sense of enclosure? The particular flowers? The style of the furniture? The decorative details?
Finally, I turned my favorite inspiration images into a photo collage to refer to for the rest of my process. Having pretty pictures motivates me to keep going even when my project starts to look like a construction site.
2. Pick a Location
Start by choosing your location. The area you have to work will dictate some aspects of your design plan.
For example, if you live in a hot location and want to use your table at high noon, then you need to site it where there’s shade. Or, if you have no shady spots, then you need to include a plan for shade in your design.
Based on my inspirational images, I knew I wanted my bistro in the heart of my garden. However, I also wanted the seating area to feel like it belonged, not just like I threw out a table in the middle of the garden. That’s why so many images with houses or large trees appealed to me.
I have a herb spiral at the center entrance to my garden. That area also has a hugelkultur section, fruit trees, and two grape arcs over matching mini frog ponds. For me, all those permanent features made that location seem more grounded and enduring for my seating area.
With your location narrowed down, now you’re ready to start planning.
3. Make a Plan

Depending on the scope of a project, sometimes you need a complete and detailed plan. Or, sometimes, you need to jot some notes and make quick drawings.
Adding a 2-seater bistro table to a garden isn’t a huge project. In my case, though, I had some grand idea for how to do it. I made notes and a quick drawing to keep me on track.
– Integrate with the Landscape
One of the biggest mistakes people make in designing their garden spaces is not integrating it into their existing landscape. The result always looks like you just made a shopping trip to the garden center. It’s often too generic rather than personal.
You have to go to some extra work to integrate your design so that it meshes with your surroundings. But its worth it in the end. Then, your space seems intentional and unique.
In my case, I opted to make a semi-circle seating area rather than rectangular. That shape echoed the herb spiral at the entrance to the area thereby tying those two elements together. I also decided to recess the seating area and put in a semi-retaining wall in place to give the area more presence and permanence.
4. Decide on Materials
Once you have a basic design plan, then you need to plan your materials. For any 2-seater area, you’ll need the table and chairs. Plus, you’ll need whatever you plan to use for your flooring. Also, you’ll need decorative details.
– Flooring
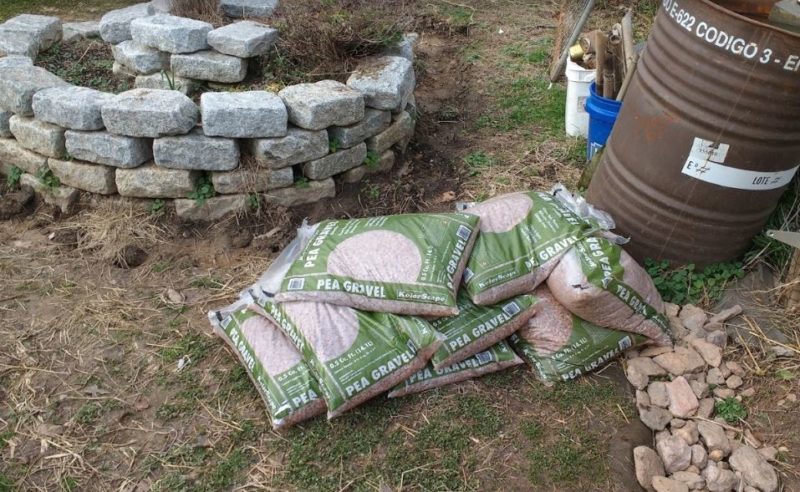
When you recess a patio, you always need to think about drainage. Beyond a gently sloping the floor so water runs off, I also decided to use pea gravel on the ground since it too would promote good drainage. Plus, it’s inexpensive and easy to use. The lighter color would also keep that area from getting too hot.
Flagstone, patio pavers, bricks, decking. hardwood mulch and other materials can also be used. I use hardwood mulch on my regular garden paths. So, I also needed to put some edging in place to keep the pea gravel from running into the mulch.
We have lots of rocks in our native soil. I decided a transition zone of larger-sized, foraged rocks would be perfect between the pea gravel and the mulch. Plus, it would be free!
– Retaining Wall(ish)
Since I was going to recess the seating area by about a foot, I needed to do something to stabilize the soil up-slope behind the seating area. We have heavy clay subsoil, so I could even dig out a 4-foot tall recessed area, and that subsoil wouldn’t move. But the few inches of topsoil we had would be at risk in heavy storms.
I decided to make a slight slope on the edge of the bed. Then, I’d lay heavy concrete pavers (that I already had) on the slope. Given the slope and the rounded shape of the area, the tiles would look as if they were opening out like a flower. Plus, their heavy weight at that angle would provide some soil retaining capacity.
Note: If I had sandy soil, this idea would never work. A real retaining wall would be necessary. Materials always need to be planned in respect to your environmental conditions.
– Plant Selection
I also planned to dig up some phlox, strawberry runners, and oregano from other areas of my garden to plant around the retaining wall area. That would secure the topsoil long-term and add beauty come spring.
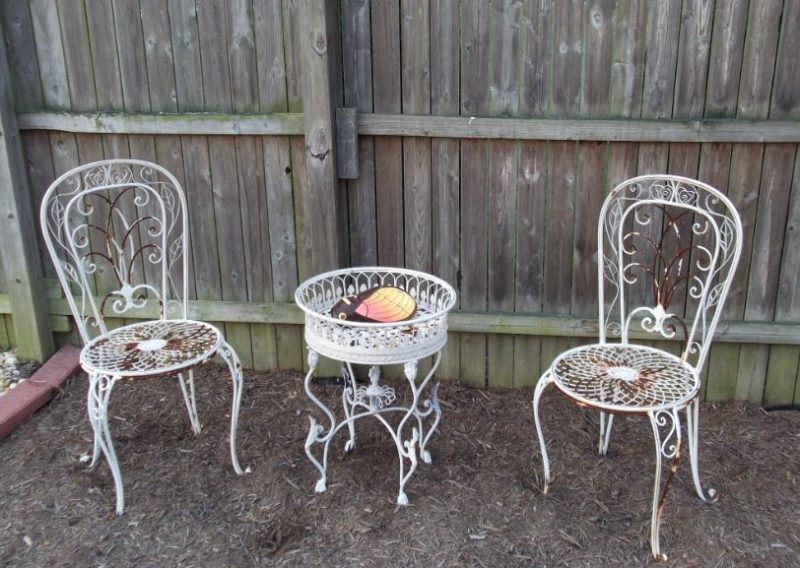
– Furnishings
I already had a table and chairs from my last garden. I decided to repaint those in rich, saturated blue since pops of color were in most of my inspirational images. I also started looking around my property for things I could use to bring together my design at the end.
5. Source your materials
I like to buy (or free source) my materials before I break ground. In case the price has gone up, or the materials I want aren’t available, at least I’ll still be able to adjust my plan before I start work.
For a project this small, often all you need is a good hardware store to find what you need. You may also be able to use materials you have left over from other projects. Asking friends to donate their extras leftover from their projects can also keep costs low.
Opt for things that will last though. You don’t want to be re-working this area every year. If you had to do that, it wouldn’t feel like your special, relaxing space. Would it?
6. Lay the Ground Work
Now, it’s time to get to work. Get out your shovel. Dig what you have to. Create your space by following your plan.
Since this soil was in my garden and we’ve had tons of rain this year, it only took me a couple of hours to create the basic shape. Some of that soil was pretty good, so I moved it around to other areas of my garden.
7. Do a Reality Check
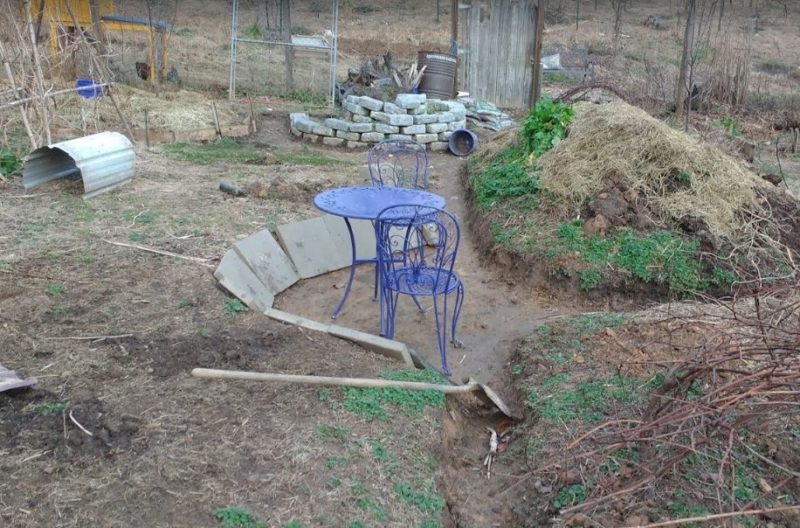
With the digging and leveling done, I laid out my concrete pavers to see if I got the angle right on the slope of the bed and the shape of the circle. I had to make some small adjustments with my shovel.
– Enough Room?
I also put my chairs and table in place. I sat down, leaned back, got up, etc. I generally used the space just like I imagined I would, to make sure I had enough room for movement.
– Good Drainage?
Finally, before going any further, I waited for a good rain. I wanted to be sure my soil was going to stay in place behind the concrete pavers. I also needed to make sure that I’d gotten the slope of the seating area right.
Luckily, it drained like a champ, right into the down-slope pathway where I intended it to go. If rain had not been on the radar, I would have gotten out my hose and given it a proper watering to test. It’s much easier to correct drainage problems before you put in your flooring material.
8. Pull It Off
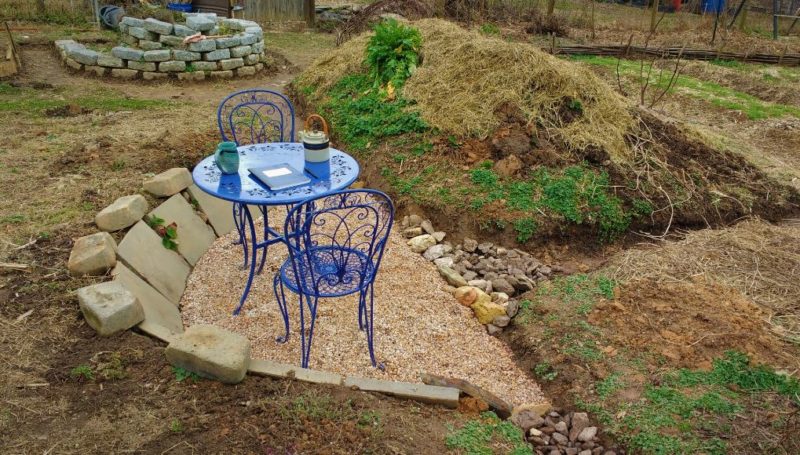
In my case, since I was working with a pea gravel floor, finishing up was simple. I had to put down some landscape fabric to suppress weeds. Position the pavers on the bed slope exactly where I wanted them. Then I had to pour out my pea gravel.
I set down some larger transition stones leading up to what will be my mulched paths. I dug up my base plants and replanted them just behind the retaining wall area. I added a few decorative details like some extra retaining wall blocks I scrounged up between my new plantings. Finally, I set up my table and chairs in my new bistro dining area.
Depending on your choice of materials, you may have a bit more to do than I did. Also, like in my case, I am doing this in January. So I’ll have to wait for spring to see if my plant choices work as intended.
9. Relax and Enjoy
You did it! You now have a perfect bistro dining area to ruminate over all your hard work and plan your spring flowers. So, take a seat, linger over a cup of tea, and relax.
You’ve earned it!


