
Beautiful barn doors.
They’re becoming all the rage, aren’t they? Who wouldn’t like one? They take up little space which makes them perfect for small areas.
They provide an impressive, rustic look to homes. Plus, they’re super cute to decorate your home with.
Perhaps the best thing about a barn door is you can make one yourself. You don’t have to purchase the door from the store and pay hundreds of dollars for it.
My husband and I recently built and installed a DIY barn door. It costs us approximately $100 to do. Here’s what we did:

You’ll Need:
- Barn door kit
- Four 1×6’s
- Door guides
- Basic power tools
- Four 1×12’s or utility shelves
- Six ¼” screws
1. Pull Out the Big Guns
When creating a DIY barn door, you must first create the door. In this case, you’ll be working with either four 1×12’s or 4 utility shelves.
We used utility shelves because they were cheaper to buy. When you have your large pieces of wood together, lay them out on a hard work surface.
You’ll need one 1×6’s to stretch across the top of the boards horizontally. This is going to work as a brace for the door.
Use an impact driver to screw the screws through the 1×6’s in each of the 4 boards which make up the door.
Squeeze the boards together as you’re screwing them together to avoid gaps in your door. When this step is complete, the first half of your door is created.
2. Cut and Measure
Be sure to measure your doorway well. It’s important to take into account how the door will hang from the tracks.
Therefore, you need the door to be able to slide across the floor, hang from the tracks, and fill a doorway.
Your measurements may vary from our doorway. Be sure to check what your doorway requires. Unless you have a wider than typical doorway (or a narrower doorway) 4 of the 1×12 boards or 4 utility shelves should make a large enough door to cover the opening.
When you have your measurements for the length of the door, measure the door you’ve begun putting together.
Cut any length off the bottom of the door. This is the end where you haven’t used the 1×6 to hold the boards together.
When the length is correct, you’re ready to finish out the creation of the door.
3. Trimming Matters
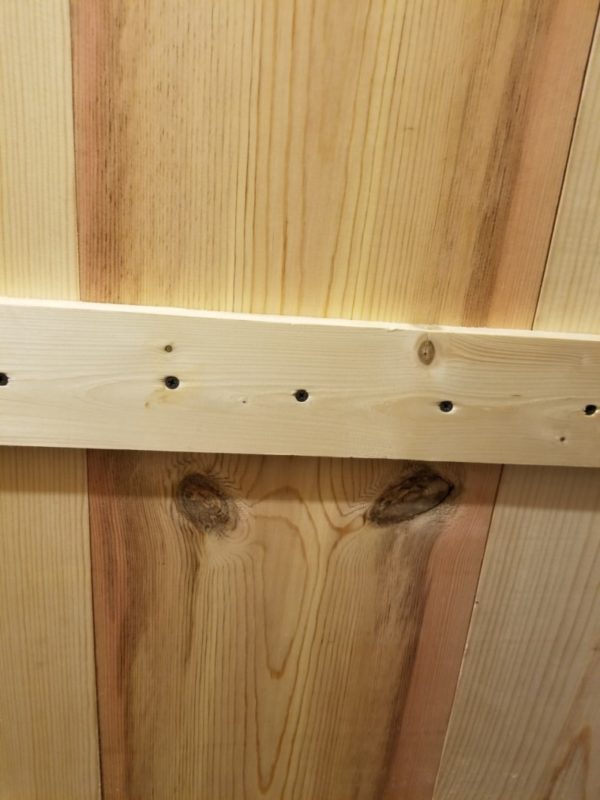
Your door is the proper length, which means it’s time to finish the door. Grab another 1×6 and cut it to the width of the door.
Lay the freshly cut board across the bottom of the door. Drive the screws through the 1×6 to secure the 1×12 boards.
Place 3 screws in each section of the 1×12 boards. Be sure to squeeze the boards together as they’re being screwed into place to avoid gaps.
4. Make It Pretty
This next step can be skipped if you aren’t one for frills. However, if I’m going to have a barn door, I want it to look good.
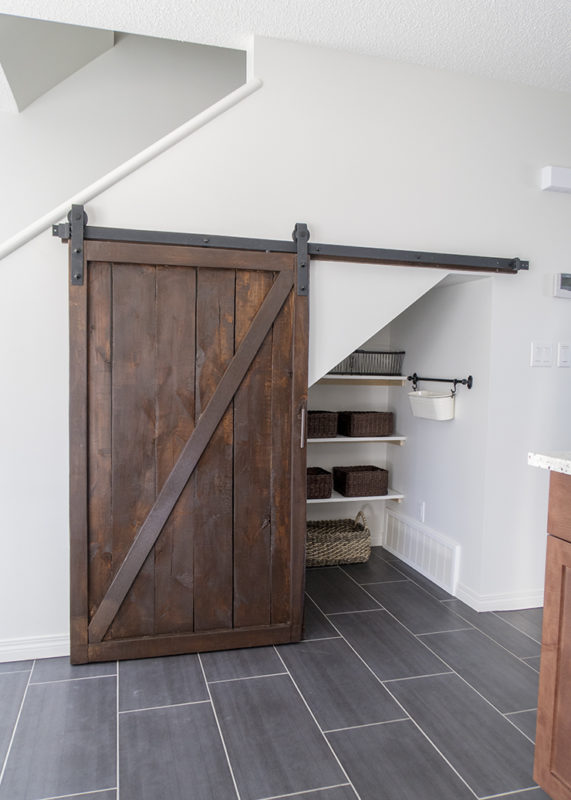
We chose to go with the diagonal design. You could decide to go with the barn ‘X’ or any other design you like.
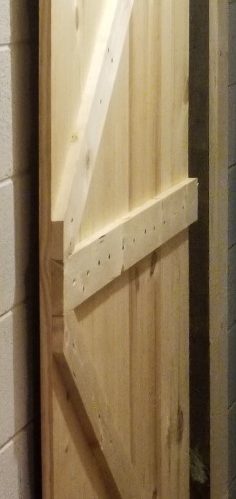
To make the diagonal pattern, we added one more 1×6 to the center of the door which had been cut to match the width of the door.
From there, we measured diagonally from the bottom 1×6 bar to the 1×6 bar in the middle. The same process was repeated from the top 1×6 bar to the 1×6 bar in the middle.
Be prepared to cut the diagonal pieces at an angle on the ends to make them fit snuggly into place against the 1×6’s.
When the boards were cut to length and fit into the door properly, we screwed them into the door.
5. Pull Out Your Kit
The fun part of installing a barn door is the barn kit. If you’re installing your barn door into typical drywall, it may be a little easier.
In our case, our barn door is what closes our root cellar in our basement. Therefore, we had to use a scrap piece of wood as the base for the barn door kit.
We screwed the scrap wood into the concrete wall of our basement. From there, we followed the steps of the barn door kit to screw it into the wood.
Each barn door kit is a little different, but you follow the diagram to screw each piece into the desired place in the wall.
You’ll also have pieces that must be appropriately attached to the door itself. Again, follow the diagram of your barn door kit for the best directions.
6. Hang Up the Door
When the barn door kit has been installed, it’s time to hang the door on the wall. This will most likely be a 2-person job.
In our case, one person took one side of the door, while the other person grabbed the other side. We leaned the door out a tad to where the rollers of the door could attach to the track.
This may take a few tries. Don’t become discouraged if it does. Once the door is on the tracks, it should roll with no problem.
Most barn door kits come with stoppers at the end of the track. Once you figure out how far you want your door to open and close, install the stoppers in their proper location on the track.
This will keep the door from flying off the track as it rolls.
7. Give a Little Guidance
As your barn door rolls, you’ll notice the top of the door is controlled while the bottom of the door flaps around.
If you’re like me, you won’t like it. In our situation, it’s important the door seals properly because I don’t want mice to crawl in through the root cellar vents and make it into my house.
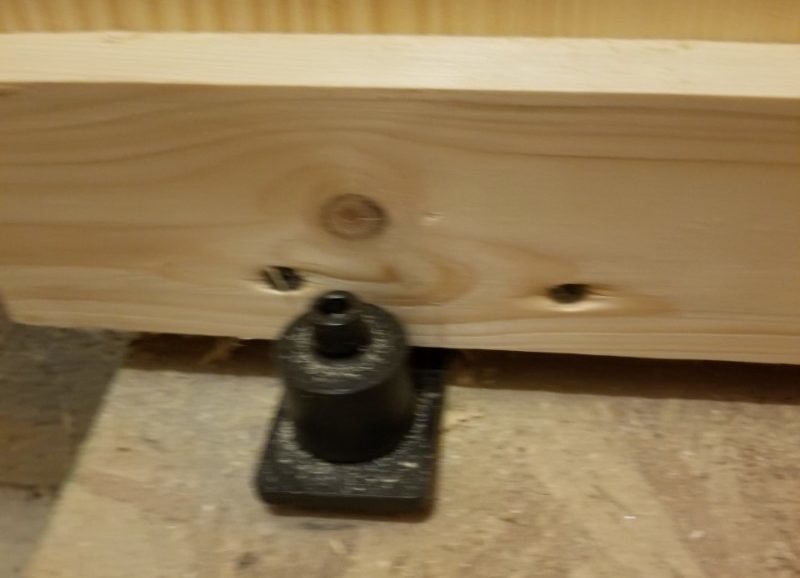
Therefore, we installed the door guides. They’re little brackets with wheels on them. The wheels guide the door through the bracket and keep everything under control.
You screw the brackets into the floor or wall, depending upon which variety you buy. When in place, this should make your door roll as smooth as silk. It also prevents the door from falling forward, in case a rambunctious youngster runs into it.
8. Extra, Extra Read All About It!
The final step of your barn door can be done in any order you like. You may want to add a few extras to your door.
If you’d like to add a handle to your barn door, you can add it at the end or when building the door. Either way, it requires only picking out the handle you like and screwing it into place.
You may want a painted or stained barn door. I’d recommend doing this before hanging the door. You can decorate your door any way you’d like.
Depending upon where your barn door is, you may want it to look a little fancier. In my situation, I wanted the diagonal design to make it look like a barn door.
However, I wasn’t highly concerned with making a fancy door because it’s in my basement, after all. This step of the process can go as far as your imagination, budget, and interest can carry you.
Now you know how to build a DIY barn door. It requires a slight investment, some time, patience, and elbow grease.
However, at the end of the day, I’m tickled with our door. It saved us space since our root cellar is off a narrow hallway. Barn doors have a way of making small spaces function better, and is often used for pantries. We hope you’ll love your DIY barn door as much as we love ours.


