Many years ago, some new fancy single-serve bottled drinks that cost almost $5 each started showing up in the refrigerator section of my natural food store. The checkers were all raving about them. One even told me she spent half her paycheck on them.
I bought one to try. I took one sip and almost spat it out!
The stuff tasted like bad vinegar.
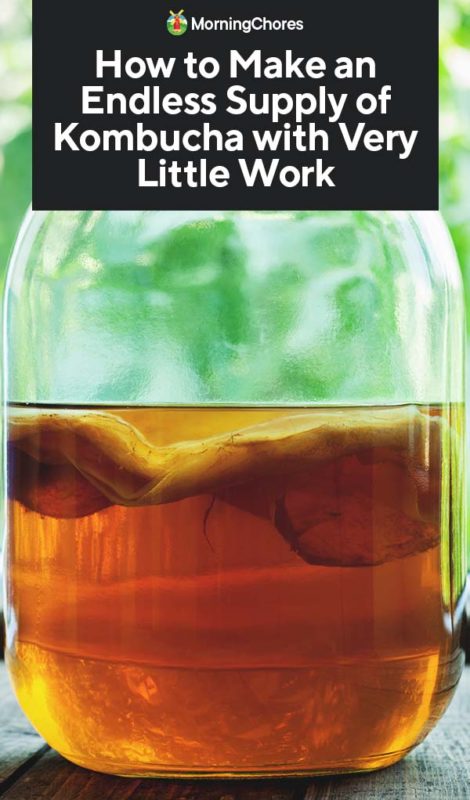
Kombucha: The Vinegar-like Beverage with a Bang for Your Buck
You may have already guessed, but I am talking about Kombucha. It’s is a probiotic powerhouse that has magical powers to start as something that makes you want to spit, and end up as something you’re willing to pay $5 a bottle for.
Usually, those fancy glass bottles in the cash-register cooler contain sweet beverages that send your dopamine sensors into overdrive. So, that first time I cracked a bottle of kombucha, I was expecting something sickeningly sweet. The shock of sour was startling!
After my initial horrified response, though, I took the bottle home and finished the rest. I mean, I’d just spent $5 on the stuff, I had to drink it!
It wasn’t long before I went racing to the restroom. I know it’s not polite to share these things in public, but the internal cleansing power of kombucha is its main selling point! So, it had to be said.
Anyhow, after that I felt such enormous relief, I started buying a few bottles of kombucha each week. At first, I drank them as a daily health tonic. Even though they all tasted like vinegar, the various flavors like “lavender ginger” or “cherry chia” did seem to make them more palatable.
After a few weeks of drinking it daily, my tastes adjusted. I started enjoying kombucha. I also felt so much more energetic and free-flowing that even if I hadn’t learned to love the stuff, I still would have drunk it!
Why You Should Make Kombucha at Home
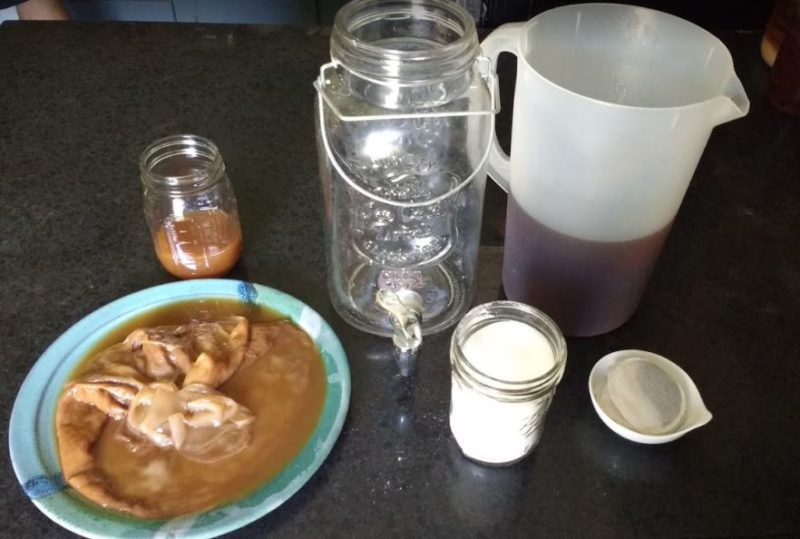
Fast-forward a few years, and now I make this stuff at home for less than $0.50 per gallon. It’s so easy to make; it’s hard to believe I ever willingly paid $5 for a tiny bottle.
Frankly, I wasn’t a homesteader then and didn’t realize how completely clueless I was about simple fermentation. Also, to be honest, I think some people want to believe kombucha is some incredibly complex elixir of life so that it keeps its mystical appeal.
If you want to keep kombucha up on a pedestal and pay a fortune for its probiotic benefits, then stop reading now!
If you’d rather have a regular supply at home, whenever you want it with minimal work, then read on.
Start with a SCOBY
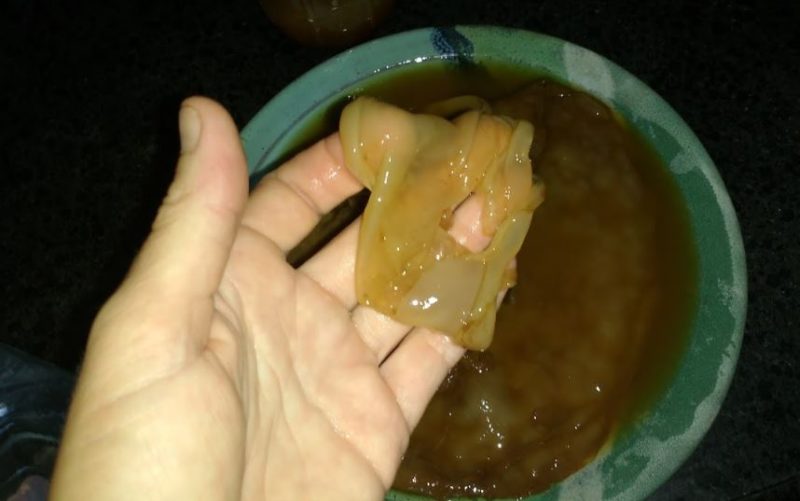
The only unique piece of equipment you need to make kombucha is a SCOBY. This acronym stands for Symbiotic Culture Of Bacteria and Yeast.
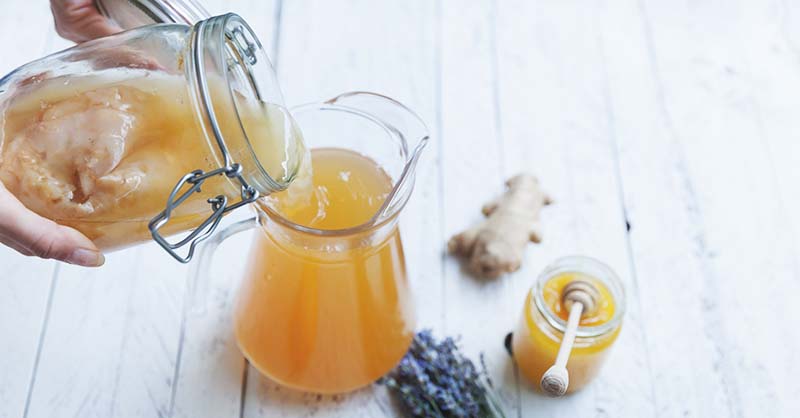
Like a vinegar mother, a SCOBY is a living blob that contains all the yeast and bacteria you need to make kombucha. You can buy these online for a few dollars, plus shipping. Or, if you know anyone who makes kombucha, they might be willing to give you a baby SCOBY for free.
– Buying a SCOBY
There’s a lot of information out there about how to obtain your SCOBY and why — frozen, dehydrated, kept at room temperature. Depending on who you ask, there could even be more ways to buy SCOBY babies.
I am not any scientific expert on the inner workings of a SCOBY, so I can’t give you the exact right answer. Personally, though, I bought my SCOBY online many years ago.
It came in a ziplock baggie with some kombucha in it. It was a kind of tannish color and looked like some creepy slime mold that could make a best-selling kid toy. The seller sent a personal thank you note and hand-written instructions on care with the baggie.
I’ve been using that same SCOBY, or it’s babies, ever since. Based on my own experience, I’d say order from a source you feel good about.
Also, if you do buy a dehydrated SCOBY, make sure to follow the re-hydration instructions precisely before using it to make kombucha.
– SCOBY Care
Once you start making kombucha regularly, your SCOBY will come to life. It will grow and form new layers that you can peel away and give to your friends.
When I take a vacation from kombucha-making, I just put my SCOBY in a mason jar, cover it with kombucha, and leave it on my spice rack (because that’s out of direct light). I’ve even forgotten about the SCOBY for a year and used it again with no negative consequences.
Two things you should know about SCOBY care are:
- The more often you use a SCOBY, the faster it seems to be at making kombucha.
- The easiest way to kill a SCOBY is to (accidentally) pour boiling water over it.
If you keep these 2 things in mind, then SCOBY care is pretty easy.
Although I have never seen this happen, I have also read that if a SCOBY turns black, you don’t want to use it.
How to Make Kombucha
The hardest part of kombucha – getting a SCOBY — is now behind us. From here, making kombucha is as easy as making sweet tea.
In fact, that’s exactly what you need to do.
Step 1: Make Sweet Tea
To make kombucha, you need to start by making sweet tea. You can play around with different recipes once your SCOBY is supercharged, but I recommend you start with a simple recipe like this.
- 1-Quart Boiling Water
- 2 Caffeinated Black Tea Bags
- ½ Cup Granulated Sugar
You can easily scale this formula up. Normally I make kombucha by the gallon. However, for your first time or two using a new SCOBY, starting with a quart-sized batch will help wake-up the cultures in your SCOBY and get you familiar with the process.
After making a couple of small-sized batches, you can start using 4-quarts water, 8 tea bags, and 2 cups sugar as your standard recipe.
If you are concerned about caffeine, you can use as few as 5 tea bags for a 1-gallon batch, but the more tea, the better the outcome. Supposedly, you can also use decaf tea, but in my experience, the result is never as useful (as a health elixir) as with caffeinated tea.
Green and white teas can also be substituted for black tea since they are all made from the same plant. Herbal teas (tisanes) can be used to add flavoring, but not as a substitute for black, green, or white teas.
Avoid using essential oils, or teas flavored with them, for best results. The oils can often produce off-putting flavors and are reputed by some to damage the SCOBY.
I suspect you already know how to make tea. But, just in case:
- Boil the water.
- Add the tea bags and sugar.
- Stir.
See? Super easy!
Step 2: Cool to Room Temperature
Making sure you allow the tea to thoroughly cool is so important that it gets its own step. This is the one place you can mess up your kombucha. If you go on to step 3 before step 2 is done, then you run the risk of killing your SCOBY.
I usually make my tea in a BPA-free plastic pitcher. After it is thoroughly cooled, I like to transfer the tea into one of those fancy gallon mason jars that have a spigot. These are often used for dispensing cold beverages at parties. However, they also make dispensing finished kombucha easy.
Step 3: Add Your SCOBY
Your SCOBY basically takes sweet tea and turns it into kombucha through fermentation. The yeast and bacteria digest the sugars and other properties in tea and make them vinegar-like. To do this, the SCOBY needs to spend time floating in a sweet tea bath.
Your SCOBY is also stored in kombucha liquid, so make sure to add all that kombucha to your tea as well. That extra liquid helps to kick-start the fermentation process.
Then, cover the opening to your jar with a coffee filter or thin cloth to keep out insects and prevent dust from settling on your tea. (Safety note: Don’t put an airtight lid on at this point or your sweet tea may make a carbon-dioxide disaster instead of kombucha.)
Step 4: Store in the Right Location
Depending on how vital your SCOBY is (e.g., how much you use it) and the temperatures in your house, fermentation can take a few days to a couple of weeks. So, you need to set your tea someplace safe and out of the way for that time. A place that is moderately warm and out of direct light.
I keep mine on the counter on the dark side of my fridge. That area stays warm due to heat from the fridge motor and is out of direct light.
You can start tasting your kombucha-in-progress after about 4-5 days. If you use the spigot jar, as I do, then dispense a little from the spigot to sample as desired.
Your tea will also change color and become lighter and more cloudy in appearance as it ferments. After a few times of making kombucha, if you pay attention to the color change, you’ll be able to tell by color when to start tasting the mix.
Step 5: Stop the Fermentation
The last step in making kombucha is to stop the fermentation.
If you like your kombucha to taste sweet, you need to stop it earlier when there are still undigested sugars in your sweet tea. If you want it to be really sour, so you can get the most health benefits, let it go until it almost burns your tongue!
When you think it’s ready, then strain the kombucha, bottle it, and refrigerate it.
The Endless Supply of Kombucha
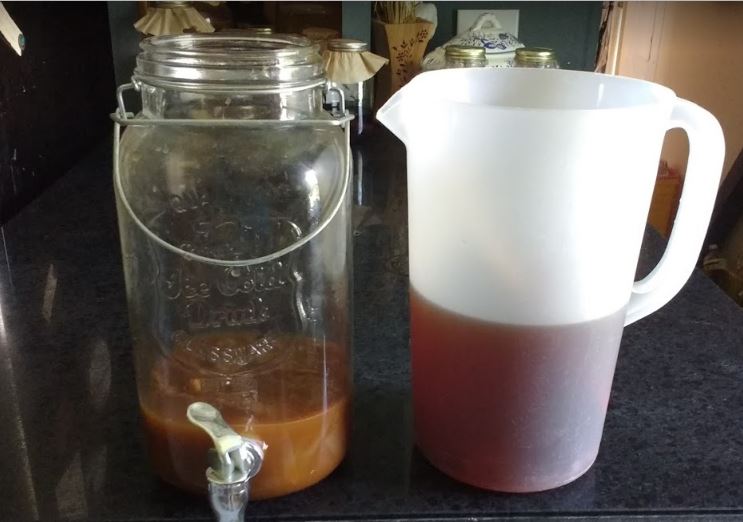
Now, if you took my advice and used one of those mason jars with spigots, all you need to do is open the spigot and let the kombucha flow into your bottles.
Close the spigot when you get down to the bottom 2-inches of liquid, so the SCOBY scraps don’t clog the spout.
Make more sweet tea, cool it, and pour it into your mason jar to start again.
Every so often, you may want to take out your SCOBY and remove the babies and donate them to friends or feed them to your chickens. Then you can wash the jar and get back to kombucha making.
I personally only do this about every 6th time I make kombucha. Kombucha is basically a hostile medium, like vinegar, that keeps bad stuff from growing in it. So, I figure there’s not a whole lot of risk in reusing the jar without washing it out every time.
Still, we all have our levels of germ-tolerance, so you can make your own decisions on how often to clean your jar.
Flavor and Fizz
If you like a little flavor and fizz in your kombucha, then you can modify the basic procedure just a little.
Flavored Kombucha
To add flavors, such as minced fresh ginger and lavender seeds, you can add those when you start your kombucha or when you bottle it. Some people like to use the kombucha to extract those flavors, kind of like a vinegar extraction. To do that, add your chosen flavor additives to your tea before you add your SCOBY.
I prefer to add fresh chopped ginger and fruit when I bottle or when I serve my kombucha, so I get their full fresh flavor and potency. Both ways can be delicious and nutritious.
Fizz
The kombucha at the store always has just a little fizz that seems to make it extra refreshing and suppresses some of the acid experience.
Fizz is basically caused by carbon dioxide being placed under pressure. If bacteria and yeast keep digesting sugar after being deprived of air, the carbon dioxide they create as a by-product becomes trapped in the bottle and makes fizz.
– Intentional Fizz
To make this happen intentionally, bottle your kombucha when there is still some undigested sugar in the tea (e.g., it tastes sweet). Close the airtight lids and let your bottles sit out at room temperature for a while.
How long you need to leave your bottles out depends on how much sugar is in your tea and how vital your cultures are. Usually, 12-48 hours is enough.
DANGER WARNING: When working with the fizz factor, there is always a chance that your bottles will explode.
We’ve made lots of sparkling kombuchas and homemade champagne and have had multiple bottles blow up on us. So, I can attest to the fact that fizz can be dangerous and messy!
Still, if you must have fizz, do so knowing that you are taking risks. Use pressure-resistant bottles like twist-top soda bottles or swing top Grolsch-style bottles. Open your bottles at least every 12 hours, to see how much fizz they have. Refrigerate them the moment, you have enough fizz.
Oh, and wear protective eye goggles when popping tops until you master the fizz (really!).
– Less Risky Fizz
OR – just let your bottled kombucha sit in your fridge for a week. It will usually develop just a hint of fizz even when stored in the refrigerator in a week’s time. This is a lot less dangerous and nearly as refreshing.
Endless Ways to Make Kombucha Exotic
Once you have mastered how to make kombucha, you can keep it simple and have an infinite supply with almost no work. Or, you can do a bit more work and have an endless supply of exotic kombucha flavors.
All sorts of homegrown herbs, fruits, and spices can be used to enhance your kombucha drinking experience. Hops, hyssop, perilla, blackberry, rhubarb, and much more homegrown stuff can make great flavor compliments to fresh kombucha. You can even add your kombucha to salads as a vinegar substitute and use it to marinate vegetables.
Now that you know how simple it is to make kombucha, and don’t have to spend $5 a bottle at the grocery store, you can enjoy it as often and in as many different ways as you want!
