Do you grow an herb garden?
A lot of people do because herbs are great for a variety of things. You can grow them indoors so it works great for a gardener with limited space.
Or you can raise herbs to add flavor to your food. Let’s also be sure not to forget the medicinal properties that herbs contain.
So whatever reason you grow herbs, it is helpful to know how to dry them so you can utilize them all year long. If you are looking for ways to preserve your herb harvest, then look no further because I’ll be sharing just that…with you…here.
Let’s get started. This is how you can dry your own herbs:
Method #1: Air Dry Your Herbs
This is a great method if you don’t have any fancy equipment. I get it. Not too long ago, my kitchen didn’t contain a lot of appliances (like a dehydrator or a microwave.) I didn’t use them so I just tossed them.
Then I listened to my kids and added back a microwave for their sanity. Plus, my husband started making deer jerky so we invested in a dehydrator. The rest is history as they say.
But if you don’t use a lot of appliances, then this method for drying your herbs might work wonderfully for you. Here is how you do it:
1. Pick Your Herbs
I love growing herbs. There is something really peaceful about walking through your herb garden and snipping the herbs from the plant, when they are ready to be harvested.
So when your herbs are ready, you’ll need to use a pair of scissors or pruning shears to cut them from the plant. Here is a great guide for harvesting fresh herbs. Once they are picked, you are ready to move indoors.
2. Wash Your Herbs
Next, you’ll need to run the fresh cut herbs under some cool water. You are just making sure that any dirt or bugs that could be on them are washed away.
Then you’ll need to pat them dry with a paper towel. Be gentle because herbs are rather delicate. Once they are dry you are ready to move on to the next step.
3. Attach String to Them and Hang Them
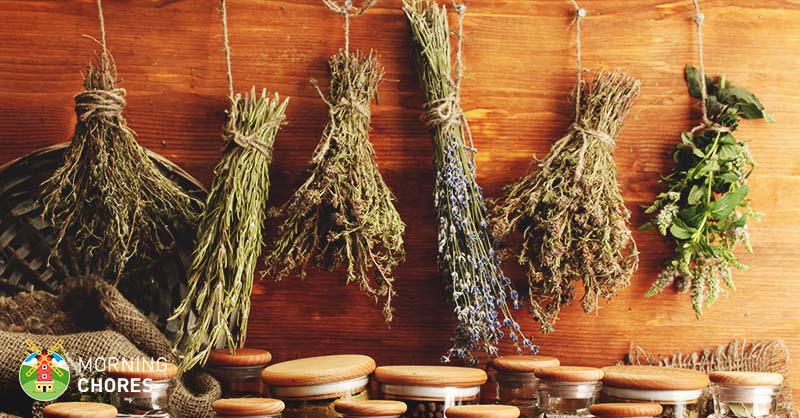
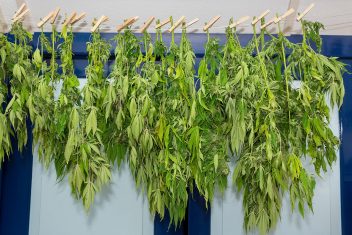
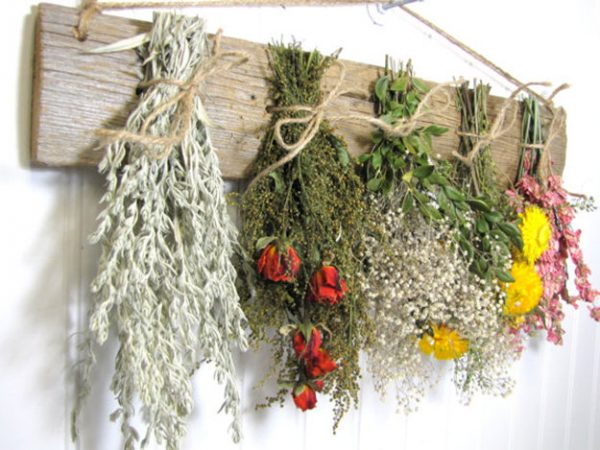
When your herbs are clean it is time to find a great place to hang them for the drying duration. You can dry them indoors or outdoors under a covered area.
For instance, when I dry herbs or veggies this way, I usually tie them with string and hang them in my living room from a quilt rack upside down. That way the ceiling fan can blow air on them, but they are out of the way too.
However, if I dry them this way and hang them outdoors, I hang them under my covered back porch where they are protected from the elements but are still given ample airflow.
So try to find a place that would be similar to these conditions. Once you’ve found the perfect place, use string and tie a knot around the stem of the herb cutting. You can also use an herb drying rack as well.
Next, you’ll take the longer section of the string and use it to tie it to an outdoor rafter or around a quilt rack.
4. Wait
This next step is pretty simple. You just wait. Pay attention to the herbs when you pass by them to make sure that nothing funny is going on like mold.
But as long as they still look like they are in good condition, then you just keep letting them hang there until the herbs are completely dry.
Once they are dried you are ready to take them down and move on to the next step.
5. Process Them Once Dry
I usually process my dried herbs for my own spices. I do this by plucking the herbs from the stems. Then I place them in a coffee grinder. When they are ground into fine pieces, I store them in airtight spice containers until I’m ready to use them.
Method #2: Dry Herbs in the Oven
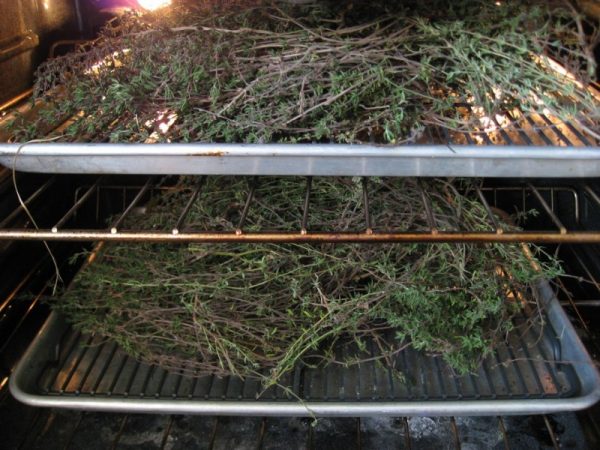
Drying herbs in the oven is a great option if you’d like to dry them faster than air drying, but don’t want to have to purchase any other equipment to complete the task.
So if you have an oven and a cookie sheet, then you can dry your own herbs in the matter of a couple of hours. Here is how you do it:
1. Pick Your Fresh Herbs and Clean Them
You’ll begin the process by picking your fresh herbs. Again, remember it is best to cut them from the plant instead of trying to break the stems from the plant. You don’t want to damage the plant in any way during this process.
Once the herbs are picked, you’ll need to bring them indoors and clean them. You do this by rinsing them under cool water. Be sure to pat them dry gently with a paper towel to absorb as much of the moisture as possible.
When this is complete you are ready to move forward in the process.
2. Place on a Cookie Sheet
Next, you need to place the fresh herbs on a cookie sheet. You can pull the herbs from the stem to dry if you wish.
However, I normally just leave them attached to the stem during the drying process as I think it is a little faster and easier. But that is a personal choice so I leave it to you.
3. Place in the Oven and Let Dry
Once the herbs are on the cookie sheet, it is time to place them in the oven to begin drying. You’ll want to turn your oven down to 180 degrees Fahrenheit. Leave the door on the oven cracked a little so you can see inside and to increase air flow.
Once the herbs have been left to dry in the oven for 1-2 hours, you can remove them. They should be dried by this point. If not (as appliances vary) leave them in a little longer. You can look and tell when they are dried. When you are satisfied that they are dried enough, remove them from the oven.
4. Store
The final step is to store your herbs. You can pull them from the stem, then grind them in a coffee grinder so they can be used at a later date. Be sure to store them in an airtight container for later use.

Method #3: Dry Herbs in the Microwave
This method is not the best method for drying herbs. The reason is that it can dry them too quickly and too much which takes away the flavor of the herbs.
So keep this in mind if you decide to use this method. But if you are satisfied with using it, then here is how you go about it:
1. Pick Your Herbs and Wash Them
You’ll begin this method like all the rest. You’ll need to cut your fresh herbs from the plant. Be careful not to damage the plant in the process.
Once the herbs are removed, you’ll need to bring them indoors for a thorough washing. You’ll need to be sure that all dirt and bugs are removed from the plant. You don’t want to microwave a bug in your spices. (Or worse, grind one up in your spice mixture! Eeew!)
So wash carefully, thoroughly, and keep the same in mind when drying the herbs.
2. Place Herbs on a Paper Towel and Microwave
After your herbs are picked, cleaned, and dried it is time to start the drying process. Leave the herbs on their stems and place them on a paper towel.
Then microwave the herbs on high in your microwave for 1-3 minutes. Appliances vary so you’ll have to keep a close eye on them to make sure they don’t get scorched.
3. Don’t Forget to Flip
When you’ve got your herbs in the microwave, you’ll need to be sure to flip them once every 30 seconds. This will help to make sure that both sides dry evenly. It is that simple.
Once your herbs are dried thoroughly, pull them out of the microwave and move on to the next step of the process.
4. Store
The final step to this process is to store them. I recommend grinding the herbs up into fine pieces so they are easily stored and can be used in cooking or creating your own spice mixtures. Just be sure that you store them in an air tight container.
Method #4: Dry Herbs in the Dehydrator
This is the final method I’ll be sharing with you today. This is probably my favorite method because it is simple to do, and I think it does the best job. But that is just my opinion.
Plus, if you have a larger dehydrator, you can dry more herbs at once in a shorter span of time. So here is how you can dry your herbs using a dehydrator:
1. Pick and Clean Your Herbs
I bet after reading through the other processes you never guessed I was going to tell you to start with hand picking your own herbs.
But truthfully, if you don’t grow your own herbs but still want to dry some, wait until they go on sale and stock up.
Then you can bring them home, clean them under cold water, and then pat them dry with a paper towel. It is the same method if you grow your own herbs.
Either way, once they are cleaned and dried, you are ready to move forward with the process.
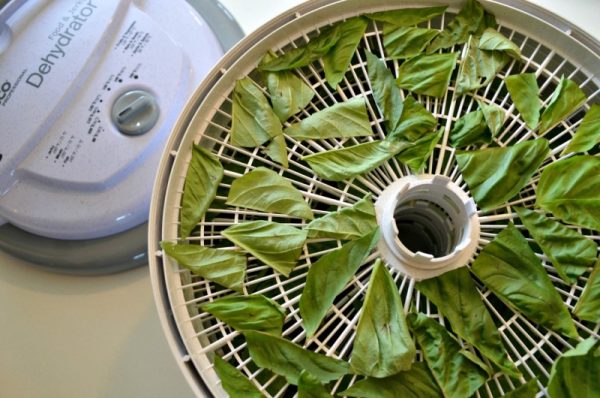
2. Place Them in the Dehydrator
Next, you can leave the herbs on the stems and place them inside your dehydrator. Depending upon the size of your dehydrator will depend upon how many herbs you can place inside of it and how long it will take.
I actually have two different dehydrators. I have a store bought one that can fit on my countertop, and then I have one that my husband built for jerky that could hold my whole herb garden probably.
Obviously, these hold two different amounts of herbs and take different amounts of time to dry.
So just keep an eye on your dehydrator and read the instructions of your dehydrator to make sure you operate it correctly for drying herbs. It might also offer a better idea as to how long your machine will take.
3. Wait
Once the herbs are loaded, you wait. Again, you’ll need to check your owner’s manual to know how long your particular dehydrator takes. I have a habit of checking mine regularly whenever I’m dehydrating anything.
So you might want to do the same just to be sure that your herbs aren’t being dried too much.
4. Store
Finally, you’ll need to pull the dried herbs from the dehydrator. Then grind them in a coffee grinder. When that is complete you’ll store them in an airtight container so they can be used at a later time.
Well, that is all there is to drying your own herbs. Now you have 4 methods to complete the task.
