It was the heat of the summer as I gazed over my garden. I was worried about everything roasting, but as I walked toward the back of my garden I saw it. It was my beautiful pepper plants with large, waxy looking peppers hanging from them.
While everything else was begging for a drink, my peppers were thriving in the heat.
But that is when my kitchen became consumed with an abundance of peppers. I had jalapenos, bell pepper, and banana peppers coming out of my ears.
So I began canning them as quickly as I could. Have you ever canned peppers?
Well, there are many different ways to do it, and I’m going to share with you how I did it. Here is how I got the peppers out of my kitchen and onto a shelf:
Method #1: Canning the Peppers
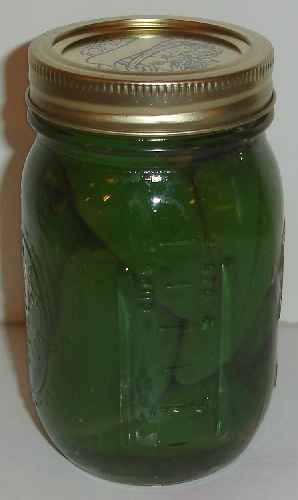
via Pick Your Own
If you have a bunch of peppers that you don’t want to have to fuss over very much, then using this canning method might be a good option for you.
Plus, they are great to throw in a pot of vegetable soup on a cold winter day as well.
Step 1 – Pick Your Peppers
You’ll begin the canning process by picking your peppers. You’ll know they are ready to pick when they are the desired color.
However, if you are growing green peppers and you see them begin to turn pink or red, know that you’ve probably waited too long. You are looking for crisp peppers. The more flexible the skin, the less desirable they are probably going to taste.
Once they are picked, you are ready to get started.
Step 2 – Prep Your Canning Jars and Lids
Your next step is to prep your jars and lids. This is important because you don’t want any bacteria growing inside of them. This will spoil the food and have wasted all of the time you’ve put into canning them.
So I usually prep my jars and lids simultaneously. I load my jars in the dishwasher and wash them on a sanitizing wash cycle. This is how I feel most confident that the germs have been killed. Here are other ways you can sanitize your canning jars.
Then while my dishwasher is taking care of the washing and sanitizing of my jars, I plop my new lids and the rings in a pot of boiling water. I let them boil for a few minutes, and then remove them.
Next, I lay them on a clean towel with a pair of tongs so they can cool enough for me to handle them when I’m ready to place the lids and rings on my jars.
Step 3 – Wash and Slice the Peppers
After my jars are sanitized and my lids and rings are ready to go, I place my focus on the peppers. I begin by washing the peppers.
So you’ll do this by running the peppers under cold water and scrubbing all dirt from them. You can fill up your sink with cold water as well.
Then splash the peppers around in the cold water to use friction to clean all of the dirt off of the harvest. After this is complete you’ll need to slice your peppers to the desired size.
Now, most people can bell peppers, but if you plan on canning hot peppers then be sure to slice and remove the seeds as this will take some of the heat out of them.
Step 4 – Blister the Peppers
After you’ve sliced your peppers into the desired size, it is time to blister your peppers. Blistering your peppers means that you remove the skin. You do this because the skin becomes gross after canning. They’ll become tough and not desirable for eating.
So you’ll need to heat a pan and place your peppers in the pan skin side down. The skins will heat and begin to form blisters on the skin.
Then you’ll remove them and let them cool. Once cool, you can easily peel the skin off of the peppers. You can also use your grill, oven, or even the microwave for this process. You’ll just want to heat the peppers until the skins form blisters on them so you can peel them when they’ve cooled.
Step 5 – Pack Your Jars
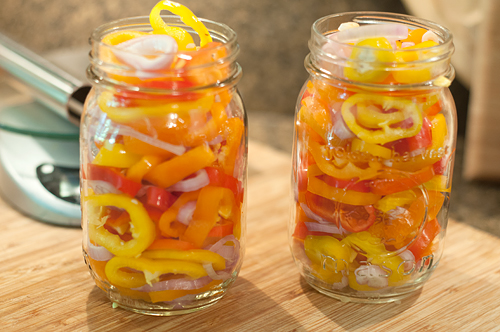
After the skins have been peeled off of your peppers, it is time to pack your jars. You’ll need to be sure to leave about a ½ inch of head space at the top of the jar so it will seal properly.
Once the jars are packed tightly, you’ll need to boil a few cups of water. Then use a ladle to pour the hot water over the peppers in the jar.
Next, you’ll need to add your rings and lids to the jars.
Step 6 – Can the Peppers
Once you have your rings and lids positioned correctly on your jars, it’s time to process the peppers. You’ll need to use a pressure canner and follow all of the manufacturer’s instructions in order to process them safely.
However, most manufacturers recommend that canned peppers be processed for 35 minutes, but be sure to check your manual for clarity.

Method #2: Pickling the Peppers
This method is great for your hotter peppers. I love pickling our jalapeno harvest because I think it makes them easier to use regardless of your heat preference.
See, my husband and I love spicy food, but my kids don’t feel the same way. When I pickle the jalapenos I can get away with using them in recipes without my kids fussing about too much heat and my husband requesting more heat.
Step 1 – Pick Your Peppers
You’ll begin this method the same way as you did the last. You will need to pick your peppers. Be sure that they are fresh and crisp when picking.
However, if you see some that have begun to turn colors or are flimsy feeling, they will be better used immediately instead of canning.
So keep that in mind when trying to harvest your peppers.
Step 2 – Wash Them
Next, you’ll want to bring the peppers indoors and begin to wash them. You can do this by running them under cold water and gently scrub each pepper to remove any dirt that might be hanging on to them.
Or, you could also fill up your sink with cold water and gently bump and rub the peppers against each other. Friction will clean them for you.
Step 3 – Mix Vinegar, Garlic, and Water
After you’ve harvested and cleaned your peppers, it is time to take a few spices and heat them on the stove to make a pickling brine.
So you’ll need to add around 2 cups of water, 6 cups of vinegar, a couple cloves of garlic, and an onion (if desired) to a pot. Then you’ll heat the mixture.
Understand, that you may have to adjust the recipe depending on the number of peppers that you have pickling.
Step 4 – Place the Peppers in a Jar
After you’ve heated your mixture and your house smells like a giant pickle, it is time to add the peppers to the jar. When pickling, I find it best to leave the peppers in larger chunks.
So if you are pickling jalapenos, I recommend cutting off the tops and leaving them whole in the jar. If you are pickling banana peppers you’ll probably want to do the same, and cut bell peppers into longer slices or leave them in halves even.
Step 5. – Process Them
Finally, you’ll pour the hot pickling brine over the peppers being sure to leave a ½ inch of head space in the jar. Don’t forget to shove a butter knife down the side of the jar to release the air bubbles.
Then you’ll need to add the rings and lids to the jars. After this is done, add the jars to a water bath canner. You’ll just need to bring the water to a boil and be sure that the jars are completely submerged in it. Be sure to process them for around 15 minutes.
After the processing time is complete, you’ll need to be sure to allow the jars to cool for 24 hours before checking to make sure that they are sealed properly. Then store them for later use.
Method #3: Put Them in the Freezer
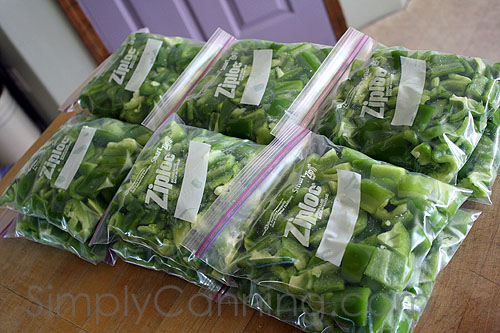
via Simply Canning
This isn’t canning peppers, but it will preserve them. I’ll be honest, by the end of the summer harvest, we are heading into our fall garden. By that time, I’ve canned my guts out and am ready for a break.
So I start freezing things. Peppers are usually one of those things. I don’t like their flavor as well in the freezer, but I like the speedier process and the fact that they aren’t being wasted.
Here is how you freeze your peppers:
Step 1 – Pick Your Peppers and Clean Them
This method starts like all the rest. You’ll need to harvest your peppers. It is best to cut peppers from the plant instead of plucking them as this can harm the plant.
However, once you have removed them from the plant, you’ll need to be sure to save the crisp ones for preserving. If they feel flimsy it is better to use them immediately.
Once they are inside, you’ll need to clean your peppers. Run cold water over them to remove any dirt, or rub peppers together under cold water to use friction to clean them.
Step 2 – Cut Them into the Desired Size
After your peppers are picked and clean, it is time to cut them into the desired size. If you’ll use frozen peppers more for soup, then you might want to dice them into medium sized pieces.
But if you want them to toss into your morning eggs, then they may need to be diced into small pieces.
However, if you’d like to freeze some for stir-fry, then it could be best to slice them
Step 3 – Blanch Them
Your next step is to blanch the pieces of pepper. You’ll want to bring some water to a boil, then place the peppers into boiling water for one minute.
Once the minute is up, you’ll need to remove the peppers with a slotted spoon so all of the water will drain out of them.
Then allow them to rest in a colander over your sink to ensure that all of the water is out of them completely.
Step 4 – Pack and Freeze
Finally, you’ll need to place the peppers into freezer bags. Before sealing, try to remove as much of the air as possible.
However, if you have a Food Saver vacuum sealer, it would work great for this as well. Once your bags are packed and the air is removed, you are ready to toss them in the freezer until you are ready to use them later.
Now you know of 3 ways to preserve your pepper harvest this summer. I hope you find it helpful. If you are unsure how to grow your pepper harvest, check out our guide. It should help point you in the right direction.
But I’d love to hear about your favorite pepper canning recipes. Why is it your favorite? Do you know of another way to preserve your pepper harvest?
We love hearing from you. Please leave us your comments in the space provided below.

