
We pulled into the long dusty driveway. You couldn’t see the home from the road. It was surprising to see this smaller, wooden home sitting at the foot of a gorgeous mountain.
The front yard was flat. The backyard had rolling hills, making it perfect pasture for our goats. It had a luscious orchard in the side yard and two vineyards.
My husband and I looked at each other, and we knew this would be our next home. The farm was perfect, but we also saw some imperfections.
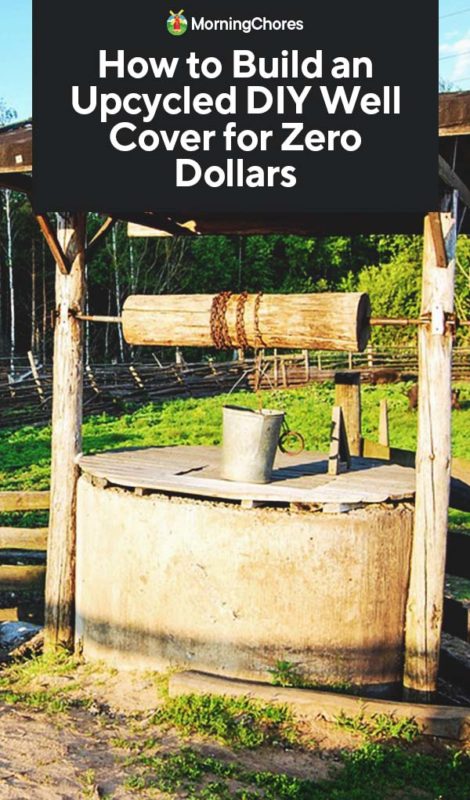
However, we looked at them as an opportunity to remodel and put our mark on the property. The first mark which needed to be made was a well cover.
We made a unique DIY well cover which cost us no money at all. I’m going to share with you how we upcycled an old porch into a well cover which looks rustic and charming. Here’s how we went about making this creation:
You’ll need:
- 2 posts
- Smaller pieces of wood to build the frame
- Decking boards for the sides and roof
- A piece of flashing
- Dowel rod
Note: I didn’t give specific wood sizes because we used a hodgepodge of wood we had left from tearing down an old deck on the property. If you have old pieces of wood hanging around your property, put them to use. Any sizes should do for this project.
1. Build the First Frame
The first frame you’re going to build is the frame around the bottom of the well. 2×4’s would work well for this task.
Be sure to cut each piece of wood to the same size. The idea is to build a square at each side of the well for a total of four sides.
Therefore, you’ll need four pieces of wood for each side of the well and a total of 16 pieces of wood to build the entire frame around the bottom of the well.
This should box in the entire well. By connecting each side of the frame together, it should stabilize. You may have to dig out certain pieces of earth to level the frame to keep it from being lopsided or wobbly.
You can use a hammer and nails to place each piece of the frame together. If you have a nail gun, this would be another efficient way of building the frame.
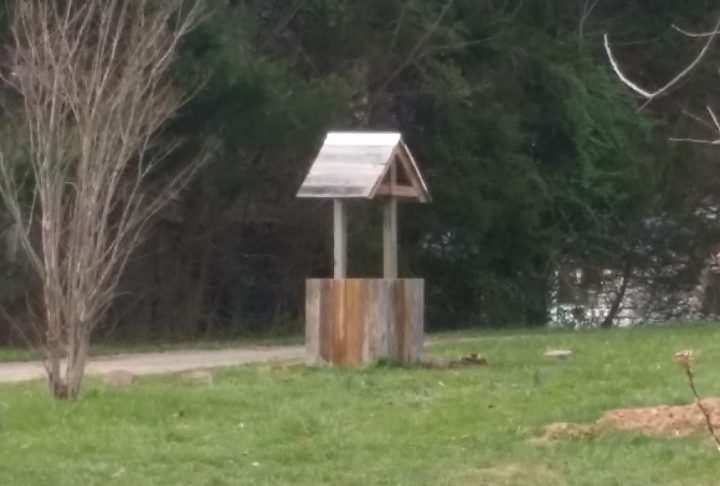
2. Add the Walls
Once the frame of your well is in place, you need sides. Our home originally had only a set of steps to enter the home. There was no porch.
Well, we live in the south, where front porches are a big deal. Not to mention, with mountain views surrounding the home, how could you not have a place to sit outside to take them all in?
However, we didn’t toss the wood from the old steps and the small porch area they were attached too. We put those boards to work.
Again, we cut the decking boards to the same size and attached them vertically to the frame of the well. They will go all the way around the well to fully enclose it.
I’m not giving specific sizes because depending upon how high you build your well frame, will determine how long the boards should be.
Some people may prefer a smaller well cover because of the amount of space. Our well is sitting out in the open which led us to create a DIY well cover which was the size of an actual well.
3. Put in the Posts
When the well is fully enclosed, it’s time to add the supports for the roof of the well house. We had two 6×6 posts which were left over from where we built our front deck.
These worked beautifully as a support for our well cover roof. My husband drove them into the ground and attached them with nails to the frame of the well cover.
Once the posts were in place, he used a Sawzall to cut them to the height we’d like the top of the roof to be.
Don’t cut them to where the bottom of the roof should fall. The posts should be as tall as the highest part of the roof because the roof frame will be built around the supporting posts.
4. Build the Second Frame
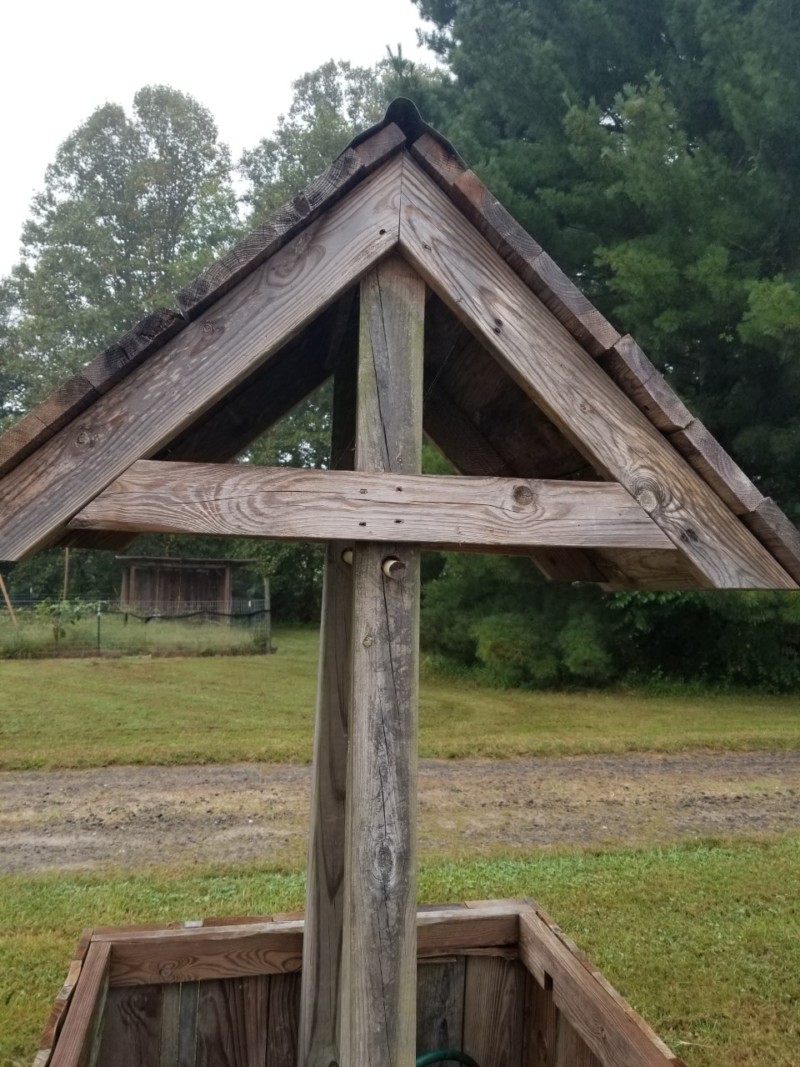
When the posts have been cut to the right size, this will vary depending upon how tall you’d like your well to be, begin building the frame for the roof.
Any smaller pieces of wood will work for this task. You’ll be making two rectangles (one for each side of the posts) to support the roof.
Attach the roof frame with a hammer and nails or use a nail gun to build the structure. You will need four pieces of wood per rectangular support.
When your rectangles are built, attach a 2×4 (cut to the length of the slope you’d like for your roof) and connect them horizontally to the support posts.
This is what will hold your roof at an angle. When the horizontal supports are there, begin attaching each rectangle at a slant to the vertical supports and the horizontal supports.
5. Put on the Roof
Once your roof supports are in place, add smaller pieces of wood to make the roof. This is a great way to utilize any remaining scrap wood you may have.
We placed our roofing wood on the supports horizontally. You’ll notice there’s still a gap between the two roof supports at the top.
Don’t worry about this gap because you’re going to take care of it in the next step. The point of this step is to make sure your DIY well is fully covered.
6. Add the Flashing
After your roof is in place, place the piece of flashing over the gap at the top of the roof. It should fold over and be secured with nails.
The flashing will make sure no excess water gets in through the peak of the roof. This is important to protect your well.
7. Add the Dowel Rod
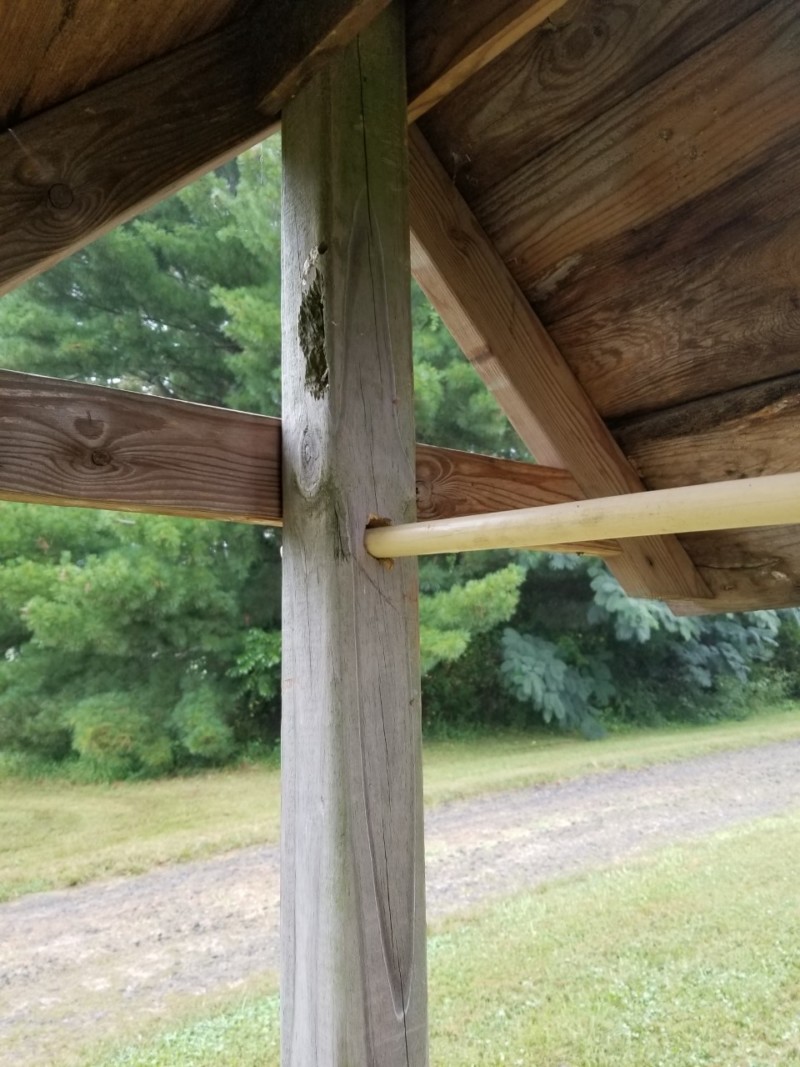
This step is optional. Everything we do around our home I like for it to look nice. I looked at this well cover as an opportunity to add more charm to our property.
My husband drilled a hole in each support beam where a dowel rod could fit through each hole. The purpose of the dowel rod is to be able to hang a hanging basket from the rod.
This is an easy and inexpensive way to add a few aesthetics to your home.
8. Apply Heat Tape (Optional)
The final step of completing this well cover is to apply heat tape to your well cover over the winter months. Our well will freeze when the weather becomes cold enough.
For this reason, we wrap the exposed pipes with heat tape to further protect the pipes which run from the well to the house from freezing.
This helps ensure we have running water all winter long no matter how low the temperatures drop.
Hopefully, this will inspire you to use any scrap wood you may have on hand or able to find, to create a neat way of covering your well.
I’ve enjoyed my DIY well cover, and I’m proud we were able to upcycle and create something to add a little more beauty to the property for no money out of our pocket.


