When you’re trying to be as self-sufficient as possible, it’s great to diversify your skillset. Even better is if that skill set includes food-gathering techniques that won’t take up your entire day. Although traditional line fishing can be a lot of fun, it also eats up a ton of time. Instead, make a handy basket fish trap to free up your time instead.
What is a Basket Fish Trap?
Have you ever seen a rubbish bin or laundry basket woven from wicker or rattan? Okay, picture that, only tapered at one end to look like a cone. Then there’s another smaller cone set inside it with an opening that’s large enough for a fish to swim through.
Fish swim into the trap, lured by the tasty bait you’ll toss in the back end. Once there, they get confused and have no idea how to get back out again.
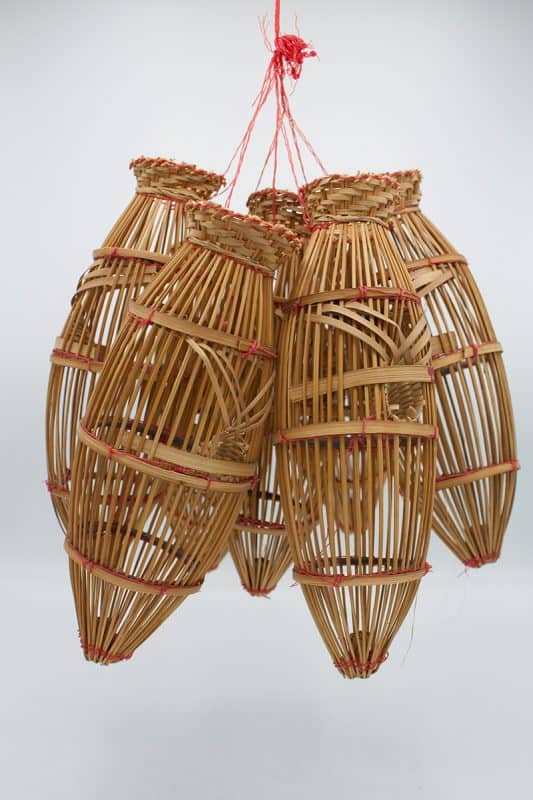
When you create your trap, be sure to make the secondary cone opening just big enough for your desired species to swim into comfortably.
For example, one of the most common species around my area is the smallmouth bass (Micropterus dolomieu). These will be 16″ to 20″ in length when fully grown and weigh five or six pounds. They’ll be around 5″ in height, so if I want to catch these in my traps, I’ll make the opening 6″ in diameter.
This is also a good size for brook trout and muskellunge. Perch will be able to swim in and out, but you’d need a dozen of them to make a decent meal, so bon voyage, perchy.
What You’ll Need
To make your fish trap, you’ll need the following tools and materials:
- Coping saw (or other small saw blade)
- Pruning shears
- Sharp knife
- Bamboo rods, cattail stalks, very young saplings, or other pole-type shafts
- A variety of weaving materials (known as “weavers”) such as willow rods, split tree bark, cattail leaves, etc.
- Cordage (rope, basically)
- Bait
Use the saw or shears to cut a large number of rods and weavers. It’s brutal to be in the middle of a project and run out of work materials. This significantly cuts into production time and makes the entire process more complicated. Gather together about 1/3 more than you think you’ll need, just in case.
How to Create Your Basket
Gather your rods together at one end and tie them together with some cord. I like to use sinew or skin strips because they tighten well once dried and can be waterproofed with pine pitch.
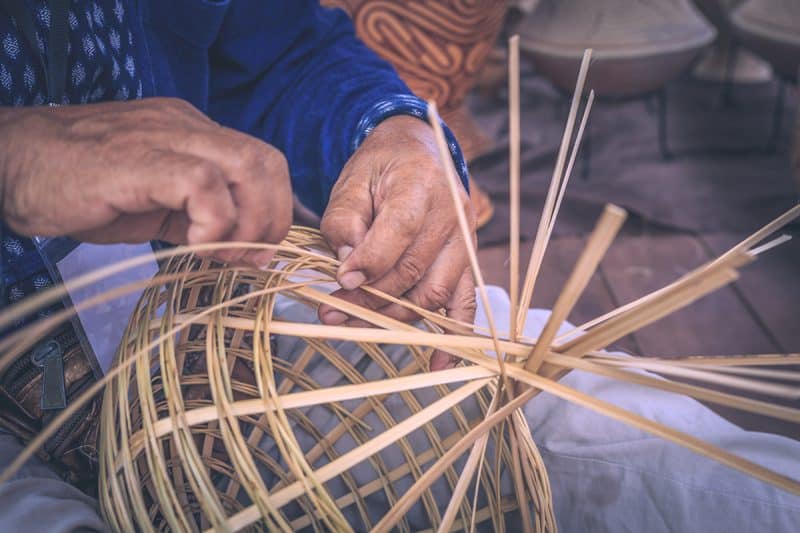
Once you have those tied together, set a tennis ball-sized rock in the middle of them to spread the rods out evenly. Then, take those weavers mentioned above and start (drumroll, please…) weaving with them! You’ll use a standard over/under/over/under repetition to create the desired effect.
If you’re using willow, you can leave the ends out and tuck them in later. Alternatively, if you’re using cattail leaves or cordage, you can tie these to the rods as you work. Try to weave tightly enough that there aren’t any gaps larger than about 1″. This will allow small fish like minnows to escape but will keep larger prey inside.
After you’ve woven a good few inches, you can remove the rock. That was to keep the rods apart while you established the weave. Then, keep going. This process will take a while, so you might want to stand up and do some yoga stretches every 20 minutes or so. Or if you really like your butt to go numb while you work, that’s cool too—your call.
Create Inner Supports
Once you get about 1/3 of the way done, you’ll need to create a circular support. Take a look at the diameter of the basket where you’ve paused, and create a circle that will fit neatly into it. Try to use something quite sturdy, such as a slightly thicker willow rod, or a very young tree seedling.
Tie cordage around it to keep its shape firm, and then secure that inside the basket. Once it’s been tied in place, continue weaving as you did before. Repeat this process at the 2/3 mark, and again at what will be the fish trap opening. Use an extra sturdy support for that one, as you’ll be attaching the inner basket to it.
Tuck all the woven ends into place, tie off your cordage, and start on the secondary basket.
Basket #2
This one will need to fit neatly into the first basket. It’ll be a lot shallower, however: aim for it to just fit about 1/4 of the way into the larger one.
Create it the same way you did with the first; only use a much larger rock to splay out the rods when you begin. Also, make a circle that will fit into the first basket’s opening, and attach the rods to that at regular intervals, using twine, sinew, or cordage.
Start to weave in reverse this time, beginning at the mouth (the larger opening) and working your way downwards. When you’ve reached the desired diameter (such as the aforementioned 6″ for my bass), create another circular support. Secure this into place, and then use your knife or pruning shears to cut off the extra length.

Place this secondary basket into the first one, ensuring that there’s little space between the two mouths. They should basically lock together to keep the smaller one in place. Then secure them into position by shoving some thick rods between their weaves, just below surface level. This shouldn’t impede the fish’s entry but hold the two baskets together.
Remember to Tie Tethers to the Trap
It would be heartbreaking for you to put several hours’ worth of work into creating this trap, only to have it float away from you mockingly as soon as you put it into the water.
Whether you’re using homemade cordage or standard rope, be sure to tie the tether(s) securely. I recommend weaving a length of rope all the way around the trap at the midpoint. Then secure it on the top with a sturdy knot of your choice. I recommend a constrictor knot, but you choose one that you like best.
Just a side note: if you’re going to be setting your trap in a swift current, tie a second tether. Honestly, it’s better to err on the side of caution here. Do the same thing at the back end of your trap as you did in the midsection, and tie that one to a different tree, if possible.
Time to Add the Bait!
I reckon that if you ask 20 people what kind of bait they use for their fish trap, you’ll get 20 different answers. I’ll tell you what has worked best for me, but it’s a good idea to try different types and see what’s most successful where you are.
Some people like to hang a piece of bait at the back of the trap. This will draw the fish into it, but it’s not always the most effective. Also, it can get a bit gross, as the best bait to use is generally the stinkiest. For example, you’ll generally get better results with a half-rotted raw chicken wing than a few fresh worms.
One of the easiest things to do is to get some cheap cans of beef, or chicken dog, or cat food. Poke several holes into a can with a hammer and nail, and then toss it into the bottom of the trap. Alternatively, you can spoon some of this food into one of those metal tea eggs and throw that in instead. These perforated containers are ideal because you can reuse them several times over.
The stinky sludge within will catch fishy attention like you wouldn’t believe.
Where to Place Your Fish Trap
If I said to place your trap “where there’s a lot of fish,” would you start screaming? Okay then.
Observe your local waterway to see where the fish seem to be most active. If there’s a natural weir nearby, that’s a good place to position your trap. Otherwise, aim for an area that’s close enough to the shore for you to reach the trap easily but in deep enough water that sizeable fish will still visit.
Tie some rocks to the trap’s mouth so it’ll stay in place. Then, take that tether you lashed to it earlier and attach that to a nearby tree. Oh, and remember that you’ll need to face its opening downstream when you position your fish trap rather than upstream.
When you face it downstream, it’s looking in the same way the water is flowing. This may seem counterintuitive at first, but fish prefer to follow scent trails upstream. By positioning your trap this way, you’re sure to catch strong, healthy fish. Otherwise, those that are already dead might wash downstream into your trap.
Nobody wants to deal with, let alone eat, fish that have been dead a few days. That’s just not right.
Once that’s done, you can go and do your own thing for several hours. Just make sure to check on the trap at the end of the day to see if you’ve caught anything. If you have, awesome! Just pull the securing sticks out so you can remove the inner basket and spill the fish into a bucket.
Don’t do this too close to the water, by the way. The fish can just leap back in there and then laugh at you as they swim away.
Care and Maintenance
I recommend making at least two traps so you can alternate between them. Additionally, having an extra two (or three) around is great in case one of them breaks or gets washed downstream. Or stolen. You get the idea.
Check the traps thoroughly after each use to see if they need any repair work done. Larger fish can thrash around in the traps quite a bit, so you may need to re-weave some of the basket areas. Additionally, since these traps are woven from natural materials, you can expect that they’ll break down eventually due to water exposure.
Be sure to dry them out thoroughly regularly to extend their longevity. Additionally, keep a spray bottle of full-strength apple cider vinegar handy. Hose the traps down weekly to eliminate algae growth or bacterial build-up.
It should probably go without saying that you need to remove the bait after every use. The last thing you want to deal with is the putrid stench of forgotten bait at the bottom of a trap that took you half a day to make.
Hopefully, if all goes well, you’ll be catching delicious suppers from your local river or lake in no time. Oh, and be sure to use the leftover bits for homemade fish emulsion fertilizer!


