
Gardening is a lot like baking. You need to have the right steps and ingredients to get a good end product. Soil testing is an integral part of the recipe. Knowing what a soil test is, how to take one, and how to interpret the results will make a world of difference in your garden.
Soil analysis allows you to examine your earth to make sure it’s ready to “bake “ your plant. Basically, a test determines what nutrients are in your ground and if they’re in balance. It also shows you the pH level of your soil. Knowing these facts allows you to adjust things so your garden will be at its most productive and fertile.
We often think of soil testing as a vegetable gardening activity, but you can test soil anywhere things grow, including your lawn, flower beds, and orchard. Basically, wherever you want to improve the ground or figure out why your plants aren’t thriving.
A test typically targets the big three elements: nitrogen, phosphorus, and potassium. They can also look at micro-nutrients such as calcium, magnesium, and sulfur, or the pH level to determine how acid or alkaline your soil is.
Soil testing can also analyze the percentage of organic matter and salts in your soil. These are important because organic matter helps enrich your soil while salts can reduce the number of nutrients the plants can access.

When To Test Soil

In general, you should test your soil at least once a year, preferably in the fall, because that’s when it’s time to add fertilizer or lime to enrich the land over the winter. However, you can test your soil at any time, and you may even want to do it several times a year to get an average.
For new perennial gardens, test a few months before you plan to sow so that you have time to amend the earth. For annual gardens, test in the fall or winter. Annual gardens can be tested every few years instead of yearly.
Reasons to Test Your Soil
Beyond a yearly test, there are instances where you’ll want to check your soil. These include:
- When you purchase a new property
- When you are planning a new garden
- To document soil composition for certification
- When you suspect you are under or over-fertilizing
You should also do a soil test whenever you see a problem. For instance, if you notice that your lettuce plants are yellow with spindly stems, get the test kit out. Yellow leaves are a sign of nitrogen deficiency, and a simple soil test will let you know if your soil is lacking nitrogen.
If it is, you can choose a sustainable fertilizer such a fish emulsion to target those plants. If your nitrogen level is adequate, then you know to look for whatever else is harming your crop.
What Type of Soil Tests Are There?
There are a variety of soil tests available. Don’t choose a soil test based on what’s easiest or cheapest. Consider your goals and level of comfort as well as pricing.
1. Lab Tests

You can mail your soil into a laboratory company. This is the most expensive method, but the most thorough and accurate one. Costs run from $25 to $50 depending on what tests you do.
I have a laboratory test once a year. I use Logan’s Lab because they answer my endless questions willingly. They send me an extensive report that lists the actual value of the nutrient in units. This is handy because I can compare year over year and I can make precise tweaks to my soil.
You can search the internet to find a laboratory near you that does soil testing. Make sure you inquire how long their turn around time is. Some labs have state or federal contracts and may have a long wait for private samples.
Your county extension office often has a testing affiliate with the state land-based university. They usually charge anywhere from $5 to $20. Extension tests vary state to state, and the analysis is not quite as complete.
One of the things I don’t like about extension testing in my state is that it’s set up for commercial farmers. My recommendations from the University of Kentucky were to apply 10-10-10 formula which would not be suitable for my organic operation. Look for a lab that offers sustainable solutions if that’s important to you.
2. DIY Kits
There are a variety of home kits on the market for soil testing. Some are better than others. Do your homework and look at the reviews on accuracy and ease of use.
DIY tests don’t give detailed information, just a range of where your soil falls. This makes it harder to determine how much of a nutrient you may be deficient in or how much to add.
Most of the DIY kits are limited in what they can test for. Usually, they target the big three – nitrogen, phosphorus and potassium, and sometimes pH. You can also get separate mini tests if you just want to focus on one thing.
Soil tests are available online, or you can purchase at your local feed store or big box store. They’re less expensive and often contain multiple tests.
LaMotte Soil tests are considered top of the line for DIY kits, which is why professionals use them. While more expensive, they also come with multiple tests in each package. LaMotte provides excellent instructions, and you determine your soil’s measurement by comparing to a color chart.
Rapitest kits are simple to use and take a few minutes to get results. These tests take some precision, and it can be difficult to ascertain your results. You’ll often find these used in schools because they’re so straightforward.
You can buy meters or probes that will measure your pH level. These are uncomplicated – just stick them in the ground and look at the reading. Make sure to read reviews on the specific meter, because accuracy varies widely.
Soil Testing
For DIY kits, follow the instructions included with the tests, because each manufacturer has different requirements. For lab soil testing, there is a general process you can follow. Before you collect a sample, make sure you know how much soil your lab requires and at what depth. You’ll also need to confirm which containers are acceptable. Most labs require at least a cup of dirt and prefer plastic bags.
1. What You Need
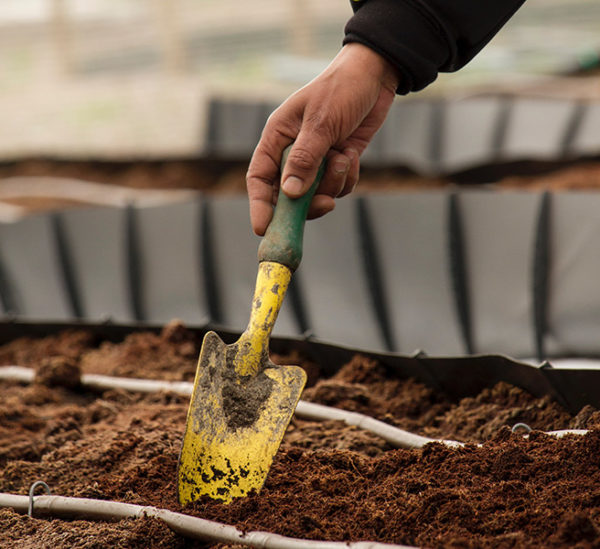
You need basic gardening tools to take a soil sample. You can use a specialized tool called a soil probe or auger, or you can use a garden trowel and a spade.
Wear a clean pair of gloves and either put your sample in a clean plastic bucket or directly in your plastic sample bag. This ensures that your soil test will be free of contaminants that could skew your results. Avoid using containers made of galvanized metal, bronze or brass because they can alter your outcome.
If you take multiple samples, you’ll want to label your bags so that you remember where they came from. For instance, I have numerous garden areas, and I give them names and numbers. I had G3 Hse and G2 Barn tested. These terms refer to the house garden and the barn garden.
2. How To Take A Soil Sample

- Scrape away surface debris such as leaves and dead plants from the top of your soil so that they don’t get in your sample.
- Use a clean soil auger or trowel to collect dirt. Soil for testing should be from a minimum of six inches deep.
- If you’re testing a large garden, take multiple samples and put them in your bucket. Mix these samples together with your trowel before placing in your bag.
- Label your soil test.
- Keep your sample cool and ship it off right away. Freeze your sample if you need to send it later.
3. Areas Not To Sample

Some areas of your garden or homestead are not good places from which to sample. These include:
- Along fence rows
- Areas where you feed livestock
- Under the compost pile
- Close to driveways, sidewalks or streets
- Close to buildings like homes and barns
- Where water tends to pool
Soil Testing for Container and Raised Beds

We often ignore our container plants, whether they are indoors or outdoors, and our raised beds. This is a mistake. Plants in confined locations may be even more prone to nutrient deficiencies.
Plants in containers and raised beds have a limited area they can spread their roots. This restricts how many nutrients they can pull from the soil. That’s why soil testing for these plants is essential.
Soil testing will give you results based on an open garden. You’ll need to make adjustments according to the size of your container.
Understand Your Soil Test

Via Fox Run
Understanding your soil test is key to knowing what steps you need to take next. Think of your test results as the beginning – not the end – of the gardening process. It’s a foundation to point you in the right direction.
For example, if you look at my test, you can see a line for calcium. The calcium line gives the desired value and an actual value. For my barn garden, it shows that my actual value is a less than desired.
I know if I plan to put tomatoes in that garden, then I need to add calcium because tomatoes are heavy calcium feeders.
Some tests will give you a range such as normal, low or high. These can help you determine if you are average (normal) or need to add something (low). If you are high in something, you’ll need to be conscious not to use any additional fertilizer with too much of that element. This can get tricky, and you will want to read the labels on your fertilizers for guidance.
Nothing about gardening is a quick fix. Soil testing should be part of your long-term goals to improve your soil. As you become more comfortable with reading your test results, you’ll better know how to handle them. In the long run, it’s worth making the time and financial investment, because it will pay off with sturdier, more productive plants.


