
I am a rebel homesteader who likes to try all the things people tell me not to do (as long as they are legal). For example, on the composting front, I had my doubts about those lists of things you supposedly shouldn’t compost.
The list says not to compost prepared foods, meats, dairy, cat poop, and so on. Well, I assure you, if you build a big enough pile, manage to keep pests out and age your compost for a year, you can safely compost all that stuff.
Just for the record, food growers are even allowed to grow food in semi-composted sewage solids. So, I figure if that stuff can be made safe for farm fields, then lots of things we like to think are taboo (like poo) can make good compost too.
Now, I live in the country. So, my nearest neighbors are the equivalent to a few city blocks away. That means, no one will notice if my compost pile stinks for a day or two after I build it. There’s also no one to complain if I have flies buzzing around the pile until it heats up.

Bokashi Beginnings
Recently though, I started wondering if I could compost everything even without building a giant compost pile. Even for me, there are times, like in winter, when I wish I could process my leftovers sooner rather than saving them for when I have enough materials to build a big pile again.
It turns out; there is an effortless way to make almost everything safe for composting. It works even if you live in an apartment and garden in containers.
You have to ferment your waste before you compost it. The process of fermenting your waste products to prepare them for composting is called ‘bokashi.’ That’s a Japanese word that means fermented organic matter.
Similar to fermenting sauerkraut, wine, cider, or beer, fermenting your potentially stinky waste products is done in an anaerobic, or airless, environment. That’s what makes it okay to do even indoors in a small space.
Similar to making other ferments, for best results you do need to create the ideal conditions for fermentation. Luckily, making your stinky food wastes into bokashi is about as easy as maintaining a vermicompost bin.
Bokashi Tools
Here’s what you need to ferment your less aromatic compost materials at home.
1. The Bokashi Bucket
Similar to making worm compost, the key to bokashi is the container you make it in. It has to be airtight and limit light transmission.
For bokashi to work well, your waste products need to have about 60% moisture. Most food products tend to have more liquid than that. So, your bokashi bucket also needs a drain for excess fluid to escape.
During the fermentation process, that extra liquid will make its way to the bottom of your bokashi bucket. If it pools there for too long, it can cause problems with the fermentation.
So that fluid needs a way to get out. There are a few simple ways to handle that.
2. Bucket with a Spigot
You can buy an official bokashi bucket with a fancy valve at the bottom. You can also use one of those beer fermentation buckets that have a spigot on the bottom. I recommend you put a piece of fine gauge screen over the valve opening inside the bucket to keep the spigot from clogging.
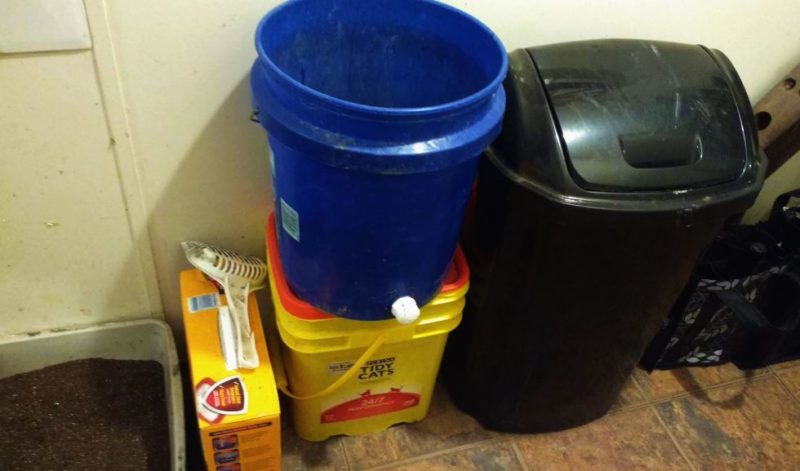
3. Double Bucket
You can also make your own bokashi bucket. The easiest way to do this is to drill a few drainage holes in the bottom of a bucket. Then nest that bucket inside another identical-sized bucket.
Make sure the two buckets fit together tightly. Also, the bucket with the holes needs a super tight-fitting lid. The snug bucket and lid make for those airless conditions bokashi requires.
4. Homemade Drain
If you have a hole saw, you can also buy PVC plumbing parts for a few dollars at the hardware store to make a drain pipe in your homemade bucket. You would need a threaded coupling reducer, some silicone caulk, and an end cap for the smaller side of the coupling reducer.
This option works a bit better than a spigot as long as you put some paper over the drain hole before you start filling your bucket. The paper keeps food particles from running out of the larger sized drain when you open the cap. You can also use a metal screen if you want something permanent.
Bokashi Starter

Like making beer or wine with wild yeast, you can make bokashi using native bacteria. However, it will take longer.
Plus, you may not have enough of the right kind of bacteria to get the results you want. So, it could also be a complete disaster!
Similar to adding specific yeast to your wine or beer, adding a bokashi starter to your waste for fermenting ensures you’ve got the right kind of bacteria. That way you can easily turn your stinky wastes into sweet-smelling fermented compostables.
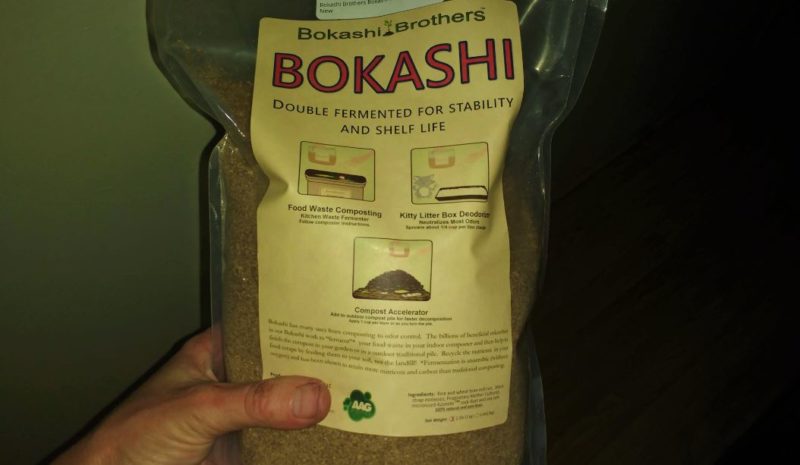
Inoculated bran is the most common kind of bokashi starter. The bran is made from the dry powdered husks of wheat or rice. The bran is fermented in molasses sweetened water inoculated with the right kinds of bacteria.
You can buy or make your own bran. Though, I suggest you purchase commercial bran to start so that you can see how it is supposed to work. Then, later you can make your own.
You can use either wet or dry inoculated bran. However, when you are just getting started, dry bran is easier to work with. Dry bokashi bran is shelf-stable.
It won’t mold as wet bran can. Plus, it weighs less, so if you have to pay shipping costs, sometimes the cost is less than with wet bran. When you make your own bran at home though, wet bran is less work.
If you are keen, you can purchase the starter kit to get going.
Feed Stock
The final thing you need to make bokashi is all the food wastes you are going to feed your bokashi-making bacteria. Personally, because bran costs money to buy or to make, I only bokashi the “yucky stuff”. Everything else goes in my regular compost pile.
The yucky stuff includes all the things that are likely to draw flies or contain pathogens. Meat, fats, oils, prepared foods, dairy products, small bones, and more get bokashied in winter at my homestead.
For best results, most people advise that you keep your bokashi bits small. The more surface area, the easier it is for the bacteria to colonize. It supposedly does help the process.
Personally though, because I’m a rule breaker, I tend to put whatever in my bucket. If the pieces aren’t small, I add more bran to make up for the lack of surface area.
I haven’t had a problem with this lazy method yet. However, it’s up to you if you want to risk breaking the rules or not.
The Bokashi Process
Now that you’ve got your tools ready to go, the next part is super easy.
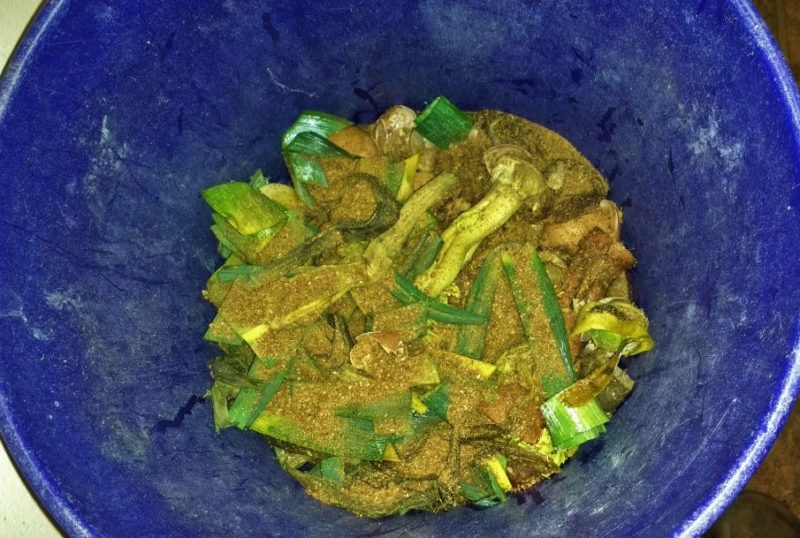
Step 1: Add Feed Stock
The first thing you do is add 2-3-inches of your waste scraps to the bottom of your bucket.
Step 2: Spread Bokashi Bran
Next, you cover the scraps with a light dusting of bokashi bran. If you are using dry bran, you’ll use a bit less than with wet bran.
Generally, though it takes about 2-3 tablespoons of inoculated bran for each layer when using a bucket. Your bran source or recipe will usually provide more precise application instructions.
Step 3: Repeat Steps 1 and 2
Now you repeat steps 1 and 2 until you reach the top of the bucket. Stop about 2-inches from the top so your bucket doesn’t explode during fermentation.
Note, as a
Also, keep the bucket closed between applications of layers. This will control smells and limit pests like flies and gnats until the real action starts when the bucket is full.
Step 4: Remove Liquid
Every 2-3 days, you’ll want to remove the bokashi liquid that pools at the bottom. If you are using a spigot or a drain, just put a cup underneath before you open your device. Then, catch that liquid in your cup.
If you are using the double bucket method, the easiest way to remove the liquid is to put the bokashi bucket with the drain holes directly into another bucket. Then, the bucket with the liquid becomes your cup.
Step 5: Ferment Your Waste
Once you reach the top of the bucket, leave the lid on and let that thing sit for 2-3 weeks. The real fermentation will happen when you stop opening and closing the lid to add scraps.
Don’t forget to keep draining the liquid during fermentation.
Step 6: Use Your Bokashi for Compost
Bokashi is not compost. It’s basically pre-digested compost scraps that have been made safe to use for other processes. You now need to compost them using your other composting methods. The easiest, safest, and most effective way to use bokashi is to trench compost with it.
Even if you container garden, you can use this concept with your large containers. Just put a few inches of soil at the bottom of your container.
Next, put in your bokashi ferments. Finally, cover everything with 6-inches of container soil. The bokashi will compost in the container and break down to feed your plants above. It kind of works like a mini hugelkutur.
You can also feed your bokashi ferments to your worms. I mix my bokashi fermented stuff in with my other normal kitchen compost scraps so the worms still get a varied diet.
Using Bokashi Liquid
The liquid from the bucket can be used as a fertilizer for other plants. For your lawn, you can apply it diluted at a rate of 1 part bokashi liquid to 100 parts water. For non-edible or large perennial plants, you can use it diluted by about 100-300 parts water to 1 part bokashi liquid based on the nitrogen needs of the plant.
I don’t recommend using the bokashi liquid in your vegetable garden. Although composted bokashi is safe to use in your garden, the liquid comes out at various stages in the process. It hasn’t been composted. Also, it can be stinky in the earlier phases before fermentation really starts.
Tips for Bokashi
Bokashi is as easy as it sounds. Still, sometimes things can go wrong. For example, I learned a few things when I first started composting cat litter.
1. Keep Chemicals Out
For starters, you can bokashi that awful chemical, clumping cat litter you get at the grocery store. However, those nasty chemicals are still in there at the end.
I suggest you avoid using bokashi on anything with questionable chemicals in them. The same goes for plants that have fungal pathogens or disease. It’s better to leave those out of the bokashi bucket.
2. Maintain Moisture
Bokashi requires airtight conditions. Still, it also needs sufficient moisture. When you bokashi all your kitchen scraps, you tend to have lots of extra moisture.
If you only bokashi the stuff you can’t put directly in your compost pile, though, you may have to add water to start your bokashi. My cat litter trials taught me this too.
When I tried to bokashi paper pellets, litter soil mixes, and more, they were all too dry to ferment properly. Once I added water, the process worked great.
3. Sniff Test
Most of the time, bokashi works perfectly. It’ll smell a bit like vinegar or alcohol and have frothy white mold in the
Sometimes the white mold doesn’t appear. That’s alright. However, if you don’t smell that funky, fermentation smell when you open the bucket after 2-3 weeks, do it again.
Just add more bran. Check the moisture and add water if necessary. Cover the container and let it go for another 2-3 weeks.
If it doesn’t work the second time, check your bokashi bran. It could be that your bran doesn’t have the bacteria necessary to initiate the process.
4. Multiple Buckets
Since it takes 2-3 weeks for bokashi to happen, I find I need a few buckets to keep in rotation.
Buying these can get pretty expensive. So if you need more than 1 or 2, refer to the above bokashi bucket ideas to cut your costs.
5. Bokashi is Beautiful
There is a bit of a yuck factor when you first start making bokashi. However, when you begin to see how much more compost you can make, that early aversion fades away.
In fact, if you truly want to bokashi a whole bunch of additional waste, use it in conjunction with your homemade composting toilet. Once you get the hang of bokashi, there’s very little you can’t transform into compost with this simple process!


