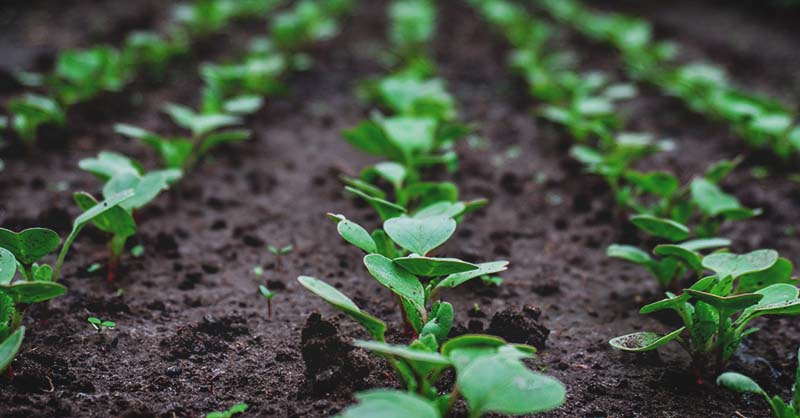
Creating a garden may seem elementary in thought, but when you begin the process, there may be steps you are unaware of how to do.
For instance, growing a garden is one thing, but how do you set up your vegetable garden beds correctly?
Believe it or not, there is a process. If you don’t complete the first step right, you can’t expect much else to go right with your garden.
However, you don’t need to fret. I’m going to walk you through each step of setting up your garden beds regardless of what type of garden you are starting.
How to Set up Raised Beds

Raised beds are becoming a popular garden choice. They have many benefits such as making gardening less labor intensive and are great for gardening in smaller spaces. Here is how you create raised garden beds:
1. Ponder Your Garden Design
Before you begin putting raised beds into the ground, you need to contemplate about how you want the beds to be laid out.
You could place the beds parallel to one another or create fun abstract designs with them. Just keep in mind, once they are in place, they are there.
Be sure of your layout before you begin building your beds.
2. Building Materials
After deciding on the design, start deliberating about the materials you will build your raised beds from.
You could choose to build with wood. Many people do this because wood has a clean, finished look to it, and it is affordable.
You could also choose to build your raised beds from concrete blocks. They are easy to put together to form raised beds, have a unique look, and are affordable as well.
Obviously, you can get as creative as your mind allows when deciding what to build your raised beds from.
3. Design Your Garden Beds
Once you’ve decided what materials you’ll make your raised beds from, it is time to design them. You could build raised beds in a U-shape, in a rectangular shape, a square, or any other shape you wish.
You’ll want to decide what shape you’d like your beds to be in and make sure it fits your original garden design.
If it does, you are good to go. If not, you’ll have to tweak either your raised bed plans or your garden design.
When you have your garden design layout lining up with your particular raised bed designs, you are ready to move on with the process.
4. Decide How High You Want Them
Now you know your design layout, you need to decide how high you want your raised beds to be. Some people like to build raised beds two or three layers high.
Building beds higher makes them easier to garden in.
However, they require much more dirt too. If you build lower garden beds, they don’t need as much soil to get started but do expect more from your back when tending them.
This is a decision you’ll need to make now. I’m usually working on a budget; therefore, I make my garden beds one layer high.
By doing this, it saves money on dirt and organic matter. These are things to take into consideration when creating your raised garden beds.
5. Contemplate the Purpose
The last step you take before building your garden beds is to decide their purpose. It will help you determine if you’ve made the best decisions up to this point.
What I mean by their purpose is: are you building raised beds because of lack of space? Are you making them to help a disabled person be able to garden with ease?
What is your reasoning for choosing raised beds? When you have your reason in mind, go back through your plans and make sure you picked the best layout to fulfill your purpose.
If you did, it is time to build the beds. If not, stop here and consider things before you go through with the build.
6. Fill the Beds
You have now studied your raised beds thoroughly. I encourage all these thought processes because I know what it is to jump the gun and spend a great deal of effort and funds to create something only for it not to function.
If you reflect on things, your chances of being unhappy with your choice are less.
When you feel sure about your raised bed choice and design, build the beds. Once complete, fill the beds with soil and organic matter to enhance your soil.
How to Set up a Container Garden

If you are working with limited space, container gardening could be the answer for your gardening problem. You still need to know how to get your container garden set-up. Here is what you need to know:
1. Choose Quality Containers
The container for your container garden is one of the most critical components, next to the soil. You will want to make sure you choose high-quality containers.
What you don’t want, is flimsy plastic containers you find at gardening centers when you purchase plants from them.
Those pots are great for starting plants, but they are not what you want as a permanent home for the plant.
However, you do want sturdy plastic pots, terracotta pots, and five-gallon buckets. These are all sturdy enough to make great homes for your plants throughout their growing season.
2. Deliberate on the Size
As much as you want sturdy pots for your garden, you’ll also want the right size containers as well. Some gardeners grow fruit trees in their container gardens.
Consider the sizes of the plants you are adding to your garden. You obviously can’t grow a large plant in a small pot.
Which is why it is vital to make sure you choose the right pot size. If you don’t, your plants could become root bound, and this will kill them.
Try to come up with the largest pots you can. It will ensure your plants won’t become root bound and give your garden a healthy chance for survival.
3. Quality Dirt Makes the Difference
The final step in creating your container garden is to be sure you place it in a location with ample sunlight and fill your containers with quality dirt.
Once you’ve filled the pots up with the dirt, it is a good idea to add organic matter to the soil as well. It will only enrich your soil and better feed your plants when they’ve been planted.
How to Set up a Small Garden Bed

Perhaps, one of the most challenging garden beds to start are the gardens which go in the ground. They are the traditional style garden, but they are larger (even the small versions) and require extra preparation. Here is what you need to know:
1. Beat the Grass Down
The first step to preparing your garden bed is to get rid of the grass. The best way I’ve found to do this is to put your weed eater to work.
From there, you beat the grass down to the dirt as much as possible. This should give you a base to start with.
However, you’ll need to complete the steps to follow because keeping the grass from coming back is vital to a healthy and weed free garden.
2. Prepare the Land
When you have beat the garden space down to rid it of grass, you have one of two choices (and they will depend upon what time of year you are preparing your garden.)
First, if you are developing your garden in the fall, use your tiller to till up the soil. You will leave the ground alone all winter. The cold temperatures will kill the grass off.
However, if you are a little late in prepping your garden, you need to first till your ground. From there, you can place newspaper over the ground to deter the grass from returning.
Also, if the days are hot enough, you could cover the ground with plastic and allow it to sit for a couple of weeks. This should kill off any remaining grass and deter any of it from returning.
Once you feel confident you have beaten the grass, you are ready to move on.
3. Work in the Good Material
When you are getting close to time to plant, work organic matter into your soil. It is also a good idea to test your soil to see what vital nutrients may be missing.
This will help you to build your soil and give your plants the best start possible. When your dirt is ready, you’ve prepared a space for a fully functional garden.
4. Add a Border
This final step is optional, but some people prefer to add a border to their garden or fence it. It will help to deter pests in the future.
Depending upon border size, it could deter small things like bugs if you go with a simple outline around your garden. It could also discourage larger pests such as deer if you go with a full fence around your yard.
Again, this is an optional step, but one which can be helpful.
How to Set up a Large Garden Bed

via livetomanage.com
Our final garden we are going to discuss creating is the large garden bed. The steps are a little different from the small garden bed because the assumption will be made you will be using larger tools to work the garden, like a tractor. Here is what you need to know:
1. Till Up the Land
When working a more extensive garden, it is a good idea to get started in the fall. You will want to mark off your garden area and till up the area with your tractor.
From there, you will let the soil sit. It will look lumpy and ugly like disturbed land does typically.
However, by allowing the garden area to sit during the cold months, you are giving the grass time to die off.
If you are starting late, it will be a good idea to cover your garden with a black tarp for a couple of weeks on hot days. It should kill the grass off quickly to help you keep weeds under control.
2. Cultivate Your Dirt
When you feel confident the grass has been killed (and usually a month before planting), either use a tiller or cultivator attachment on your tractor and cultivate the land.
It will soften the dirt, make things lay flat, and give your garden a smoother look. I know my garden is ready when I no longer feel I will twist an ankle by walking through it.
3. Add the Good Material
Once your garden has been smoothed over, you are ready to add organic matter to your soil. It is a good idea to test your soil to see what it may be lacking.
When you know what you are lacking, you can work on adding it back into your soil. This is a big job because you are working a more extensive section of the garden. Keep this in mind, to keep from becoming discouraged.
4. Cultivate Again
Finally, you’ll cultivate the land again once everything has been added to the soil. Cultivating it will help distribute everything evenly and give your garden a nice finished look.
It should be ready for planting once you’ve completed this step.
However, I will say, when working a smaller garden, it has benefits to adding a fence. I don’t recommend adding a fence to a larger garden because if you use a tractor, you can’t maneuver in the garden with a fence.
This is your choice, but I stick with an old-fashioned scarecrow to keep larger pests out of my garden.
You now know how to start any garden your heart may desire to create. It isn’t complicated; it only requires forethought and a little effort.


