Do you incubate your own chicken eggs for hatching? You’re probably already aware of how exciting this endeavor can be.
Personally, I find chick hatching time to be some of the most thrilling moments on my farm – I know, I know – I don’t get out much!
But to make things even more exciting, I like to candle my eggs. This is an inexpensive and fun way to discover what’s going on inside an egg, and moreover, it can give you an idea of whether there are any abnormalities within the shell.
You don’t have to candle eggs in order to hatch them, but it can take a lot of the guesswork out of the process for sure – and improve your chances of a good hatch.
What is Egg Candling?
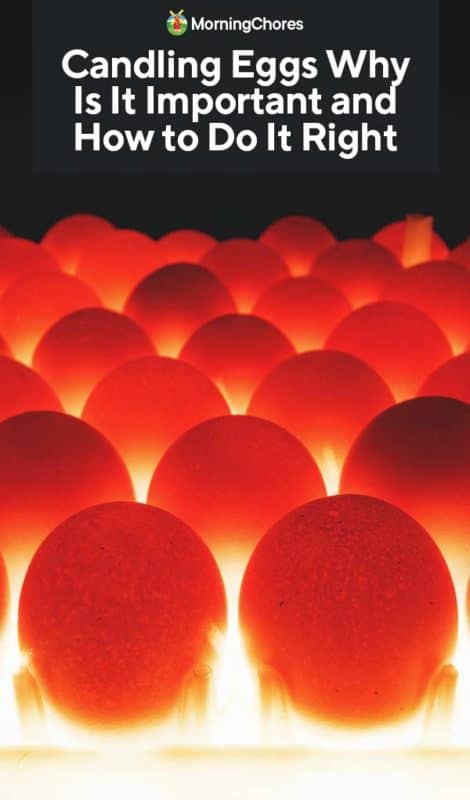
Egg candling is a method of shining light inside a poultry egg that enables you to see what’s going on inside an egg. You can do this at various points in the egg’s development, all the way up until right before hatching.
Of course, it’s probably not the most failsafe way to see what’s going on, but if you’re skilled at egg candling and have done it several times, you will be able to get a good idea nonetheless.
Candling helps you see if the egg is developing and progressing as it should be – or whether there’s a problem you need to address. Originally done with a candle, egg candling is now done with a small, powerful flashlight that shines up and through the shell of the egg.
There are many varieties of egg candlers you can use – some people are even successful with a basic, standard flashlight – but ultimately, candling is easy and inexpensive to do.
Why Should You Candle Eggs?

Egg candling lets you keep track of all kinds of problems in the incubation timeline. Not only will you be able to keep track of fertility issues – you can see which eggs are fertile early on – but you can also observe problems such as halted embryo development and late mortalities inside the shell. It also helps you determine the hatchability of shipped hatching eggs.
In the case of shipped eggs, it’s a good idea to candle them before putting them in the incubator. This way you can get a closer look at small hairline cracks.
Sometimes, your embryo will stop developing very early on in the process. If you candle within the first couple of weeks and notice a thick red line, the chick will probably not make it to hatching. This is known as a bloodline, and it’s a sign that your chick has died.
Other embryos fail to mature when they are further along in the incubation process. You can sometimes determine the cause of death by looking at the egg either through candling or actually cracking it open – the latter of which I don’t really recommend due to the smell.
In some cases, your chicks might die right at hatching. This is usually due to temperature that is too high or too low humidity.
A Timeline for Candling
There really isn’t a single day at all when incubating eggs isn’t exciting! However, this timeline for candling will give you a good idea of what you can see, and when.
Day 1
No, you aren’t going to be able to see anything yet. But the first candling is important so you can determine that all of the eggs entering the incubator are healthy, intact, and free of cracks. Cracks in the shell allow bacteria in, which can cause serious issues and even exploding eggs later on.
If you have cracked eggs, discard them. The same goes for eggs that are wrinkled, pointed, or deformed in any way. These features can lead to difficulties in hatching, too.
Day 4
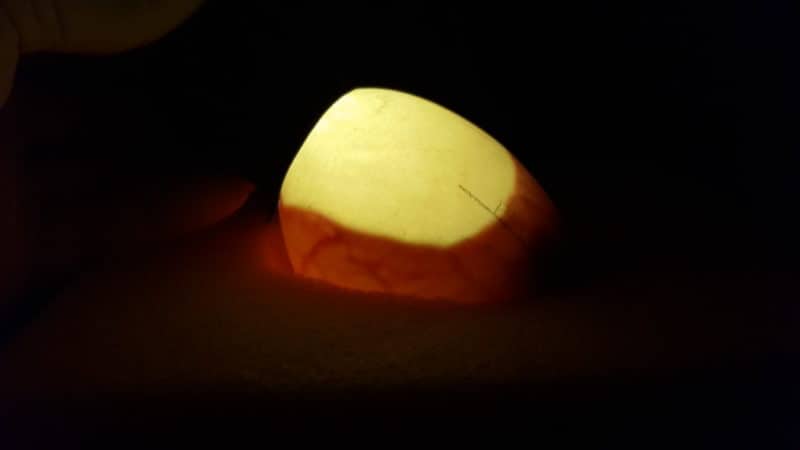
By day four, you should be able to see some veins or blood vessels spreading through the egg. These will look like tiny hairs, and all fertile eggs have them. If you don’t see the streaks, don’t worry quite yet – it takes some eggs a bit longer. Rekindle at day seven to be sure.
Day 7
Now, you should be able to see the vein web clearly as it grows. You might also see the beginnings of a cell at the blunt end of your eggs. If you only see the yolk without veins, then the egg is not fertile. At this stage, you might also start to see the air cell or air sac at the blunt or larger end of the egg.
Discard Quitters ASAP
Starting on day 7, you can separate the quitters or the eggs that won’t hatch from the healthy eggs and potential hatchers. The first quitters are obviously the non-fertile eggs (yolkers). You need to discard these eggs as soon as possible otherwise they will become rotten.
Not all fertilized eggs will hatch, though. During the next few days, some of them might stop developing and you will see a thin, blood ring. If that happens, you should toss them as they are now considered non-viable eggs.
Day 10
Make sure you have candled all of your eggs by the time day ten arrives. You will be able to see parts of the chick itself – most notably, its eye. The eye will look like a large black blur. It will be quite large, too. You might even be able to see some movement.
Day 17
Day seventeen is when everything seems to stop. This moment tends to lead some people to panic, thinking their chicks have died because they don’t see anything at all.
However, this is normal. It is because the chick has filled most (or all) of the available space inside the egg and is moving itself into hatching position. Try not to move or jostle the egg too much. The chick needs to prepare for piping.
Day 18
Stop candling! It’s now time to cease all inquisitive behaviors, as your chick will be hatching in a few days. It’s important that you do not open the lid of your incubator after day eighteen in preparation for hatching, and that your temperature and humidity are spot-on.
Equipment Needed for Candling
You can use either a basic, small flashlight or an expensive, high-end machine to do your candling. Of course, the more money you spend on your candler, the more likely you are to get the most accurate results. However, you can get a good handle on what’s going on inside your eggs without purchasing a costly machine—as long as you have a bright light source and a dark room.
Some candlers come with high-intensity webcams, while others have viewing lenses or adapters for different size eggs. You can also fashion your own DIY candler by attaching a bit of cardboard to an LED flashlight.
Tips for Candling
Ready to get started? Here are some tips to help make your candling experience successful and enjoyable:
First, don’t candle every day. I get it. It can be exciting to check up on how your egg is developing! But just as opening an oven too often while you’re baking bread can affect the progress and ultimately the quality of the final loaf, so too can candling eggs every day. You will be disturbing the growth and development, interrupting progress too often.
Also, you should avoid using eggs that are dirty or soiled in any way. This is a good rule of thumb for incubating in general. It is not wise to incubate eggs that are covered in manure or otherwise damaged. You have a reduced likelihood of seeing them through to hatching.
Even if you’re only candling nice, clean eggs – and only doing so every now and then – try not to keep them out of the incubator too long. You don’t want them to become chilled or dried out in the process. Never leave eggs outside the incubator for more than half an hour.
When you are candling, mark the eggs. Use a regular pencil to do this so you know which ones you have candled. Keep good records of what is going on inside the egg, as well as which ones don’t seem to have a fertilized embryo. You will also want to track events that may impact the health of your chick, such as power outages.
Finally, keep in mind that the conditions of your eggs and the incubator will impact how successful you are at candling. Eggs that are dark in color (such as those from Welsummers) are more difficult to see through, even if there is a healthy embryo inside. An incubator with poor or fluctuating levels of humidity will also be less likely to produce eggs that are suitable for candling.
Remember that you won’t be able to see anything early on in the incubation process. Candling is best done after the fourth day of incubating. Lots of changes happen up to this point. Try to contain your excitement until after the first week or so has passed.
Why Candling is Important
If you are hatching eggs for your own use, you definitely don’t have to candle your eggs. However, it can make incubation a lot more exciting, for sure! There is a learning curve involved in mastering candling techniques. Similarly, you may find that you struggle at first to understand what you’re seeing.
Once you’ve figured things out, you will emerge from the experience much more educated about the incubation process – and you’ll have fun doing it too.
