Did you know that you don’t have to shop at the grocery store? It is kind of a mind-blowing concept considering how dependent we are upon modern conveniences.
But truthfully, if your grocery budget is killing you, there are other options. One option is canning. You might be thinking, “That sounds great and all, but I don’t know how to pressure can. It intimidates me a little, and you can only water bath so much.”
Well, I would agree with that statement a lot. That is why today I’m going to share a general overview of how to pressure can.
Now, before we get started here is my disclaimer:
Pressure canning can be dangerous. You should read your owner’s manual for your particular canner before ever attempting to pressure can at home. Also, you should seek out guidance from someone that is experienced with pressure canning so they can be there to help you in person before attempting. You should also follow all recipes when pressure canning to ensure proper times and pressure for food safety. We are not responsible for any incidents or illnesses of any kind that may occur while you pressure can. You pressure can at your own risk.
Okay, now that all of the safety disclaimers are out of the way, let’s get started.
1. Buy a Canner and Read Your Owner’s Manual
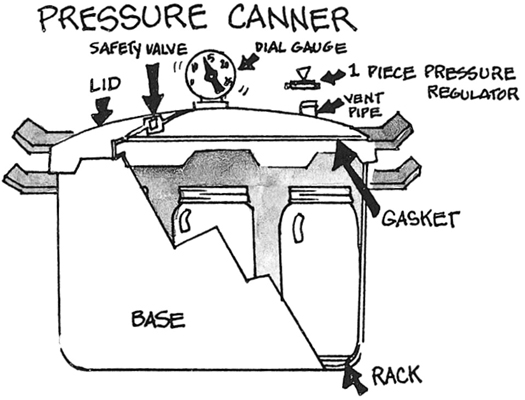
We begin this process by purchasing a canner if you don’t already have one. Here is our guide to help you along this journey of buying the right canner for you.
Once you’ve got your canner, you need to begin by reading the owner’s manual. You may think I’m beating a dead horse, but I promise, there is a reason. Pressure canning is cooking under pressure.
Therefore, if you are new to this, haven’t read your owner’s manual, and don’t have an experienced canning buddy to walk you through all of this, it could be a recipe for someone to get hurt.
So that is why I tell you to not attempt this alone and be sure to read your manual! I’m not saying all of this to scare you. I just want you to understand that this is a process that should be respected.
After you’ve read your owner’s manual and have familiarized yourself with all the parts of your canner, then you are ready to move on.
Remember, this is just a generalized guide for you to get an idea of how to pressure can. It may not include certain steps that your canner requires. That is why it is so important for you to know how your canner works.
Okay, so I think you’ve gotten how important this step is so we’ll move on now.
2. Check Out Your Canner
Now, you’ll need to check out your canner. Be sure that your seal is in place and on tight. If it isn’t, then the canner will not hold pressure.
Also, you’ll want to be sure that there is no gunk around the rim of the canner or around the pressure regulator. That is a very important part as it shows you when pressure is beginning to build inside of the pressure canner.
So you don’t want anything stopping the canner from functioning as it should. Often after many years of use, things just build up on a canner. That is why it is important to check it out before you begin canning.
3. Place the Rack in the Bottom
Most canners come with a jar rack that is supposed to fit in the bottom of the canner. It supports the jars as they are pressure canned. This ensures that as the jars are canning that they are held up off of the bottom of the canner.
And this protects them from breaking during the process. I actually forgot this one time and pressure canned a batch of jars. Only to open the canner after the process was finished, and found that most of my jars had cracked.
So don’t forget the jar rack in the bottom. It can be vital.
4. Add Some Water to the Mix
After you’ve familiarized yourself with your canner, made sure everything is working properly, and have added the jar rack to the bottom of the canner, it is time to get started.
You’ll need to take 3 quarts of water (usually) and add it to the canner. The water can just be cold tap water. There are no fancy specifications for it.
Now, you’ll want to double check your manual. Depending upon the size of your canner, the amount of water may vary. For my canners, they require 3 quarts of water.
5. Get the Jars Ready and Add Some Weight
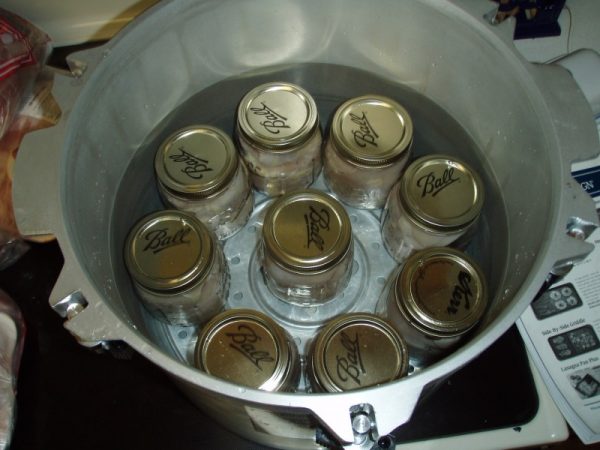
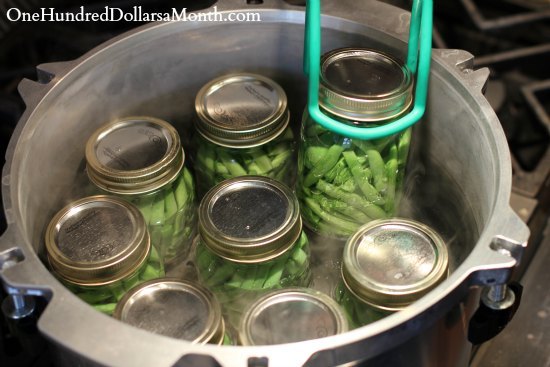
After you’ve added the water, it is time to get your jars ready. You’ll need to make sure that they each have a fresh lid placed on them with a ring tightened around the top of the jar. Be sure to place the jars into the pressure canner.
Usually, you place 5 or 6 jars in a circle in the canner. Then you place one in the middle. Larger canners can hold more, while smaller ones will hold less.
Then you’ll need to check with your recipe to see how much weight you need to place on the canner. Each canner usually comes with little rings that stand for so much weight. They are a part of the three piece pressure regulator. You’ll place the desired amount of weight on the pressure regulator.
After you’ve got your weights right, it is time to place the lid on the canner. There are notches on the lid that should match up with notches on the canner itself. Canners have locking lids so you’ll need to line those notches up and twist the lid on until you feel it lock into place.
If the lid did not lock, then it is not on correctly and will not hold pressure. Once you’ve done this, you are ready to move on to the next step.
6. Crank Up the Stove
Now that your jars have been placed inside the pressure canner and the lid is locked and ready, you are ready to turn on the stove.
So you’ll turn the stove to high and wait. It takes a while for the pressure to build. If you have a canner that has a pressure gauge, you’ll gradually watch the pressure climb. If you have a canner that has a jiggler, then you won’t know the pressure is building until the vent pops up.
Once the vent pops up, you’ll know to begin to either listen for the jiggler to start moving, or to watch the pressure gauge.
7. Listen, Maintain, and Time
Now that the pressure canner has come up to pressure, you’ll need to keep an eye on the pressure gauge or an ear out for the jiggler. I actually prefer the pressure canners that have the jiggler on top because it is hard for too much pressure to build up without you knowing it because you can hear it.
However, I will tell you, if you have a new canner the old fears of the lid flying off because of too much pressure and leaving a hole in your kitchen ceiling can now fade away. The reason is because new canners have a pressure release valve.
So if the canner builds up too much pressure, instead of the lid flying off and hurting you and your ceiling, now the pressure valve opens and releases the pressure safely.
Now, I’ve never had this happen, and I encourage you to keep that pressure release valve in your mind as a nice security blanket, but don’t neglect your canners to where it has to be used.
So once the jiggler is jiggling or the pressure gauge is at the half-way mark, you’ll need to turn the stove down a little. Not so far that you lose pressure but enough that the pressure won’t climb anymore. It is all about maintaining pressure.
Once you’ve done this for a while it isn’t hard. When I first started, I only wanted to use my canner with the pressure gauge because I could visibly see the pressure. Over time, I prefer the jiggler because I know what I’m listening for. It is all about preference.
However, with the jiggler, you don’t want it to stop, but you don’t want it dancing off the top of your pressure canner either. You just want a nice steady movement and that is how you’ll know you are maintaining pressure.
Once the vent has popped up and the pressure has begun building on the gauge, it is time to begin your cooking time. You’ll need to set a timer and keep a close eye on your canner during this time.
8. Don’t Touch the Canner
When the timer has sounded that the cook time is complete, you’ll turn the timer off and then turn the stove off.
This step is important: DO NOT TOUCH YOUR CANNER AND DO NOT REMOVE THE LID! The canner is still under pressure.
So you’ll leave the canner on the stove as it is until you see the vent drop back down into the canner. When it has dropped, you know that all of the pressure has been removed from the canner.
Once the vent has dropped, you can safely remove the lid from the canner. Be careful because the canner is hot, and the steam will also be hot.
9. Remove the Jars When Safe
Now, you can safely remove the jars from the canner. You’ll need a jar grabber and a hand towel to help you safely grasp the jars.
Then you’ll transport them to a safe location on a table or counter. Be sure that a towel or mat is under the jars before placing them on the surface. They will burn a surface quite easily.
Next, you’ll want to make sure the rings on the jars are still secure. This will help with the sealing process.
Again, use an oven mitt or towel in this process so you don’t burn yourself. Then you’ll wait to hear the ‘ping’ sounds to let you know that the jars are sealing. Wait for 24 hours.
10. Wait and Put Away
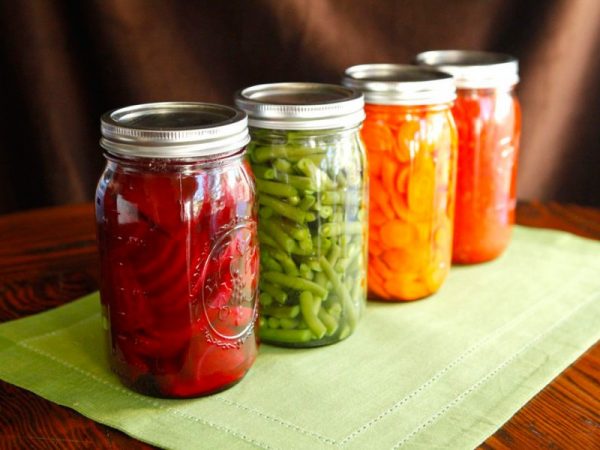
After waiting 24 hours, you’ll want to run your finger over the top of the lids of the jars. If the top is smooth, they are sealed. If the button on the lid is still up, you’ll need to throw that lid away and try processing it again with a fresh lid.
Once you know all of your jars are sealed, you’ll want to label the jars, and then put them away.
Congratulations! If you made it all the way to the final step, then you just pressure canned! I know it is scary at first, but the more you do it, the more confident you will become in your abilities.
Hopefully, this guide will be a little encouragement to those that are considering trying out pressure canning. It is a great way to preserve almost any food. I hope it helps you.
