Remodeling. It can be fun, but it can also be an exhausting process that taps you of cash and sanity. Don’t let the latter happen to you.
We’re working on remodeling our second house. Our first was interesting because the entire thing had to be redone to become livable.
Our new home only requires a few updates. Because of the lessons learned when remodeling our first home, when it came time to renovate our new kitchen, I knew exactly how I was going to handle the countertops.
If you love butcher block countertops, then you will love this DIY alternative. Creating your own butcher block countertops is easy and cost-effective.
Here’s how we made and installed our own butcher block countertops:

You’ll Need:
1. Out with the Old
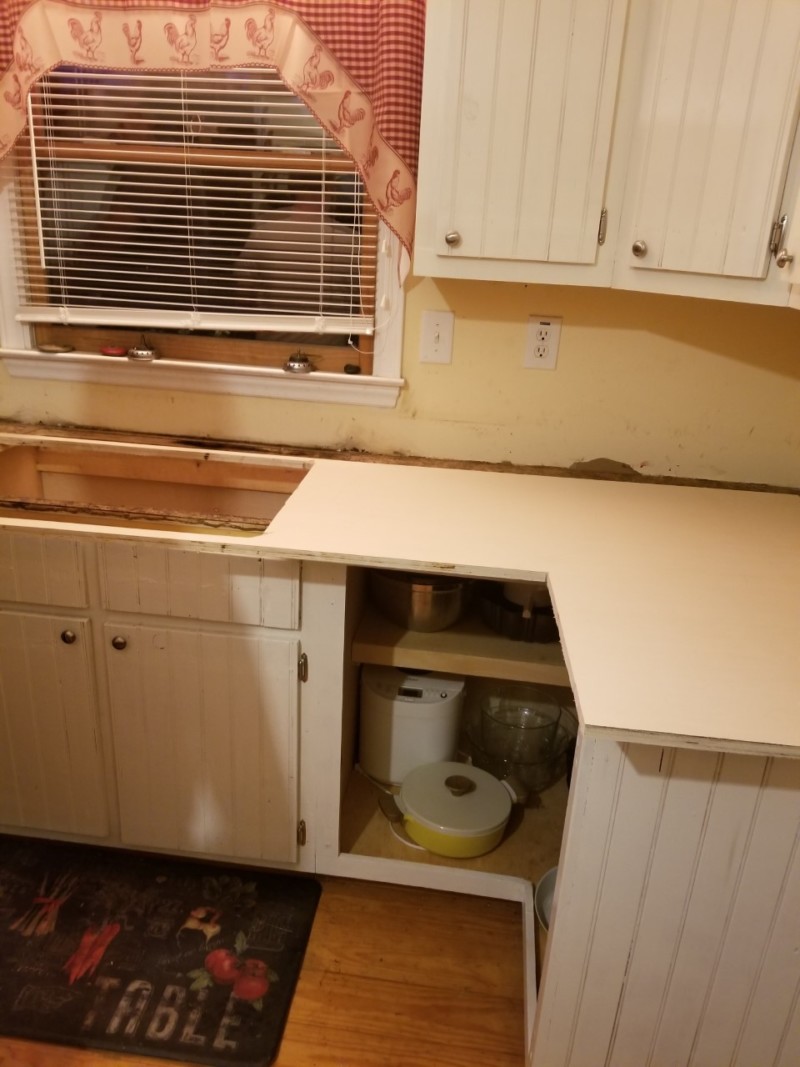
The first step to putting in new countertops is to remove the old ones. Remove any old trim, backsplashes, the sink, and old countertops.
However, leave the wood underlay beneath the countertops. It will serve as the support for the new countertops and make them thicker as well.
You’ll probably have to use your hammer to beat the trim loose. Be sure to watch out for your fingers to avoid a sore thumb.
When everything has been removed, be sure to discard each item using the appropriate method. If you’re going to reuse your sink, be sure to keep it in a safe location, and don’t be afraid to upcycle any items.
2. Measure and Mark
Once the old has been removed, it’s time to focus on the new. Pull out your trusty tape measure and see how long your countertops are.
Be sure to measure accurately because if you’re off a little, it could cause you to either cut too much or to have to make multiple cuts to make the wood fit correctly.
When you know what measurements the plywood should be cut, use your skill saw and cut the plywood to match.
After the plywood has been cut, bring the wood back to the counter and, using a pencil, mark the edge of the counters. Be sure to mark on the underside of the plywood.
Be sure to mark where the sink goes in the counter as well. When everything is marked, remove the plywood from the counter.
3. Time to Cut
We have a large front porch where we did most of our cutting because it was convenient. When the plywood had been marked, the wood was taken to the front porch to cut everything to shape.
The skill saw traced the pencil marks. You’ll probably need a few people to help hold the wood still while you cut.
Be careful because a skill saw will jump around on occasion. Make sure you stand far enough back to avoid getting hurt if the saw jumps from the wood unexpectedly.
When you’ve traced the edges where the counters stop and also traced around where the sink fits, you should be left with wood resembling a countertop and a hole in the middle for the sink.
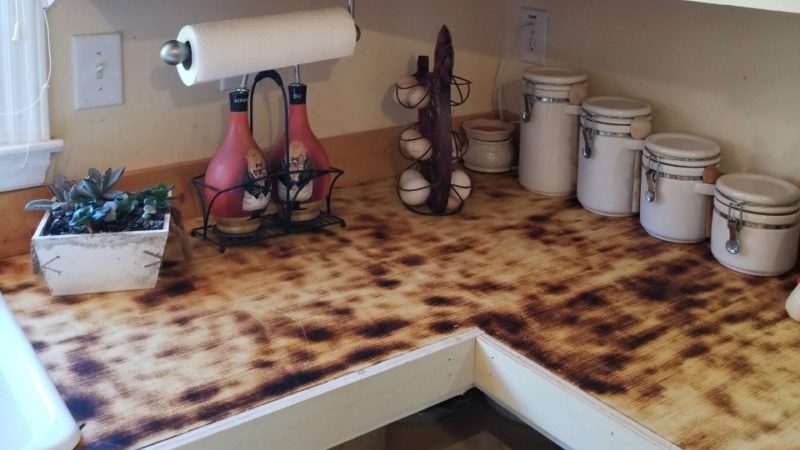
4. Burn Baby Burn
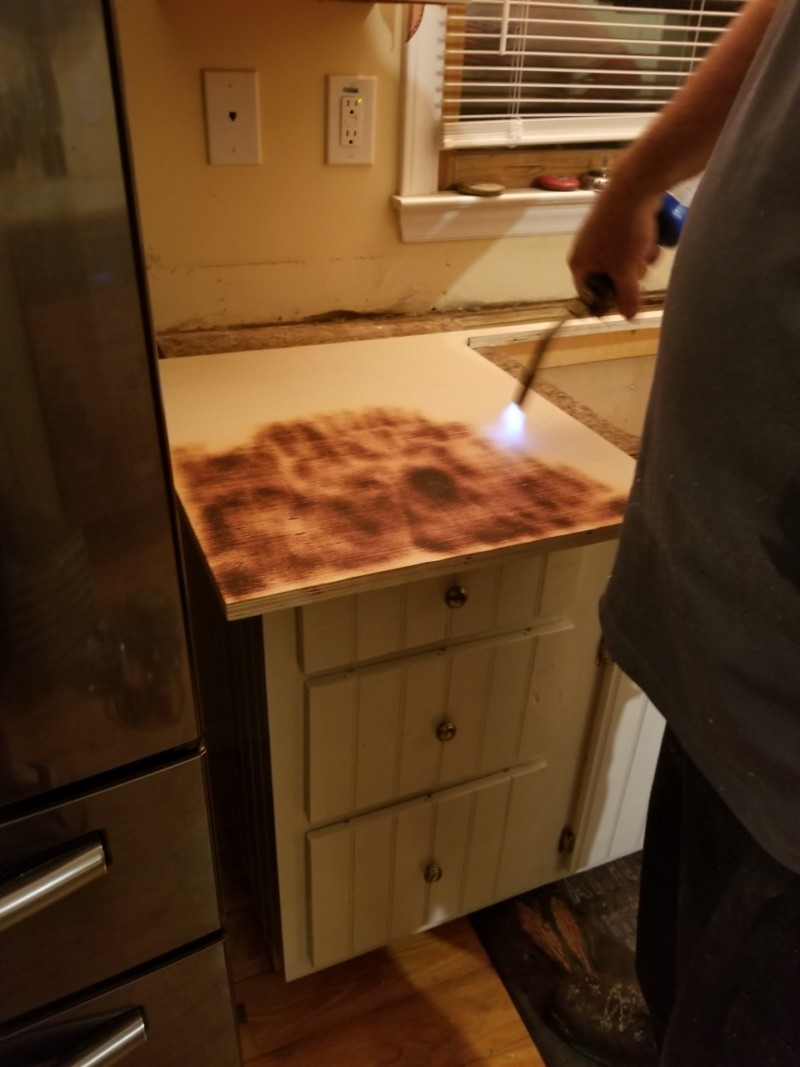
I’ll admit, this part of the process made me a little nervous. It can be skipped, but we chose to go with it.
When we created wooden countertops in our previous kitchen remodel, we didn’t burn the wood. I prefer the darker color, and I also wanted to make sure our wood was thoroughly sealed.
Last time, our counters turned out fine, but I wanted to give this extra step a try this time around. It’s a personal decision and up to you.
If you’d like to burn your countertops, pull the plywood away from the walls and away from anything which could catch fire.
Lightly braze the wood with your torch. Don’t leave it on any one area for too long because you don’t want the wood to catch fire.
The torching will make the wood darker, bring out the design in the wood, and it also helps to seal the wood.
Sealing the wood is important because you don’t want food to get into your countertops when preparing food. We’ll utilize another step to continue to seal and nourish the wood later on.
However, because this can help seal it, it was worth the extra time.
5. Apply What You Know
After the wood has been cut to match your measurements and has also been scorched, you’re ready to apply it. You’ll probably need a friend to help carry and fit the plywood where it should go.
When the plywood is in place, use your nail gun and nails to secure the wood to the original counter. Place multiple nails at the edges because you don’t want the countertop to bow up.
It’s important to nail along the back and front side edges as well to secure the countertop as well. The idea is to place where the trim will go to cover any nails from view.
6. Rub It Down
With the countertops in place, it’s time to seal and nourish the wood. Use a dry rag and mineral oil to accomplish this.
I poured a decent amount on the counters and used the rag to evenly apply the mineral oil to all parts of the countertops.
When the wood has soaked up the first coat, I applied a second. Until the wood felt fully covered with oil, I kept applying.
The idea is to leave the countertops feeling damp with oil and glistening. When this happens, you’ve applied an appropriate amount of mineral oil to your wood countertops.
You can go ahead and put your sink in at this point as well. It shouldn’t hurt your counters, and you don’t want to be without having use of your sink for a few days while they dry.
7. Put Everything Back
Leave the countertops overnight to dry. It’s common for them to even feel sticky for a day or two after the application of mineral oil.
When the counters are dry, you can reattach the trim and backsplash to the outskirts of the counter and walls.
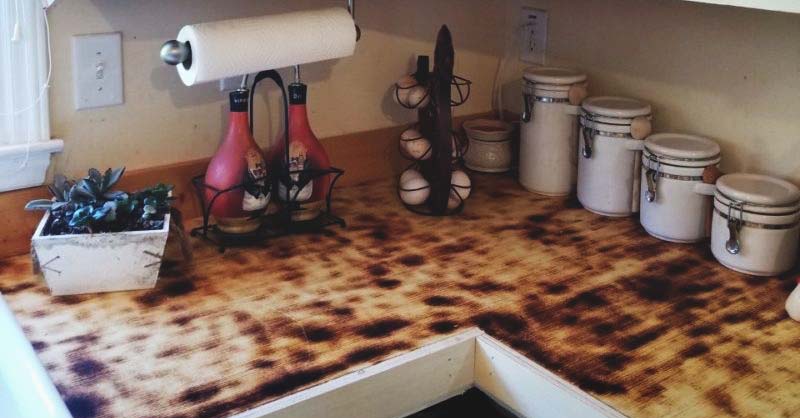
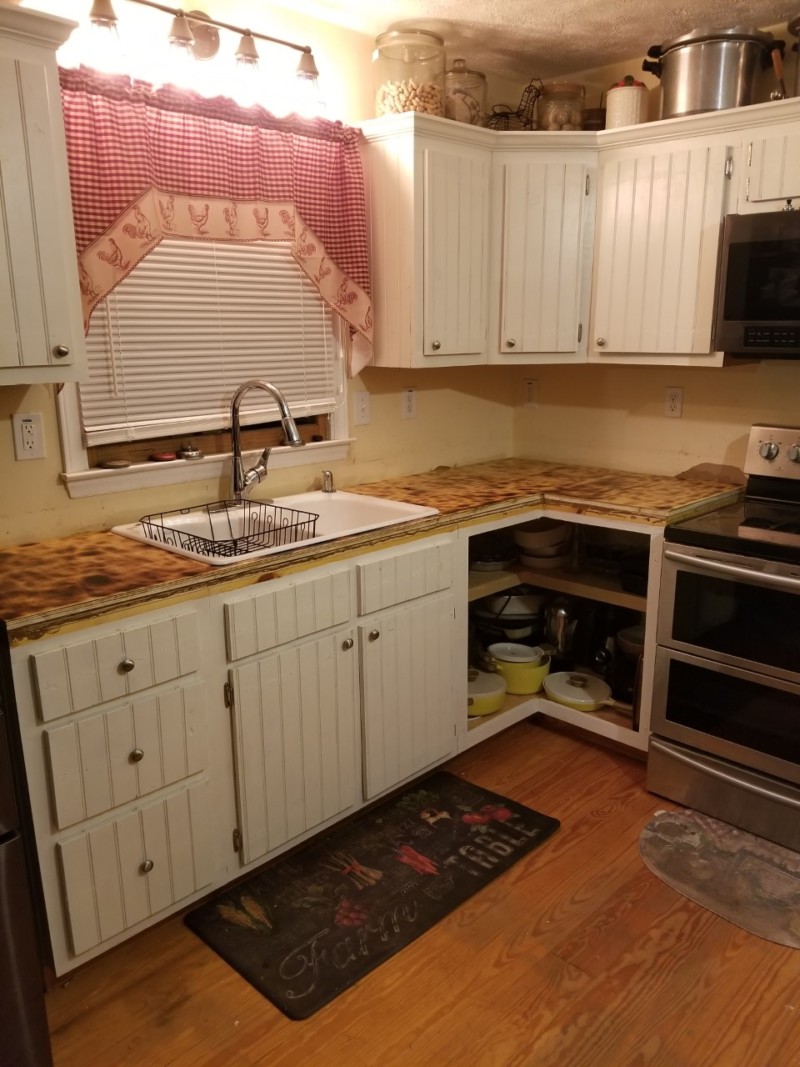
Also, when the counters are dry, you can begin using them again. Put any canisters you may have removed or any appliances back on them as well.
Your kitchen can now be used normally as it would’ve been before the remodel.
8. Maintenance Is Important
Though the kitchen remodel is done, the maintenance is not. Butcher block countertops are cost-effective and a gorgeous option for counters.
However, they need to be well cared for. If you don’t, the wood becomes porous and will crack. Which isn’t good for the appearance of your kitchen nor for food safety.
Therefore, you must apply mineral oil to your counters in a healthy amount once every 2 weeks for the first 6 months. This maintenance task isn’t an expensive thing to do, nor is it a huge chore, and will make your countertops healthy.
After 6 months, you should oil them once a month or once every other month. The idea is to keep the wood looking and feeling healthy.
If at any time your countertops begin to look or feel brittle and dry, don’t be afraid to add more mineral oil to them.
So this is how you make and install your own DIY butcher block countertops. Hopefully, this will bring new life to your kitchen without breaking the bank.
Butcher block countertops are functional and easy to care for. I hope you’ll enjoy your countertops as much as I’ve enjoyed mine over the years.


