It was a steamy summer day when we first set foot onto our homestead.
At the time, it was a piece of overgrown land with a double-wide trailer on it that was deemed uninhabitable. We got a killer deal on it and just like that we put our money down and purchased our future homestead.
However, the house had no floors, only sub-floors. It wreaked of dog urine and it was extremely outdated and had been foreclosed on twice.
Basically, it needed a lot of work. However, we didn’t want to spend more than a thousand bucks. So today I’m going to share with you how we created amazing floors in our kitchen for a little over $100.
Here we go…
What You’ll Need
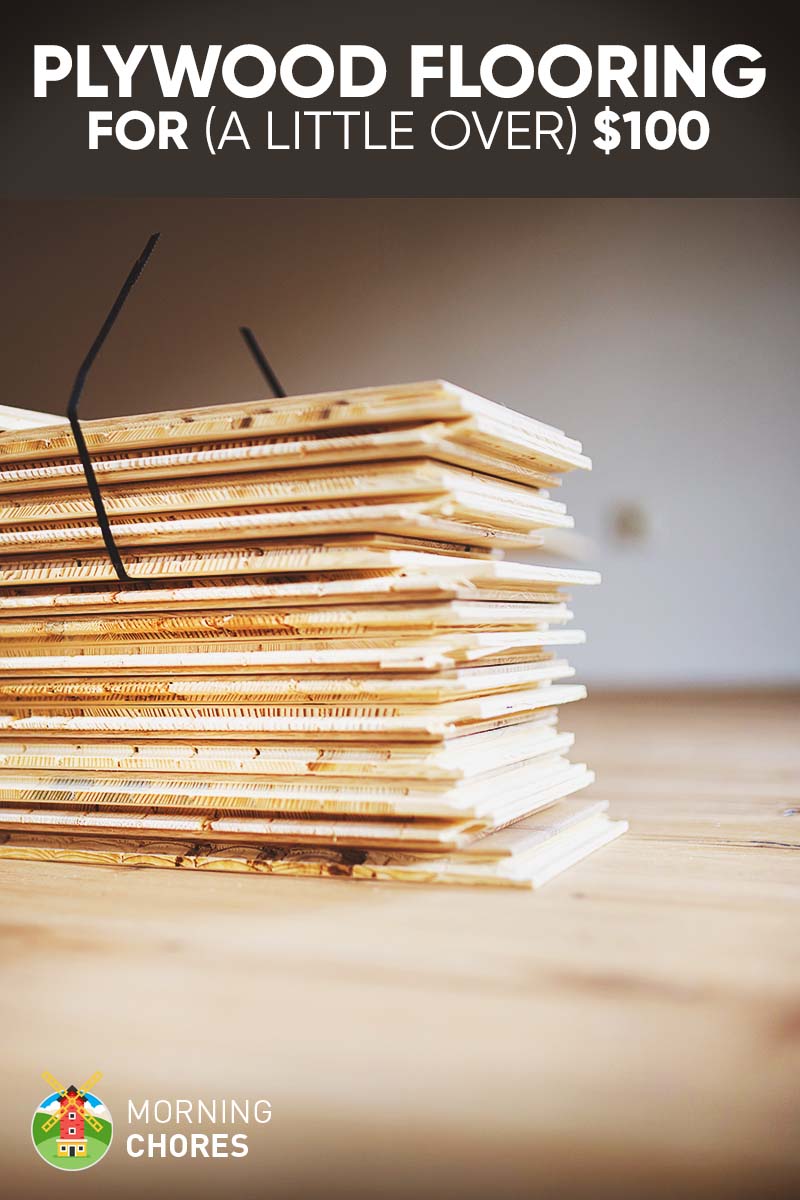
- Plywood
- Nail Gun
- Nails
- Sander
- Table Saw
- Stain
1. Get the Idea
You might be wondering why we decided to create our own floors. Well, truthfully, we were on a budget (as always), and we needed a new kitchen.
We went to our local home improvement store and thought we would just purchase some quality laminate flooring. We did lay cheap laminate floors when we first moved in, but they cracked very easily.
When we measured our kitchen and compared it to the cost of laminate flooring, we soon realized we would be spending almost $600 just on the flooring. That didn’t include the padding that went underneath.
So this was a huge issue as we only had a $1,000 budget! Well, we went to Pinterest and started looking for DIY floors and that is where the idea of rustic farm floors came about. There were some videos and articles on how to do these a little differently than we did but I feel like our method worked great. Not only that but it was also efficient, and cost-effective.
2. Measure and Buy
Next, you need to measure the space where you want to apply the wood floors. For us, the measurements were 15 x 8-feet. Once we had our measurements in hand, we went to our local home improvement store and purchased already sanded plywood.
You can purchase the cheaper option which is the rough cut plywood. It is about half the price but does require a lot more sanding. My elderly mother-in-law lived with us at the time so we had to be quick and get our house back together.
The already sanded plywood suited us better. However, this is completely up to you and your budget.
You also need to purchase a nail gun as it makes your life a lot easier. However, before getting one (especially if you’ve never used one before) make sure you are knowledgeable about the safety precautions.
Also, purchase the appropriate nails needed for the project. One pack should do the trick as it doesn’t take many nails to nail the boards down securely.
You’ll also need a sander and a good table saw if you don’t have them already. We were lucky enough that we already had all of the necessary tools on hand.
3. Cut Your Plywood
Here’s a nice video on how to break down plywood:
I have heard that certain home improvement stores will actually cut your plywood to the correct size for you.
However, our local store didn’t do it for us. We had to go home and cut it ourselves. If your local store is just like ours then you’ll have to cut the boards yourself. Set up your table saw and cut your boards to 6-inches by 48-inches long. The trick to this step is to try and cut your boards as straight as possible.
It will make laying them much easier. However, if by some chance you don’t get them perfectly straight don’t panic, you can still get them to work.
My husband and I made this project a 2-person operation. He would feed the boards into the table saw, and I would help guide them off of the table saw and stack them.
And that is all there is to it. You will have your floor at this point.
4. Lay Your Floor
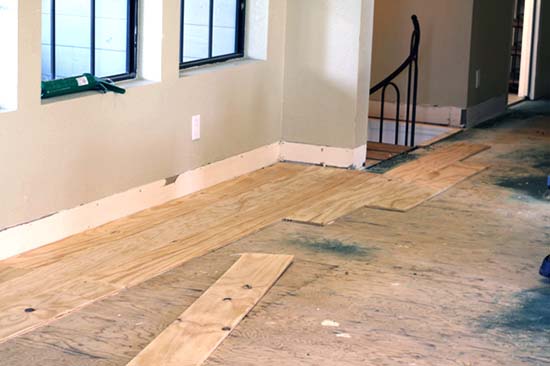
You will lay this floor just like you would any other laminate style flooring. You will start laying one row of boards and run all the way to the end of the space. And then start on the next row.
However, this is where our method differs from a lot of the other farmhouse floors. Some people place a coin in between each board. This gives it a little bit of a more rustic look.
Even so, we did not do this for two reasons. First, this would have added one more step in our DIY process and we just didn’t like it enough to take that extra step.
Second, unwanted gunk can easily be caught in those cracks. I personally did not want the challenge of having to clean the gunk out of those cracks. However, you know gunk is probably inevitable in the kitchen.
If you are placing these floors in a room where they might be less likely to catch all of the unwanted dirt and gunk in them then you might want to consider placing the spaces between boards.
For us it wasn’t the right choice. So it’s up to you.
5. Sand the Floors
The next step is rather self-explanatory. You will take your sander (even if you purchased the sanded plywood) and go over it. Unfortunately, you will feel this step on your back. I’m actually the one who did this part of the project because I’m shorter. I also did it bare-footed.
That way when I was finished sanding an area I could rub my feet over it and see if it was smooth enough to walk on without socks or shoes.
If not, then I’d go over it some more. You’ll just keep repeating this process over the whole floor until it is sanded to your preference.
6. Clean Them Up
Now, you’ll clean up the floors. Be sure to go over them with a good broom, vacuum cleaner, or shop vac because you want to get as much of the debris up as possible so when you apply the stain to the floor nothing will show.
We did this by using our shop vac. I didn’t include it in the tools needed list because this can be accomplished with a broom or with a good vacuum cleaner.
Be sure to walk on the floors with bare feet again so you’ll be able to feel how clean they actually are.
7. Stain Them
This next step is very simple and gives the floors a finished look. Once your floors are sanded and cleaned it will be time to add some stain.
You can add a simple coat of polyurethane which will leave the floors the lighter color of the plywood but will still give the floors needed protection from liquids falling on them. Or, you could also add a darker stain if you desire a deeper look.
We actually chose to whitewash our floors. Let me tell you why: it gives our kitchen a rustic, country charm that I really desired when we remodeled it.
Yet the best part of having whitewashed kitchen floors is that they are actually great at disguising the dirt. When I sweep my floors, I’m amazed at how clean they look yet I get up a lot of dirt.
Now is probably a good time to request that you don’t judge me for having dirty floors. I have children and a husband that don’t believe in wiping their feet before entering the house.
Fortunately, the floors shine when you mop them because your floors (that never looked dirty, to begin with) are bright and white like new again. So needless to say I absolutely love and don’t regret my choice of whitewashing.
You still need to know how to apply the stain, though. We actually added a broom handle to a roller brush. Then we painted our floors like you would your kitchen walls. Just try to apply it as evenly as possible.
Also, be sure to give your floors time to dry. Then add another coat of paint to the floors. Once you are pleased with the color then you can quit covering them.
Now you are ready to enjoy your floors.
How to Clean and Repair Your Floors
The best part about these floors is that they don’t require anything special to clean them. You will need a heavy old fashioned mop and some hot, soapy water. Then you’ll just wring your mop out from the soapy water and go over the floors.
If you have some dirty spots that are stubborn to remove, add a little pressure and they should disappear rather easily.
If by some chance something happens to your floors, you don’t have to take up the whole floor. You will simply cut another board to size and pull up the bad board or boards and replace them like you did when you put the floors down.
It doesn’t get any easier to clean or repair any floor than that.
Well, there you have it! We actually put these floors down in our kitchen for a little over $100.
So hopefully this will give you an idea of how to remodel your homestead house on a budget.


