Facts are facts.
If you own a lawn mower long enough, you’re going to have to figure out how to fix it at some point or another.
There are some common problems with lawn mowers that you can assess and possibly fix yourself, before taking the costly step of getting a lawn mower repair service.
I’ll tell you upfront, I’m not a lawn mower mechanic and take no responsibility for your experience. However, on my homestead, we have had to learn to problem solve ourselves.
If you’re interested in checking into a few theories as to why your lawn mower could be giving you fits, here are a few things I’ve learned by trial and error over the years doing our own lawn mower repair:
The Lawn Mower’s Engine
A lawn mower engine has many parts, and each part could be the potential cause as to why your lawn mower isn’t working properly. Here’s how I go about checking into each part of our lawn mower engine:
1. Disconnect the Spark Plugs
Safety is first in my book no matter what I’m working on. When you’re dealing with any kind of engine, it should be disengaged before you begin working on it.
Make sure you disconnect the spark plugs because the engine can’t crank without them being in place. Remember to wear your protective goggles and gloves too.
2. Check the Spark Plugs
Spark plugs are a small component of the engine yet; they can cause big problems if they aren’t functioning correctly.
Therefore, check the condition of each of the spark plugs. They should be slightly brown and show some wear from use.
However, if they look corroded, melted, etc. they should be replaced. It’s also a good idea to do further research as to the condition of the spark plugs.
If they’re damaged, there’s a reason. By checking into the condition of the plugs, it could show you if there’s an underlying condition.
Through research, you should also be able to figure out how to fix the condition which is damaging your spark plugs.
Some conditions could be as simple as the oil not being changed frequently enough. Regardless, checking on the spark plugs, their shape, and why the spark plugs would be damaged, could help save further expense on your lawn mower.
3. Check the Ignition System
Lawn mowers have different ignition systems. As a general overview, check all the wires in the ignition system to make sure they’re all intact and clean.
If you notice a problem, research what type of ignition system your lawn mower has. You should be able to locate a diagram of the system through research.
Once the diagram is located, it will give you an idea of how the system should look, what parts might be in need of repair, and should point out any other issues you may have going on with your ignition system.
4. Carburetor Care
Carburetors can hold power in many mechanical situations. I’ve learned a great deal about carburetors when helping my husband fix up an old boat. If the carburetor isn’t cleaned and well-maintained, you’re going to have issues with the equipment running efficiently.
To begin, remove the carburetor and check each part. In my experience, the carburetor has tiny holes throughout it.
When the holes become clogged, your lawn mower can develop problems. It’s a good idea to start by cleaning each hole of the carburetor with a wire brush.
If you battle cleaning the holes, place the entire carburetor in lemon juice and let it soak for a while, then try cleaning it again.
When the carburetor is thoroughly cleaned, if it still isn’t functioning, check each part to make sure it’s functioning as it’s supposed to.
If it isn’t, replace the malfunctioned part of the carburetor and reapply the carburetor to the mower.
5. Fuel Lines Matter
If your fuel lines are having issues, again, your lawn mower will have issues. Problematic fuel lines affect whether the lawn mower get adequate amounts of fuel and it not.
When the lawn mower doesn’t get enough fuel, it won’t run. Some mowers have a hole in the gas cap. If this hole becomes clogged, the lawn mower won’t function properly.
Therefore, check the hole in your lawn mower cap to make sure it’s clean.
Next, check the filter on the gas tank. If it’s filled with gunk, use a wire brush to gently clean it.
From there, begin checking for holes in the gas lines. You can also run a long wire brush or a pipe cleaner through the lines to dislodge any blockages.
6. Intake Valve and Exhaust Valves
The intake valve’s job is to shoot the air-fuel mixture inside the combustion chamber. The exhaust valve’s job is to release the carbon monoxide and any leftover from the combustion.
These valves have a camshaft which moves them. The camshaft is driven at a specific rate by the engine. Obviously, these parts must work together in time, or your lawn mower will have a problem.
The valves can collect gunk which will stop the camshaft from moving as it should. Therefore, you should clean the valves and camshaft by hand or by using a cleaner.
If the valves are leaking, it’s most likely due to lack of oil changes. Change your oil and replace the valves if you notice this issue.
If the valves have become damaged, they’ll allow fuel to pass through at the wrong times. It will reduce the combustion within your mower. The valves should be replaced if you notice any damage to them.
7. Clean Spark Arrestor
This is a simple component of your lawn mower, and it sometimes goes overlooked. Its job is to catch any sparks your lawn mower may produce to prevent fires from happening.
By law, this piece is required on any outdoor equipment. The spark arrestor should be cleaned with a wire brush. By gently rubbing the brush over the part, it should remove any clogs.
8. Pistons and Gaskets
When trying to clean your lawn mower engine and locate potential issues, it’s easy to damage a gasket. If you’ve done everything listed above and things still aren’t running smoothly, try replacing the gaskets.
We also know pistons and their corresponding rings can have an impact on how your mower runs. Looking into this will require you to split your engine into two parts to access the pistons.
If you’re not an experienced mechanic, I wouldn’t recommend doing this step yourself because you can easily damage your lawn mower.
Don’t be afraid to take the lawn mower to a friend who is more experienced or a local repair person, if you’re under the impression the pistons could be a problem.
My Lawn Mower Won’t Start
If your lawn mower won’t start there could be a few potential issues. They’re easy enough to figure out:
1. Air Filter
If your air filter isn’t clean, it will make life hard for your mower. Before you become too flustered because the lawn mower won’t crank, take a quick peek at your air filter.
You can either use a brush to knock the dirt off the filter gently or if it’s beyond help, replace it.
2. A Dry Spark Plug
When I had a small push-mower, we had this issue many times. Check the spark plug to make sure it’s dry. It not, the lawn mower won’t fire.
Clean the spark plug with carburetor cleaner and allow it to dry before attempting to fire again.
3. Old Fuel
When you leave old fuel in your lawn mower, it can be hard on it. Fuel can be considered old if it’s been in your mower for a month or more.
If you have old fuel in the mower, siphon it and add fresh fuel. Be prepared to clean and dry the spark plug a few times because it may take a few tries to get the fresh fuel to the carburetor for the lawn mower to crank.
4. Check Fuel Filter and Lines
Your fuel filter and lines are another important part of the lawn mower and could hinder it from cranking.
Begin with a bowl and hold it under the fuel lines. Use a C-clamp to cut off fuel at each section as you work your way up the lines.
Start by checking the fuel filter. Remove any dirt or replace the filter if needed. As you work your way up the fuel line and move the clamp, hold the bowl beneath the lines.
With each section, there should be fuel flowing out. If there isn’t, you’ll know there’s a clog farther up and to keep working your way up the fuel lines.
When fuel begins to flow into the bowl, you’ll know you’ve found the clog, kink, or damaged part. Once fixed, you can put the pieces back together.
5. Carburetor
As mentioned above, the carburetor can be the answer to many issues when it comes to considering lawn mower repair.
If the lawn mower doesn’t crank, check the carburetor to see if it appears corroded. If it does, it’s time for a new carburetor.
If the carburetor looks fine at a glance, begin checking the different parts. When you locate a part which seems corroded, clogged, or damaged, replace the specific part of the carburetor.
6. Clogged Main Jet
The main jet could be another reason your lawn mower won’t crank. Clean it with carburetor cleaner. If the lawn mower still won’t fire, the engine is probably still not receiving fuel. In this instance, you’re most likely in need of a new carburetor.
7. It’s Running… But Not Well
Your lawn mower cranked. Happy day! Yet, it’s running choppy and unsmooth. You’re not sure how long it will continue to run in this condition.
It’s most likely still a wise decision to replace the carburetor. Sometimes it can be the difference between equipment barely running and running like a champ.
Help! My Lawn Mower is Blowing White Smoke

Your lawn mower is blowing smoke. What should you do?
The answer can range anywhere from ‘do nothing’ to ‘do a bunch.’ If your lawn mower is blowing black smoke, it’s burning more fuel than it is air.
If the lawn mower is blowing blue or white smoke, it means the mower is burning oil. Don’t panic because this could be a simple fix.
Lawn mowers are meant to work at certain angles. Let’s say you became carried away and ran over something which jolted your mower at a steeper angle than intended.
At this point, oil could’ve leaked. The lawn mower will burn the oil off, and life is good. If you notice the mower only blows smoke briefly, you’re probably in the clear.
However, let’s say the mower continuously blows smoke. This could be anything from the crankcase’s breather, a blown head gasket, or an old cylinder or rings.
Check all of these possibilities and again, you may need to call in a professional or someone more experienced to help.
My Lawn Mower is Sputtering
Yes, I’ve been here too. It’s frustrating when you go to mow, and suddenly the lawn mower sputters and spits at you.
There could be a variety of reasons for this happening too:
- Stale gas
- Dirty carburetor
- In need of an oil change
- A damaged spark plug
I’ve mentioned most of these problems above and how you can go about correcting them. Remember, if you have a damaged spark plug, research the condition of the spark plug to diagnose any underlying issues before replacing the spark plug.
After reading this overview, hopefully you know more about lawn mower repair. It should help you have a better idea of how to diagnose any issues before taking the expensive step of taking it in for repairs.
If you’re new to working on lawn mowers, don’t get frustrated with yourself. I’m not mechanically inclined, and it took me longer than my husband (who is mechanically inclined) to get the hang of each part.
With time, patience, and lots of research you should be able to diagnose and work out many of the issues which may arise when owning a lawn mower.
How to Winterize Your Lawn Mower
It’s important to look after any mechanical investment, and your lawn mower will need special protection over the winter since it will go unused.
Winterizing your lawn mower is not hard. Here’s all you need to know to take the best care of your lawn mower this winter:
1. Cover is Important
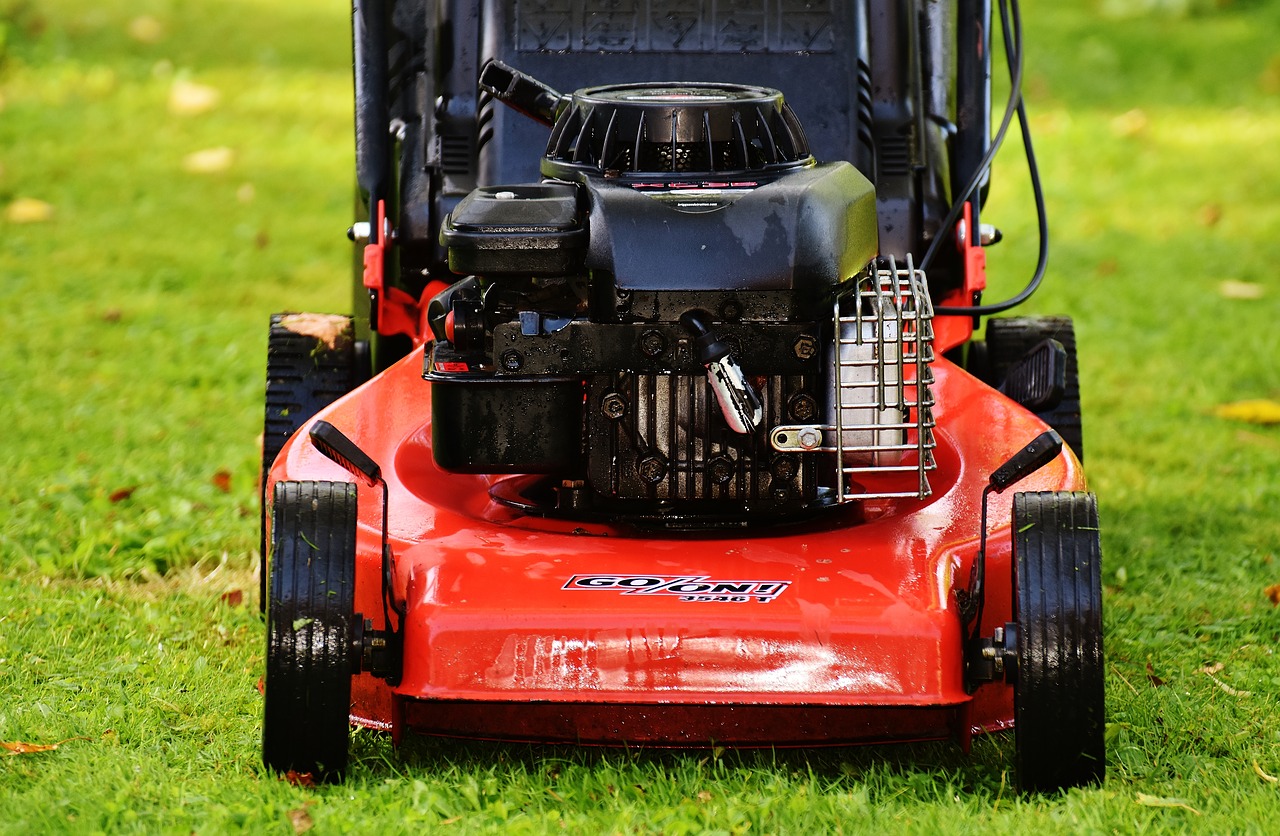
If you expect any piece of equipment to last, one of the most important steps you can take is to give it proper cover from the elements.
We all know winter can bring anything from cold temperatures, rain, ice, and snow. None of which is great for your lawn mower.
It can cause moisture build-up which invites corrosion and rust. Be sure to give your mower a proper cover, store it under a carport, or in a garage.
2. Iron Sharpens Iron
You guessed it. Before you put your mower up for the year, it’s time to perform basic maintenance on it. Basic maintenance could be anything from sharpening the blades, to oiling exposed moving parts on the mower.
If your mower has been having issues over the season, it’s a good idea to fix the problems before retiring it for the season too.
This will take one more thing off your busy spring to-do list. Before putting your lawn mower up for the season be sure you’ve made all necessary repairs, oiled everything down to make sure it won’t rust or worsen over the winter, and also sharpen your blades to make sure the lawn mower will be ready to use when spring rolls around again.
3. Time for an Oil Change
After running your mower all season, it’s a good idea to put fresh oil in it before putting it away.
Some people prefer to change it after a season’s use because they don’t want dirty oil sitting in the lawn mower all winter.
However, some prefer to do it at the start of spring to make sure there’s no moisture in the oil. The danger of changing the oil before winter is condensation could build up in the mower and add moisture to it.
However, if you top off the fluids in the lawn mower, theoretically, there shouldn’t be room for condensation to form. This is a personal decision you must make. Either way, be sure the lawn mower gets an oil change before use the next season.
4. Ditch the Fuel
Ditching the fuel is perhaps the item of greatest importance on the winterizing list. Be sure you drain the lawn mower of all fuel.
When you are positive you’ve removed it all, crank the lawn mower to let any remaining fuel which may have found a place to hide, burn off.
The issue with leaving fuel in your lawn mower is it becomes stale which isn’t good for your engine, but it also draws moisture to the mower.
Moisture is a problem because it can cause corrosion inside your mower. This damages parts and can create unnecessary expense.
Also, fuel can eat away at rubber and plastic parts in the fuel system. Again, this causes an unnecessary headache and expense.
Do yourself a favor and be sure to drain all the fuel from your mower before putting it away for the winter.
5. Unplug the Battery
Some people have shifted to all-electric mowers. Other people have traditional mowers with a battery. Either way, your battery needs care.
If you’re working with an all-electric mower, be sure to remove the battery over the winter and store it in a battery storage case. This case should protect it from the elements and keep the battery from draining.
If you’re using a traditional lawn mower, it’s still a good idea to either place a battery maintainer on the battery to keep it from draining or to remove the battery and store it in a safe location from the elements of winter.
6. Mr. Clean

One of my biggest pet peeves is when my husband tries to put something away knowing it isn’t ready for its next use.
Well, a lawn mower is no different. If your lawn mower is dirty, don’t put it away. You don’t want the dirt and grime to freeze to your lawn mower. It can’t be good for the paint job at the least.
Therefore, take the time to clean it well before storage. You should clean the mowing deck. Make sure all grass and debris are removed from under the mower.
Wet grass tends to stick to any place it can. Check the lawn mower to make sure it’s washed, dried, and all outdoor particles are removed.
Next, check the air filter. If it’s nasty beyond saving, toss it and replace it with a new one. If the air filter is dirty but can be cleaned, clean it.
Finally, as I mentioned above, take the time to oil any exposed movable parts of your lawn mower. If they’re starting to stick now, imagine what a few months of cold temperatures, damp weather, and sitting still will do.
Try to stay ahead of the game and anything which might need maintenance in the spring, go ahead and do it now.
7. Pay Attention to Where You Store
You may think if you store your lawn mower in a garage or carport, you’re good to go. Well, not exactly.
Accidents happen over winter. People rummage through garages and carports looking for items, they spill things, said items get all over everything, and many times the messes don’t get cleaned up because it’s cold and no one wants to freeze while cleaning it up.
In these instances, it matters where you park your lawn mower. Be sure you don’t leave cleaning supplies or fertilizers near your lawn mower.
If they get spilled on the lawn mower, they’ll cause corrosion. Again, this will hurt the lifespan of your mower.
Being careful to provide cover for your lawn mower and double checking what you park it next to can be the difference between a beautifully winterized lawn mower or a springtime headache.
We trust these tips will help you store your lawn mower in the best possible setting over the winter months.
Remember, the idea is to do what you can to prolong the life and health of your mower. An unhealthy mower will begin to give you problems. An uncared for lawn mower will eventually give out.
Lawn mowers are too expensive for them not to last. Do yourself and your wallet a favor by taking the time to properly winterize your lawn mower, as it is one of the biggest assets in caring for your yard.
