Can you imagine roasting a chicken without rosemary or dipping your chip in salsa without cilantro?
If you do a lot of cooking at home, then you already know what difference herbs can make to flavor a meal. However, if you live in cold climates where rosemary only grows well for a few months, or hot climates where cilantro starts to bolt and become coriander in April – then you also know that keeping a constant supply of your favorite herbs can be a challenge.
Luckily, there’s an all-in-one herb growing solution that extends your growing season, increases your yields, and can save you tons of time on harvesting and care.
Yes! You guessed it – I am talking about the incredible, edible herb spiral.
Why Build a Herb Spiral?
Before we get into the dirty details of building a herb spiral, let’s talk about a few of the benefits.
1. Greater Growing Space
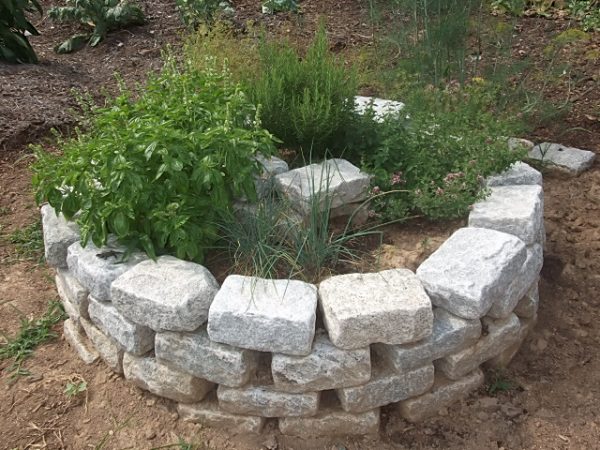
A herb spiral is a whole lot like the Tardis from Doctor Who that looks like a tiny outbuilding but houses an entire emergency center inside. By rolling your herb garden into an upward rising spiral, you can fit a whole lot of herbs into a tiny space. This might not save the world, but it can make dinner more delicious.
2. Creates Micro-climates for Season Extension
Thanks to that upward spiraling shape, you can also create multiple micro-climates in a minimal area. By situating heat-loving, dry soil preferring plants toward the top of the spiral and on the sunward-side (e.g., to the South in the US), those plants will cast a bit of shade on the root systems of cooler-weather loving plants planted below and behind relative to the sun.
The materials you use to build your herb spiral, such as rocks or bricks, provide temperature stabilizing benefits to the soil. For example, during the day, your spiral brick walls will absorb heat which they will radiate back out into the soil as temperatures cool in the evening. As a result, your soil stays warmer longer. Since plant roots are usually more tender than plant tops, just by warming the soil at night, you can lengthen your growing season for hot-weather plants and start cool season plants earlier.
3. Makes Harvesting and Routine Care Easy
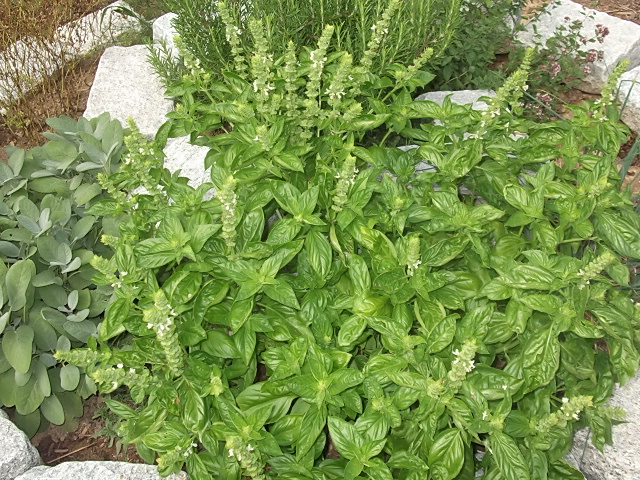
If you build your herb spiral right, you can quickly reach all of your herbs from all sides of the spiral. That means you can nip off your rosemary, basil, and sage in one go without having to walk to another area of your garden.
When you need to water, weed, fertilize, or harvest, you can reach the entire spiral by standing in one location. Thanks to the spiral shape, close plantings of your herbs, and raised-bed type environment you won’t need to do as much maintenance as you would if you grew your herbs in rows.
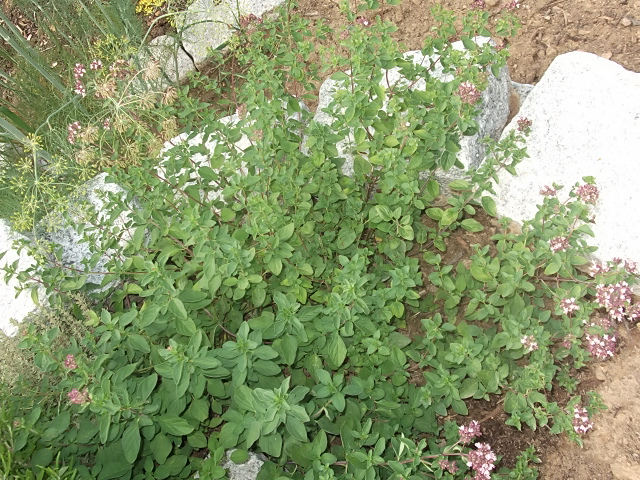
If herbs start to get out of control, it’s easy to see and snip of runners. Plus, due to the inherent space limitations of the spiral, fast-growing herbs like oregano are much slower to expand into other parts of your garden.
4. Beautiful and Smart!
Here is my favorite reason for having a herb spiral. It’s a stunning addition to almost any landscape. Even though herb spirals are super easy to make, they still seem to be an undiscovered secret.
When friends and family visit my garden, they always fall in love with my herb spiral and think we are so smart for figuring this out. Then they want to go home and make one. This is, of course, great for my ego, but more importantly, it gives me a chance to encourage my loved ones to start their herb gardens even if they’ve got no soil to work with or no garden skills to speak of.
5. Build a spiral quickly, and grow herbs in a shorter timeframe
Herb spirals are a great way to get growing in a hurry – even with no experience or tools! Which is the last reason why you need a herb spiral. They are easy to make, require no tools, and can be made with either salvaged materials or stuff you can buy at most garden centers.
Now that you know some good reasons to get one, we’re about to get into the nuts and bolts of how to make your herb spiral at home. Let me just warn you though – you don’t need precise instructions. What follows is just a rough sketch to point you in the right direction. Herb spirals are one of those projects you can easily figure out on your own, so long as you have the basic idea in mind.
How to Build a Herb Spiral
Now, let’s go nautilus (and not at the gym, you can do this in your backyard!)
1. Choose a Great Location
Most culinary herbs need at least 6 hours of sun, so pick a sun-shiny spot. If you live in a windy area, select a location that has some wind protection for best results.
Keep in mind, the closer to your house you build it, the easier it will be for you to harvest herbs when you need them. Herb spirals are so beautiful, using them as a focal point in your outdoor eating areas is also a great idea.
2. Make the Base
Just like building any raised bed, you’ll want to mow down whatever you’ve got growing in that area now. Then, cover the ground with either weed mat or a few layers of cardboard to suppress future growth.
After that, you need to create the spiral shape. This is the fun part!
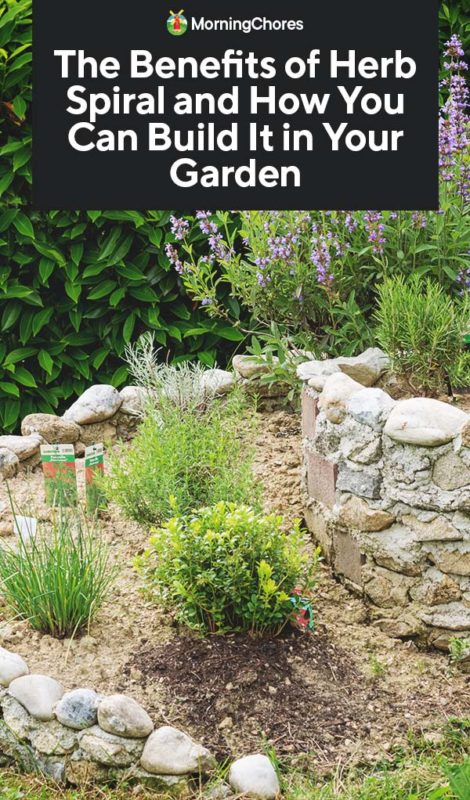
I like to layout my decorative bricks or rocks first to get the shape right. Make sure you orient the higher side of your spiral on your sunny side (e.g, the same orientation you would use if you were installing solar panels) so that the plants on the up-slope can shade the soil for the plants on the down-slope side.
Next, you create walls so that your shape spirals up toward the center. You are going to be filling those walls with good soil before you plant. That means the walls below the soil level won’t be visible.
To get the height that you need at the center, you can use whatever cheap or available materials you want, so long as they will keep the soil in place. Cinder blocks and salvaged bricks work well for your hidden center. After that, you can cap your spiral with more beautiful stones and bricks.
3. Add Soil and Prepare for Planting
Once you have your walls in place, fill your spiral up with soil. Bagged potting soil is the easiest way to go. However, you can also mix topsoil and compost or even sheet mulch to have more soil in place.
Saturate your soil so you can see if you have any leaks. If you do, then you can tuck some paper bags into your crevices to keep the soil from sneaking out until your plants are established. Once your plants have set down roots, they’ll do an excellent job of holding the soil in place by the time the paper bags decompose.
4. Plant Placement
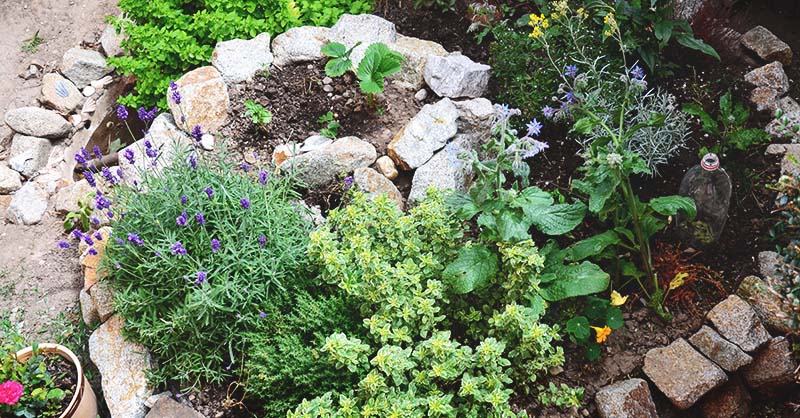
Now, you just need to take advantage of those micro-climates that you’ve created with your spiral base. Plant heat-loving perennial Mediterranean plants like Rosemary, Lavender, Thyme, and Oregano on your upper, sun-catching side. Place cooler condition loving plants like cilantro, parsley, and dill on the shadier, water-catching, lower end of your spiral. Plants such as basil and chives can go somewhere in between.
Adding a couple of inches of hardwood mulch will also help preserve water and protect roots while your plants are getting established. It also gives the whole project a more polished look until your herbs grow in and cover the bare soil.
Give your plants time to set roots and start growing. Only then can you start harvesting.
Oh, and don’t forget to invite your friends and family over to admire your hard work and ingenuity!
Go spiral!
