It’s said that necessity is the mother of all invention, and humans are certainly an inventive lot. Trees have been some of our greatest resources for tools and crafts (as well as food and medicine) for thousands of years, and pines are no exception.
If you’ve wondered how to put all those abundant needles on a pine tree to use, have we got a great idea for you.
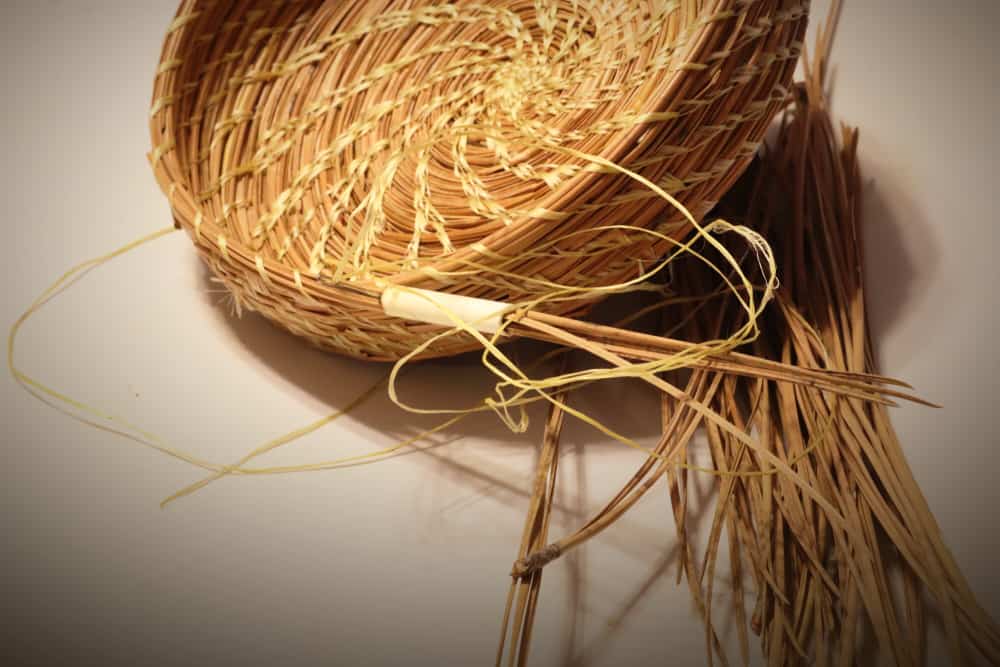
Read on to learn how to make your own pine needle baskets with simple household and foraged materials.
What Can You Use These Baskets For?
That’ll depend entirely on you. Pine needle baskets are remarkably versatile, and you can make them any size, from teensy trinket boxes to large laundry bins. I use them to store knitting notions such as stitch markers or cable needles and to hold various ingredients when I’m brewing up herbal medicines.
You can use large, shallow baskets to display dinner napkins or hold cutlery, while tall baskets are ideal for storing wooden clothes pins. Fill small baskets with cedar shavings, cloves, or rosemary and hang them in closets to fend off moths.
Alternatively, you can stuff them with lavender or lemon balm and use them to scent your bed linens or tuck them between your pillows as bedtime aromatherapy aides.
My favorite little pine needle basket sits on my bedside table, where it keeps my nighttime essentials (earplugs, passionflower tincture, lip balm, etc.) close at hand and corralled.
What You’ll Need
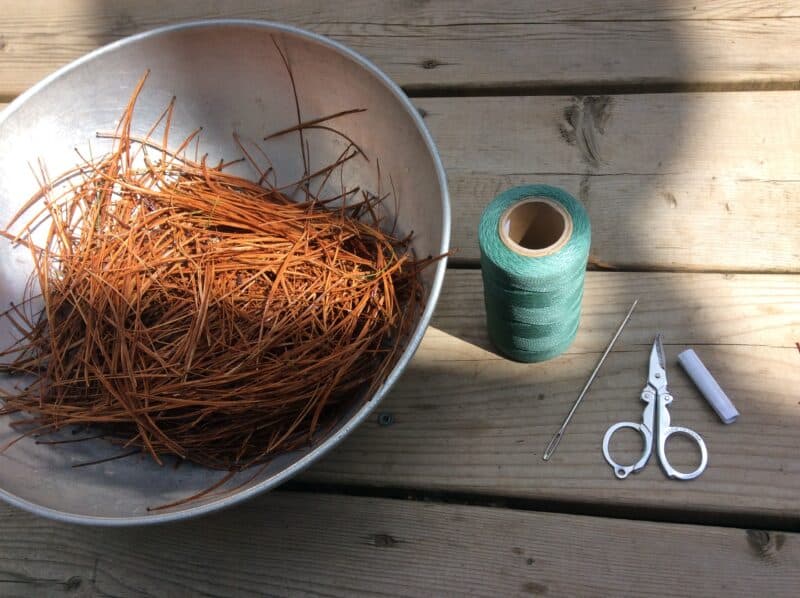
- Dry brown pine needles: collect these off the ground or take them off fallen dead pine trees. Never use fresh green needles—they’ll shrink as they dry and warp your basket. If If you had a long-needled pine as a Christmas tree, consider saving the needles for future projects!
- Dish soap
- Sinew or waxed thread
- Tube: You’ll need a hollow, firm tube about two inches long to hold your needles as you work. This does double duty for keeping the needle bundles in place and maintaining thickness consistency in your coils.
- Tapestry or darning needle
- Needle-nose pliers
- Scissors or knife
- Fabric dye (optional)
1. Gather Needles for your Pine Needle Basket
Grab a large bag, basket, or bucket, and head out to an area where there are a lot of fallen pine needles. I live in an area where white pine reigns, but we have some red pine needles as well.
Try to avoid picking up needles that have mold growing on them. This will appear as gray or brown fuzzy spots. You won’t be able to remove the mold, and it’ll spread to the other needles once woven and break down your basket quickly.
Aim for long, firm brown needles with no mottling or other discoloration.
The number of needles you gather will depend on the size of the basket you’re aiming to make. Remember that you’ll be bunching these needles into coils and sewing them together, so you’ll need quite a lot of them. It’s always better to err on the side of caution and gather more than you think you’ll need.
If you’re so inclined, consider leaving a gift for the genii loci (local land spirits) or wild animals in thanks for the needles you’re gathering. Here in Quebec, we leave tobacco, nuts, and indigenous wildflower seeds, but offerings will differ depending on where you are.
2. Wash and Soak!
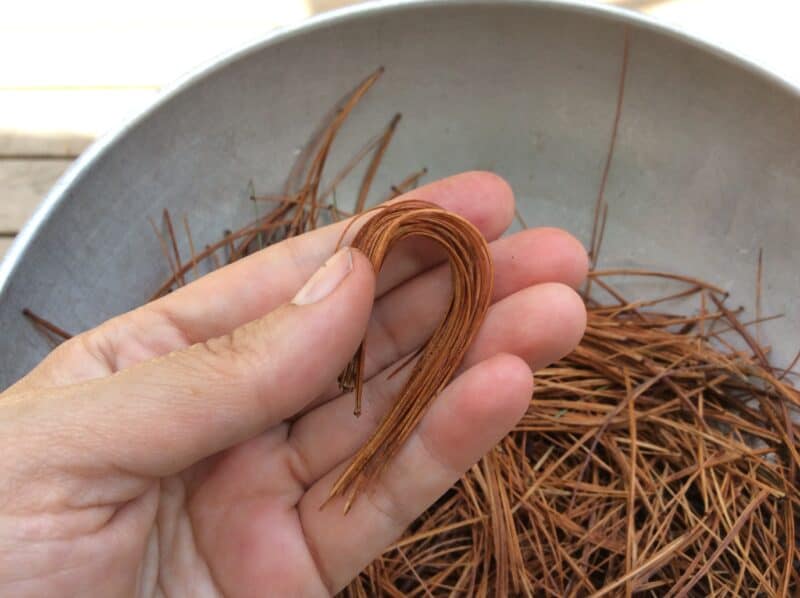
Wash your gathered pine needles in hot, soapy water to get rid of any pathogens they might be carrying.
The easiest way to do this is to put them in a pot with its own colander, like a pasta pot. Use a bit of dish soap in the water, agitate it well for a few minutes, then lift out the colander basket so the soapy water can drain off.
Pour out the suds and re-fill the pot with clean, hot water. Pop the colander back in and ensure that there’s enough water to cover the needles completely. You’ll need to soak these needles for 12-36 hours.
Since they’re dry, they need to be re-hydrated to make them pliant enough to bend and sew. Otherwise, they’ll break off while you’re working with them.
When you’re ready to work with them, pour out the water and keep the needles covered with a towel until you’re ready to use them.
*Note: If you’d like to make a more colorful pine needle basket, you can also dye some of the needles. During the soaking process, you’ll simply brew up a dye batch with fabric dye and water, and soak as many needles as you like in it.
If you aim to be as natural as possible here, you can make plant dyes from local species to tint your needles. Alternatively, you can also use Kool-Aid or RiT dyes for more vibrant hues.
3. Make Your Center Coil
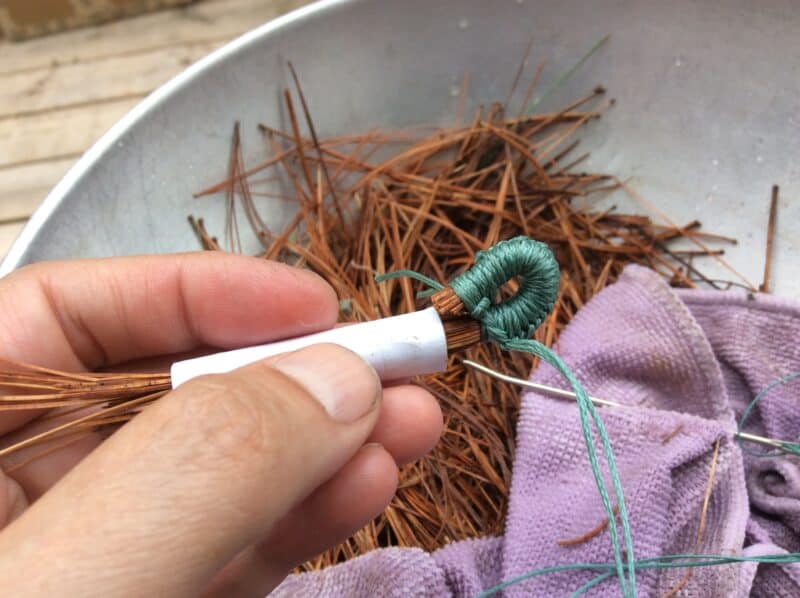
The first thing you’ll need to do is make a coil loop. This will be the center point of your pine needle basket, so it needs to be quite sturdy.
Grab a handful of soaked needles and pull the end caps off. The needle bundles should still hold together, but you won’t have those hard nubs sticking off the ends of them.
Tuck several of these into the gauge tube you’ve created, and wrap them with the sinew or waxed thread you’ve chosen.
Wrap this quite tightly, as it needs to be sturdy. When I create mine, I thread my tapestry needle with a double length of string, make a slipknot, and then wrap the thread the same way I cast on for a knitting project.
Ultimately, as long as it’s bound securely, use any method that works for you.
When you’ve wrapped enough to create a circle or spiral shape with these needles, do so, and sew that circle closed. Now it’s time to start building your basket.
It’s unlikely that you’ll be able to finish your pine needle basket in a single sitting. Store your soaked needles in a plastic bread bag, or cover them with a wet cloth until you’re ready to use them again. If they start to show signs of mold, soak a fresh batch and use those instead.
4. Coil and Sew
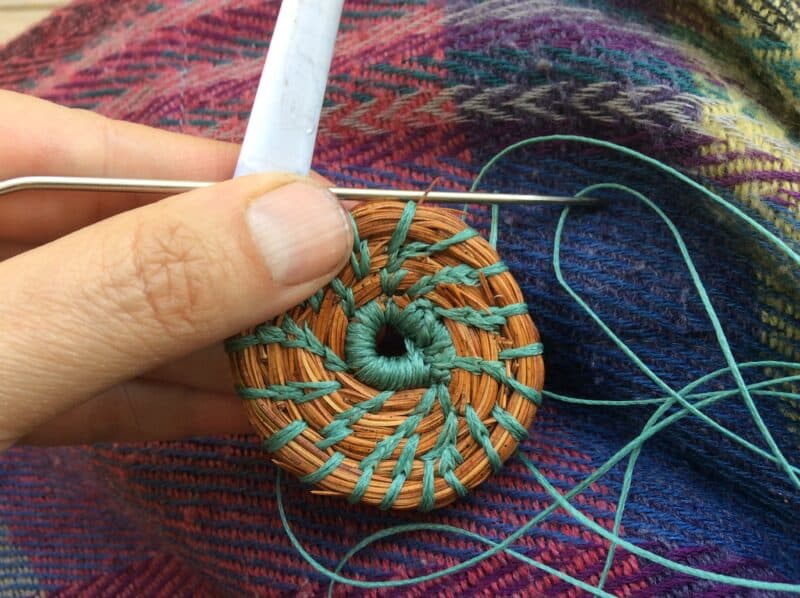
As you make your coils, you’ll need to keep adding more pine needles. You’ll do this by removing the end caps as you did earlier and then poking the ends into the center of your gauge tube.
The goal is to have the ends hidden by the needle ends around it. This will create smooth, aesthetically pleasing basket sides rather than knobby ones.
Thread about four feet of thread on your tapestry needle, and tie the ends together to create a double layer. This will secure the needles well as you go.
For the first row, you’ll sew around the coil of needles every half inch (or one cm) and secure it into your center knot. After that, the stitches around each subsequent row will be pushed through the previous row to secure them.
Aim to make “split stitches” through the stitches you made in the last row: this creates a beautiful ladder-like stitching effect and holds the coils very securely.
As the pine needle basket expands in size, you’ll need to add more stitches to hold everything together securely. Do this by sewing an extra stitch in between those of the previous row.
In contrast, if you need to reduce width so you can shape the basket smaller—for instance, if you’re going to create a lid for it—you’ll go back to making fewer stitches between the coils.
While you sew, you’ll inevitably run out of thread and have to add more. To do this, cut the thread off your needle when there are about four inches left.
Thread your needle with a new length of thread, and tie the new ends to the cut ones, as close to the needles as possible. When you sew your next stitch, draw the knot in between the needles to hide it. You’ll cut or singe off the bits that are still sticking out later.
5. Finishing, Lids, and Decorations
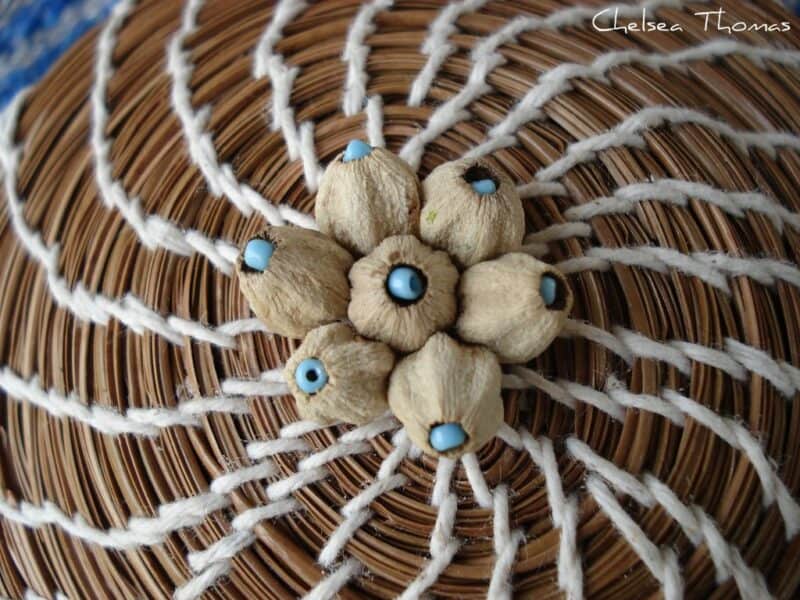
When you get close to finishing your pine needle basket, you can decide whether to make a lid for it or not. Lids are great for trinkets or storage baskets but aren’t really necessary for larger ones.
If you do make a lid, you’ll need to create a lip inside your basket for it to sit on. To do this, you can simply create a layer that’s drawn slightly inwards compared to your other coils, followed by a few coiled layers that are pushed outward again.
Then, to create the lid, you’ll repeat the same process you did when you started the basket’s body. The only difference is that you’ll stop coiling layers once the lid is the right size to nestle onto the lip you created.
As you draw towards finishing off this basket, stop adding needles to your coil gauge. Continue stitching around until the needles taper off, so the last needle you have to work with lies flat against the previous coil layer.
Finish your basket by tying off your last stitch and then drawing the needle back through one of the coils to secure it. Pull the thread taut and cut as close to the needles as possible.
This will cause the cut end to be drawn into the needle coil once tension is released, thus hiding it nicely. If there’s a loose end from your beginning stitches, poke that in between coils, or burn it to seal it off.
If a tiny bit of the last needle is sticking out, either snip it off or tuck it down into the coil below to hide it.
Repeat this process for the lid if you’ve made one.
Additionally, you’ll need to figure out a way to move that lid around. Some people also like to create a handle from pine needles, while others prefer to use tiny pine cones, twigs, or even bits of bone. If you’re going to use a cone or other small item, you can use pine pitch glue and a few strong stitches with thread or sinew to secure it in place.
Once completed, you can decorate your pine needle basket with beads, charms, or anything else you like.
Use your basket to store whatever you’d like, provided it isn’t wet or sticky! These baskets are difficult to clean, so it’s best to only store dry objects inside them. Organic matter that can be wet or gooey can get between the needles and rot them, so be sure to take proper care.
If you want to preserve your pine needle basket long-term, consider spraying it inside and out with a protective coating. A good one is Thompson’s Water Seal, but any other waterproofing spray should offer some protection as well.
Most importantly, have fun! This is a wonderful, creative process, and your basket-making skills will only improve with practice.
