Have you noticed how handy baskets can be? Whether you’re foraging, planting, or just carrying supplies, these things are pretty much invaluable. They’re also quite easy to make! Let’s grab some nice, pliant greenery and a few tools and make a willow basket together.
Why Make a Willow Basket?
You can make a basket with many different materials. I’ve made them with stripped bark, thimbleberry canes, and a variety of other plantstuffs. Willow, however, is remarkably versatile. Those young shoots (whips) that appear in springtime are nice and pliant. As they dry, they harden up into a tough, durable material that can last for years.
This type of willow weaving isn’t just for handy baskets. You can use the same technique for creating woven fish traps. In fact, you can even create fences and walls with this method if you use large, young saplings. Everything comes down to creating a sturdy weave with plant matter while it’s still pliant.
Just make sure to remove leaves and stray twig bits, if there are any.
What You’ll Need:
- About a dozen thick willow whips: These are going to form the base and handle. Some people dry out their willow bits and then re-hydrate them. This is because the willow shrinks when it dries, so they want to be sure that the whips stay a certain size. I just use them fresh, as the shrinkage is negligible.
- 70 to 200 thinner willow whips: These are your “weavers,” and the number depends on how big you want your basket to be. A larger basket will need more weavers.
- Secateurs or other durable snips
- Utility knife
- Needle nose pliers
- A weight of some kind
- Fid or sturdy work needle thinger: If you can’t get hold of a utility fid, use a thick wooden or metal knitting needle.
- An empty planter pot
- Zip tie or elastic band
Step 1: Prepare the Slath (Base)
Isn’t “slath” a great word? It rhymes with “bath” and forms the central base of what will be your basket.
Cut six to eight thicker willow whips to the same length. The length of them will determine the basket bottom’s circumference, so consider how wide you want it to be.
For a rough estimate, if you want a small basket with a 10-inch diameter, cut these pieces to 12 inches. This way, you have a bit of extra to work with as needed. If you want a large basket, let’s say 30 inches across, cut the pieces to 32 or 34 inches instead.
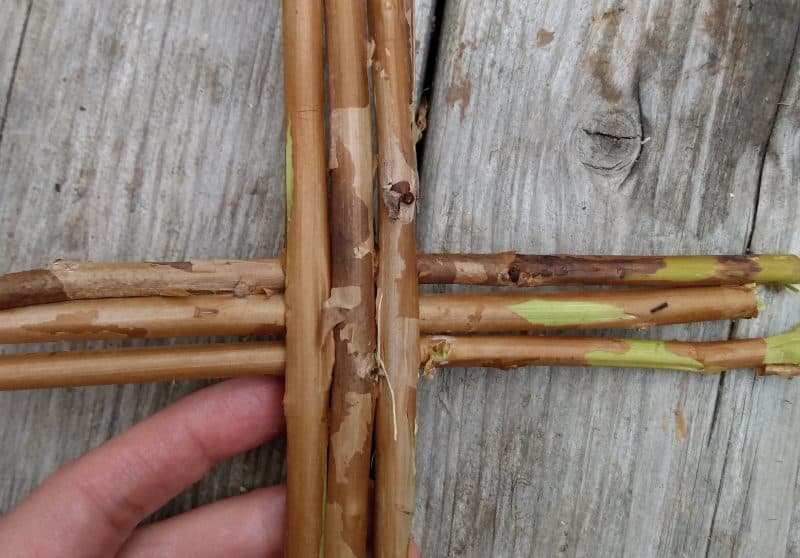
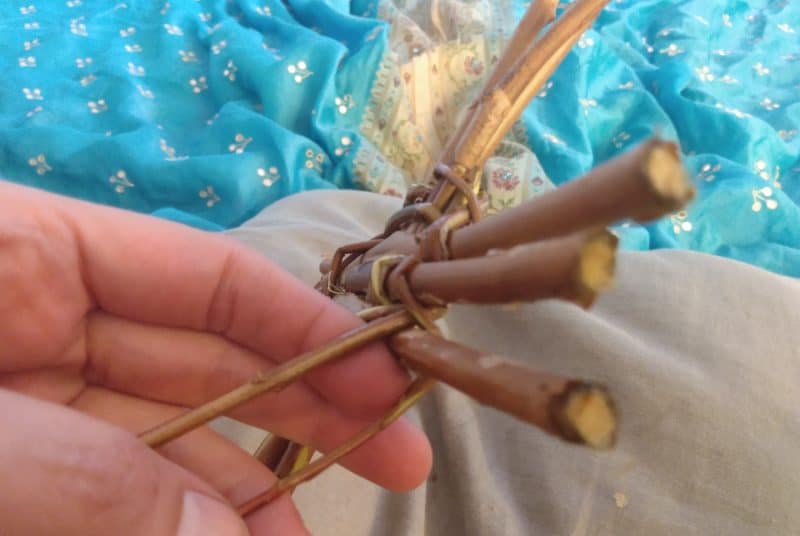
Take your utility knife and cut a two-inch slit vertically right in the center of three or four of these slath whips. I used three here for the sake of reference, but four are better.
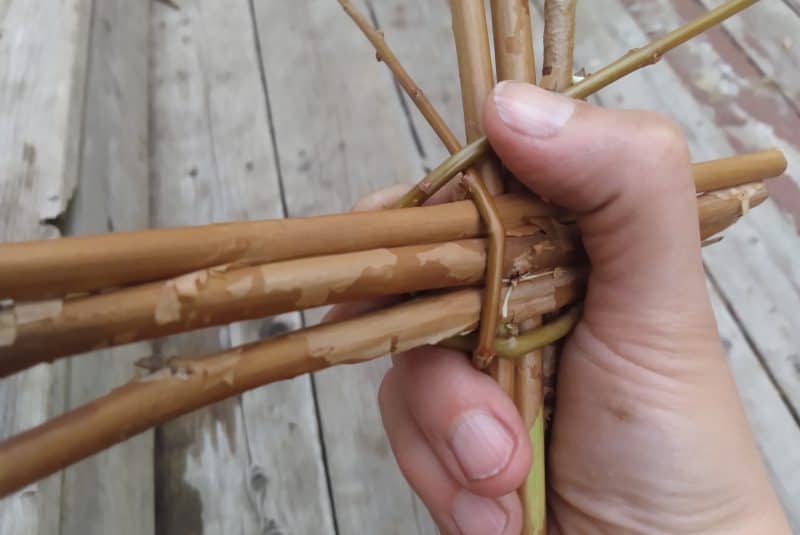
Then poke the other set through these to create a cross. There should still be a slight gap on one side of the slath hole. Cram the ends of two thinner whips into it. Then, wind them in a large “pairing weave” around all the slath rods to keep them in place.
You’ll use this pairing weave to create the body of your basket as well. It involves crisscrossing the whips over and under each rod on alternating sides. Here is a great instructional video on how to do it.
Step 2: Start Weaving the Willow Basket Bottom
Now that you have your slath sorted out, it’s time to start weaving. Apologies for the background change on this project: I was being eaten alive by black flies so I took refuge in my bedroom. Yay for mosquito netting!
Take up the ends of the willow whips you’ve been using to secure the slath. Keep going with that pairing weave until there are only a few inches left on each.
Grab another two whips and use your utility knife to cut each of their butts into a wedge shape. Insert one of them in between some previously woven rods, and use it to continue where one of the now-nearly-finished whips ended off. Keep weaving for another inch or so, then do the same with the other.
The reason for doing this is that if you replace both whips in exactly the same spot, that’ll create a weak zone.
Keep weaving, adding new whips in as needed. Once you’ve created the basket’s bottom, use your secateurs to trim off the poky bits left over.
Step 3: Create the Basket’s Sides and Handle
Some people weave the basket completely and then shove a handle in afterward. Sure, you can use that method, but I find that it creates a very flimsy handle. Instead, I secure the handle bits before even starting to weave the sides. This will ensure a sturdy, durable handle that’s integrated into the basket, rather than being an afterthought.
Determine how high you want the basket’s sides to be. Let’s say you’re aiming for a height of about 10 inches. Choose six long, medium-sized willow whips and two very long ones of the same diameter. Use your utility knife to sharpen all their butt ends into points.
Then, shove these points in beside each of the base spokes. Seriously, cram them in as deeply as you can. Make sure the extra-long ones are directly across from each other. These will create your basket’s handle.
Once those opposing spokes are in, bring them across the basket bottom in an arc-like shape. Twist them together, then trim their respective tips and shove them into the base as well. Next, take your needle nose pliers and bend the remaining six spokes upward. They should soar vertically with a fair bit of enthusiasm.
Now, pop your weight inside your empty planter pot. Place this on the center of the basket’s bottom, and lift the willow whips high above it. Secure them with a zip tie or elastic to keep them in neat order above you, rather than flying all around. Remove the planter pot, but place the weight back down. This will keep the basket in place while you work.
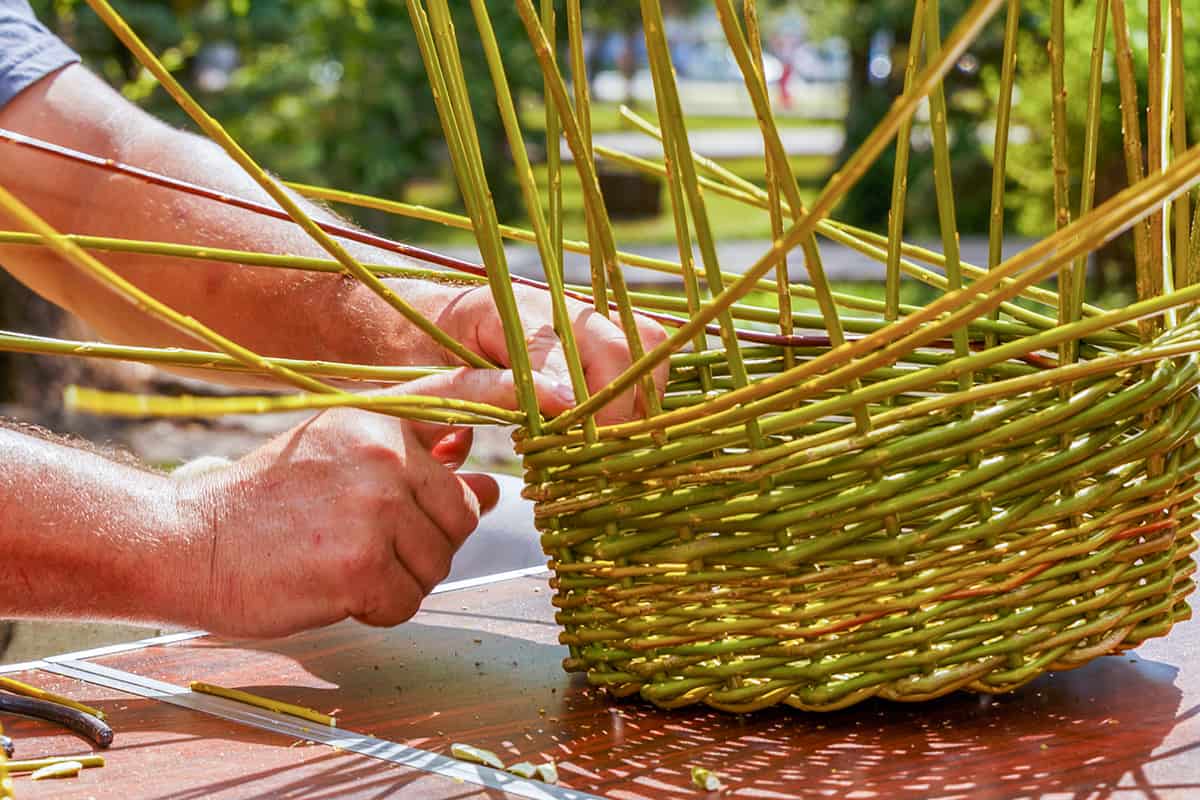
Remember that pairing weave you were doing before? You’ll keep doing that all around the sides. Keep trimming and adding more weavers as needed.
Step 4: Finish it Off
Once your basket is as deep as you want it to be, it’s time to finish it off.
This time instead of the pairing weave you’ve been doing, you’ll be incorporating a third rod: these belong to the tall whips that made up the side frame. Release the ends from the zip tie or elastic that’s been holding them together.
Twist all of these rods together and lay them atop the work you’ve done so far. Next, use the fid or knitting needle to widen some of the woven bits close to the top. Work two of the rods through here to secure the edge. Then keep twisting, and do the same widening and working through another couple of inches down the line.
This time, use one of the previously used rods, and the unused one. Alternate like this until you’ve created a complete edge around the basket. Then, use the secateurs to snip the leftover ends down to about three inches. Use your pliers to push these edges into the woven basket. Trim off any bits that are left sticking out.
And now you have a basket to fill with deliciousness! Enjoy.
