
Getting the right fertility for the plants you are growing is one of the hardest skills to master when growing food at home. It can take years of practice to get it right. Plus, it’s a moving target!
Every time you add garden amendments or grow things, you change the composition of your soil. As long as you are doing this organically, using lots of compost, slow-release nutrients, and beneficial soil conditioners, your soil keeps getting better.
If you blow it and apply something that throws off your soil chemistry too quickly though, you can set your soil back years of effort. That’s why there are so many horror stories about organic gardening failures. People put the wrong things in their garden for the state of their soil.
In an organic garden, managing fertility is all about taking it slow and easy. That being said, we also want to grow big plants and have tasty vegetables within reasonable time frames. The easiest way to do that is by using slow-release organic fertilizers adjusted to your soil needs.

The Problem with Organic Fertilizer
If you’ve been to your local hardware or garden center looking for organic fertilizer, you probably noticed how expensive they are. I see prices like $10 for a 4-pound bag. That tiny bag only has enough nutrients to feed about 60 square feet of garden space for the growing season.
When you’re only growing a few square foot garden beds, that price is reasonable. But when you have a 4000 square foot self-sufficient vegetable garden, that would break the bank!
Make Your Own Organic Fertilizer Mixes at Home for Less
Fortunately, you can make your own fertilizer mix at home for much less. Similar to buying things like toilet paper and flour in bulk, you will need to spend money up front to purchase large quantities of amendments. But, you can save long-term by lowering your per unit costs.
Start With Simple Recipes
Also, just for the record, making fertilizer mixes is a little bit tricky to understand at first. There’s a lot of math involved. You also need to know what each soil amendment does to your soil and plants.
So, you will want to start slowly with single nutrient amendments like feather or bone meal. Later, when you have mastered the basics, you can begin to mix bat guano with neem, crab, corn, or 16 other kind of organic meals to make your own fertilizer!
Plan for Heavy Lifting
You also need to be able to lift (or have someone else lift) essential bags to see real cost benefits. But if you are up for the challenge, making your own fertilizer mixes is a great way to up your garden game and increase your soil knowledge, while saving money!
Understand Your Soil (So you don’t screw it up!)
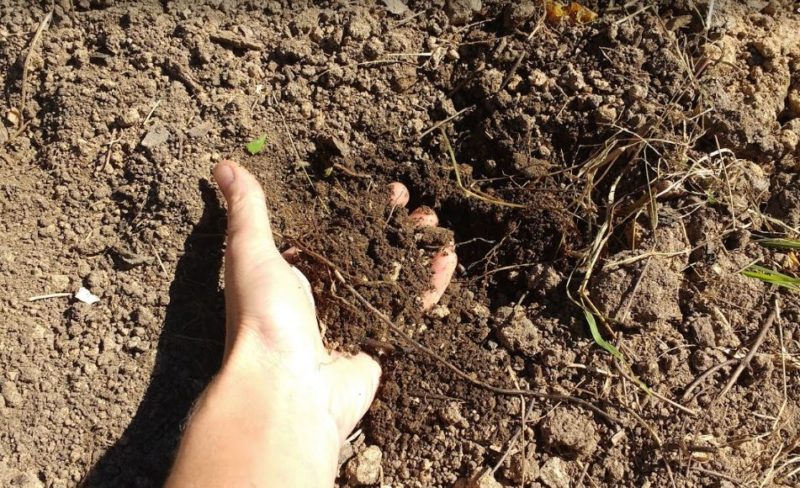
Now, before you go applying fertilizer of any kind, you need to know what’s in your soil, to begin with. The best way to do that is to have a soil test.
Organic gardening is very different than standard gardening. Unfortunately, most soil tests are geared to conventional gardening. So, when you get your standard soil test results, it might give you advice like telling you to apply X pounds of Nitrate of Sodium to your garden to grow vegetables.
Yikes! In an organic garden, that would be like forcing a pot of coffee down a person who has never had a sip before. It will send your garden into overdrive at first then cause it to crash and burn shortly thereafter.
With organic gardens, you must make all changes to your soil very slowly so that you don’t upset the soil life balance you are working so hard to build. Also, because you cultivate so much soil life in an organic garden, you need significantly less N-P-K than a standard garden.
Healthy, compost rich soil, actually make nutrients for you! Instead of using the specific recommendations from your standard soil test, focus on the data they give about your soil. Then use that information to help you plan your organic fertilizing strategy.
Soil pH
If your pH is wrong for what you are planting, your plants can’t take up nutrients. That means they won’t grow well. This is just as true in an organic garden as in a standard garden. Getting your pH right can boost your plant production hugely.
For an organic vegetable garden, unless you have incredibly high organic matter content (4% or more) in your soil, a pH of 6.0-6.5 will work well for most vegetables. If you do you have high organic matter content, your plants will grow well in soil with a pH of 5.5-6.0. (Using the standard pH recommendation of 6.5 when you have high organic matter content can actually make it harder to grow stuff. )
If your pH is off, make sure to use pelletized limestone to make soil alkaline. Or, use pelletized elemental sulfur to make the soil more acidic. If you aren’t sure which products to choose, try to find lime or sulfur that is OMRI listed.
Pelletized versions of these amendments move slower in the soil and change pH over time. This is much safer for your soil life. Avoid using granulated or finely pulverized pH amendments in an organic garden unless your garden is brand new and has impoverished soil.
Also, note: Liming adds calcium and magnesium to your garden. If your soil test shows that you have too much magnesium, choose a lime that is low in magnesium (e.g. hi-cal lime). Magnesium overload can make calcium inaccessible to plants and cause stunting.
Phosphorous and Potassium (P-K)
Some homemade soil amendments can cause phosphorous and potassium to build up in your soil over time. If your soil tests high in these nutrients, then you want to avoid adding them to your home-made fertilizer mixes altogether.
What About Nitrogen (N)?
Nitrogen is extremely volatile in the soil. Some soil tests won’t even show nitrogen results. Soil tests that do indicate the amount of nitrogen may only show nitrogen that is immediately available to plants.
“Water-soluble” nitrogen could be washed out by heavy rain. It could also be used up by a heavy population before you plant your bed. Unless your soil test shows you the amount of “water-insoluble” nitrogen in your soil, then that data isn’t very useful in an organic garden.
Ideally, if you do get nitrogen results in your soil test, then you want them to be very low so that you can add slow-release versions of what your plants will need during the growing season. If your nitrogen levels test high in an organic garden, something has gone wrong.
Don’t apply fertilizer until you figure out where that nitrogen is coming from and how to get it under control!
Organic Matter Content
The last bit of information that’s important to know is your organic matter content. If your garden has less than 2-3% organic matter, then you are going to need to do one of two things to make organic fertilizers work for you.
Organic fertilizers are only activated by soil life forms. If you put organic fertilizer on dirt, your plants would die from starvation and the organic fertilizers would just sit there doing nothing. That’s because organic fertilizers are only unlocked and made “bio-available” through contact with organic matter, water, bacteria, fungi, and other forms of soil life.
To make sure your homemade fertilizers will work in a garden that is low in organic matter, do one of these things.
Option 1: Apply Fertilizer with Compost
Apply your fertilizer mixes along with a few inches of well-aged compost to cover your garden beds. This works because good compost is full of microbial life forms that will readily make the nutrients in your organic fertilizers available to plants as they need it.
Option 2: Apply Fertilizer with Bacterial and Mycorrhizal Soil Inoculant
When you buy retail store organic fertilizer mixes, they almost always contain bacterial and mycorrhizal inoculant. These are dormant bacteria and fungi that will become active in your soil when they come into contact with water. Then, they will break down the nutrients in the fertilizer to make them available to plants. You can buy and add these to your home mixes too.
Even if you have high organic matter content, boosting your bacteria and fungi using the methods above can produce even better results. When in doubt, add beneficial microlife!
Find a Bulk Organic Soil Amendment Supplier
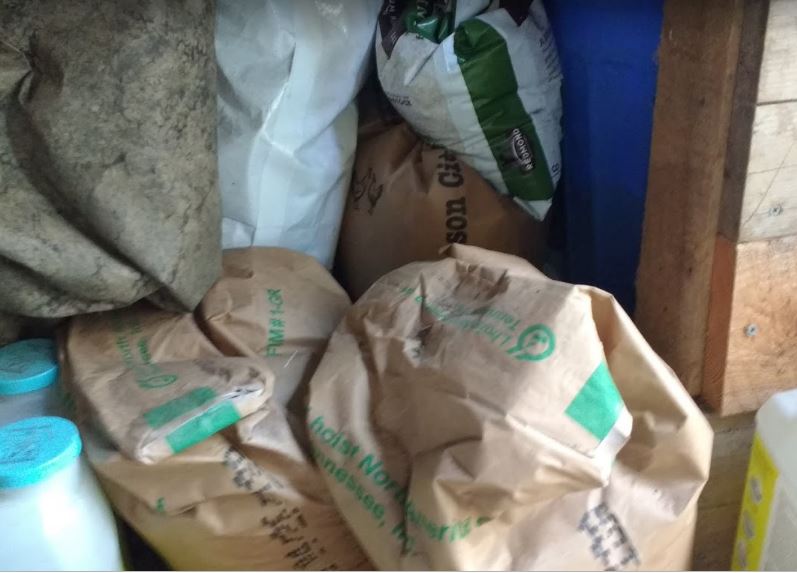
Now, the next challenge is to find a place you can buy organic soil amendments in bulk quantities for reasonable prices. I am lucky enough to have a bulk organic farm supplier within driving distance of my house. Even if you don’t though, many small farm supply stores or co-ops are willing to bulk order for you.
Also, if you have a relationship with any of your local organic farmers, they already order large quantities of organic supplies. If you ask nicely, they might be willing to let you add your order in with theirs to share shipping costs.
If you have a large group of gardening friends, then you could also pool your order and share the shipping. Large orders are also often discounted which can help offset shipping costs.
Simple Homemade Fertilizer Recipes
With those important administrative details attended to, I am about to share my secret formulas for making my own at-home fertilizer mixes for my garden. These are similar in performance to store-bought fertilizers mixes but they end up costing a lot less!
Important Things to Know About Amendments
– Feather Meal
Feather meal can have between 13-15% nitrogen for a 50-pound bag. It is very slow release, so don’t worry if your bag is 15% instead of 13% nitrogen.
– Bone Meal
For the bone meal, since the ratio of phosphorous to nitrogen is so high, I pretend that nitrogen doesn’t exist in these mixes. That tiny bit of extra slow-release nitrogen won’t have a negative impact on organic garden soil.
– Sulfate of Potash
Organic potash of sulfate is one of the most cost-effective ways to deliver potassium to your garden. However, it is a faster-acting amendment. If your potash has more than 50% potassium, you can add a bit less than what I’ve included in these recipes.
Also, if you plan to foliar spray your plants weekly, you can leave the potash out entirely. Instead, use blackstrap molasses as part of your spray regimen.
Blackstrap molasses has plenty of immediately available potassium for plants and increases your beneficial bacteria counts too. So, it’s an even better way to deliver potassium to plants if you have the time to do it!
– Trace Minerals
Trace Minerals can be applied to your soil on their own or incorporated into your fertilizer mixes. I only add them to my seedling starting fertilizer mix. Those plants won’t be in the ground for 4-8 weeks, so I include just enough trace minerals to get them through to transplanting. (Use the application rates on your bag for best results).
– Bacterial and Mycorrhizal Inoculant
Most of the bacterial inoculant you can buy in powdered form is specifically for use with legumes. However, you can find liquid forms of other beneficial bacteria. Or, you can find mixes that include both bacterial and mycorrhizae in one go.
When buying mycorrhizal inoculant, the key is to choose arbuscular or endomycorrhizal fungi rather than ectomycorrhizae. Ecto fungi won’t hurt, but Endo fungi are what you really need to release nutrients in your vegetable garden.
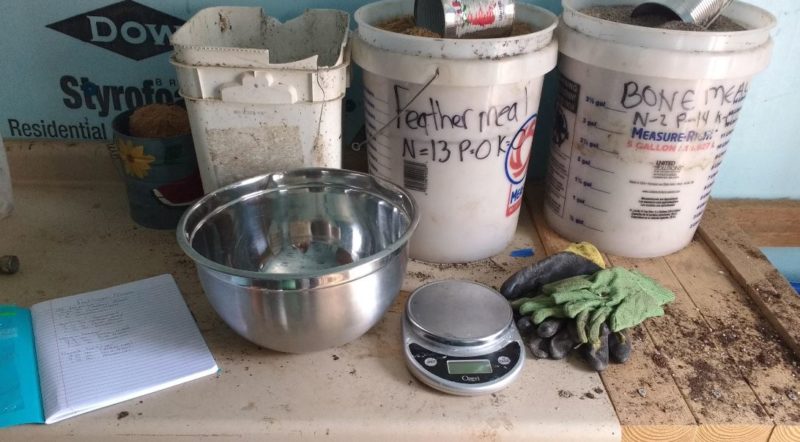
Step 1: Gather Your Ingredients
What You Need:
- 50 Pound Bag of Feather Meal 13-0-0
- 50 Pound Bag of Bone Meal 2-14-0
- 10 Pound Bag of Sulfate of Potash 0-0-50
- Large Mixing Bowl and/or Bucket
- Mixing Tool (e.g. Trowel, Gloves, or Wooden Spoon)
- Scale that goes to 11 pounds (or more)
Optional Amendments:
- Trace Mineral Source (e.g. Azomite, Sea Salt Mineral Mix)
- Bacterial Inoculant
- Mycorrhizal Inoculant
Step 2: Make Your Mixes
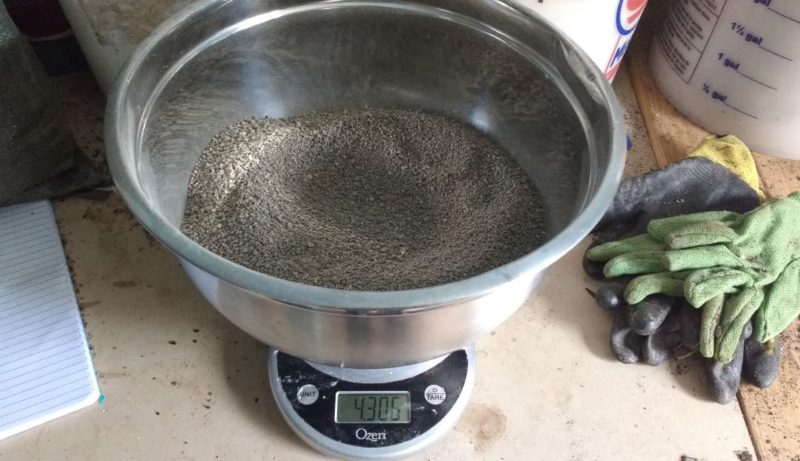
Now that you have your ingredients assembled, it’s time to weigh them out to make mixes. I use a kitchen scale that goes to 11 pounds and a big bowl. Then, I pour the stuff from the bowl into a bucket to make mixing easy.
Make sure to set your scale to zero once you put your measuring container on it and before you add your amendments. Once you have everything weighed out, you can mix it up with your gloved hands, with a wooden spoon, or using your garden trowel.
Here are my most commonly used veggie garden mixes.
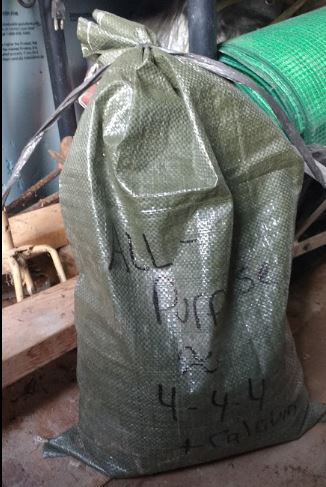
1. All-Purpose Vegetable Fertilizer (10 Pounds)
This formula works well for most vegetable gardens as long as your soil is in good condition, to begin with. If you have too much P or K in your garden based on your soil test, cut out the bone meal (P) or feather meal (K) as needed.
Apply about 1.3 pounds for every 10 square feet before planting. Then apply 1/3rd pound every 4-8 weeks as needed to maintain plant health. (Note: 1/3 pound is about a cup).
- 4.6 pounds Feather Meal
- 4.3 pounds Bone Meal
- 1.2 pounds Sulfate of Potash
2. Seedling and Transplant Fertilizer (10 Pounds)
This fertilizer mix is intended for use in seed starting soil mixes. Seeds don’t need any nutrients to germinate and can sometimes be harmed by them. However, after seedlings are a few days old, they need nutrients for fast growth.
To account for these changing needs, I use fertilized soil on the bottom ½ of my seed trays and unfertilized soil up in the top half where seeds sprout. If you try this method, make sure to water gently so you don’t intermix the fertilized and unfertilized soil until after the seedlings start to put up their first true leaves.
Use about two tablespoons of this fertilizer for every gallon of soil. To figure out how much a gallon of soil is, I actually turn a gallon container into a scoop.
You can also use this mix for transplanting seedlings to larger pots and for potting up your plants started from cuttings to help them establish roots. The extra phosphorous, by way of bone meal, in this formula is all about supporting root growth!
- 4.0 pounds Feather Meal
- 5.0 pounds Bone Meal
- 1.0 pounds Sulfate of Potash
3. Heavy Feeder Fertilizer (10 Pounds)
This started as my corn mix. But I now also use it for cabbage and lettuce. For corn, I apply it about once every four weeks until harvest. For those other nitrogen-needy leafy greens, I usually apply every 6-8 weeks.
Apply about 1.3 pounds for every 10 square feet before planting. Then apply 1/3rd pound as needed to maintain plant health.
- 5.3 pounds Feather Meal
- 3.7 pounds Bone Meal
- 1.0 pounds Sulfate of Potash
4. Tomato Fertilizer (10 Pounds)
Tomatoes need some nitrogen. But they need extra phosphorous for good root development. Then they need even more potassium for good tomato taste.
They also need calcium for good fruit yields. Bone meal also has calcium. So, there’s no need to add calcium or Epsom salts to this mix unless your soil is extremely calcium depleted.
Apply about 1.3 pounds for every 10 square feet before planting. Then apply 1/3rd pound every six weeks or as needed to maintain plant health.
- 3.6 pounds Feather Meal
- 4.5 pounds Bone Meal
- 1.9 pounds Sulfate of Potash
Step 3: Add Your Optional Ingredients
After you have made your base mixes, you can add in any of the optional amendments you decided to use on your garden. Follow the application rates on your bags. Alternatively, you can just apply them separately to your garden or soil mix when you fertilize.
Just remember, N-P-K is only part of what makes your plants grow. However you go about getting beneficial bacteria, fungi, and trace minerals in your garden — you need to make sure they are in the soil when fertilizing to support the work these organic mixes will do in your garden.
Storing Your Fertilizer Mixes
Your rate of use will vary based on your garden size. So feel free to make larger or smaller batches of fertilizer mix by adjusting the recipes above.
These ingredients are all shelf stable for many years, as long as you keep them in mostly airtight containers and keep them dry and out of direct sunlight.
Personally, I store mine in dark-colored poly bags or food grade buckets. But any dry container that you can close will work.
Conclusion
Hopefully, these simple recipes have inspired you to make your own fertilizer mix at home. If you want to take the next step and formulate your own recipes, you’ll have a lot more studying to do. But, for me, growing a garden isn’t just about growing food, it’s also about growing my skills as a gardener.
Making fertilizer mixes, and then one day making your own formulas using all sorts of different amendments, are ways to evolve as a gardener. These examples are only the beginning of what you can make yourself once you start to understand how to work with various soil amendments.
May you grow a beautiful garden and keep growing as a gardener too!


