
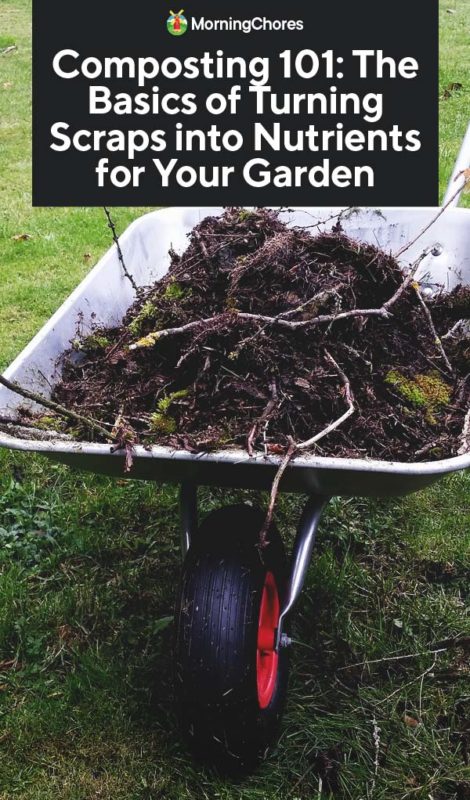
Welcome to composting 101 – the basics of creating a happy compost pile. If you’ve tried composting in the past with no luck, or if you are new to the process, you’ll find everything you need to know to get going.
Composting is the biological foundation of every garden, whether manmade or natural. The process occurs naturally in all ecosystems. In a forest, leaves fall, and animals die, and they enrich the soil as they decay. We’ll show you how to harness this natural process to boost your own garden.
By composting, you can add nutrients to your earth and develop a good soil structure, which means healthier, more productive plants. It’s also an easy way to recycle food, animal and plant waste, and turn it into a usable product.
There are several different methods of composting: vermicomposting, cold, and hot composting. We’ll focus on the hot method in this article because it’s considered the most common.
Why Compost?
Compost helps the soil retain moisture and adds nutrients, which means you can use less fertilizer and water. It also encourages beneficial bacteria and fungi to breed and do their job breaking down organic matter. Basically, it contributes to the soil food environment so plants can more efficiently take up nutrients.
It’s also ideal for using up kitchen scraps or yard waste, so it doesn’t end up in the landfill. You’re turning waste into a valuable tool in the garden for little or no cost.
What To Compost
Like everything else, there is a list of do’s and don’ts for composting 101, especially if you apply it to a food garden.
Things to Avoid
Things that are high in fats and hard to break down won’t compost well and will turn rancid and smell bad. Don’t try to compost your trash like paper products. Many people feel they can add “biodegradable” waste to the compost. It will slow down the process and possibly add contaminants to your pile.
You may also want to avoid composting onions and garlic because it could discourage worms from coming.
Avoid:
- Dog feces
- Cat feces
- Butter
- Cooking Oil
- Meats
- Diseased plants (unless you are keeping your compost temperature above 140 degrees for at least two weeks)
- Dairy products
- Coal ash
- Weeds that go to seed
- Newspapers or cardboard (save these for mulching)
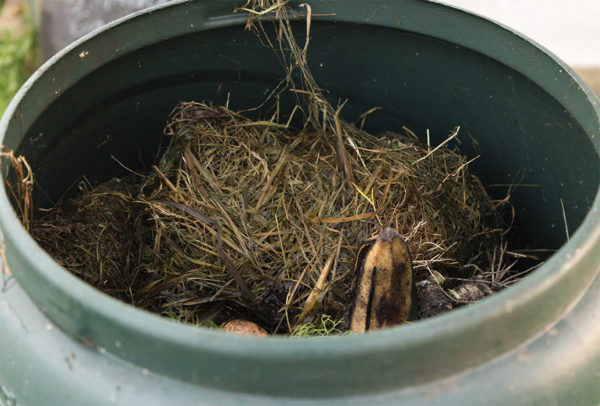
Things to Use
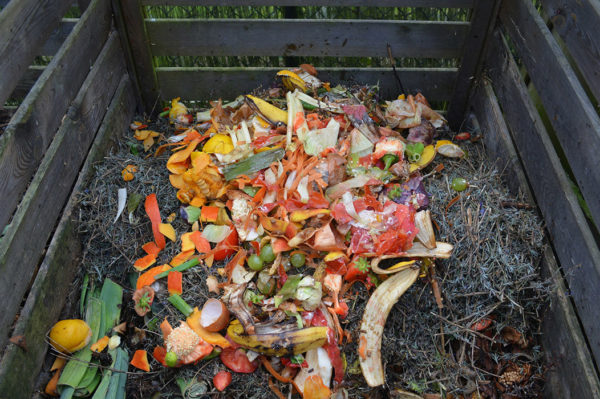
You can keep a little container in your kitchen to collect scraps as you cook. Pretty much any veggie waste can go into your compost.
I personally don’t put any food scraps in my compost. Why? I run all food scraps through animals first. Salad fixings and bread to the chickens or goats. Then I collect it back when I clean their stalls. If you don’t have this advantage, just go ahead and toss them straight in.
Add:
- Livestock manure
- Straw
- Grass clippings
- Small branches (cut them up first)
- Spent plants
- Food scraps
- Leftover veggies
- Bread
- Eggshells
- Leaves
- Vacuum and dryer lint
- Fireplace ashes
- Coffee grounds
Where to Compost
One of the basics of composting is placement. Where to compost depends on your location and your space. The process can occur in small contained spaces or in a huge pile behind the barn.
When I was a kid, we had a “muck” pile about 100 feet behind the barn. We cleaned the stalls and put the waste into a wheelbarrow, which we dumped on the muck pile. In the winter, we loaded up the decaying manure in the wheelbarrow again and dumped it on our garden. This wasn’t the most organized method, but it got the job done.
When picking a spot, keep in mind that some people might consider compost piles an eyesore. Avoid placing them near neighbors or on the front lawn. It’s also nice to have them near your garden for ease of access.
You want a place that has good air circulation, so don’t put it next to a building. A partially-shady area can prevent it from getting overheated or too much moisture from the rain. Unless you live in a dry area, keep it away from sprinklers or other irrigation.

Never place your pile on concrete or wood unless you have a pan underneath to collect moisture. Avoid putting it too close to large trees or vines because these plants can leach nutrients from your compost. You shouldn’t put your pile near a wood fence or any other wood structure because the compost will cause it to rot.
Compost Containers
When learning how to compost, you can spend hundreds of dollars on a new set-up, but let’s be real. You can also just make a pile in the middle of an open spot, and it will work. The purpose of a container is to help you keep things restrained and to make it easier to control moisture levels. You can either make your own or purchase one.
DIY
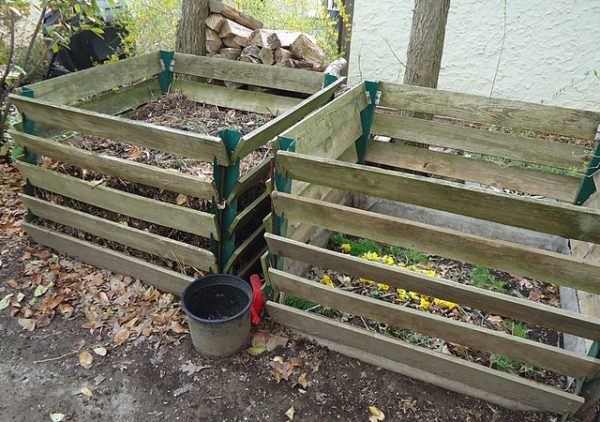
Many people make cages or bins to contain their pile. These bins are normally about 3-feet square each for a total ground space of 9 cubic feet. This is a good size to get microbial action going.
Bins can be made of wood, plastic or wire. A system of three boxes next to each other gives you the ability to have several piles in different stages at once. When the first one fills and starts to decay you flip that into the second, and use the first for fresh stuff.
Closed Bins

Urbanites can also compost successfully. When my mother sold her farm and moved to a suburban neighborhood, there were rules about open compost. So I purchased a stand-alone compost bin for her, and we put it in a partly sunny spot near the flower gardens. It was inconspicuous and still gave her the satisfaction of producing her own fertilizer for her flowers.
There are many of these options available online. The biggest concern is not letting them get to wet. Look for one with drain holes and/or cover it during storms.
Indoor Options
Maybe you don’t have the outdoor space available, or you want a convenient indoor option. In that case, there are numerous indoor bins that you can make or purchase. These are smaller, of course, but they still get the job done.
Starting Your Pile

Making your pile is the most important skill to learn in composting 101.
The method I use is the layering method. I have a large compost area with three piles that are about 6-foot square each, but that is because I have large gardens to feed. This method can also be done in a small compost bin.
The layering method is straight-forward. Think about a lasagna and how you have different layers of food. You want to layer your pile in the same way.
The trick is to think of the layers as colors – browns and greens. This helps to keep a good carbon to nitrogen ratio which will give you the best end product and gives air an opportunity to circulate in the pile.
I start each pile with a foundation of brush. This helps with air flow and drainage. Straw is perfect for this because it’s hollow, which allows necessary oxygen to flow in your pile.
Next go the browns, which are good carbon sources. Leaves, branches, old hay, sawdust, and corn stalks are all examples of things you can put in your brown layer.
Top it off with your greens. Greens are your “hot” nitrogen builders like grass clippings, vegetable scraps, and manure.
Once you have everything piled up, soak it with water, so it feels like a damp, wrung-out sponge. Don’t add too much water or you’ll suffocate the pile.

Making it Thrive
Now for the meat of composting 101. The basics of composting involve controlling four elements of your pile: air, water, temperature, and food.
Air circulation is vital. The microbes – bacteria and fungi – need oxygen to metabolize and do their job.
Your microbes are surface feeders and begin chewing on the outside of the material. This starts the material breaking down. Next, insects such as pill bugs and earthworms ingest and defecate the material, which further breaks it down. Make sure to have enough fluffy stuff like straw to keep the air circulating and the critters eating.
Water is also important. The microbes and animals doing the decomposing need damp conditions. Think of a moist sponge. You want to make sure your compost is in an area with good drainage. If the weather is hot and dry, you may need to squirt your pile with the hose.
Your compost pile needs to build up heat to work. Piles that don’t get warm are considered cold compost, which is another method you can try, but keep in mind that it can take a year or more to harvest your compost.
Heat will occur naturally if you layer the pile and make sure your microbes have adequate water and air. Heat not only makes your microbes happy but it can kill bad weed seeds, bacteria, and viruses.
Finally, you need to feed those microbes. That’s the easy part since you can toss kitchen scraps on the pile and call it a day, but depending on what materials I have going into the pile I may also add some supplements.
For instance, if I am using shavings that have been used for animal bedding, I add a dusting of lime to balance the pH of the pile.
To Turn Or Not To Turn
Turning – this is the million dollar question in the world of composting 101.
People who advocate turning feel that it allows oxygen to enter the pile and mixes up materials so that they compost evenly. They feel turning speeds up the process.
People who don’t turn feel that turning slows down the composting process because it cools the pile down and disrupts the microbial life. I fall into this camp.
When I was in college, I did a study on microbial activity in compost. I found that the number of microbes diminishes for about two weeks after the pile is turned. That means composting activity slowed down for about two weeks.
That said, gardening is all about experimentation. If you want to try turning your pile, do it once a week and see how things go.
Troubleshooting
For one reason or another, sometimes you’ll find that your compost isn’t heating up enough or isn’t decomposing. It happens to all of us as we start composting. There are a few things you can check to make sure that conditions are right to create a healthy mixture.
Carbon to Nitrogen Ratio
Make sure you have a good mix of “green” and “brown.” You want about 24 parts carbon to 1 part nitrogen. This is the ideal combo for things to really heat up and get cooking. If you have too much nitrogen or not enough carbon, your pile may not thrive. You can add or withhold things for a while until you reach the right mix, here’s a handy calculator to help you.
Don’t worry about getting all technical about your compost mix, and know that it’s best to err on the side of too much carbon. You may even want to just toss some extra leaves or straw on top of your pile to keep conditions on the interior of the pile ideal.
Moisture
Another element of the basics of composting is moisture. You want your pile not too wet and not too dry. Aim for moist but not soggy, like a damp sponge that has just been wrung out.
The more greens you have in your pile, the less water you need. If you get a lot of rain where you live, a cover or a layer of straw on top of your pile will protect it from getting too moist.
Air
The critters breaking down your pile need air to survive. If your pile gets too dense, they won’t be able to breathe. If you have a hard time getting a shovel into the pile, it’s too compact. You can either turn your pile with a fork or add dry, fluffy things like strat to your pile.
If you don’t have straw, you can place some 2-inch perforated PVC pipes in the compost pile. Make sure the pipes are long enough to run from side to side.
Temperature
One of the first things you learn in hot composting 101 is to check the temperature of your pile. The ideal temperature is 140 to 160 degrees Fahrenheit. At this temp, diseases are killed off, and elements break down quickly. If your pile isn’t heating up, you may not have enough nitrogen or moisture.
You don’t have to stress about hitting the exact temperature because a healthy pile will take care of itself, but if you stick your hand into the middle and it doesn’t feel warm, it’s an indication that something isn’t working. If you’re geeky like me, you can buy a compost thermometer to see how hot your pile is.
If all of the above looks good, you can also add a bit of dirt from your yard to the pile to introduce bacteria, which may be lacking.
Pay Day
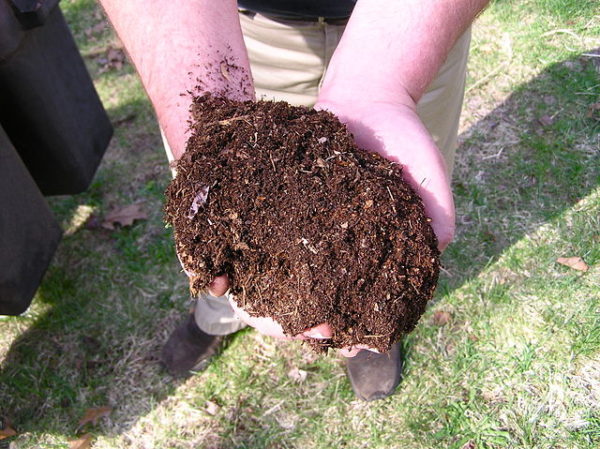
Your compost pile is like a money market account. You input materials (money) and take out finished compost (interest). Typically the layering method takes three to six months to complete.
You can spread compost on your garden at any time. Finished compost will not burn your plants. The most common times to add compost in the spring when you are getting ready to plant and in the fall when you are putting your garden to bed.
Compost can be added when you are tilling or turning the soil with a shovel. You can also add compost on top of the soil along your rows. I like to add two-inches of compost to my garden soil in the fall.
If you are like me, your chickens are happy to help with this process.

Congratulations, you’ve graduated from composting 101. Now you’re ready to reap the benefits of all your hard work.


