Do you spend a fortune on purchasing pumpkins to decorate your home or bake pies? Can’t live without those orange guards during fall festivities? Why not try growing your own pumpkins?
It’s not too difficult or expensive, and there are multiple ways to grow pumpkins. I’m going to walk you through each method, let you know how to care for pumpkins, and how to harvest and store them, too.
Ready to get started?
Pumpkin Plant Info
- Hardiness Zones: 3, 4, 5, 6, 7, 8, 9 (find yours)
- Soil: Clay, loam, sandy, PH between 6.0-6.5, well-drained, compost-rich
- Sun Exposure: Full sun
- Planting:
- Start Indoors: 2-4 weeks before the last frost date
- Hardening Off: 7-10 days before transplanting
- Transplant Outdoors: When the soil temperature is at least 70°F before seedlings develop their second set of true leaves
- Spacing: 4-5-feet between plants and 5-10-feet between rows
- Depth: ½-1-inch seed depth
- Best Companions: Pole beans, corn, datura, melon, squash, dill, marigold, marjoram, nasturtium, oregano
- Worst Companions: Potato
- Watering: Water deeply once a week, providing at least 1-inch of water, avoid wetting fruit and foliage
- Fertilizing: Mix lots of compost and aged manure into the planting site before transplanting
- Common Problems: Alternaria leaf spot, Alternaria leaf blight, Fusarium crown, downy mildew, foot rot, Cercospora leaf spot, gummy stem blight, powdery mildew, septoria leaf spot, southern blight, verticillium wilt, angular leaf spot, bacterial leaf spot, aster yellows, bacterial wilt, mosaic, Phytophthora blight, armyworms, aphids, cabbage beetle, cucumber beetles, flea beetles, cutworms, squash bug, squash vine borer, thrips
- Harvest: When the fruit color changes uniformly and the rind becomes hard, typically 75-120 days after seed starting depending on the variety
Pumpkin Varieties to Plant
Pumpkins come in different sizes and there are different varieties of each size. The larger the pumpkin, the more days it takes for it to reach full growth.
Also, the larger the pumpkins the larger the vines. Below, I’ll share the size of pumpkins, the most common uses, and some popular varieties for each size:
1. Small Pumpkins
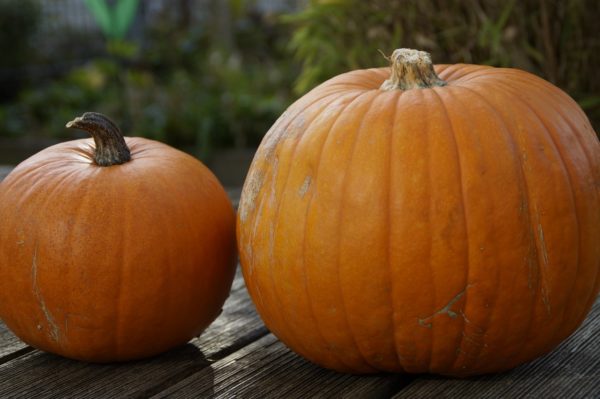
Small pumpkins range anywhere from 2-5 pounds. They’re often used for baking. Some of the most popular varieties of this size are:
- Baby Bear: 105 days to maturity
- Small Sugar: 100 days to maturity
- Baby Pam: 100 days to maturity
2. Medium Pumpkins
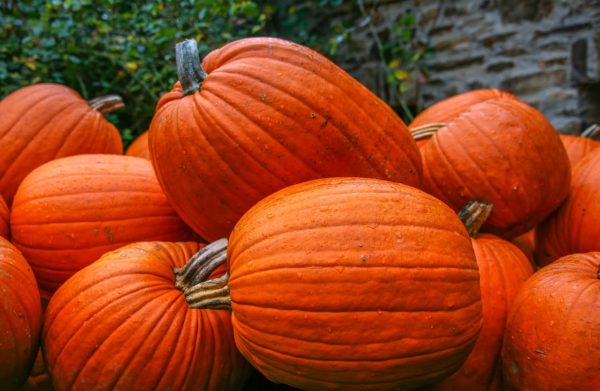
Medium-sized pumpkins weigh anywhere from 8-15 pounds. They can be used for baking, decorating, or making jack o’ lanterns. The most popular varieties of this size are:
- Autumn Gold: 100 days to maturity
- Jack O’Lantern: 75-115 days to maturity
3. Large Pumpkins
Large pumpkins range from 15-20 pounds. They’re known for their large vines and are great for use around Halloween. The most popular varieties of this size are:
- Big Tom: 120 days to maturity
- Cinderella: 84-100 days to maturity
- Jumpin’ Jack: 110-120 days to maturity
- Happy Jack: 105-110 days to maturity
4. Jumbo Pumpkins
Jumbo-sized pumpkins can reach anywhere from 50-100 pounds. These varieties, if cared for properly, could reach even greater sizes and are great for competing, decorations, and could still be used to cook with as they maintain a good flavor as well.
However, the larger the pumpkin, the larger and more invasive the vines can be. Keep this in mind when growing these larger varieties:
- Mammoth Gold: 105-120 days to maturity
- Prize Winner: 120 days to maturity
How to Plant Pumpkins
There are a few basics you should know about pumpkins. They apply regardless of the pumpkin growing method you use.
First, pumpkins require anywhere from 75-100 days or more to grow. As mentioned above, larger varieties take longer to produce.
They don’t like cold, which makes it vital you wait until all danger of frost has passed before trying to plant them. Ideal soil temperatures for pumpkins is 70-95°F. You also need a long enough summer so that they can mature before the frosts set in.
Second, pumpkins need full sun and plenty of room to spread out when growing. Their vines can reach anywhere from 50-100-feet per plant.
Be sure to plant pumpkins in nutrient-rich soil because they’re heavy feeders. The soil should also be well-drained. If they can’t get what they need from the soil, you shouldn’t expect a big harvest.
When planting pumpkins, it’s best to grow them from seed.
However, if you live in a cooler climate, you may not have as large of a growing window. If this is the case for you, start the pumpkin seeds indoors a month before the last spring frost.
Be sure to harden the transplants off before planting.
Here are the 3 different methods of growing pumpkins:
1. In a Row
If you have a large garden plot you’d like to fill up, pumpkins are a great option.
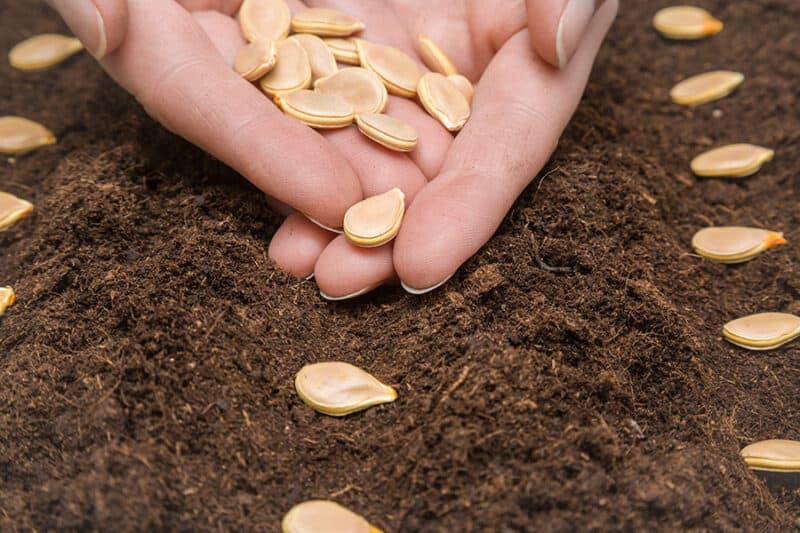
Place plants or seeds in a row of soil that has been prepped. As mentioned above, the soil should be nutrient-rich and well-drained.
Whether you’re starting from seeds or planting transplants, each plant should be a foot apart. When the plants have reached 3-inches, you’ll begin to thin them out, leaving the largest and strongest plants in the ground.
You should have one plant every 3-feet in a row. Be sure to use scissors to cut out the other plants to ensure you don’t damage any of the plants’ roots you want to keep in the row.
2. In a Hill
One of my favorite ways to grow pumpkins is in hills. When planting pumpkin seeds in hills, it encourages quicker germination because the soil heats up faster.
This method also makes it easier for the soil to drain too.
You’ll begin the process by prepping the hills for planting. Be sure to dig down a foot into the ground to work aged manure or compost into the soil. Then, mound the dirt up for planting.
When finished, you want an area that is the size of a substantial upside-down mixing bowl. It’s essential to incorporate all of the manure and compost for the proper nutrients.
After the mound is complete, you plant the seeds in the hill. You want 4 seeds per hill and plant each seed 1-inch deep into the hill.
Make sure your hills are around 10-feet apart. If you’re planning on growing large or jumbo pumpkins, put 20-feet between hills. This especially applies to those who grow giant pumpkins to compete in county and state fairs.
The pumpkin seeds should germinate and be above ground in 2 weeks or less. When the plants have reached 3-inches in height, it’s time to thin the hill out.
You want 3 plants per hill. Be sure to use scissors to cut out the plants you don’t want. This should prevent any damage to the remaining plants’ roots.
Keep in mind, when growing pumpkins in hills, you can place them around the perimeter of your garden if you’re short on space.
This will allow the vines to run over your lawn instead of through your garden. It could also help cut down on the amount of mowing you’ll have to do for a few weeks.
3. In a Bucket
This method is excellent for people who are short on gardening space but would love to grow pumpkins. It’s easy too.
You begin with a 10-gallon bucket. Turn the bucket over and drill holes in the bottom of it. This is to allow any water to drain through the bucket to keep the soil from becoming too soggy.
Again, you want nutritious soil which is also well-drained. Add rich soil to the bucket, filling it to the top. When the soil is in place, you can transplant your pumpkin plants or sow seeds in the dirt.
One 10-gallon bucket should hold 2 pumpkin transplants. If sowing seeds in the bucket, plant 4 seeds 1-inch deep in the soil.
When the plants reach 3-inches tall, you’ll cut 2 of the plants out with scissors. The vines will run over the bucket and sprawl.
This method is good if you have poor soil conditions, and it also works if you’re new to gardening. You can see how the vines sprawl, and if you need to move the plant to a new place when the vines take off, you can.
How to Care for Pumpkins
Pumpkins need some basic care for a successful harvest. Here is what you’ll need to give your pumpkins for a bountiful harvest:
1. Water
Pumpkin needs a lot of water. If you’re growing typical pumpkin varieties, be sure to water them deeply a couple of times per week.
You want the plants to have deep watering sessions instead of frequent shallow ones. The goal is to give the pumpkins 1-inch of water per week.
Be sure to water in the morning or to use soaker hoses when watering. You want to avoid the foliage of the pumpkin plant or the pumpkins themselves being wet for long periods of time. This could cause your pumpkins to rot.
2. Mulch
Mulch is a crucial ingredient in growing successful pumpkins. By placing mulch around the base of the pumpkin plant, you not only keep weeds at bay, but you also make it easier for the plant to retain moisture.
This is a great help because as we’ve mentioned already, pumpkins are heavy feeders. They don’t prosper when they compete with weeds for food.
Also, pumpkins need lots of water. Anything that can help them retain these necessary elements is a benefit to you.
3. Fertilizer
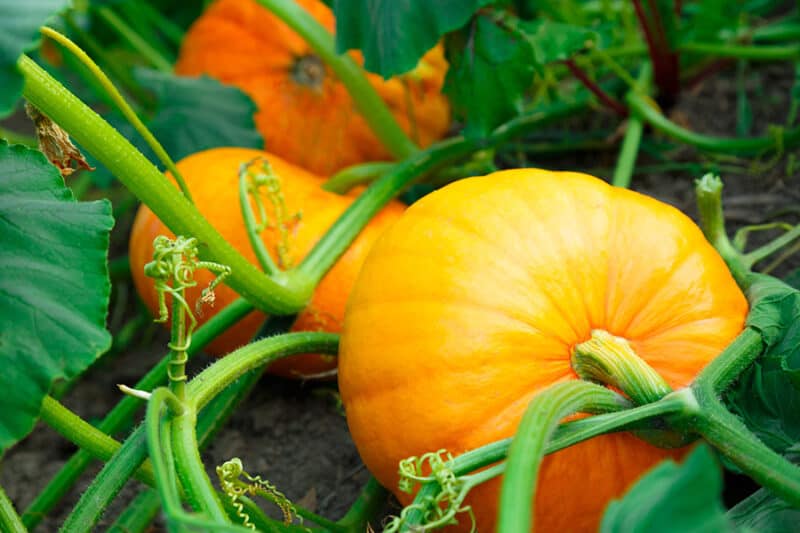
Pumpkins feed heavily. Therefore, it’s essential to start the pumpkins with nutrients in the ground. Even when you do this, you’ll need to add more food for the pumpkins to feed on as they grow.
When the plants have reached 1-foot, and before vine production, it’s vital to give pumpkins a boost of fertilizer that is high in nitrogen.
Right before the pumpkins begin to blossom you should give them another boost of fertilizer that is high in phosphorous.
4. Train the Plants
If you don’t want your pumpkins growing everywhere, consider training them to run up a trellis. Smaller varieties are easier to train.
5. Prune
Don’t be afraid to prune your pumpkins. If the vines are growing everywhere, and you simply can’t stand it, prune them.
Identify the healthiest, largest fruit, and then prune away the vines around them. Leave the most robust plants behind. Bury any stem ends in the soil to prevent diseases from getting in.
This should produce larger, healthier pumpkins.
6. Add Protection
It’s a good idea to place a piece of cardboard under the pumpkin as it grows.
By doing this, you’re stopping moisture from coming in direct contact with the pumpkin from the ground. This should help deter rot.
7. Give Them a Twirl
If pumpkins never change position, they can grow distorted or have a flat, discolored side.
If this concerns you, give the pumpkins a twirl (without damaging the vine) to ensure the pumpkin can have a nice, round shape. Shift them slightly every few weeks as they grow.
8. Tips for Competitive Pumpkins
If you’re growing pumpkins for a competition, there is a simple tip you can do to help them grow larger.
Snip any blooms forming on a weaker vine. You’ll see as your pumpkins develop some vines are larger, sturdier, and look healthier. These are the vines you want your pumpkins to grow from.
When you find the healthiest vines, pinch every bloom from your plant beside 3. You will focus on 3 pumpkins per plant.
This should help the quality and size of the pumpkins produced.
9. Invite Pollinators into Your Garden
Pumpkins produce both male and female flowers. Bees should do all of the pollinating for you, but you must draw them to your garden first.
Be sure to plant lots of plants and flowers bees love around your property. If you don’t have enough pollinators around your farm, consider pollinating your pumpkins by hand.
Pumpkin Problems
Pumpkins are sensitive plants. They need the right amount of sunlight, heat, nutrients, and care to produce quality pumpkins.
Even after the hard work, you still have pests and diseases to keep a watchful eye out for. Here are the concerns for pumpkins:
1. Squash Bugs
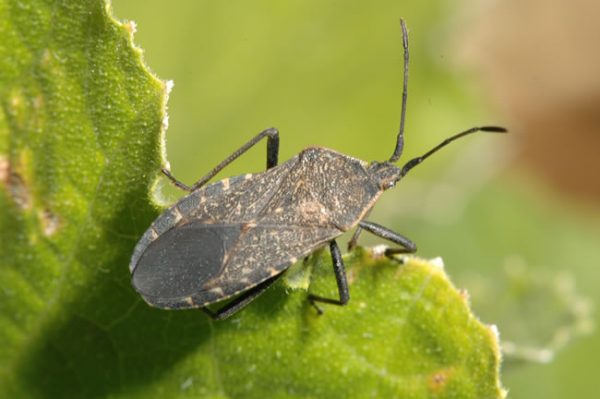
Squash bugs are garden pests that look like stink bugs. They can suck the juices from your plants while also giving plants a toxic substance.
This will cause the foliage of your plants to wilt and turn brown. You can beat these pests by using insecticides and handpicking them from your plants.
Keep a watchful eye on the undersides of the plant leaves because this is where squash bugs will lay their eggs. You can handpick the eggs from your plants too.
2. Cucumber Beetles
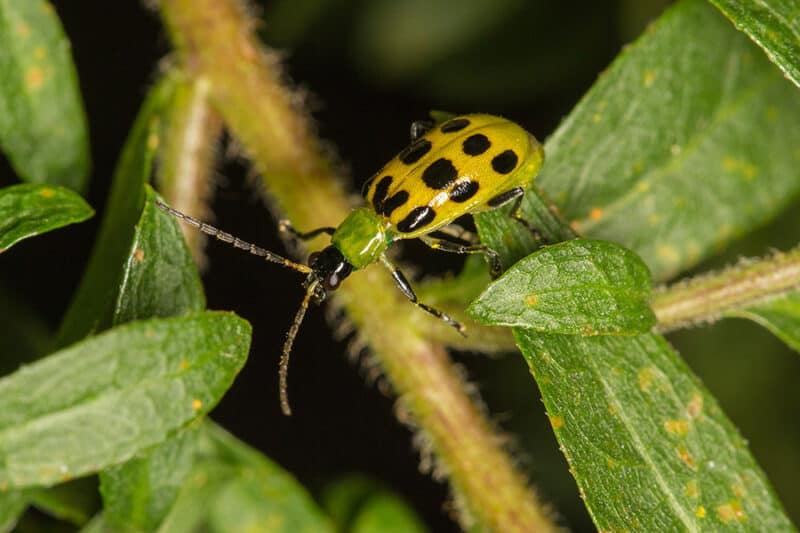
These pests look like yellow ladybugs because of the spots on their backs. These pests chew on your plants, causing holes in the foliage and wilt to occur. The most significant threat with this pest is its capability of spreading harmful plant diseases in your garden.
Cucumber beetles are difficult to remove from your plants, even with the use of insecticides. They’re difficult to pick off by hand too. You can use a vacuum cleaner to suck them from your plants or knock them to the ground onto a piece of cardboard around the base of your plant.
From there, you pick up the cardboard and give the cucumber beetles a boot out of your garden.
3. Aphids
Aphids are small insects that find their way into gardens in most locations. When you see your plants are being feasted upon and changing colors or wilting because of the stress, you should check them over for this pest.
When you see these tiny insects, give them a strong, cold douse with the water hose. This should loosen them and knock them from your plant.
Consider adding beneficial insects to your garden.
4. Powdery Mildew
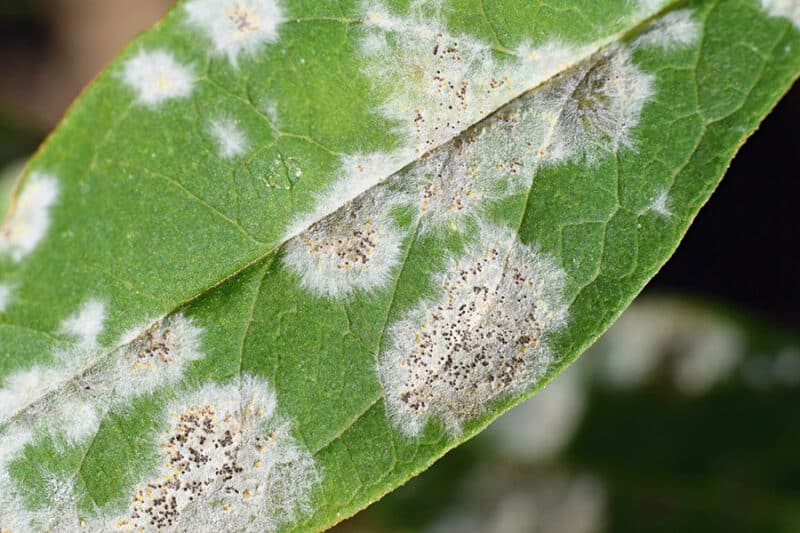
This disease says it all in its name. Powdery mildew is mildew that looks like powder has been thrown all over your plant. You can prevent powdery mildew by keeping the foliage of your plants dry.
You should either water your pumpkins with soaker hoses or water early enough in the day so the foliage has time to dry.
If you have powdery mildew on your pumpkins, spray them with a fungicide or rub the leaves together to knock it off. You can also remove any infected part from the plant as well.
5. Squash Vine Borer
This pest is a fat worm that bores its way through the vines of squash and pumpkin plants. The bug will begin as an egg, take worm format when it’s in the larvae stage, and eventually turn into a moth.
Squash vine borers feed on what is inside the vines of your pumpkins. You’ll begin to see holes in your vines, and the plants start to wilt when they’ve attacked your pumpkin plants.
Beating these pests is difficult. Some say to plant extra for these particular pests to feast on in hopes they’ll leave your crop alone.
However, you can try to use insecticides, but it’s difficult because the insects aren’t on the outside of your plant but the inside. You’d have to apply it at the exact time of hatching.
You can also try to apply diatomaceous earth to the base of your plants and piling dirt around the bottom of the plant as well.
The diatomaceous earth will slice the larvae as they crawl over it, and the dirt will make it more difficult for them to get to the vines as well.
Best and Worst Companions for Pumpkins
Most plants have other plants they grow well when planted near them. These are called good companion plants. The best companion plants for pumpkins are:
Plants also have other plants they shouldn’t be planted near because they cause issues for one or both of the plants. These are known as bad companion plants.
Pumpkins only have one plant they should avoid being planted near and this plant is potatoes.
How to Harvest and Store Pumpkins
Harvesting a pumpkin is one of the easiest parts of the growing process. Here is what you need to know to be able to collect and store your pumpkin harvest:
1. Look at the Color
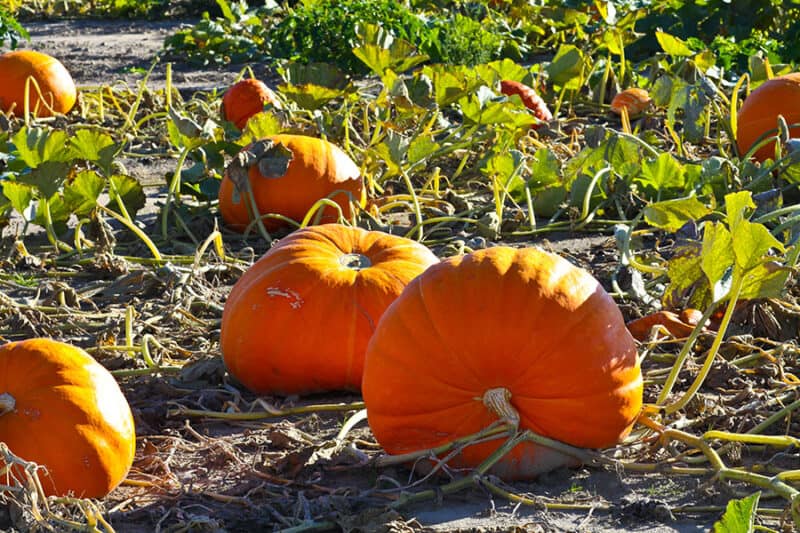
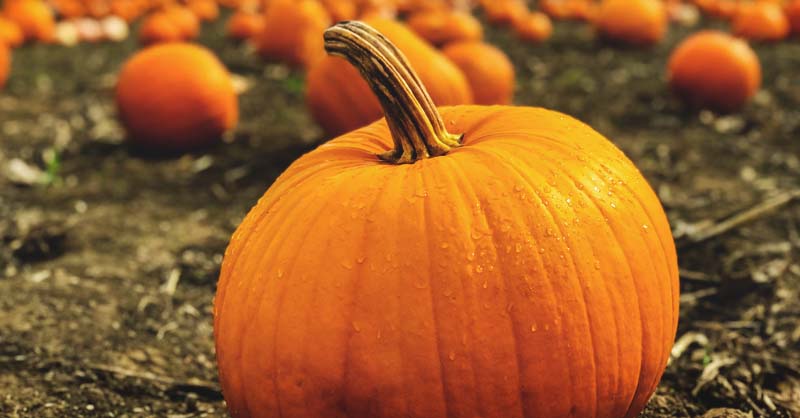
You’ll have an idea when your pumpkins are finished growing because the stem will dry up and look dead. At the same time, the pumpkin should have a beautiful, deep color to let you know it’s ripe.
When these two things begin to align, you can have confidence the pumpkin is ripe and ready for you to harvest it.
2. Check the Texture
If you’re still in doubt about the ripeness of your pumpkin, you can feel it. When you knock on the rind of the pumpkin, it should sound hollow.
Also, you can put your fingernail on the skin of the pumpkin. If your nail doesn’t easily dent the pumpkin’s skin, you know it is ripe as well.
Either way, be sure to harvest your pumpkins before the first frost of fall.
3. Cut from the Vine
When you feel confident your pumpkins are ripe, use a sharp knife to cut the pumpkin from the vine at the stem.
Leave 4-6-inches of the stem attached to the pumpkin. This helps deter diseases from forming within your pumpkin after harvest.
4. Let Them Dry
The next step in the process is the curing process. Brush any dirt from the pumpkin, but don’t use water. You don’t want to add anything to your pumpkin to encourage rot to take place.
From there, you’ll store your pumpkins in a sunny, warm, and dry location. We have a greenhouse which is an excellent location for curing pumpkins. You could also use a sunroom as well.
You’ll leave the pumpkins in this location, stem side up for 2 weeks. When the 2 weeks are complete, you’ll turn the pumpkins upside down, and leave them to finish curing for 2 more weeks.
5. Shine Them Up
After the pumpkins have cured in a warm, dry location for a month, it’s time to seal the moisture in the pumpkins before storage.
Use an old t-shirt or a soft cloth to apply vegetable oil to the skin of the pumpkin.
6. Store Properly
The final step in storing pumpkins is to place the pumpkins in a dark, dry, and cool location. Store pumpkins between 55-68°F.
Place the pumpkins on a shelf where airflow can still occur. You can use a wire shelf or durable ventilated plastic shelving for this purpose.
Be sure to add a cushion of straw, hay, or cardboard beneath the pumpkins to keep them from sitting directly on the shelf. This stops any damage to the outside of the pumpkin that could cause your pumpkins to rot.
Also, don’t place pumpkins in the same area where other fruits are stored. Fruits put off ethylene gas. This accelerates the lifespan of the pumpkins, meaning they won’t last as long.
Check your pumpkins regularly for signs of rot or mold. If these appear, be sure to discard the pumpkins to keep it from spreading to other pumpkins.
The pumpkins will last for different lengths of time depending upon the variety.
