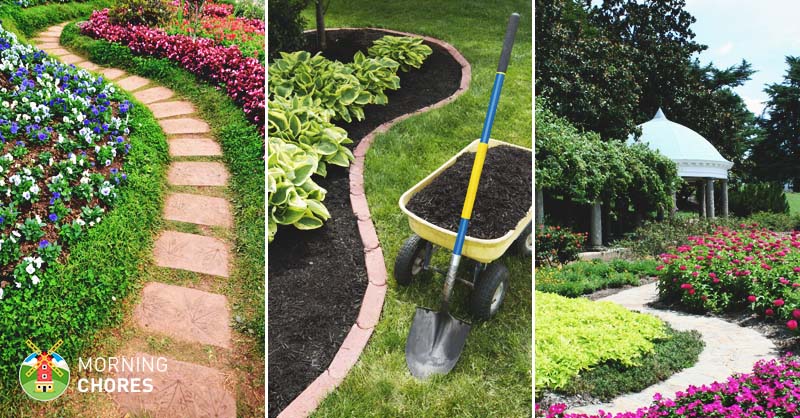
Do you like having a neat yard that is not taken over by weeds?
Then you need to discover mulch. It is an inexpensive way to make your yard look well-manicured. It does a great job of controlling weeds and keeping plants well-watered.
There are certain techniques to mulching, and if you are someone that is new to homeownership, you may be unaware of how to properly mulch.
We are going to cover all of the basics on how to correctly mulch. Here are the steps of how you go about it:

How To Mulch
1. Locate the Area You Want to be Mulched
Before you start mulching, you need to first decide which areas you’d like to mulch. Some people mulch their entire yards. Other people will mulch flower beds. While some people just mulch around certain plants.
You’ll need to decide what areas of your yard need mulch. In my experience, flower beds look great when mulched. Walkways are great when they are mulched. Mulching around trees and shrubs is always a great idea.
Also, mulching around your plants in your garden is a great idea as well as it helps them to retain moisture.
Once you have figured out what areas of your yard need mulch, then you are ready to move on to the next steps.
2. Trim the Mulching Area
You know where you want to apply the mulch, but you need to design the area first. I’ve mulched an entire backyard before. We had a bunch of above-ground planters in our yard.
So it was easier to do the whole yard than to try and mow around them. When we did an area that size, there wasn’t a lot of design to it.
However, if you are mulching smaller areas, like around shrubs, trees, or flower gardens, then you’ll need to design them.
For instance, if you have a garden bed up against the front of your house, many people line them with different items. You could use landscaping timbers, or you could use different edging designs like this.
Also, if you are mulching around a tree, it is a good idea to apply stones or some type of edging around the tree. Not only does it make your yard look neater, but it also helps to hold the mulch in place. This is an important step for that reason.
You’ll want to look at where you want to apply the edging and figure out if you need a way to hold it in place. If so, then you need to figure out the design you like to use to accomplish that.
3. Find Your Mulch
Now that you have the design in mind that you are going to try and create, you’ll need to have your edging in place.
Once that is done, you need to begin searching for your mulch. There are multiple ways to find it and different kinds to use.
First, you can use old leaves and yard scraps as your mulch. Gather them in a pile and then place them where you want to mulch.
Second, if you like a more traditional style mulch you can also just go to the store and purchase some bags of it. You can also purchase it here.
Third, you can create your own. You do this whenever you cut down a tree or anything that produces brush.
Once you’ve cut it down, you’ll need to run it through a wood chipper to create chips (or mulch.) You can go ahead and apply it directly to the area, or if you worry about the acid, then let it compost somewhere for a while before you apply it to your plants.
Finally, you can call up your local tree service and see if they will deliver a truckload of wood chips.
Again, if you worry about applying them directly to your plants and shrubs, then allow them to compost somewhere before application. This will save you a lot of money and give your yard a nice, finished look.
4. Get Your Tools Ready
Once you have your mulch and it is ready to go, it is time to get the tools out. Applying it to your yard looks wonderful, but it is hard work.
So you’ll need certain tools to help you accomplish the task.
First, you will need gloves. When you are spreading mulch, your hands will get blisters on them, especially if you are applying large amounts of it.
So do yourself a favor and protect your hands. You can purchase work gloves to do the job.
Second, you will need a wheelbarrow to help you lug large amounts of mulch around your yard. It will save your back a lot of stress.
Personally, I have moved a lot of large amounts of mulch around our yard. I would’ve never gotten the job done without a great wheelbarrow.
Do yourself a favor and buy a wheelbarrow to help you make this task a little easier.
Finally, you need a tool to spread your mulch. You can use a shovel, garden hoe, or my personal favorite which is a pitchfork. The pitchfork makes it easier to get large amounts of mulch from the pile to the wheelbarrow, and then from the wheelbarrow to the desired location.
Once you have these items, it is time to apply it to your yard.
5. Spread the Mulch
You have your tools in place, your mulch in place, and your yard design laid out. All that is left is to fill everything in with the mulch.
Now, if you are doing it in a garden bed at the front of a home, then you may want to consider laying landscaping fabric. This is laid over the ground and then you cut little holes in the fabric where your plants are.
Then you’ll pull the plants through. This is so the weeds and grass cannot come up, but your plants still have access to the surface. I just recommend adding this so you don’t spend a lot of time pulling weeds.
It is also important to make sure that you plant everything that you want in this area before laying the landscaping fabric because it is difficult to go back and add plants. We actually did this because we turned our front bed into an area for perennials.
Well, we didn’t do this until after we laid the landscaping fabric. I didn’t have as many weeds, but I did have more than if I had planted everything prior to laying the fabric.
Once this is done, you’ll begin throwing mulch on the areas. You want to make sure that the entire ground is covered completely.
Then I usually go back and add an additional second and third layer. The thicker it is, the harder it is for weeds to get through and the longer it takes it to compost. This means you have to apply it less often.
The more the better when you are doing the job. Just be sure that you don’t cover up any plants with it, or you could kill them.
And that is all there is to applying mulch to your home. If you are applying it around plants, then you’ll want to pile it up around each plant. Be sure that you fully cover the base of the stem as it can protect the plants from dirt splatter which causes disease in plants.
However, if you are applying it to plants, be sure that you wait until the plant is rooted and thriving in the ground. You don’t want to suffocate the plant.
3 Mulch Ideas in Your Garden
Well, now that I’ve explained to you how to mulch, you may want a few ideas to get you started. Here are a few ways people have used this around their homes:
1. Around the Mailbox
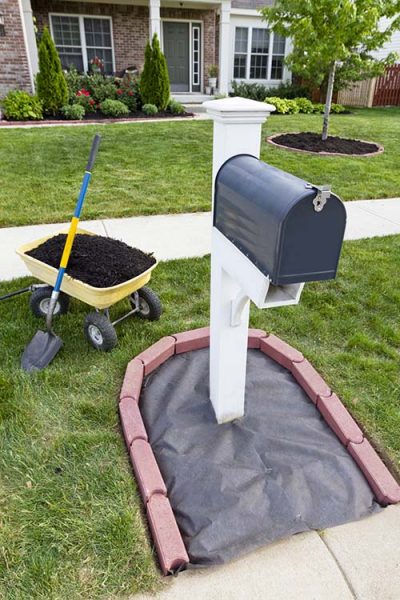
This picture shows how they laid the landscaping fabric around the mailbox to stop any unwanted grasses or weeds from popping up.
Then they used landscaping bricks around the mailbox to help define and hold it in place. It definitely brightens up the mailbox area.
2. The Mulched Walkway
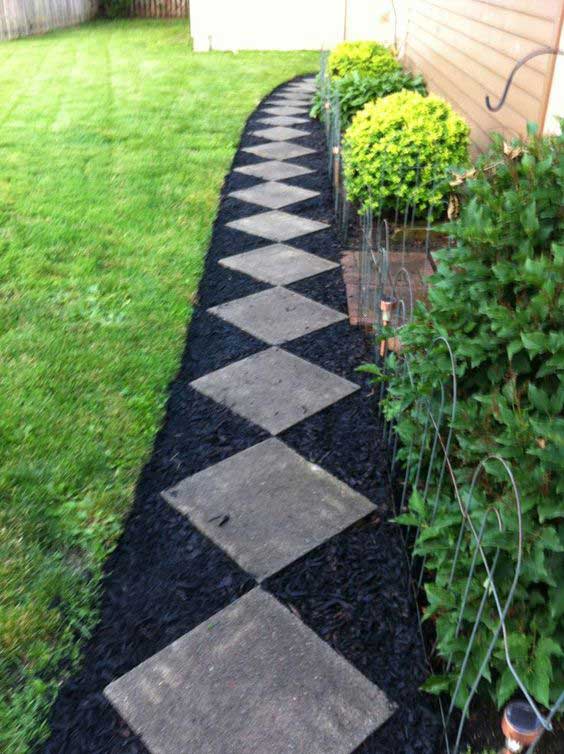
This is a really neat walkway design. If you like to use stepping stones, then you could turn them like diamonds. It gives them a unique style.
Then finish the look by mulching around the stones. It gives your walkway a pleasant design.
Check out this mulch idea3. The Mulched Front Garden Bed
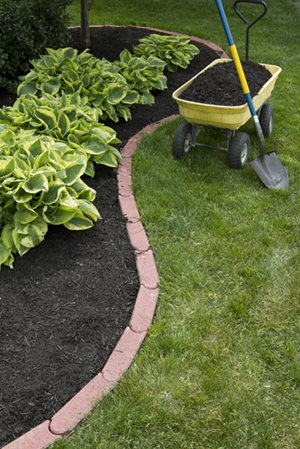
This is a great mulched garden bed idea. They used landscaping bricks to outline the area. Then they filled the area with beautiful plants as shown in the picture.
Finally, they completed the look by adding a darker mulch to the area. It really creates a clean look for the front of any home.
Check out this mulch ideaNow you know how to properly mulch your yard or garden. Plus, you have a few ideas of how you can use it to really brighten up your property as well.
Hopefully, these tips will help you to transform your home or garden this year.


