
Did you know that every last Saturday in July, a Green Bean Festival is held in Blairsville, Georgia to honor the green bean? They have green bean cooking contests, a beauty pageant, and even a tour of the local canning plant.
Wow! Who knew that a green bean was that special to some people that they had a day just to celebrate them?
Well, if you love green beans even half as much as the folks around Blairsville, Georgia do then you are probably interested in all there is to know about growing green beans.
So today I’m going to give you the information you need to successfully grow green beans right outside your backdoor.
Let’s get moving…
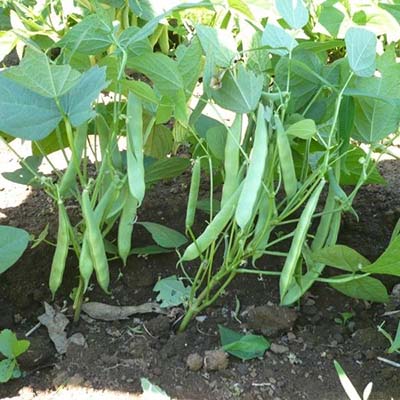
Green Beans Plant Info
- Hardiness Zones: 3, 4, 5, 6, 7, 8, 9, 10
- Soil: Silty loam, sandy, PH between 5.5-7.5, well-drained, temperature between 15.5-29° Celsius
- Sun Exposure: Full sun exposure in well-drained soils
- Planting: Seeded directly in the garden when the soil temperature is at least 15.5° Celsius, 14-28 days before the last frost date and 80-133 days before the first frost date
- Spacing: 6-inches between plants for pole beans and 4-6-inches for bush beans, 12-inches between rows for pole beans and 4-6 inches for bush beans
- Depth: 1-2 inches seed planting depth
- Best Companions: Corn, potato, eggplant, cucumber, catnip, nasturtium, carrot, celery, tomato, peas, broccoli, beet, strawberry
- Worst Companions: Onion, scallion, leek, garlic, sunflower, pepper, basil, fennel
- Watering: Water moderately to ½-inch of water per week, avoid watering the plant tops
- Fertilizing: Apply a balanced fertilizer once a month throughout the growing season
- Common Problems: Bean weevil, stem nematodes, downy mildew, leaf and pod spot, chocolate spot, black bean aphid, bean seed beetle, bean rust, sclerotinia, cutworms, white mold, mosaic viruses
- Harvest: When the leaves are dry, before the seeds bulge, continual harvesting is recommended for prolonged production
The Varieties of Green Beans

There are 4 basic types of green beans. Within each type, there are different varieties to choose from.
1. Bush Beans
The first type of green bean is a bush bean. Bush beans are shorter beans that only grow to be about 2-feet in height.
However, they don’t require any trellises because if planted correctly they basically stretch out and lean on one another for support.
And an upside to growing bush beans is that they do produce about 1-2 weeks faster than pole beans though they don’t produce as much as pole beans do.
Also, bush beans have many popular varieties such as Contender, Blue Lake, Provider, and Tendergreen.
I must admit, we grow a variety of green beans in our garden, and bush beans are one of them. The reason we love bush beans is that you usually do not have to string them. The downside to bush beans is that they are very hard on your back when picking.
2. Pole Beans

The second type of bean is pole beans. Now, these beans grow to be about 8-10-feet in height.
Even so, these beans certainly need a trellis because of how tall they grow. However, most people grow these beans on teepees.
They are obviously going to be much easier to harvest because they grow so tall, and they also are great producers as well. The varieties of these beans available are Rattlesnake, Fortex, and Kentucky Wonder.
3. Runner Beans

The third type of bean is a runner bean. These beans are great producers but take a lot of work while harvesting.
However, don’t let that deter you because though they are a lot of work at harvest, we still grow them because of how great their product is.
So the most popular variety of this type of bean is the Scarlett Runner. However, it is worth mentioning that if you do raise these beans that they will offer large pods though they do require stringing, and you will have to give them something to run-up.
4. Yardlong Beans

This type of bean is one that you may not be very familiar with. It is actually an Asian variety of green beans. They are most commonly found in Chinese markets.
The most popular variety of this bean is the Red Noodle. However, if you are interested in raising this type of bean you must live in a very warm climate. These beans need long hot summers (day and night) in order to thrive.
How To Plant Green Beans
Green beans give a large harvest for the amount of work that they require.
Here is the skinny on green beans. They can be planted once your ground temperatures are above 60°F. Not sure when that is going to be? No worries, just use this calculator.
Now that you know when you should plant them, you have already done half of the work in planting beans. Basically, you’ll add 1-2-inches of compost to the soil where you are planting them and plant them as seeds. Yes, they are direct sow. Isn’t that great?
However, it is worth mentioning that your soil pH level should be around 6.0-6.5. That is the acidity that makes them the happiest.
Then you will plant your seeds 2-4-inches deep. And be sure if you are planting a variety of bean that will need a trellis to do that before you actually plant your seeds.
And that is all there is to it. If you add the proper amount of compost to your soil you shouldn’t need to fertilize your beans any further after that. Beans are actually very light feeders so if you add too much nitrogen then you will cause a delay in their production.
When you go to plant them you can just dig a shallow ditch in the dirt with a trowel or a hoe. There are no fancy tools needed to plant green beans in your garden.
And that is just how easy green beans are to plant and become a part of your garden.
Common Problems in Green Beans
Green beans require very little care. All they ask for is 1-1.5-inches of water per week.
And they do better if you can water them through a drip irrigation system versus an overhead watering system and a garden hose. This is because dirt will not splash on them and helps them to avoid diseases from the dirt that splashes on them.
However, green beans do still have a few common ailments that you may come in contact with during your time growing them.
1. Stem Anthracnose

Stem Anthracnose is actually a fungus. You will know your plants have it if you begin to see dark colored spots on them. This actually forms from your beans growing in overly wet conditions.
You will be able to avoid this fungus by avoiding overhead watering. This keeps the dirt off of your plant and, in turn, avoids the fungus from latching on to your beans. Unfortunately, there are no treatments known at this time.
2. Bean Rust

Bean rust is also a fungus. You will know your plants have developed this disease because it will have developed rust-colored spots.
Again, the only way to beat this fungus is to stop it before it starts. You can accomplish this by rotating your crops. Unfortunately, if your plants do develop this disease you will need to discard them.
3. Mosaic Virus

Mosaic viruses are caused by many factors such as herbicide use, infections, or nutrient deficiencies. You will know your plants have this disease if they have unusual colored splotches on them. Like many of the other diseases, the only real way to beat them is to discard once your plants develop the disease.
4. Powdery Mildew

Powdery mildew looks like it sounds. It is basically a white powdery film that develops on your plants. It is spread by wind and rain.
The only way to beat or avoid this disease is to avoid overhead watering, use high-quality seeds when planting, and also to use a fungicide if your plants develop this disease.
Best Green Beans Companions
Companion planting is a great method to keep in mind when planting a garden. The reason is that there are certain plants that complement each other well when planted near each other. They are able to give each other a boost that they simply can’t get when planted near other plants.
However, with that same thought process, there are also plants that should avoid each other in the garden. They drag one another down by drawing the same bugs and other common problems that could equate to a disaster for both crops.
Well, green beans are no different. They have friends and foes in the garden. So what are they? Here they are…
Best Companions for Green Beans:
- Carrots
- Cucumbers
- Cabbages
- Lettuces
- Peas
- Parsley
- Cauliflower
- Spinach
- Summer Savory
Worst Companions:
- Onions
- Garlic
- Fennel
- Sunflowers
- Kohlrabi
Harvesting and Storing Green Beans

So you’ve planted your green beans and now they are producing like crazy. However, now what?
Well, the fun is just beginning. Green beans are fairly easy to make grow but the harvesting is where the real work begins.
When you harvest your green beans is going to depend on your personal preference. Around my house, I have some picky green bean eaters. When green beans are still young and tender is when I have to pick them if I expect my husband and boys to eat them.
See, as green beans get bigger and the beans fill out, the strings become more prominent and the outside of the pod gets a little tougher.
Now, some people love this type of bean commonly called a ‘shelly.’ However, not around my house. If my husband or boys have tougher skin or see a string then they pretty much turn their noses up.
As I said, I pick my beans when the inner bean is still very small. Basically, when they are young and tender.
However, as I was saying, you look at your beans and decide your own preference as to when you want to harvest.
And after you decide to harvest you just go along the row or teepee and gently pluck them from the plant. Once they have been picked you’ll bring them inside and rinse them.
Then my favorite part begins. You grab a large pot and a pan. You’ll need the pot to put the broken beans in and a smaller pan to hold handfuls of green beans in your lap. I usually put on a movie while I’m breaking beans so I can relax and be productive simultaneously.
When you are set up you will break one end of the bean and pull the string down the side of the pod. (Unless you went with stringless beans. If that’s the case you’ll just break off both ends of the bean.)
You’ll then break the other end of the bean and pull the other side’s string off. Then you will break the bean into 2 or 3 parts. Then toss them in the pot. And do this repeatedly until the whole harvest has been strung and broken.
After stringing is complete, you’ll wash the beans again in cold water to make sure there is no remaining dirt on them. Then it will be time to store them.
Storage Options
1. Into the Fridge
If you don’t have time to string your beans right after harvesting, no worries. All you need to do is leave the beans unwashed and place them in a storage bag or a grocery bag.
Then you’ll toss them in the fridge. They should remain in good shape for up to 7 days. And then you’ll process them as mentioned above when you are ready.
2. Into the Freezer
Many people actually do not recommend freezing your fresh green beans. Apparently, there have been some studies that show that green beans begin to lose certain nutritional value after being stored in the freezer between 3 and 6 months.
However, if you would still like to freeze them then after you process them as mentioned above, you will steam them for 2-3 minutes. Then place them in a freezer sealed bag and toss them in the freezer until you are ready to eat.
3. Into the Canner
I usually can most of my green beans. So after you process them and wash them the second time you will tightly pack the raw beans into washed and sanitized quart jars. You will also need to place 1 teaspoon of canning salt in the bottom of the jar.
After the jars are tightly packed, you’ll want to fill the jars with water up to the neck of the jar. Then place a fresh lid and a ring on to the jar. Then you will pressure can the beans for 25 minutes under 10 pounds of pressure. If you are unfamiliar with canning, here is a great resource:

4. Into the Stomach
So you picked and processed your beans. However, you don’t want to store them for later. You want to eat them now! I understand. Fresh green beans are so delicious.
After you wash the beans for the second time you will place them in a pot where they are covered with water.
Now, I like a lot of flavor in my beans. So instead of just boiling them in the water, I add some stock or bullion to the water. I also add some fresh onion or onion flakes. As well as red pepper flakes, bacon, or bacon bits to the mix.
Then you will bring them to a boil and then allow them to simmer for about 1-2 hours until they are tender. Then you can add some butter to the finished product. They are so good!
As you can tell there are multiple ways to store your fresh green beans and harvesting isn’t very difficult either. Green beans are truly a great plant to have in your garden.
Recipes for Your Green Bean Harvest
When you grow green beans, harvest them, and store them you have to know what to do with them once you have them ready for your consumption. So here are a few recipes to help you get started.
1. Green Bean Casserole
Green bean casserole is a favorite around many households. It is a delicious way to help your family have a little different twist on the traditional form of cooked green beans.
2. Dilly Beans
Dilly beans are a delicious option for fresh grown green beans. When you get tired of canning regular green beans then you can always can these for a different twist.
3. Green Beans with New Potatoes
This recipe is great for a Sunday supper with the family all gathered around your kitchen table. It is very frugal and rather simple to put together. So if you need a dish that is delicious and will feed many then this recipe is for you.
4. Vegetable Soup
I love vegetable soup. I could seriously eat it on a hot summer day. It is healthy and delicious. If you would like a tasty soup that will warm you up on a cold winter day or fill your stomach on a warmer day then you will love this one.
5. Fried Green Beans
This is a different recipe for green beans. However, it sure looks tasty. If you are a fan of fried green tomatoes then you will probably love fried green beans too. Give it a try with this recipe.
There you have it, folks. All you need to know about growing your very own green beans. They are very tasty, easy to grow, and great nutrition for you and your loved ones.
So why not go for it and raise your own?


