Collards are one of my top choices among greens to grow in my garden. Where I live, the scorching heat makes it tough to successfully grow things like spinach, lettuce, and other greens in the middle of the summer. I could cover crops with shade cloth and plant them in partial shade, but even then the heat and humidity are often enough to force the plants to bolt early. But I can succeed in growing collard greens even in the heat of summer.
Bolting, which is when a plant sends up its flower stalks, typically causes plant foliage to become bitter, so when it happens early, it’s a big letdown. Especially if you haven’t had a chance to harvest anything yet.
I didn’t know much about collards when I first saw a packet of them. I had a vague understanding that people in the South ate these types of greens, but that was the extent of my knowledge.
Now, collards are some of the most important crops I have in my garden. I love how big and leafy they get and how they rarely need much attention because they thrive in the hot weather. I’ve also found them to be reasonably tolerant to cool weather and never worry when the temps become unseasonably chilly.
Below, I’ve included information on the different collard varieties, how to time your planting of this bolt-resistant vegetable and tips for how to harvest the leaves.
Collards may not be a first choice plant for gardeners, but I think they are a mighty match for other greens like kale. They’re well worth trying in your garden!
Collard Varieties
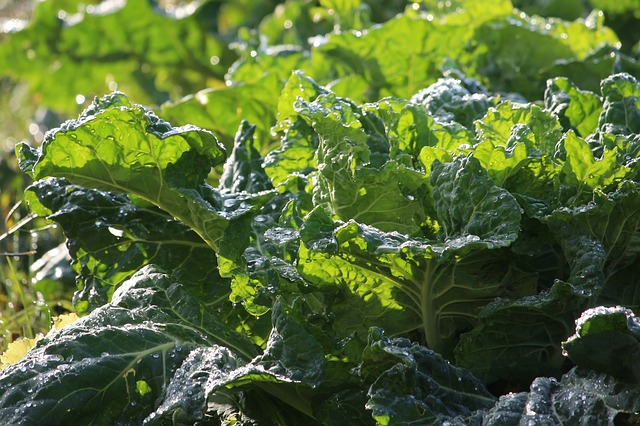
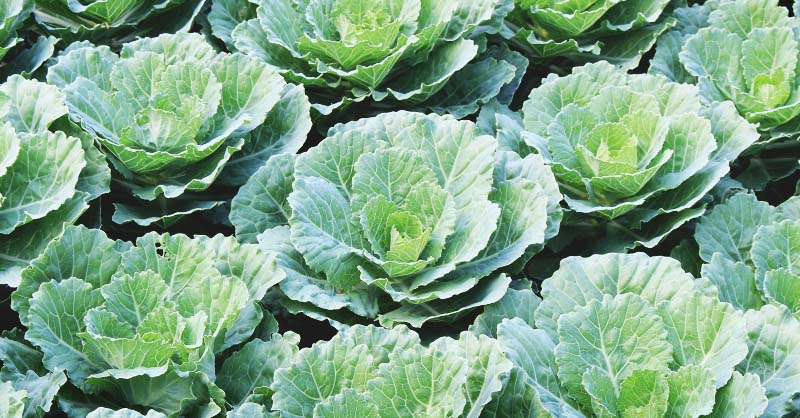
Collards thrive in the hot weather and feature some of the broadest foliage I’ve ever seen on any greens I’ve planted. One collard plant provides a sizeable yield, which is a bonus when you’re space-starved.
When I first started growing collards, there weren’t many hybrid varieties available. At least not where I was buying my seed. Nowadays, though, there are plenty of improved hybrids to choose from.
If you’re ready to start growing collard greens, here are a few varieties to consider for your garden:
Georgia
An heirloom variety that tolerates heat and cold, so its suitable for a range of climates. Produces a lot of tasty leaves.
Morris Heading
Also known as ‘cabbage collards’ this type is bolt-resistant and grows relatively quickly. This heirloom features attractive dark green leaves that are nice and tender.
Vates
This variety features smaller leaves than some others, but it’s just as heat-resistant. It’s also cold hardy, so it’s an excellent pick for cooler regions. A good choice for those who want to try collards and don’t need a big yield.
Champion
Champion is a compact grower, like vates. This type is resistant to cabbage worms, but in my experience, the worms will manage to get to these leaves as well as they would any other brassica.
Tiger
Tiger is an early hybrid collard variety with textured leaves. It’s an attractive addition to the garden.
Top Bunch
Top bunch is another hybrid that produces a compact bunch instead of loose leaves. It’s a tall plant that’s ready to pick early in the season.
Flash
Flash is perfect for incredibly hot locales. It’s a hybrid that features dark green leaves and continues to produce for a long time.
Planting Collards
Growing Zones
Collard greens grow in zones 6-10. They’re an excellent choice for both northern and southern climates because they love the heat but also tolerate cold weather. Many varieties will even hold through the winter and can be picked if protected with a cold frame or another season extender.
Sun Requirements
Plant collards in full sun, though partial shade will work in a pinch. Unlike other greens, they won’t bolt in the full sun.
Soil Requirements
Choose a spot or space in your garden with a soil pH between 6 and 7. Soil should be fertile and drain easily. I add a handful of compost to my planting hole once it’s time to transplant.
Starting Collards
I like to start my collards indoors because of all the greens I grow, they’re usually the slowest growing. Direct sowing is also doable; you’ll have to wait a bit longer for full-size plants, though.
Think of collards like they’re kale. They’re both from the same family, after all. I start collards indoors a little earlier than kale, about 4-6 weeks before the final frost date. Start indoors 6-8 weeks before the first frost date in the fall for an autumn harvest.
I also direct sow collards a couple of weeks before the last frost date (if the soil is workable).
Germination
Germination typically takes about a week, but sometimes longer, depending on whether the conditions are ideal. It’s important to thin seedlings to prevent overcrowding. Do this as soon as there are a few visible true leaves.
Hardening Off
Harden off indoor starts for about a week before planting.
Transplanting
Transplant seedlings outdoors when they have 5 to 6 true leaves.
Spacing
You can space collards in a few different ways. If you want to harvest baby leaves, space the plants closer together at 4 per square foot if you’re a square foot gardener.
For large plants, I usually plant 2 per square foot, as I do with kale. Give row plants 12-24 inches with 2-4 feet between rows.
Container Growing
Collards do well in containers. If you have limited space, I suggest making container displays that include collards. Choose a large pot and pop in kale, collards, along with flowers like marigolds or zinnias for a pretty arrangement on your deck or porch.
Succession planting
Because I love this plant so much, I scatter my start dates, so I have a continuous supply of this tasty veg.
Caring for Collard Greens
As I mentioned, growing collard greens is much like growing kale plants. Here what you need to know:
Watering
Water evenly and regularly. Collards deal well with drought, but you should still expect to water often, about an inch a week.
Temperature
Collards handle hot and cool weather fine, so don’t worry much about the forecast.
Mulching
I mulch all my plants, collards included, because it conserves moisture and keeps down weeds.
Fertilizing
A handful of compost or a feeding with an all-purpose fertilizer at the start of the season is usually enough to get by, but most collards will do best with a dressing of compost or fertilizer every 4 to 6 weeks. Growing collard greens are heavy feeders.
Weeding
Plant close together or use mulch to keep weeds at bay.
Crop Rotation
Start another batch of collards indoors for transplanting in the late summer for a fall or winter harvest. Don’t plant collards in the same area as other brassicas in the following year.
Problems and Solutions When Growing Collard Greens
Anthracnose
Anthracnose is a fungus you generally see in the eastern U.S. You’ll know you’ve got it if you see water-soaked lesions on the leaves of your collards. It likes lots of moisture to thrive and it spreads by rain, irrigation, insects, and garden tools.
Buy resistant plants if you know you have this in your area. Clean your tools between use and use a broad-spectrum fungicide or neem oil to control it.
Alternaria Leaf Spot
Alternaria leaf spot shows up as brown, ring-shaped spots on collard leaves. The key to keeping it under control is to keep pests away, remove all dead plant matter from around your garden, water at the base of plants and not the top, and sanitize your tools. Also, be sure to rotate your brassica crops.
Black Rot
This bacteria shows up as yellow, V-shaped lesions that turn black and necrotic. The best ways to prevent it is through crop rotation and watering in the morning at the base of plants. You can also purchase disease-free certified seed and be sure to give plants plenty of space when planting.
Clubroot
Clubroot causes galls to form on the roots of growing collard greens, eventually causing stunted growth and leaves to turn yellow and drop. Infected plants may perk up during the day only to wilt again at night. High levels of calcium, magnesium, and a high pH discourage clubroot.
Be sure to keep your garden weeded and rotate your crops frequently to avoid it from taking hold in your garden.
Downy Mildew
Downy mildew shows up as yellow or white patches on the upper sides of leaves. As the disease progresses, leaves may turn brown or yellow and fall off.
Improving air circulation is the best way to tackle this problem. Give plants plenty of space when planting and keep gardens weeded. Treat plants with copper spray, particularly when the weather is cool and wet.
Cabbage Aphid
As the name suggests, cabbage aphids are aphids that attack plants in the cabbage family. These gray pests usually appear in late summer and cluster on collard leaves.
Clip off infested leaves and spray plants with neem oil regularly.
Beet Armyworm and Cutworm
Armyworm and cutworm are two different species of larva that feed on collard greens. Cutworms attack at the base of plants while armyworms feed on the leaves.
Keep debris and weeds away from your garden so these pests don’t have a place to hide. Encourage natural predators, use sticky traps to catch them as moths, and make a cardboard plant collar to keep them from attacking. You can also use an organic pesticide to control them.
Cabbage Worm
As with kale, I’ve only ever had one problem while growing collards: the dreaded cabbage worm. They’re particularly troublesome if you have young plants on your hands. The worms can quickly devour entire swaths of seedlings in a day or two, which makes it hard to get any plants to grow big enough for harvest.
Manual picking is your best bet if you already have an infestation. Diatomaceous earth works as well, but both options won’t typically put a massive dent in a cabbage worm population if they’re numerous enough to eat entire plants down to the spines.
Your best approach is to prevent the cabbage moths from laying their eggs on your plants in the first place. Insect netting and row covers will protect your plants while still letting air, sun, and rain through. It’s the strategy I’ve used this year, and I’m incredibly happy to report that I haven’t seen a single cabbage worm slinking along the leaves of my brassicas.
Flea Beetle
These tiny, black, jumping insects chew shot holes throughout the leaves of your growing collard greens. They are particularly awful because they transmit diseases.
Use row covers to protect young plants and yellow sticky traps to nab flea beetles. Apply diatomaceous earth around your plants and spray leaves with neem oil.
Thrips
Thrips suck the life out of your plants and can rapidly harm your garden because they move in large groups. Discard infested plants immediately and keep weeds away from your garden to reduce their hosts. You can use blue sticky traps to control them, as well as beneficial insects and organic insecticides.
Companion Planting for Collards
A few of these friendly companions play well with collards and even supposedly deter cabbage moths:
- Other brassicas (e.g., bok choy, kale)
- Onions
- Garlic
- Rosemary
- Mint
- Chamomile
- Tomato
- Potato
- Celery
- Dill
- Thyme
- Beet
- Sage
These plants don’t play nice with collards, so avoid planting them nearby:
- Pole beans
- Rue
- Strawberries
Harvesting & Storing Collards
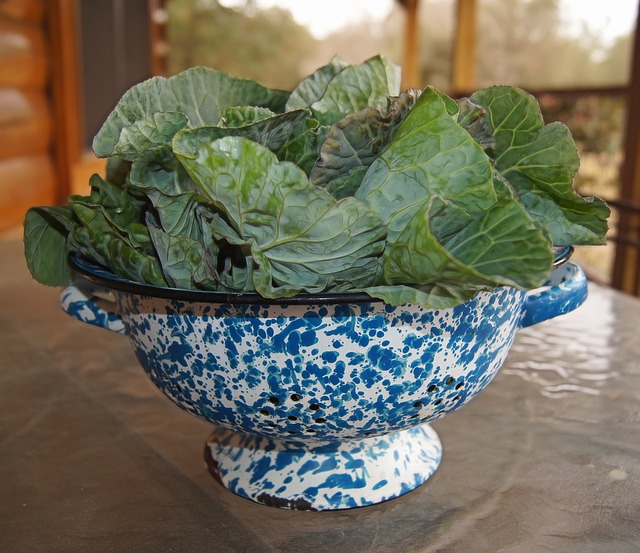
Harvest collards as you would kale. Pick outer leaves first and once the leaves reach their desired size. The plant will continue to grow and produce throughout the season, so don’t cut at its base. Collards are generally ready to harvest 60-80 days after planting when leaves reach 12 inches tall.
Use leaves right away or store them in the fridge in a plastic bag for about a week. I like to cut leaves as I need them. I simply find it easier and more convenient.
Like kale and other brassica family vegetables, collards are delicious sautéed, stir-fried, or braised. My favorite way to use collards is as a substitute for cabbage when making cabbage rolls or in soups. Oddly enough, I make a lot of soup during the summer. Why? Because greens of all kinds make an excellent and nutritious addition to soups, so I’m always in a soup making mood when my garden is producing.

