
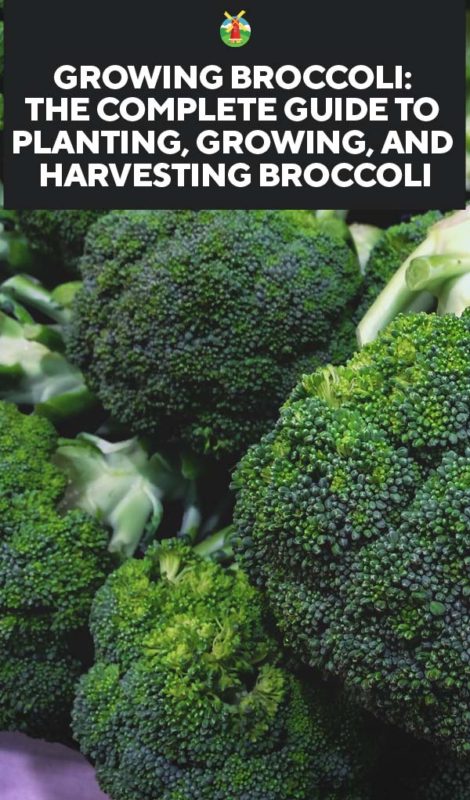
Broccoli is a vegetable rich in vitamins and tastes delicious in a variety of recipes. Knowing these two qualities, you should be asking yourself why you aren’t growing it in your yard right now?
If your answer is, “I don’t know how” then let me fix this problem for you.
I’m going to share different broccoli varieties, how to plant and care for them, and the best way to harvest and store this nutritional powerhouse.
Here’s what you need to know to grow broccoli:
Broccoli Varieties
There are an endless variety of broccoli out there, but here are a few of my favorites:
Gemini
Gemini is a variety known for producing broccoli with uniform heads. This is ideal if you’re someone who presents food on special occasions and is concerned about food presentation. It also makes it easier on you at harvest time.
Tahoe RZ
If you’re looking for a variety of broccoli that will give you a beautiful harvest with little effort, you’ll like this variety. It’s known for producing a nice-sized, quality harvest.
Avenger
Broccoli is frequently thought of as a cold-weather plant, which is correct in most cases. This variety has proved it can grow well in warmer climates, as well, such as in Mexico and Guatemala.
Asteroid
When you grow your broccoli, there are some varieties that produce different colors. The asteroid variety is not one of them.
This variety produces a dark green crown. Another wonderful advantage of this variety is the ease in harvesting because of how erect and neat the plant grows.
Constellation
This variety of broccoli is known for producing a harvest all at once. If you’re someone who preserves food, this could be helpful. This variety is one that can be enjoyed during both the spring and fall growing season.
Paraiso
This variety is known for producing quality sized florets. Most of the broccoli on this list is good for home gardens, but this one does nicely for commercial growing as well.
Marathon
When you go to the supermarket, this variety is what you’re most likely accustomed to seeing. It’s a favorite among those who sell broccoli commercially because it produces well in a variety of climates.
Lieutenant
This broccoli is an excellent option for a spring garden. In fact, this is the only time it’s recommended to grow this particular variety.
Though it can’t be grown two times in a year, like some varieties, it makes up for it by only taking 58 days to reach maturity.
Blue Wind
The blue wind variety produces smaller broccoli heads with a blue tint to them. This variety is one that must be harvested quickly since the heads don’t do well when being left in the garden.
Emerald Crown
This is another variety that is known for producing uniform heads. If you prefer only to grow broccoli in your fall garden, this is a great option since fall is the recommended time for this variety.
Centennial
This variety of broccoli is worth considering if you live in an area with a temperate climate because it can be grown year-round.
Imperial
The imperial variety requires more daylight than other types. Because of its need for longer days, it should be grown during spring.
Planting Broccoli
Once you pick what varieties of broccoli you want to grow, it’s time to start planning and planting. Here is what you need to know about growing broccoli in your garden.
Broccoli grows in USDA zones 3-10.
When to Plant
Broccoli is a cool-season crop that does best when you plant it in the spring or fall. The goal is to harvest the plant by early summer or late fall to avoid the heat. Not only will those temperatures stop the growth, but it could cause your broccoli to bolt.
Be sure you plant broccoli when it’s the right temperature. The ideal temperature for a broccoli plant is between 60 and 80°F during the day.
If the temperatures aren’t right, the broccoli will begin to form heads too quickly. This equates to tiny broccoli florets.
I made this mistake my first year growing broccoli. I planted too late, and it killed my harvest.
Sun and Soil Requirements
Broccoli needs to be planted in a location that has full sunlight, which is 6-8 hours of sun per day. If you don’t have enough sunlight, it could cause thin, leggy plants with subpar heads.
The soil should be moist and fertile, and it does need to drain well. Broccoli likes moisture but not standing water. The dirt should be slightly acidic, between 6.0-7.0.
If you need to increase the acidity level of the soil, you can try adding lime or leaf mulch to the soil. Both are soil amendments that raise your soil’s pH level.
Ideally, you should work 2-4 inches of compost or a layer of manure over your garden beds a few weeks before you plant in them. Compost increases the nutrients in the soil as well as increases drainage.
Planting by Seed
There are different rules to follow based upon whether you’re growing broccoli in the spring or fall.
For spring plantings, start your seeds 6-8 weeks before your last frost date. Sow your seedlings in the garden 2-3 weeks before your final frost date. You can plant them earlier if the soil is workable.
For fall plantings, sow your seeds outside 85-100 days before your first fall frost date. Find your first frost date and use a calendar to count backward.
Another choice is to start the seeds indoors in May or June to plant 6-8 weeks later in the garden.
Seedlings need to have 4-5 real leaves before you can transplant them outside. Be sure to give them a week period of transition to harden off. Space them 18-24 inches apart in holes that are deeper than their containers.
Spacing
If you’re sowing seeds, the seeds should be 1/2 inch deep and 3 inches apart. When the seeds are 2-3 inches tall, thin them so that they’re 18-24 inches apart. Broccoli needs room to spread.

Each row of broccoli should be 2-3 feet apart. If you space the rows closer together, it will result in smaller main heads but more side shoots.
Can I Grow Broccoli in a Container?
Broccoli does well in containers, growing happily in pots of all types. Since the roots are widespread, you can only put one plant in each 5-gallon container. If you have a 15-gallon container, you could grow 2-3 broccoli plants.
How to Care for Broccoli
Planting broccoli in your garden correctly is only half of the job. Now you have to take care of those plants properly to achieve a harvest.

Fertilizing Needs
Broccoli is a heavy feeder, so you do need to fertilize your plants 3-4 weeks after transplanting seedlings into your garden. Make sure you select a low nitrogen fertilizer for optimal results.
Watering Broccoli Plants
Since broccoli is a cool-weather crop, it needs a lot of water. It’s best if the soil always stays moist and doesn’t dry out. There is a difference between moist and soggy; you don’t want the ground to be saturated with standing water.
Stick your finger into the soil. If it’s moist up to your knuckle, it’s wet enough.
Plan to provide your plants with at least 1-1 1/2 inches of water each week. If you experience drought-like conditions, you will need to provide more water than this.
Though water is important, you need to make sure it’s applied in the right places. When the heads of broccoli are forming, it’s important to water in a way they don’t get wet.
It isn’t good for the plant and can cause problems for your harvest. Broccoli is best if watered using soaker hoses to ensure only the roots get watered.
Mulching
Mulching around your broccoli plants is a must-do task. These plants have shallow roots, so weeds and other disturbances could cause issues with the roots.
When you apply thick layers of mulch, you suffocate the weeds without disrupting the roots by yanking out the weeds. Also, applying mulch will keep the soil temperatures down.
Cover with Netting
Broccoli plants are prone to pests, so you should cover all of your plants with netting or floating row covers. That can help to deter pests and other critters that might bother your plants.
Another thing that you can do is apply diatomaceous earth on your plants to stop pests from visiting. It’s an effective preventative measure.
Common Pests and Diseases
Broccoli, like many cool-weather crops, deals with a fair amount of pests and diseases. While they can struggle with a plethora of pests and other problems, here are the top contenders.
Aphids

If your plant has curling leaves, it might be an indicator that you have aphids that are sucking out the plant’s sap. Aphids are tiny little insects that like to attach to the underside of your leaves. They are typically little black insects, but they can be green, white, tan, or brown.
You can use a blast of water to remove what aphids you can see. Another choice is to use soapy water on the sides of the leaves where you see the aphids. Insecticidal soap works well.
Cabbage Loopers
If you see small holes in the leaves between the veins, it could be an indication that cabbage loopers are in your garden. Cabbage loopers look like green caterpillars.
The first thing that you should do is handpick all of the cabbage loopers off of the plant. After you remove all of the visible loopers, use Bacillus thuringiensis to get rid of the rest. B.T. is a natural, bacterial pesticide.
Clubroot
You might have clubroot if you find quickly wilting broccoli plants in your garden. Clubroot is caused by a fungus in the soil.
Unfortunately, if your crops end up with clubroot, you need to dig up the entire plant, including all of the roots and root tendrils. If clubroot is the problem, the roots will be misshapen.
You need to remove all of the plants in that garden because the fungus can continue to live in the soil. Make sure not to toss those plants into the compost or the fungus with spread throughout your entire compost bin.
Cutworms
Cutworms are one of the most frustrating pests to handle. They can destroy young seedlings at the ground level, working at night. When you wake up, your healthy broccoli plants are fallen over.
One measure that you can try is to wrap the stem at the soil level with a collar made of cardboard or cloth. Save your toilet paper rolls; they work great for this! Another choice is to make a collar out of aluminum foil.
Downy Mildew
This disease leads to yellow patches on the leaves of the plant, and moist weather can encourage the development of downy mildew.
While you can buy broccoli plants that are resistant to downy mildew, the best plan is to actively prevent the disease by keeping the leaves as dry as possible. The plants need good air circulation, so be sure to keep the proper spacing between the plants.
Nitrogen Deficiency
One of the biggest problems that you might face when growing broccoli is that the bottom leaves start to turn yellow. Eventually, the yellowing continues to the top of the plant.
The best solution is to give the plant a high nitrogen fertilizer with low phosphorus or blood meal. Blood meal is like a quick fix for nitrogen deficiencies.
Best and Worst Companion Plants for Broccoli
Broccoli has certain plants it does better when planted near. Those plants are:
There are certain plants that need to be avoided around broccoli too. Some of these plants have similar nutritional requirements which could hinder your broccoli harvest.
Other plants feed heavily from the soil (as does broccoli) which causes your soil to become depleted of nutrients quickly. Also, some of the vegetables (such as nightshades) have been scientifically proven to hinder broccoli production.
Here are the plants to avoid around broccoli:
- Cabbage
- Cauliflower
- Brussel Sprouts
- Asparagus
- Cantaloupe
- Corn
- Pumpkin
- Watermelon
- Tomatoes
- Eggplant
- Peppers
- Greens
- Grapes
How to Harvest Broccoli
Harvesting broccoli is simple. It requires only a sharp knife or a sharp pair of snips to turn your plants into a meal. Here’s how you harvest broccoli:
Look at the Head
The head of the broccoli should be tightly put together when you harvest. If the head is showing signs of flowering or has turned yellow, it’s time to harvest your broccoli quickly.
Don’t be alarmed if your broccoli heads aren’t as large as what you’re accustomed to purchasing from the store.
They’re homegrown and fresh, which makes up for anything they may be lacking in size.
Do It in the Morning
It’s important to harvest your broccoli in the morning unless you’re in an urgent harvesting situation where the heads are beginning to yellow.
Otherwise, you’ll want to harvest when the soil is still cool because it gives the broccoli a better flavor.
Leave Enough Space

When you collect the broccoli, you’ll take the head of the broccoli off by cutting part of the stem. You’ll need to take six inches of the stem when cutting the broccoli head loose from the plant.
Let the Plant Produce
Depending upon the variety of broccoli you planted, you could have side shoots coming off of the plant. If this is the case, leave the broccoli plants alone.
They’ll produce more broccoli heads from those side shoots in the weeks to come. If you live in a cool enough climate, you could have broccoli producing all year long.
Wash and Dry Well
After you’ve harvested your broccoli heads, you’ll need to bring them in the house and wash them in water.
Be sure to dry each head thoroughly before you store it. If not, you could cause the harvest to rot before you get to enjoy it.
How to Store Short-Term
If you’ve only grown enough broccoli to eat as you go, take the freshly washed broccoli heads and store them in your fridge.
Be sure to use them within the next five days, or they’ll go to waste.
How to Store Long-Term
If you’ve produced enough broccoli to store for the long-term, quickly blanch the broccoli heads in boiling water.
This means you dip the broccoli in boiling water for one minute. Pull the broccoli heads out and let them drain any excess water from them.
From there, you place the broccoli heads in a freezer bag and store them in your freezer for up to one year.
Home Grown is Best
Now for the best part. Once you’ve grown and harvested your broccoli, you need to do two things. First, dig in and appreciate how much better home brown broccoli tastes.
Second, come back here and tell us how you like to prepare your broccoli! I’m always looking for new ways to eat it.


