Did you know that the oldest grapevine in America is over 400 years old? Or that grapes can help with circulation issues and eye stress? Doesn’t it make you want to eat more grapes? If so, you should learn how to start growing them.
This post is going to show you how to pick a grape variety, how to plant them, growing challenges you could face, tips for helping your grapes grow stronger, and also recipes to help you utilize them once you’ve managed to grow them.
Let’s get started:
Grape Plant Info
- Hardiness Zones: 2, 3, 4, 5, 6, 7, 8, 9, 10
- Soil: Loamy, sandy, clay, PH between 6.0 to 7.0, fertile, well-drained
- Sun Exposure: Full sun
- Planting: In early or mid-spring after all danger of frost has passed
- Spacing: 6 to 10 feet between plants and rows
- Depth: Plant the vines at the same level as in the nursery
- Best Companions: Chive, clover, mustard, peas, blackberry, oregano, geranium
- Worst Companions: Potato, radish, garlic
- Watering: Water regularly, at least once in 10 days during hot weather
- Fertilizing: Place 1/4 to 1/2 cup of 16-16-8 fertilizer 2 to 3 inches deep and 10 to 12 inches from the plant when planting and again in March of the second year
- Common Problems: Anthracnose, Armillaria root rot, botrytis bunch rot, eutypa dieback, esca, leaf blight, leaf spot, powdery mildew, black rot, crown gall, pierce’s disease, young vine decline, black vine weevil, grape cane girdler, grape mealybug, Japanese beetle
- Harvest: 1 to 3 years after planting, harvest when the grapes are rich in color, juicy, full-flavored, easily crushed but not shriveled, and plump
How to Pick Your Grape Variety
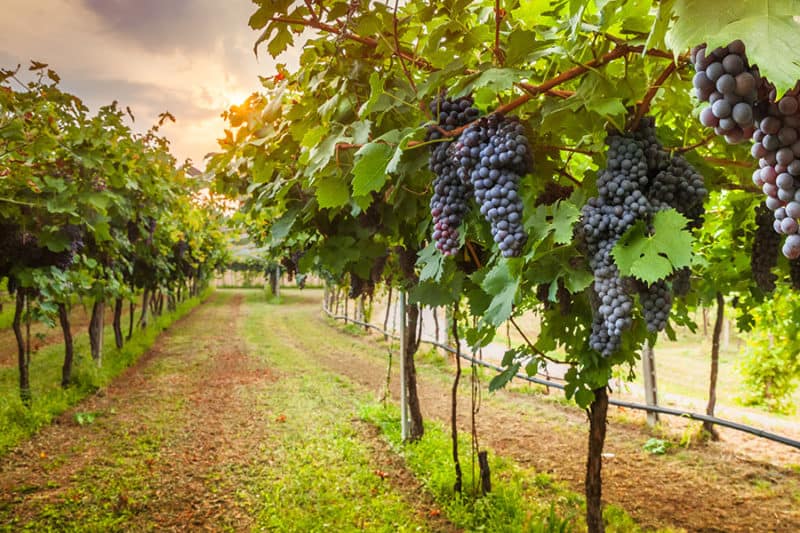
There are three main varieties of grapes that are most common for people to grow. The first option is the American grapes. They are known for their ability to withstand the colder temperatures.
Common types of American grapes
- Catawba
- Concord
- Delaware
- Niagara
- Scuppernong
- Steuben
The second option is the European variety which prefers warmer temperatures and are better for making wine than for eating. European grapes are what is most commonly grown in the United States.
Varieties of European grapes:
- Black Beauty
- Calmeria
- Cardinal
- Black Corinth
- Emperor
- Exotic
- Flame Seedless
- Italia
- Perlette
- Queen
- Red Globes
- Red Malaga
- Ribier
- Ruby
- Thompson
- Tokay
Finally, the third most picked variety is the North American Muscadines. These are usually found in the south as they prefer warmer temperatures.
You should consider which types of grapes you enjoy the most and what you plan to do with them to decide which variety to plant. American grapes are usually what are used for eating while the European grapes are most commonly used for winemaking.
I personally have muscadines, concords, and white seedless grapes growing in my backyard.
Growing Grapes in Your Garden
Ready to plant grapes in your garden? Here’s everything you need to know.
When to Plant Grapes
The best time to plant grapes is in the early spring. Once the soil is workable, you can plant the bare roots. Depending on where you live, that’s typically between March to May.
If you’re planting potted grapevines, you should do so after the threat of frost has passed. That’s from April to June for most locations.
You should ask if your variety of grape plant is self-fertile when you purchase it. Most are, but be sure to ask so you’ll know whether you have to plant a second vine to pollinate each other.
The Right Location
Pick a spot on your property that has full sun. At the very least, you need a place that, at least, gets plenty of morning sun. If you get some afternoon shade as well, that’s beneficial.
The Best Soil for Grapes
You need to make sure the soil around your grape plants is deep, loose, and well-draining. Grapes don’t like standing water, so well-draining is absolutely essential.
You should apply compost around the base of the vines to help provide all the nutrients needed. Mix the compost in the soil 2-3 weeks before you plant the roots.
You Need a Support System
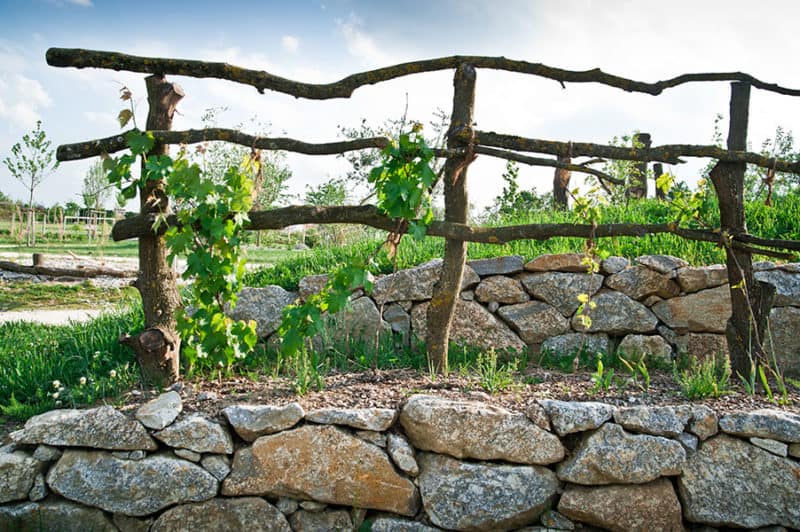
All grapevines need to be trained to grow up a support system of your choosing. Not only does it make harvesting easier, but it reduces the risk of disease. Vines spreading across the ground have a risk of developing a disease and dying.
It’s essential that the support system is in place before you plant the bare-roots.
Here are some options for grapevine support systems.
- Use A Trellis: A trellis is standard for many different crops. You need to make sure it’s sturdy and won’t topple over with a burst of wind.
- Build an Arbor: Try building a DIY grape arbor. An arbor can have two, four, or six posts, depending on the style and size that you want. You can find different designs for arbors. Just remember that you grow one grapevine per post.
- Stake the Vines: If you don’t have a lot of space, you can use stakes to grow grapes. Put the stakes in the ground sturdy, and let the grapes grow to the top of the stake the first year.
Getting Grapes in Your Garden
Typically, you plant dormant, bare-root grape vines, and most are self-fertile. Before you buy your grape varieties, make sure you ask if you need to buy more than one plant for pollination.
Before you plant the grapevines, soak the roots in water for 2-3 hours. Then, it’s planting time! You should remove all canes except the most vigorous one.
Be sure to examine the roots of the vine before planting. If you see dead roots, trim those off before planting.
Remember that each vine needs to be planted 6-10 feet apart. Make sure you have the space needed to grow grapes.
If you are planting muscadines then you’ll need to give around 16 feet between each vine.
Dig a hole that is 12 inches deep and 12 inches wide. Put 4 inches of topsoil into the hole and set the root on top. Cover the roots with 6 inches of soil with the lowest bud just above the soil surface, patting the soil down. Fill the rest of the hole with topsoil, but don’t pat that down.
Can You Plant Grapes in Containers?
Surprisingly, yes, you can plant and grow grapes in containers! You have to pick a large, sturdy container that can support the weight of full-grown grapevines.
Go with a 15-20 gallon pot that is 16-18 inches deep and 18-24 inches wide. As your grapevines grow, you might need to re-pot into an even bigger pot
Caring for Grapes in Your Garden
Now that your grapes are planted in the ground, it’s time to learn how to care for them.
Watering Grapes
During the first year after planting, make sure you water the vines regularly. Regular, ample watering is necessary to let the root system grow extensively, while also encouraging shoot growth throughout the first year.
Young grapevines need between 1/2 to 1 inch of water per week. Watch your weekly rainfall; a rain gauge is convenient. Continue this amount of water for the first two years.
If you’re growing grapes in containers, they need more regular watering until the roots are established. Check the soil in the container each day; grapes don’t handle drought stress well. Containers dry out much faster than ground plants.
After the second year, the roots and trunks are established, and your vines don’t need too much watering unless you have sandy soil or drought conditions. Old, well-established grape vines rarely need water unless they’re growing in sandy soil.
Mulching Grapes
For most crops, mulching is recommended, but for grapes, you don’t need it. While it does help with soil moisture, it might keep the soil temperature too cool. Grapevines grow better in warmer soil, so mulching could backfire on you.
Fertilizing Grapes
It’s important that you don’t fertilize your grapevines in the first year unless you have issues with your soil.
In the second year, fertilize lightly to encourage the next year of growth.
Pruning Grapevines
Pruning is the most important part of caring for grapevines. Grapes grow fruit on shoots growing from the one-year-old canes. If you have a lot of old canes because you forgot to prune them, you won’t get as many grapes as you would otherwise.
You need to prune in the late winter when the plant is dormant, typically around March. After you plant the bare-roots in the spring, prune the grapevine back to three buds.
Let’s take a look at how to properly prune grapevines. These are tips and things to remember when pruning.
Pruning Year One
- It’s best to start with one straight cane that you tie to a stake to encourage straight growth.
- Whenever it reaches the top of the support system, remove an inch of terminal growth to force the vine to branch out.
- Then, train two of the branches to grow in each direction by tying them to the fence. They need to go in opposite directions, forming permanent branches at the top of your fence.
Pruning After Year One
- Prune the vines that are established each spring before growth begins. Remember fruit is grown on last seasons wood.
- For best results, heavily prune, which leads to the best quality fruit
Pruning Old, Established Grape Vines
If you move into a house that has old, overgrown grapevines, you can probably save them. With some dedication, you can revive old vines and bring them back to growth.
You have to do this in stages, or you’ll put too much stress on your plant!
- Pick a new trunk from the vanes that are growing at the base of the vine. Then, cut it back to the right height.
- Pick two canes on each side to bear fruit this year and tie them to your support system. If you don’t have any lateral canes, wit until next season with 2 new shoots.
- Remove the rest of the old wood. There might be a lot.
- Keep pruning and training as the plant vines.
Common Diseases that Attack Grapes
There are certain diseases that can threaten your grapevines. Here is what they are what you can do about them:
Downy Mildew
You may notice downy mildew on your grapevines. You will see the first signs of infection on the foliage of your vine. It will appear as yellow spots on the leaves.
You can treat downy mildew with fungicides and choosing varieties that are capable of withstanding this disease.
Since downy mildew attacks most American varieties, you should keep that in mind when choosing your variety of grapevines.
Powdery Mildew
Powdery mildew literally looks like powder all over the foliage of the grapevine. It is a fungus as well so moisture obviously plays a huge role in this disease.
You can treat this disease with the use of fungicides.
Grey Mold
Grey mold usually impacts ripe fruit. They will become grey, watery, and rather mushy looking. Then they will develop a film of fungus on them.
Proper pruning techniques will help to keep the grapevine sanitized and clear of grey mold. Removing old shoots of grapevines helps ensure proper air circulation. You will also want to keep the plant weeded during growing seasons.
Anthracnose
You will know that your grapes have this disease if you see dark brown spots on the leaves of the grapevines.
This is a fungus, so applying lime sulfur while the vine is dormant helps to keep this disease at bay. Also, making sure that you prune out any diseased shoots from the vine will help to stop the disease from spreading.
Black Rot
Black rot is another fungal disease. It forms when you have a wet growing season. You will begin to notice black spots on the leaves of the vine. Then the fruit will turn black as well.
The best way to treat this disease is by pruning to provide proper airflow. You will also want to use fungicides in order to contain this disease as well.
Crown Gall
Crown gall comes from the soil. You will know that you have it if your grapevine begins developing round growths on it. This disease develops within your grapevine during injury to the plant while pruning or injury from freezing.
Crown gall can remain alive in the soil for many years. So be sure to buy healthy grapevines that are showing no sign of the disease. You can also cover the vine with natural burlap during the winter months in order to protect the plant.
If you come across grape vines that have developed it, you’ll need to cut that section of the vine off and destroy it so it will not compost back into the ground and spread the disease.
Harvesting Grapes
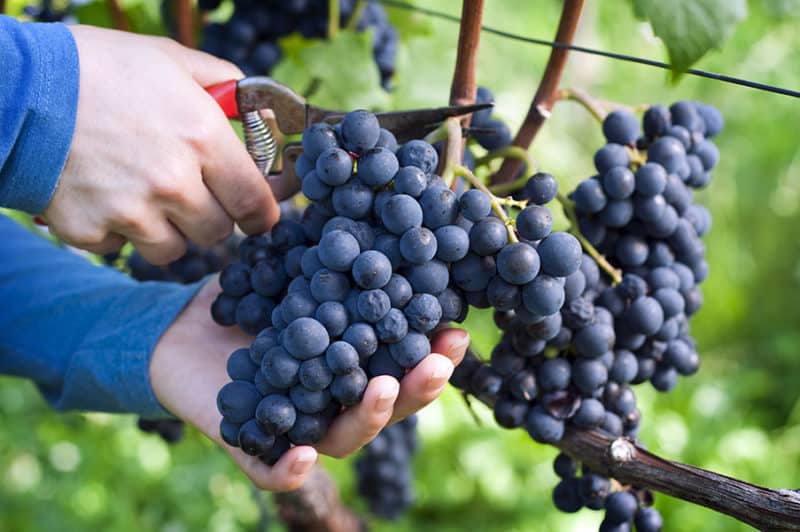
Here comes the best part of growing grapes – harvesting.
You know that your grapes are ready to harvest and ripe when they’re rich in color, juicy, full-flavored, plump, and easily crushed. Ripe grapes are tightly attached to the stem.
Make sure you sample different grapes from each cluster. Remember that grapes don’t continue to ripen once you pick them from the vine. So, what you pick is what you get.
If you find that your grapes aren’t ripening, try to remove or pinch back some of the foliage which will let in more sunlight as well as improve air circulation.
Storing Grapes
Once you pick the grapes from the vines, they can be stored for up to 6 weeks in the right location. Cellars, basements, or other cold locations are ideal.
However, remember that grapes can absorb the odors from other vegetables and fruits, so you need to keep them separate.
A good option would be using a cardboard box or crate that is lined with clean, dry straw. Make sure you separate the bunches with straw or sawdust to keep them as fresh as possible.
Recipes to Utilize Your Fresh Grapes
There’s more than just wine and popping the fresh fruits when it comes to using your grapes.
I am a huge fan of sherbet, but I’m also a huge fan of clean eating. So when I came across this recipe for fresh grape sherbet it definitely piqued my interest.

One of my favorite treats is homemade bread with fresh, homemade grape spread. It is a fresh, sweet, and filling treat. Plus, it is extremely delicious, too.
If you like homemade bread and jam then you’ll definitely want to check out this delicious recipe. It is one that could also be shared as a gift as well. A lot of people love homemade and delicious gifts.
This goat cheese and grape balls recipe offers a delicious and different take and can be thrown together quickly.
Plus, I not only raise grapes, but I raise goats as well. So this is one more way to utilize my homemade goat cheese and grapes.
We love chicken salad around our house. For me, the more ingredients added to it, the happier I can be. I think chicken salad on a warm and buttery croissant is an ultimate lunch idea.
This recipe has lots of grapes and pecans included which makes a delicious addition to any salad or sandwich. The next time you make chicken salad, keep this recipe in mind.
My kids are extremely picky eaters. They don’t care for most anything healthy which is kind of ironic considering we raise most of our food.

But fruit salad is the game-changer in my house. When I add lots of sweet fruit together, they can’t help but leave the bread alone and try something freshly grown. If you have picky eaters, maybe this will help you too.
