Love berries? It’s rare to find boysenberries at grocery stores because they go bad quickly after harvest. That means if you love them, growing boysenberries in your own garden is a must.
If you have grown raspberries or blackberries before, adding a few boysenberry bushes is no big deal, but the fruit is unlike any other berry out there.
Boysenberry bushes produce large, sweet, thin-skinned, juicy berries that mature from May through mid-July.
Let’s take a look at how to grow boysenberries in your backyard.
What Are Boysenberries?
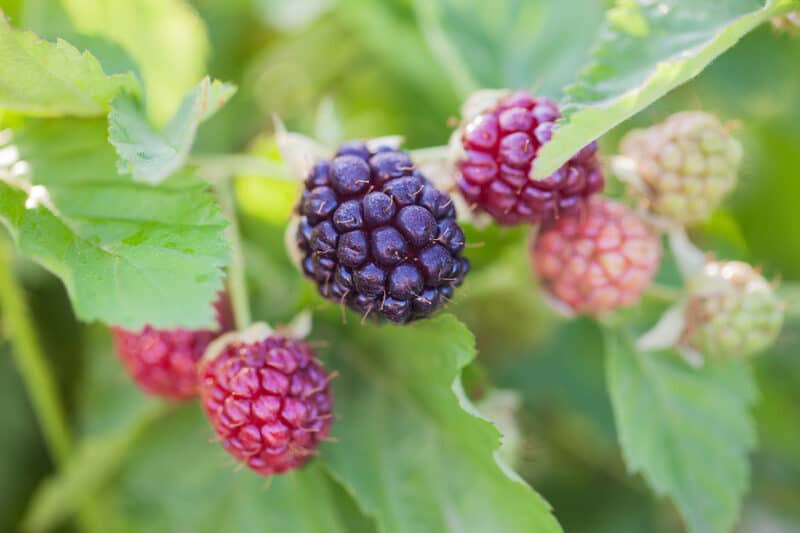
Not everyone has heard of boysenberries (Rubus Ursinus × R. idaeus), so you might wonder what they are. You don’t usually find them fresh in the grocery store!
Boysenberries are a berry bush belonging to the Rubus genus. It’s a hybrid coming from four parent plants: blackberry, raspberry, dewberry, and loganberry. Like other Rubus plants, this is a bramble and has woody, thorny stems.
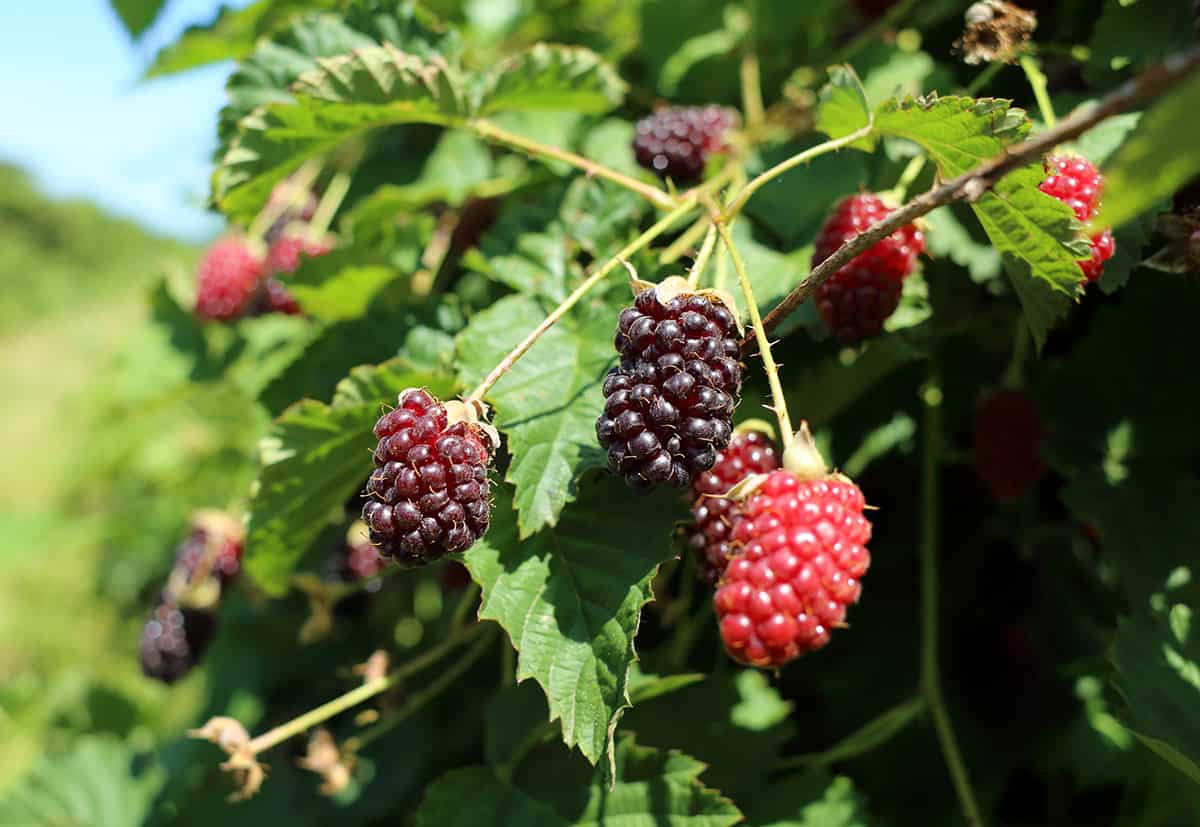
Boysenberries have a flavor similar to blackberries with a bit more sweetness. Each berry weighs around eight grams, which is larger than the biggest blackberries.
Gardeners growing in USDA Zones 5-9 can raise boysenberries, but some growers say they’ve had success in Zone 4.
Planting Boysenberries
Here is what you need to know about planting boysenberries.
First, make sure you have a sunny spot on your property for these bushes. They need six to eight hours of sunlight each day.
If you live in a hot climate, pick a spot that provides partial shade in the afternoon to avoid burning your plants.
Next, make sure the soil is ready for the plants. These bushes prefer a pH range between 6.0-7.0 for optimal growth. Lime will raise your pH, and sulfur lowers it; be sure to amend before planting.
Add plenty of compost or aged manure to the soil to provide the nutrients needed for growth. Compost also increases the drainage.
Prepare a Support Structure
Boysenberries, like many other berries, need a support structure for growth. They’re a vine, so they wrap around anything (and everything). It’s best to create something for them rather than allowing them to find something on their own.
A trellis or fence is sufficient, or you can build a support system. It can be as simple as a few poles and wire strung between them—no need to be fancy or expensive.
The Four Ways to Plant Boysenberries
Starting boysenberry by seed isn’t recommended because it’s a hybrid plant. It won’t grow true boysenberries. This is true for any hybrid; seeds don’t produce an exact copy of the parent plant.
Instead, gardeners have four ways to propagate these berries.
- Plant a dormant bare root
- Get a small plant from a nursery
- Take a cutting from an existing plant
- Take a root cutting
It’s up to you to decide which route you prefer.
When planting more than one boysenberry, plant them two feet apart to provide plenty of air circulation.
Plant at the same soil level that the plant was in at the nursery. Ensure the hole is the root ball’s size, place the transplant inside, and fill the hole in with soil. Tap into place and water deeply to help establish the roots.
Growing Boysenberries in Containers
Some gardeners prefer to grow these berries in a container. Get a container that is at least 18 inches wide and 12 to 24 inches deep. Make sure the pot has several drainage holes and fill with slightly acidic soil. It’s best to add compost as well for extra nutrients.
Once filled with soil, set the plant in the middle of the container. Then, add a cage or trellis for support.
Caring for Boysenberries
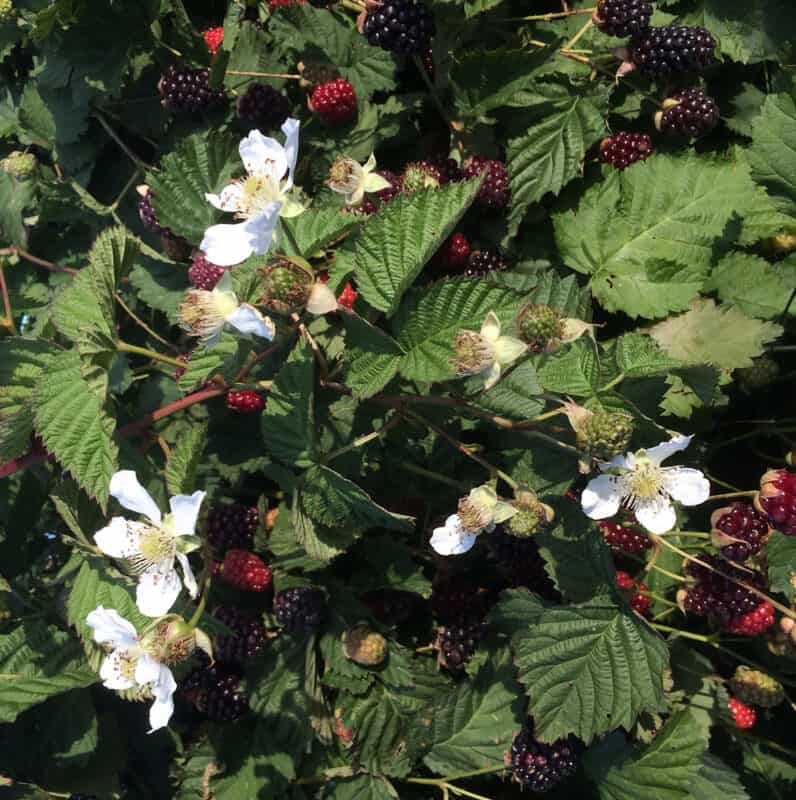
Once the plants are in the ground, you need to learn how to take care of them. It’s easier than you think!
Keep the Soil Moist
Boysenberries love growing in moist soil; you never want to let the soil dry out entirely. These aren’t drought-tolerant plants.
Keeping the soil moist is essential because it encourages the plant to produce buds and berries. It’s important to water often, but don’t flood the soil and don’t let the leaves get wet. Wet leaves lead to rot and diseases.
Each plant needs one to two inches of water per week. To check moisture, put your finger into the soil down an inch. If it’s dry, you need to water.
Mulch Around Your Plants
Spreading mulch around your new plants is a smart idea. Mulch or wood chips keep weeds at bay while retaining soil moisture. That cuts back on how often you need to water.
Fertilize Your Plants
Fertilize the bushes at the beginning of spring with a 20-20-20 fertilizer. Then, fertilize every four weeks after that.
Make sure to mix the fertilizer into the soil and add more mulch over the soil once it’s mixed into the soil.
Prune After Harvesting
After all the berries are harvested, it’s time to prune. Pruning takes place between autumn and winter. During this time, these plants head into dormancy.
Always use clean tools; that’s the essential first step to avoid spreading diseases. Prune the fruit-bearing vines, as well as any long or weak vines. Fruit-bearing vines are woody and will produce even more in the following year.
Common Boysenberry Pests & Diseases
Once planted, keeping your new plants healthy is a priority. You don’t want pests or diseases to kill your new berry bush. Here are some of the common pests and diseases.
Aphids
Aphids are always on the list for common pests. These sap-sucking pests cause the leaves on your boysenberry plants to crinkle and wilt, weakening the plant’s overall health.
Typically, a small infestation won’t bother these plants, but a major infestation could. Releasing beneficial insects, such as ladybugs, into your garden might take care of the problem, or spray a neem oil-based insecticide over your bushes.
Cane Borers
Cane borers bother a range of berry species. The larvae of the cane borers dig into the canes, causing swelling and internal damage. As they work their way down the cane, the leaves start to wilt, and the adults continue to lay more eggs in the new shoots.
It’s best to remove and burn the affected canes. Then, spray the removing canes with neem oil to prevent re-infestation.
Raspberry Sawfly
These pests are tiny wasps, measuring about six millimeters at full size. The adults and larvae like to eat holes in the leaves. The larvae also like to eat new growth, which is bad for the next year’s crop.
An infestation leads to skeletonized leaves. It’s best to use a natural spinosad-based spray to kill off the larvae.
Anthracnose
Anthracnose is caused by a fungus, and it’s often called dieback because it causes infected canes to die back to the ground. An infection typically starts with small, purple-grey spots on the leaves and new shoots.
Most of the time, an anthracnose infection won’t kill your plants, but it can impact the harvest size. Spray the bushes with a fungicide in the last stages of dormancy in the late winter or early spring.
Doing so stops an infection in the summer.
Cane Gall, Crown Gall & Hairy Root
These three diseases are grouped because they are all caused by bacteria, and they all cause root or stem problems.
- Cane gall is characterized by large galls, which cause the stems to split open.
- Crown gall causes similar problems in the root area of the plant.
- Hairy root causes skinny, weak roots to grow off the main root.
In many cases, these problems can be spotted in the nursery before planting, but if an infection starts once it’s in the garden, you must remove and destroy the plants.
Then, you’ll need to plant something else that isn’t in the rubus family, or remove the diseased soil, because the bacteria lives there for years.
Cane and Leaf Rust
This is a fungal infection that causes yellow blisters to develop on the cane and leaves in the summertime. If left untreated, this fungus causes canes to dry out and crack.
If you notice this rust, prune off the infected canes and burn them. The rest of the plant will be fine if you prune the diseased portions.
Harvesting Boysenberries
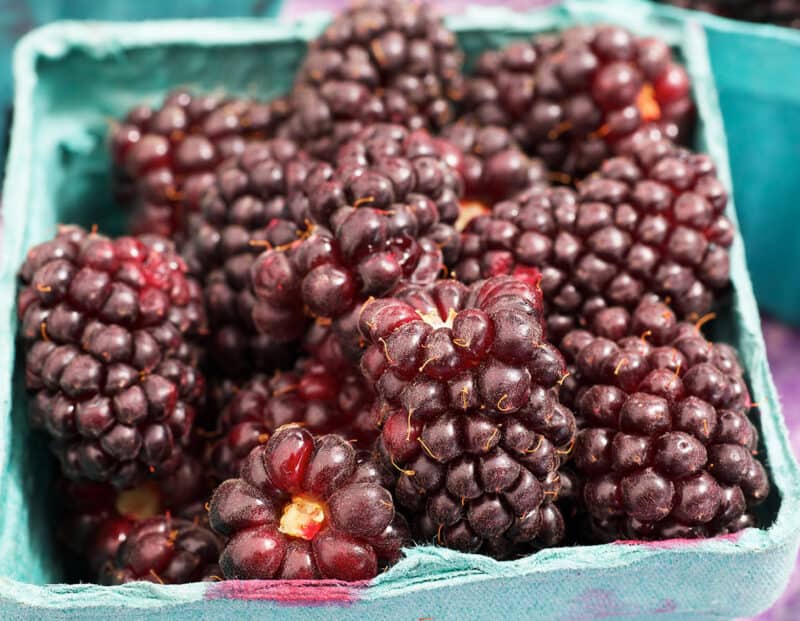
As the bushes grow, they produce white flowers that eventually turn into berries. Boysenberries are ripe when they’re dark purple, plump, and shiny.
The best time to harvest boysenberries is in the early morning. They come off of the stem easiest then. You should check several times per week because not all of the berries ripen at once. They ripen a few at a time from mid-May to mid-July.
These berries only stay ripe in the refrigerator for three days. Eat them fresh or toss them in the freezer to use later!
