Years ago, I used to watch this show on HGTV called Design Remix. At the time, I had a huge mortgage, a great big empty house, and no money to spend on furniture or decorating.
Well, luckily, the premise of that show was that they would create a beautiful room using things the homeowner already had for under $50 and the cost of some paint. They would go through people’s junk, find stuff on the roadside, and transform a space using incredible creativity.
I was so inspired by what they could pull off that I started picking trash, hitting yard sales, and welcoming every hand-me-down offered. Then, in my spare time, I transformed my barren house into a beautiful home by creatively re-purposing whatever I had.
I know it’s a faux pas to brag. But truthfully, all my Ethan Allen furniture buying friends were stunned at the style I created for pennies compared to their thousands of dollars. My house was a hot spot for friends to come tour to get ideas of how to snazz up their spaces for less.
Design Remix for Your Homestead Courtyard
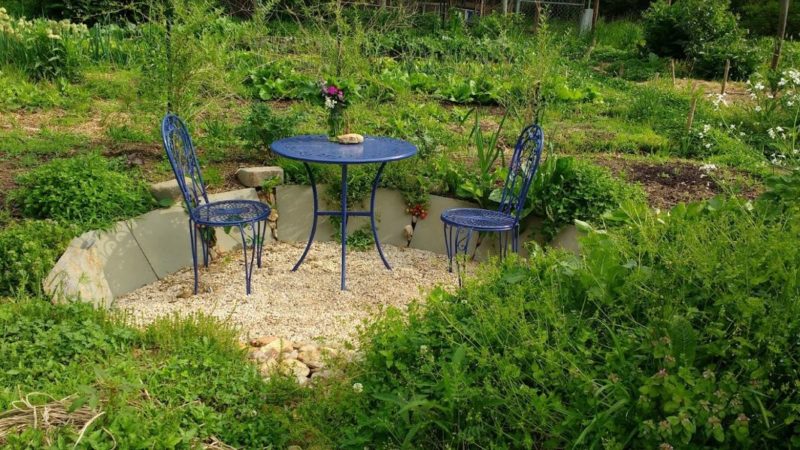
Fast-forward a few years, and I find myself in a similar situation. I’m just as broke. But, now instead of a big, empty house, I have a 10-acre homestead in need of some design remixing. So, I have dusted off my creativity and started putting it to use to create low cost, cozy spaces to make our big homestead feel more intimate and charming.
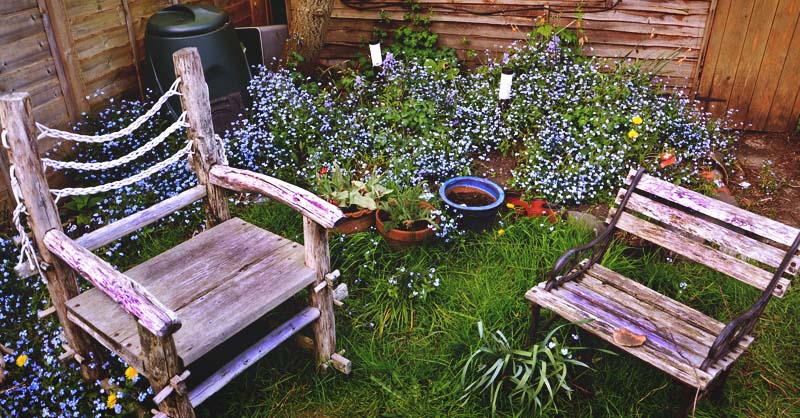
I started by making an intimate bistro seating area in my biggest vegetable garden (shown above). Now, I am turning a junk zone behind our house into an outdoor room that will have a cozy, courtyard kind of feel.
If you are looking for inspiration to help you turn odd spaces on your homestead into relaxing nooks, then read on for an inside look at creating a courtyard atmosphere using some simple tricks. I hope my experiences will help you create the homestead of your dreams too.
Step 1: Assess Your Space
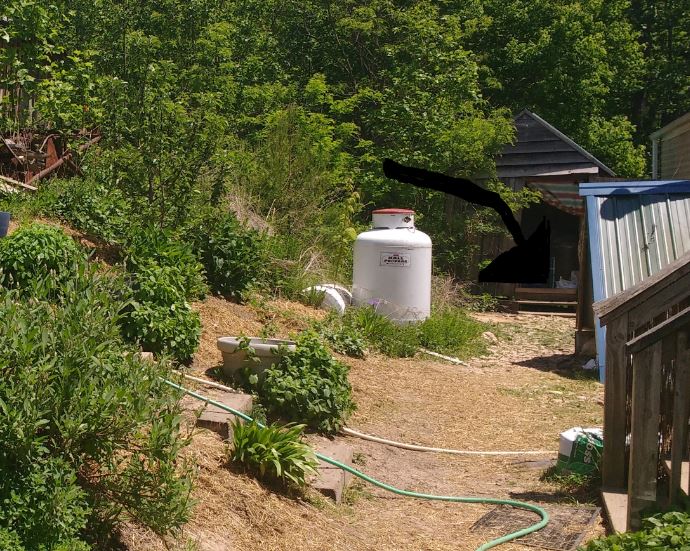
The one thing big lesson I learned from Design Remix was to go room by room. They didn’t try to decorate a whole house; they just remade a room. With a big landscape like mine, rather than trying to tackle it all at once, it’s easier to identify outdoor areas you can treat like rooms.
The soon to be courtyard area I am working on now is the back side of our house. It’s nestled between a crooked shed, a wood storage area that looks like a roof sitting on the ground, and a steep hillside.
It’s kind of secluded and out of the way. So for the last five years, it’s been the place we stuff junk that we don’t know what to do with. But, now I plan to use that sense of seclusion to guide my design plan.
Step 2: Clear the Area
In Design Remix, they always emptied the room before they started working. I don’t know exactly why. However, I suspect that having a blank slate, to begin with, makes the final transformation seem all that more dramatic.
From my perspective, having a cleared area to work with allows creativity to flow a bit better. Once the space is cleared, you can begin to see possibilities where before there was just junk.
Step 3: Get Inspired
For me, when I start a design plan, I always scour the internet for inspirational ideas to help get me in the mood. Then, I try to figure out what it is about those images that appeal to me.
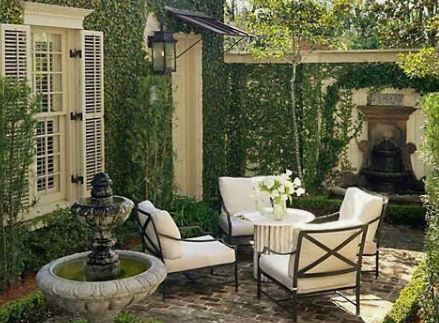
Turns out, when I think “courtyard,” I think of sipping wine and eating prosciutto alfresco in a relaxed Tuscan villa. Of course, there are plants, pottery, some kind of stonework, a water feature, and a comfortable seating area. There’s also shade to protect you from the piercing sun of the Tuscan countryside and a beautiful view.
My design plan will include all of those elements – plants, pots, stonework, water feature, seating, shade, and a view. However, I don’t want this to look like some silly attempt at pretending my single-wide mobile home is a Tuscan villa. So, style-wise, I’ll be going for something more like rustic, shabby chic than luxurious old world.
Step 4: Take Inventory
On Design Remix, the designer would go through the homeowner’s stuff to see what they had that might be useful for the design. So once you have some basic inspiration, then you need to take inventory of all the junk. …err, I mean potentially useful stuff you have around your homestead.
Here’s what my available inventory looked like:
- A bunch of old beehive frames
- Two blue outdoor chairs with chipped paint
- A wine cork collection
- Random forks and spoons
- A couple of pottery pots
- Some miscellaneous, dust-collecting knick-knacks that could be used outdoors
- An egg-shaped clay chicken cooker that never worked well
- Half a bag of sphagnum peat moss that someone gave me
- Blue and green exterior paint
- Three concrete stepping stones
- A rusty metal office trash can
- An endless supply of rusted steel vineyard posts
- Leftover fencing and rebar panels
- Rocks – as many as I needed – could be dug out from our soil
- Construction supplies – scrap wood, screws, zip ties, etc.
Step 5: Make a Plan
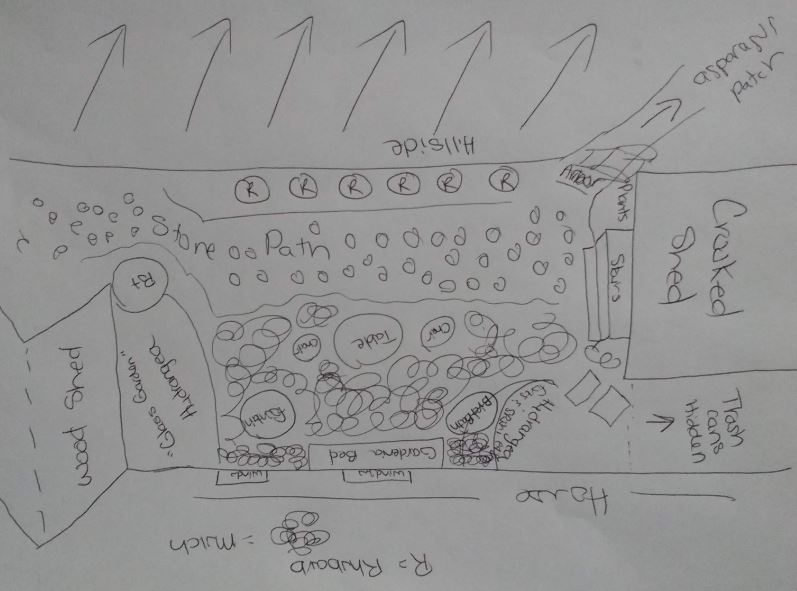
Armed with my inventory, internet inspiration, and that creativity I dusted off, a plan began to emerge. Sometimes I draw my plan out to keep me on track. If there are more than a few things to keep track of making a quick sketch helps. But, you can also just make notes to work from later.
The key is to go through all those things you identified when you were getting inspiration and doing inventory. Use that information to come up with ideas for each of the components you’ll need in your courtyard.
The Seating Area
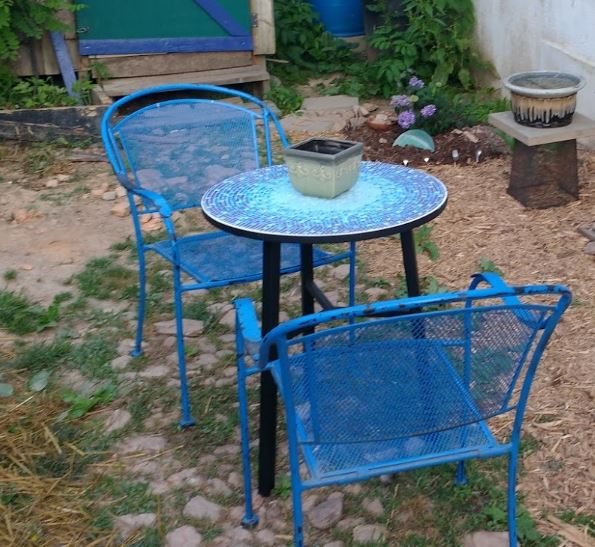
I knew there were a few things I couldn’t make from my inventoried items. Nothing on my list would have made a good outdoor table. Luckily, when I went to Aldi to get a few things (like $2.89 wine for sipping in my courtyard), I found a Mosaic 2-seater table on sale for $20.
The tiles on top of the table perfectly matched my chipped chairs. So I decided I didn’t even need to paint the chairs, I’d use them as is.
The Water Feature(s)
Every courtyard needs the water element represented. Fountains are obvious, but, there are other things you can do if you don’t have electricity or can’t run a solar fountain pump.
Bird Bath
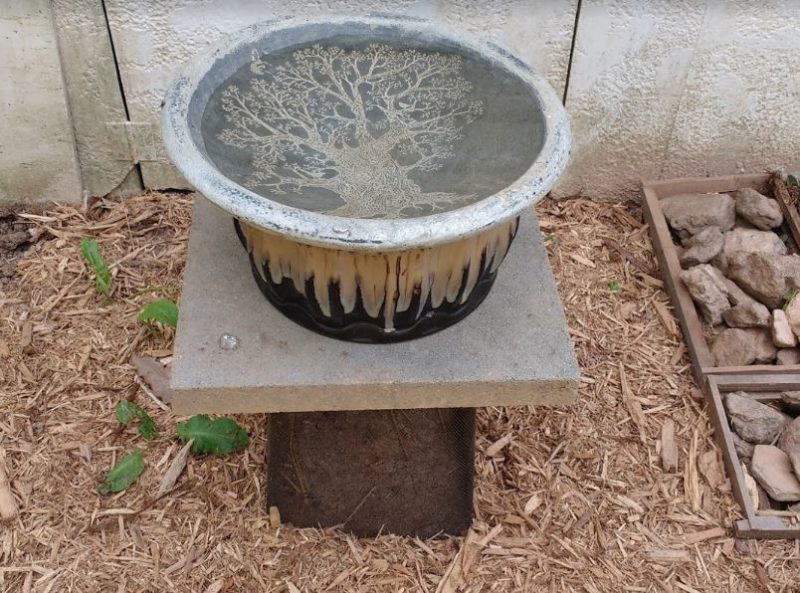
I decided to use the trash can, a stepping stone a pot, and a bowl-shaped knick knack to create a pedestal and birth bath. Now, keep in mind, birdbaths need to be shallow so your smaller songbirds can stand up in them. So, you’ll need to fill them every few days in hot weather if you want birds to find and use them often.
Pollinator Watering Stations
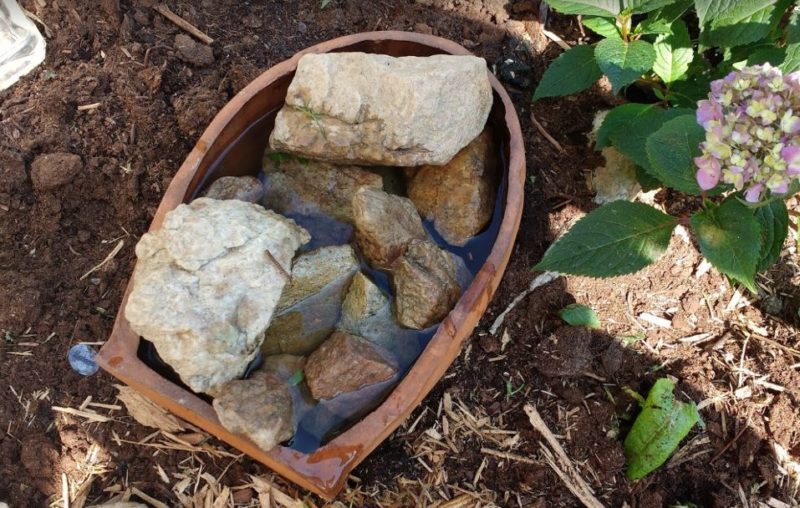
I also decided to use the two sides of the clay cooking pot, filled with stones, to make some pollinator watering stations for bees and butterflies. The cool thing about clay is that it actually absorbs water and allows some to flow through slowly over time. So, by putting these in planter beds, they not only offer a watering location for pollinators, they are a pretty way to keep the soil moist around plants.
The Fountain
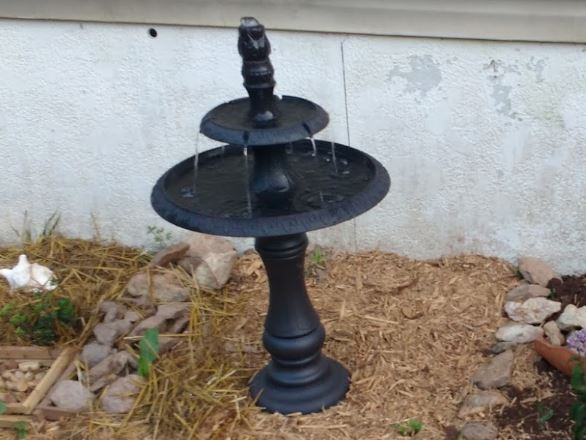
I decided I had to splurge and buy a small fountain. That sometimes happened on Design Remix too. When faced with the actual plan, homeowners might choose to purchase something that was hard to fake with junk.
Just the cost of a good submersible pump was $40. Then I’d need to go get some clay pots or antique milk jugs or metal watering cans. Plus, I’d need attachments from my drills and bulkheads to get good seals around plumbing parts.
When I started putting together some DIY plans, I realized it wasn’t going to be that much more to buy a small fountain already made. But, if you are willing to do the work, already have the tools, and have suitable junk materials to work with, you can also make your own fountain at home.
Plants
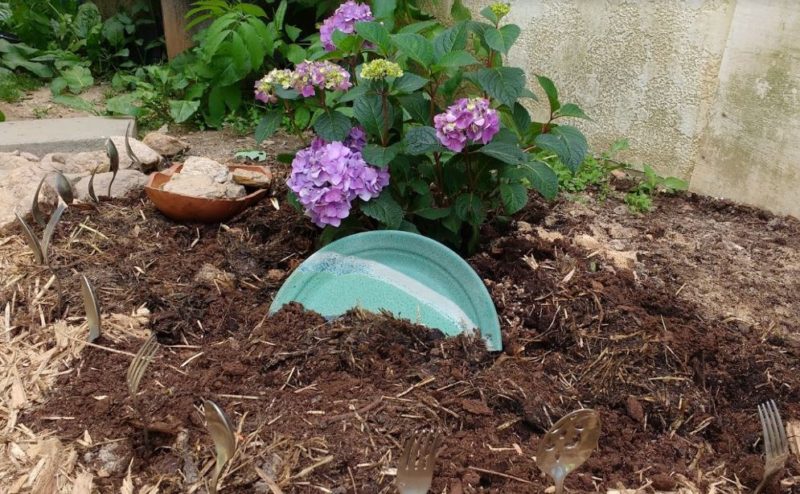
I am on a mission to add more hydrangeas around the homestead because I love them. I’ve been so focused on edibles, I didn’t already have any I could use to propagate new plants from cuttings. So, I also decided to splurge on two hydrangeas for my courtyard.
Shop Hardware Plant Sale Sections
While I was at the store getting my hydrangeas, I found some daisy gardenias on discount. People are more likely to buy plants when they are in bloom. When the blooms are spent, no one wants to buy the plants.
So, hardware stores heavily discount those sad-looking, but entirely salvageable perennials just to make room for new inventory. If you find out when your hardware store changes its inventory each week, you can show up on that day and save a ton buying discount plants.
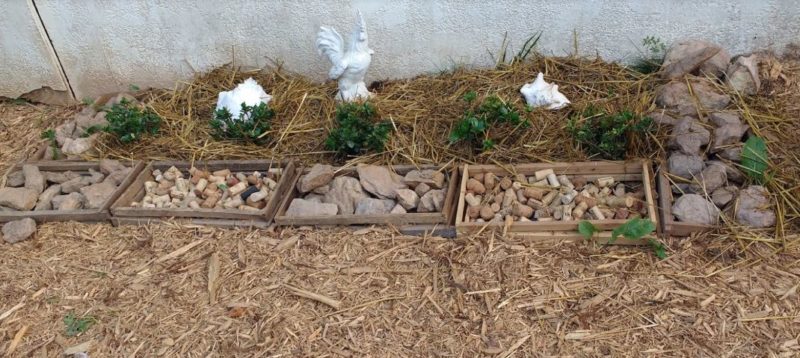
So, I picked up 5 of those to make a gardenia hedge next to the dining area. When they grow in, they’ll make a beautiful low, shade-loving hedge to cover some of our mobile home skirts. Also, the blooms will be exceptionally fragrant.
Use Beautiful Edibles
Rhubarb is very easy to grow from seed. It’s a delicious edible. But it’s a beautiful, high-impact plant when used in groupings. So, I also decided to use some rhubarb seeds to start enough plants to make a rhubarb hedge along the hillside of the pathway.
Lots of other edibles make great plant options for courtyard areas. A grape arbor, culinary herbs, edible flowers, and more are all things we homesteaders have that can be put into service to create ambiance in an outdoor room.
Flooring Materials
One of the most critical design aspects of any room is the flooring. It’s the foundation for all your other choices. The right floor will make things stand out while still feeling integrated. The wrong floor can ruin a room.
Outdoor rooms are no different. We still need appropriate flooring to set off our design. We work with different materials than you would indoors. Our choices are things like ground covers, decking, pavers, mulches, and rocks. Moss is also becoming a more common alternative in areas that are a bit more protected in a landscape.
In my case, I blew my budget on the fountain and plants. Fortunately, I’d been dropping stones dug out of the soil along the pathway in that area for years. So, part of the area was already covered with rocks. Then, I just bought the cheapest mulch I could find that looked nice for the rest of the area.
Environmental Factors
I got four bags of Cypress mulch for $10. I assumed something like Leyland Cypress which grows quickly and falls down just as quickly was being used for the mulch. I also knew Cypress mulch would acidify the soil too and be good for my hydrangeas and gardenias.
Unfortunately, when I got home with the bag, my boyfriend told me using Cypress mulch was an environmental no-no. Turns out it’s often harvested from areas that really need to keep those trees to maintain ecological balance. I used it this time but put it on my no-buy list for the future.
When using flooring materials on a homestead, you need to think about the impact on your soil and your budget. Plus if you are like me, you’ll hopefully keep in mind the environmental impact too (even if you aren’t always perfect at it).
Decorative Details
Once the big ticket items are taken care of, then you need to get into the details to create the feel you want. This is all about personalizing. So, there are no rules on this part of the process.
You should also feel free to try stuff. Change it if it doesn’t work. You can start with what you have and upgrade as your budget allows. You can also add in decorative details over time, so you don’t have to do it all at once.
I painted the door of the shed blue and green to create a colorful backdrop to the courtyard area. I also used that peat moss in my list as mulch on my flower beds.
Those hydrangeas are going to take up a lot of room when they are established. But, right now, I bought tiny plants to save money. Rather than just leaving the bed empty, I used some glass bottles and knick-knacks I had to fill that bed for now.
I also used a few conch shells and a white ceramic rooster in the gardenia area. Plus, I took those beehive frames to use to create edging around the bed. I filled some of the frames with my cork collection and used rocks for the rest.
Oh and those forks and spoons I mentioned, they too became garden edging for the more out of the way bed. So, even stuff from your homestead that you can’t imagine how to use at the outset might play a role when you get designing your details.
Bonus: Arbor
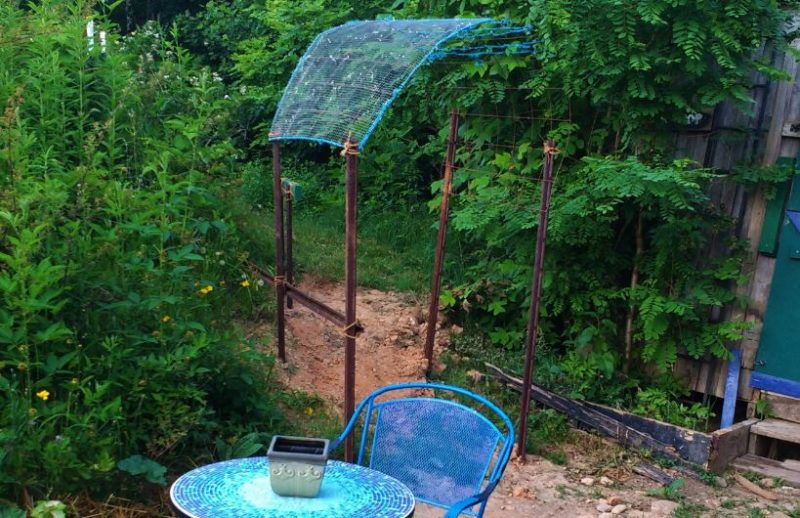
Now, most of the courtyards that inspired my ideas didn’t have arbors. But, several did have arched entryways or arched windows offering sweeping vista views of the external landscape. So, those arched shapes and my endless vineyard posts and the rebar panel gave me an idea.
I decided to make an arbor entrance to the path that leads to our asparagus patch. That path is visible from the seating area and accentuating with a rustic (and rusty) arbor emulated with imitating the beauty of an archway.
Step 6: Execute Your Plan
From here, you have to do the work to make things happen. Like in my case, I had to plant things, assemble the fountain, make the bird bath and arbor, and put the other design details in place.
Some things worked just like I planned. A few others needed some tweaking. But, after all the work is done, the fun begins.
Step 7: The Big “Revel”
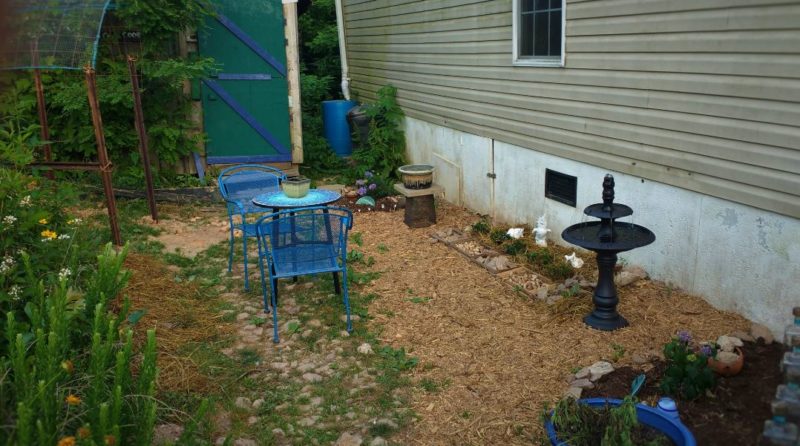
Now, on the Design Remix show, at the end of the episode they would have the big “reveal”. On your homestead though, no one is looking but you.
So instead of a grand “reveal” I prefer the grand “revel” where I revel in my new courtyard and sip wine like I imagined at the outset.
Courtyard Conclusion
As a homesteader, you may not have money, but you’ve got lots of stuff left over from other homesteading activities. All those things you hung on to because you couldn’t stand to see them go to the landfill or hoped to make useful later can be put to use to create beautiful rooms around your homestead landscape. Get creative and create spaces that are beautiful to you using things you have!

