
There is something mystical and enchanting about moss in a landscape. It always makes me think of hobbits and fairies. It also evokes a sense of calm and tranquility in a way that grass or other ground covers don’t.
Until a few years ago, though, I just thought of moss as something that happens in nature. You find it in shady, moist spots in the woods, growing under trees and over rocks. I didn’t realize you could plant moss in your own backyard.
However, once I started making indoor moss scapes to alleviate the winter gardening blues, I realized how easy it was to grow moss. I began to think, well, if moss can grow on a plate in my dining room or office, then why not outdoors in my landscape?
As it turns out, with good preparation and regular watering, moss can grow just as well in your backyard. There are a few tricks you need to know when considering landscaping with moss. If you want to add a touch of fairy tale to your garden and homestead, then read on to learn how landscaping with moss can happen where you want it to!

Tip 1: Understand Moss
Moss is not like the other plants you grow in a garden. Moss belongs to a family of plants called bryophytes. This family also includes hornworts and liverworts.
Non-Vascular
Unlike most plants, it doesn’t have roots at all. That means it does not take moisture and nutrients from the soil through a vascular system the way that all your fruits and vegetables do. Instead, moss gets water from precipitation and humidity. Plus it gets nutrients from the air, water, and all the dust particles that settle on it through natural processes.
Fungi-confusion
In terms of plant reproduction, moss doesn’t flower and set seeds like most garden plants. Instead, it spreads by spores like fungi.
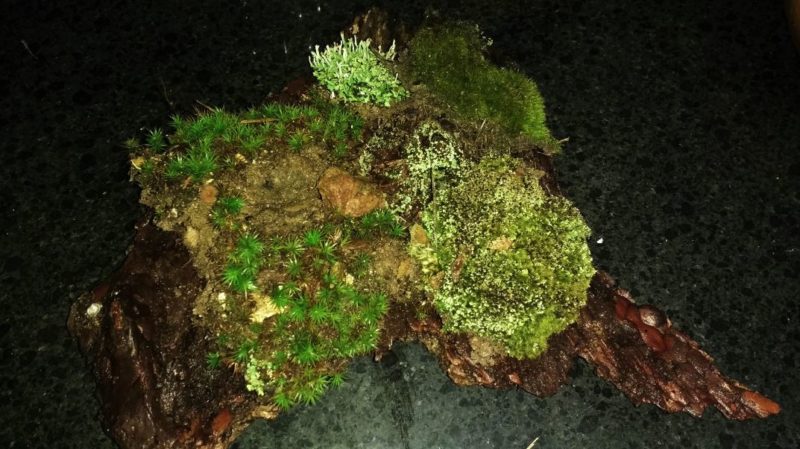
In terms of appearance, it also can sometimes be confused with lichen. Since lichen is basically a fungus fueled to life by algae, it’s easy to understand why some people don’t even realize moss is a plant!
The Mother of All Plants
If you look back far enough in history, moss is probably the mother of all plants. Moss dates back at least 450 million years and was likely the precursor to all the plants you have in your garden today.
Lives by Light
Like our other modern-day plants, moss requires sunlight to photosynthesize nutrients and produce chlorophyll. It collects sun using its leaf-like structures.
Even though many of the 20,000 types of moss do well in the shade, all of them need some sunlight to thrive. Plus, they need water to use during photosynthesis.
Tip 2: Pick the Right Planting Method
The first thing you need to know about landscaping with moss is that there are 2 ways to get it started in your garden.
Planting Method 1: Transplant Moss
You can purchase moss in flats and rolls similar to other ground cover plants. The advantage of this method is that once you roll your moss out, water it, and walk on it; it will look like moss has been growing in your landscape forever. If you want instant impact with minimal work, this is the way to go.
On the downside, buying moss that is ready to plant can be expensive. Unless you are lucky to have a moss grower near you, you’ll need to order your moss and have it shipped to you. Between the cost of the moss and the shipping, it can get pretty pricey to cover a large area with moss.
You can also wild harvest moss to plant at home. However, do not over harvest. Check with wildlife authorities in your area to find out what kinds and quantities of moss are safe to harvest without harming the environment.
Also, if your goal is to cover rocks and fill odd-shaped crevices with moss, this might not be the best method. Sometimes when you cut pre-grown moss to size, it can take a bit of finagling to make the moss seem like it grew there and wasn’t just thrown on as an afterthought.
Planting Method 2: Spread Slurry

If you want to install moss for less cost, making a moss slurry is the way to go. Also, moss that is grown from a slurry tends to look well integrated on, over, and around rocks and fallen trees or stumps in your moss landscape design.
Making a moss slurry is quite simple. All you need to do is mix a handful of moss with a cup of a suitable liquid base and pulse them together in a blender or food processor. It creates a liquid that you can use to paint onto rocks or pour over soil surfaces.
This works because moss spreads by spores. So by blending existing moss in your liquid base, you spread those spores throughout the liquid. Then, when you spread that liquid around, you essentially inoculate the soil or surfaces with moss spores.
– Liquid Base
As to what liquid base to use, that’s up to you. According to moss growing experts, plain old water works just fine for making a slurry.
Some people like to use buttermilk, add some egg whites to the water, or use yogurt. These substances help the moss adhere to surfaces. However, they can promote mold if applied too thickly. For more sticking capacity, you can also mix in some clay with your water to create a moss paste.
Tip 3: Choose the Right Moss

Many of us think of moss as a shade and moisture-loving plant. This is true for many mosses. However, there are also some mosses that do well in full sun and can tolerate drier conditions. If you have your heart set on growing moss in the desert, it’s not out of the question as long as you have a good moss irrigation system.
Still, most of the moss types available for retail sales tend to do best in the shade and acidic soils. Many of the easiest to find and harvest mosses are found in wooded areas, growing on north slopes or areas where moisture is continually present.
If you collect your moss from nature, then take note of the growing conditions it is thriving in. That will help you recreate similar conditions at home. If you buy moss from a retailer, make sure to choose mosses that are ideal for the soil and area you want to plant.
Tip 4: Properly Prepare Your Soil
The hard part of getting moss started is ground preparation. Since moss has no roots, it can’t compete with plants that do have root systems. To install moss on the ground, you must remove all other plants and their roots to give the moss a clean slate to start well.
You will have to check your soil pH. Most mosses prefer acidic soil of around 5.5. Apply amendments as necessary to ensure your soil pH is right for the moss you have chosen.
Also, mosses usually grow best in compacted soils. So, instead of incorporating pelletized sulfur to lower pH, as you would for a vegetable garden, consider applying a solution of wettable sulfur and water to adjust pH quickly.
Once roots are removed, moss plants can be set out, watered, and stepped on to secure them in place. After planting, moss will prevent seeds from reaching soil and sprouting. However, seeds under the moss or roots left behind may still grow into plants that push up through the moss, dislodging it from the soil. You will need to weed regularly after installation to make sure the moss takes.
If you are using a moss slurry, rather than apply plants, you can apply your slurry to your cleared ground. On average, it will take 5-6 weeks for your moss to take hold. Depending on your conditions, it may even take longer. Be prepared to keep the soil weed and root-free until moss has taken hold.
Tip 5: Rock It Out

When using moss on rocks or other surfaces, take advantage of depressions in your surfaces to allow for better adherence.
You can also mix and match mature moss plants with the application of slurry to get instant impact and create an integrated feel long-term.
On flat land, use smaller rock groupings to help hold moss spores in place. It also helps trap moisture at ground level while moss gets established. As moss grows in, you can remove the rocks when the moss starts to crowd around them.
Tip 6: Use a Misting System to Water

Moss requires regular watering to proliferate. Since moss does not have roots, you do not need to water deeply. Instead, misting the surface of moss or slurry covered areas is ideal.
You can buy misting irrigation kits for this purpose. Or you can water with your hose and add a misting nozzle to your hose.
Do not water during hot weather. Instead, water in the evenings or early mornings to prevent mold from growing on your moss. In addition, watering a few times daily during the establishment period and as needed after established is ideal. Short watering sessions are sufficient.
Tip 7: Keep Moss Debris Free

After your moss is established, other than watering during periods of insufficient rain and regular weeding, you’ll also need to keep your moss from being covered by debris. Use a soft broom to sweep over your moss, or use a leaf blower to remove leaves and other things that settle on your moss.
Be careful not to dislodge moss when sweeping or blowing though.
Tip 8: Avoid Homestead Moss Mistakes
For many people, moss can be a low maintenance lawn substitute. For homesteaders though, you may have to do some extra work to protect your moss from your livestock and work animals.
Since moss has no roots, it’s easily disturbed by digging animals. Chickens love to scratch up moss. Ducks enjoy rooting under it for grubs. Barn cats find moss to be a perfect natural litter box. And digging dogs can decimate a moss patch in minutes.
As such, moss is ideal for areas where your homestead animals don’t go! Use this in your private, relaxation shade garden or along paths intended for humans only.
Tip 9: Don’t Buy Moss-Nomers

Beware, there are a number of plants out there with “moss” in the name that are not actually moss. Something called “Irish Moss” is frequently sold in flats at plant departments of hardware stores. The “Spanish Moss” that hangs from trees in the south is also not a moss at all.
As a rule of thumb, moss never flowers. So, any moss-like plant with a flowering period is not a real moss.
Tip 10: Prevent Moss-takes
Moss is often considered a weed in many lawns. There are even products designed to kill moss without harming other plants.
Since moss loves compacted soil and acidic pH when it grows in lawns, that usually means the soil quality is too poor to grow grass. Simply improving your soil in your lawn can prevent moss from invading.
Keep in mind though, if you do have low fertility, water-logged soils on other parts of your homestead, moss may happen in places where you didn’t intentionally plant it.
Conclusion
Moss is an ancient, beautiful member of the plant family. It can be the perfect plant for compacted, water-logged, or shady parts of your property. I hope you can bring a little moss magic to your homestead with these simple landscaping with moss tips.


