So you want to garden but don’t have a tiller or the means to purchase one? Maybe you aren’t looking forward to the endless amounts of weeding and backbreaking work? No worries; just start a ‘no dig’ garden.
Maybe you aren’t looking forward to the endless amounts of weeding and backbreaking work?
No worries; just start a ‘no dig’ garden.
There are many reasons to choose this method beyond cutting expenses and saving time (and your back). It has been proven that plants actually grow better in a no dig garden.
It takes things completely back to nature. The process is simple and the results are great!
1. Start in the Fall (If Possible)
A ‘no dig’ garden is basically a bunch of items you have on hand, brought together so they can compost and form amazing dirt that does most of the work for you. If you are able to start the process the fall before you plant your crops it gives everything more time to compost and create better dirt.
However, if you are a little late to the party don’t give up on this idea. Just put everything down to start composting and realize you can still have a great harvest. It just may take your dirt a little longer to reach its full potential.
2. Ditch the Weeds
To start a ‘no dig’ garden, it is important to get rid of the weeds first.
You start by covering the area in cardboard or another biodegradable product that will smother all of the grass and weeds so they will no longer sprout in your garden.
If you don’t have enough cardboard to cover the entire area, realize that as the years go by you can keep adding matter to your composting area. This will knock out the weeds eventually. Just don’t get discouraged. You will get there.
Just don’t get discouraged. You will get there.
‘No dig’ gardens are very low in maintenance and this step helps to keep them that way. If you succeed here then you should have to do very little weeding (if any) during gardening season.
However, if you are not able to get the area completely covered this first year, know that the weeds will be easier to pull using this method.
As if not having to battle weeds isn’t enough of a reason to want to explore ‘no dig’ gardening, learn about other benefits of this type of gardening.
3. Fertilizers
If you have livestock like chickens, rabbits, ducks, cows, etc. gather as much of their fertilizer as you can and pitch it onto your garden. This step gives your plants an organic boost!
This step gives your plants an organic boost!
You can actually place woodchips in your coops or beneath your rabbit hutches throughout the year for this purpose. When it is time to fertilize the garden, create a screen and sift through the mulch in the coop or beneath the hutches for great organic fertilizer.
If you don’t have chickens or rabbits (yet) you can either skip this step all together or gather some for free from a local farm.
A lot of nurseries actually will sell and deliver chicken litter by the dump truck load for very little cost. If you don’t have any of these options available, you can always go to a chain lawn and garden store and buy bags of cow manure and use that as fertilizer as well.
4. Gather Any Other Materials You Have That Can Compost
During the fall, leaves are everywhere. Everyone is always trying to keep them off of their lawns so they don’t kill the grass.
Gather as many of those leaves as you can.
If it is only from your front yard, that will do just fine. If you want to go take them off of your neighbor’s hands, I’m sure they’d appreciate it! So would your garden!
If you have any old, moldy hay or anything else that is old, rotting, and just lying around. Make good use of these items and throw them into your garden.
You can use ashes from your woodstove over the winter as well to add to your composting material in the garden. Basically, whatever you can find, take it and pitch it onto your garden so it can compost and create beautiful, rich dirt for your plants.
5. Gather Woodchips
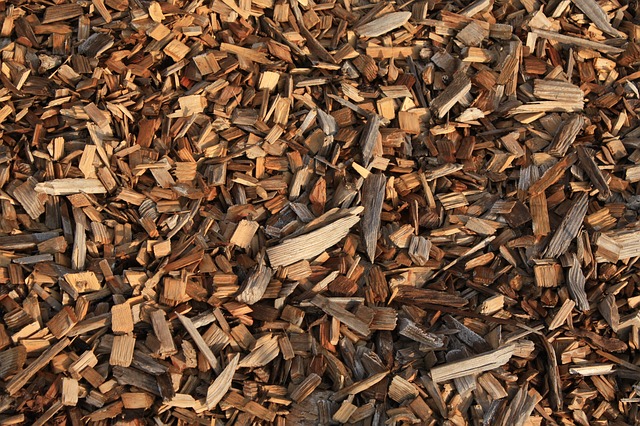
Woodchips are something far too many people pay for, and you can get them for free! Call your local tree service and ask them to drop off woodchips at your property.
Tree services have to pay to dump the woodchips they create from grinding trees and stumps.
You are actually saving them money.
When they drop off the woodchips, take them and place them out in your garden on top of the other materials. The woodchips help retain moisture and compost as well to make great dirt!
This means that you will have to water your plants less and when the dry heat of summer comes along your plants will have extra protection since the woodchips will help them retain water.
Don’t worry about the acidity from the woodchips. If you place them out in your garden in the fall they will have composted by spring.
If you have waited until the spring to do this step, when placing your plants in the ground be sure to create a circle of just dirt around the plant and pull the woodchips away from the plant.
This will keep the acid from scorching your plants. The woodchips will compost as the season progresses.
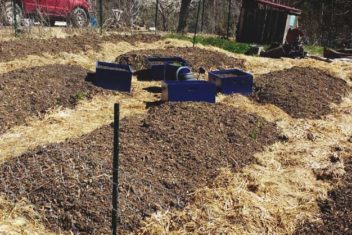
6. Create Your Garden
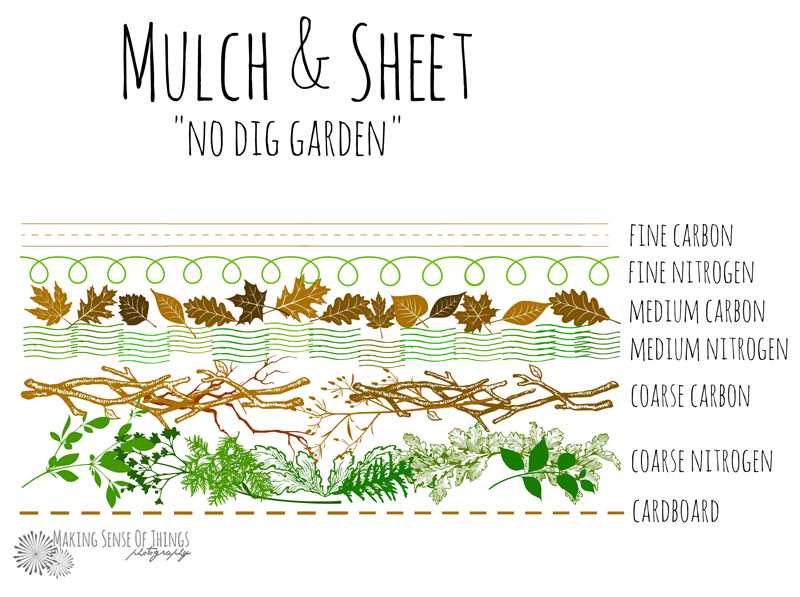
Take all of the items collected in steps 3-5 and place them over your garden area.
Start with the cardboard to stop the weeds. This has to be done by hand by breaking the boxes down with a box cutter, flattening them out, and lining them up over the area.
Then place the collected fertilizers over the cardboard. Place all of the fertilizer in a wheel barrel and walk up and down the rows with a shovel throwing it out over the garden.
Then place any other items you collected that are biodegradable such as leaves or old hay over the garden. If you have a leaf catcher you can use your lawn mower to collect and then effectively dump the leaves over the garden.
If not, collecting the items in a wheel barrel and tossing them sporadically over the garden will do just fine.
Finally, place the woodchips over the garden as the top layer.
Again, this step can be executed by using a wheel barrel and a shovel. Load the wheel barrel up and dump each load in rows leaving some space between each load that you dump. Then you can spread the mulch out with a rake or hoe to get even coverage.
After piling all of your organic matter on your garden, let the mixture sit for a few months and it will compost and create beautiful dirt in time for spring planting.
7. Time to Plant
When spring hits and it is time to plant your garden, planting will be much easier!
Instead of your dirt being coarse and hard to dig, you will simply run the edge of your hoe or rake over the dirt and lay your plants in the line your gardening tools created.
Then you use your garden tool to nestle the dirt back up around each plant to insure the roots are covered. That is it! There is no bending over for long periods of time and no digging for each individual plant. Your back will thank you!
‘No dig’ gardens are so successful because it allows for plants to develop deep root systems.
They grow in compost and then have a self-watering system because of the woodchips.
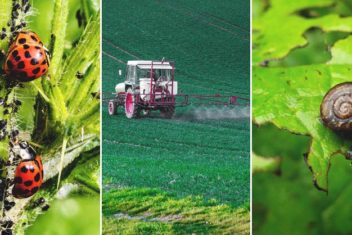
This type of gardening can be accomplished organically as well. You don’t have to go back over your plants with pesticides. The bugs will naturally eat your weak rooted plants and leave the healthy ones for you to harvest.
Raising a ‘no dig’ garden has recently become all the rage because of its simplicity. What do you think? Could you become the next ‘no dig’ gardener?