
If you’re looking for an introductory guide to planting potatoes, we’ve got one called Growing Potatoes: Varieties, Planting Guide, Care, Problems, and Harvest. This post right here isn’t a basic guide. This is about the deep, dark secrets of peak potato production.
We’re going underground to uncover potato growing habits. We’ll also unearth some great tricks you can use to grow amazing potatoes in the ground and in containers.
So, if you are ready to discover some ground-breaking potato truths, let’s dig in!

Understanding How Potatoes Grow

The potatoes we eat and frequently call “root” vegetables aren’t roots at all! They are plant stems.
Many people think of stems as the parts above ground that run between the leaves. However, lots of plants have stems that grow underground. For example, the most delicious parts of garlic, turmeric, and ginger are also underground stems.
The difference between a root and a stem is that roots gather nutrients from the soil. Stems, on the other hand, transport nutrients from roots to plant leaves. They also transmit sugars made from sunlight collected by the leaves to the roots.
In potatoes, their underground stems also have a special capacity to store extra nutrients rather than just move them around. The portion we eat is a fattened, modified stem.
Roots from Stems

This is important to know because it helps explain how potatoes grow. That potato stem, like lots of other stems, has the capacity to make both leaves and roots. If you’ve ever rooted mint cuttings in water, then you already have some experience with this concept.
In warm conditions, potato tubers send out sun-seeking stems. At first, those stems just look like little nodes poking through the skins (called eyes). Then, these sprouts elongate. Those upward growing stems will keep on growing until they reach sunlight or until the potato runs out of energy to keep growing the stems.
On your countertop, most potatoes only put out stems. Because most of our homes are dry, the potatoes won’t form roots. But if you store your potatoes in damp humid conditions, they will often form a few roots too.
Underground Sprouting
If you plant those potatoes with eyes in the soil, the stems will grow up through the soil to reach daylight. The moisture in the soil will also trigger the tuber to start producing roots. In fact, the potato stem will produce roots all along its length as well as underneath the original potato you planted.
Tips for Peak Potato Production in the Ground

Now that you know more about potato stems, let’s get to some tips for how to grow them in the ground for peak production.
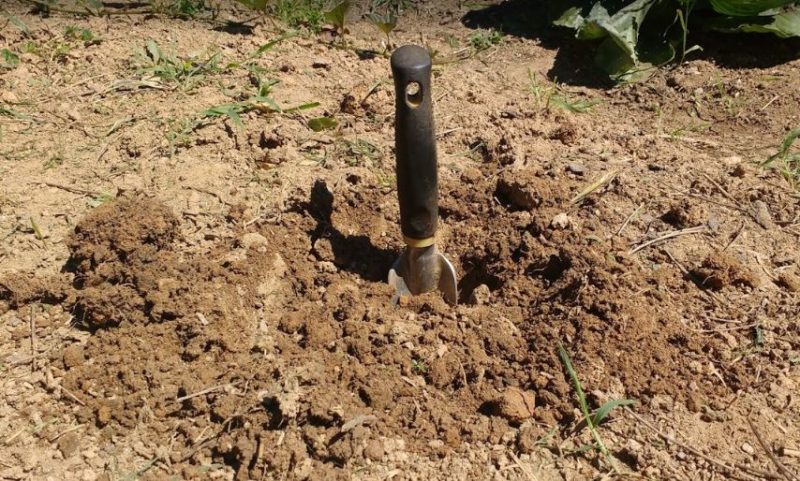
Tip 1: Plant Deep
Can you guess why most people plant their potatoes in deep trenches? Yep, you got it!
We want the underground stem to be as long as possible. The more extensive a potatoes stem is, the more roots it can grow from the stem area. Potatoes with extensive root networks access more nutrients in the soil and make more fattened potato tubers to store those extra nutrients.
– Depth and Potato Production
I’m terrible at drawing. But, just to demonstrate how a long stem can add up to more potatoes, I made this quick sketch to highlight the benefits of a long stem.

– No-Till Planting
Just to be clear, you don’t have to plant potatoes deep at all. In fact, you can start them right on the surface of the soil. This is how they are planted in a no-till system.
As you see in the drawing, though, you won’t get as many roots, so you won’t get as many tubers. However, in a no-till garden, you have lots of compost. So, your tubers at the surface can get fairly large. Also, the longer you no-till garden, the greater your potato yields tend to be.
– Deeper Planting
Even just planting four inches below the surface can increase your yields. For the best production, you want to shoot for planting about 8-10 inches deep with about four inches of soil below the plant tuber. This way you get a 12-14 inch potato tuber column growing along the stem.
You can also go deeper if you have exceptional quality soil. However, it’s not always beneficial to plant deeper than that 8-10 inch range because the biological life that feeds plants from the soil tends to be scarce down deep. That’s why even great big trees get most of their nutrients in the top 12 or so inches of soil.
Tip 2: Lure Longer Stems
The other trick we pull on our potatoes is that we don’t just bury them under 8 inches of soil to start. We bury them under a few inches, wait until they reach the surface, then bury them again. We repeat this until they are to the top of the soil line, then we even hill a little soil on top for good measure.
This is because potatoes are smart. They don’t bother trying to grow in extremely cold conditions. They wait until the soil warms up a bit.
– Early Growth
If you just stuck a potato under 8 inches of soil, at that depth, the soil is cool because the sun doesn’t penetrate that deeply. As such, that deep-planted potato might sit there until June or July before it starts trying to grow up to feel the warm sun. By starting it under just a few inches of soil, it feels the sun through the soil and starts to grow earlier.
– Cold Protection
Since potato stems can only tolerate a light frost, covering them with soil each time stems poke through in cool weather also prevents them from cold die back. So, that allows us to get a jump on the season.
With potatoes, I cover mine with soil at a rate of 2 to 3 inches at a time. In colder climates, you can go with 4 inches for more frost protection.
Tip 3: Right Size Your Seeds
The next thing to know is that the size of the tuber piece, called a seed potato, that you plant has an impact on how well your plant grows.
– Too Small
If you plant too small of a piece, your potato will have to set roots and gather nutrients as it grows to make the long trek to the top of a trench. That slows plant growth. Also, if the plant runs out of energy too soon, it may just die of exhaustion.
– Too Large
If you plant a tuber that’s too large, your potato will be…well, a couch potato. It’ll take its sweet time growing, waiting for warmer soil temperatures. In climates that get hot early in summer, that delayed effort toward reaching sunlight can reduce yields because potato plants grow best in cool conditions.
– Just Right
Planting a tuber piece that has enough energy for fast growth, but not enough to encourage laziness is the best bet. In my own experimentation, I have the best luck when I use 1.5 ounces of potato for every 4-5 inches of soil they have to grow through.
If I’m planting in a no-till bed, a 1.5-ounce piece is sufficient. For trench planting 8 inches deep, a seed potato just over 3 ounces is perfect. For the fastest results, each seed potato you plant should already have eyes. However, even if it doesn’t, they will still form underground. It just takes longer.
– The Whole Potato
When possible, I plant whole potatoes that are the right weight. They are less prone to rotting than cut pieces. Yet, if you have a jumbo potato, you’ll need to cut it into pieces and allow those cuts to scab for at least 24 hours before planting to limit rot risks.
Tip 4: Target Soil Fertility
The last piece of this great potato productivity puzzle is fertility. The other benefit of a long stem is that potatoes can access nutrients deeper in the soil. All that stuff you put on top of your soil last year, that got washed down below the root zone in the rain, now becomes food for potatoes.
Unfortunately, if you apply fertilizers including compost to the top few inches of your soil, then your potato plant will focus on tuber production where the most nutrients are first. So, those long stems you encouraged become less effective if you don’t have well-distributed soil nutrients all the way down.
Rather than top feeding potatoes, incorporate the nutrients into the soil. You can do this one of two ways.
– Fresh Manure Method
You can put uncomposted materials, such as fresh cow manure, into your soil about 4-6 months before you plant. Applying early allows the soil lifetime to incorporate those nutrients deeper into the soil.
This was a pretty typical way to plant potatoes back when lots of people kept their own livestock and didn’t make carbon to nitrogen balanced compost piles.
It works great as long as you rotate your potato plots every 2 years. Otherwise, productivity can decline and that area becomes at greater risk for plant diseases because soil can only process so much fresh manure before it gets overloaded.
– Compost/Soil Mix Method

Alternatively, you can mix well-aged compost with your soil and use that soil/compost mix when you bury the stems. Personally, when I dig out my soil for planting, I put it in an old compost or feed bag. Then as I put it back in the hole, I add half high-quality compost and half soil mixed together to backfill my trench.
That extra soil I have left at the end I use to ‘hill up’ the top few inches with. I don’t add any compost to the hilled area. Using this method, I have grown potatoes in the same plots for 5-year periods without plant diseases cropping up.
Tips for Peak Potato Production in Containers
Now that you understand the basics of how potatoes grow and how to increase yields by stem stretching and nutrient dispersal, you can use this knowledge to plant potatoes in all sorts of ways. You just need to understand a few more things about what potatoes need to grow well above ground.
Tip 5: Stabilize Soil Temperatures

Potatoes like to have their leafy parts warm and their roots cool. When planted in the ground, especially in an 8-10 inch trench, the soil stays fairly cool and this keeps potatoes happy. When you put potatoes in an above-ground container, the soil in that container heats and cools faster than the soil in the ground.
Many people have tried to grow potatoes in a black grow bag or trash bag with holes sitting on pavement or compacted soil. They usually get a few potatoes. But given the cost of the soil, the bag, and the seed potatoes, it’s often much cheaper to buy a 50-pound bag of potatoes than grow your own.
The problem is that those black containers are thin. They get super hot in the sun and cool quickly at night. Since the soil temperatures inside the bags are fluctuating constantly, the potato plants are constantly stressed by those changes.
Putting those kinds of containers on compacted soil or pavement also acts as a heat sink and reflects extra heat back into the bagged soil. This compounds the stress on the plant roots.
– Light Colored Containers/Cooler Locales
You’ll get better results using a light-colored container. Then also put it in an area with tall weeds, grasses, or other plants to offer shade to the soil mass inside the container. In the photo above, the white bucket in the green area is a much better option for growing potatoes. T
– Bag Beds
Or better yet, place lots of bags together and surround them with something to keep them cool such as straw bales. This effectively becomes a kind of above-ground bed and is great for peak potato production. By grouping containers together, the container bases shade and protect each other creating a better regulated soil microclimate.
Tip 6: Contain Your Creativity

If you use creative ways to stabilize your soil temperatures, then you can use just about any large containers for growing potatoes. If it has good drainage so water flows through and keeps your soil from washing away, then you can use whatever you’ve got to grow potatoes.
You can even use small containers, though, for good yields, you’ll want containers that contain close to a 40-pound bag equivalent of soil mix.
Here are some ideas to get you started.
- Punch drainage holes in your woven polypropylene feed bags.
- Use extra wire mesh or hardware cloth to make round baskets.
- Weave potato plant sized wattle beds using your fruit tree trimmings.
- You can even plant in burlap if heavy-duty enough (e.g. like burlap tree bags). Burlap can be too well-draining so you’ll need to water more often. Do the same for the purchased fabric grow bags as well.
- Old mineral buckets, galvanized tubs, discarded toilets or bathtubs, upside-down truck caps, and more can all be used.
– Potatoes in Tires

You can even plant in old tires. Larger tires are better.
Also, instead of cutting off the rim as you might in a tire bed vegetable garden, fill the inside of the rims with hardwood mulch. This will help retain moisture and regulate soil temperature.
Paint those tires white too or cover them with burlap to make them more attractive and slower to heat up in direct sunlight.
What makes tires a good prospect for peak potato production, is that you can keep on adding one on top of another, encouraging your potato plant to stretch and create longer stems, and thereby create peak potato production.
Tip 7: Soil
On the subject of soil, when planting in containers, because they dry faster and soil can quickly become compacted by frequent watering, you can’t use standard soil to plant potatoes. You need a potting mix, raised bed mix, or soil that has been amended with at least 50% compost.
Since potatoes need a lot of soil to grow a lot of tubers, you may end up making or buying the soil you need. I highly recommend that you use mixes that contain lots of organic compost. Potatoes don’t seem to favor perlite, vermiculite, or peat moss.
If you can use leaf mold or leaf compost in the mix, potatoes love that stuff. Also, if you cover the top of your soil with mulched leaves you’ll help keep the potato roots cooler and retain moisture without adding extra nutrients in the top few inches.
Grow Your Own Potato Stems!

Whether you grow them above ground or in great garden soil, potatoes are one of the most calorie-dense, useful crops you can grow on a homestead. In fact, potatoes are so important as a homestead staple crop, I encourage you to keep on experimenting with all sorts of growing methods and share your peak potato production tips with others.
Have fun growing your own big, fat potato stems for summer potato salad and winter storage!


