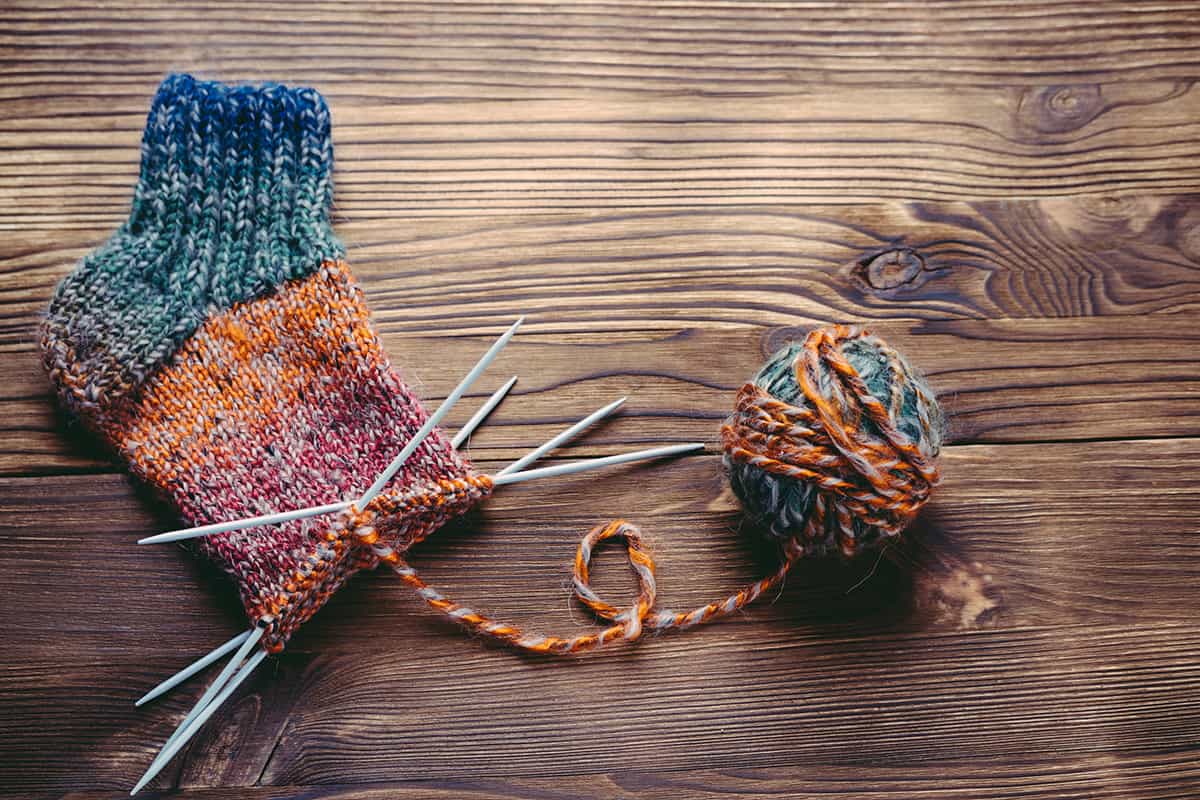
Whether you’re new to knitting or have been playing with yarn for a while, you may be interested in learning how to knit socks. These are immensely handy items to know how to create, and You can complete a simple pair like the ones shown here in just a few days.
Why Learn How to Knit Socks? Why Not Just Buy Them?
The DIY movement has been building in popularity over the past several years. Many people have been rediscovering the joys of handmade craft and realizing that pursuits that assist with self-sufficiency have the helpful side-effect of being immensely calming and satisfying.
After all, a craft that is proven to help reduce anxiety while also keeping you (and your family members) warm and cozy is a win-win all around, isn’t it?
When it comes to making these kinds of clothing items by hand, a lot of people roll their eyes. After all, why would you bother spending a couple of days wrestling with knitting needles and yarn when you can buy a three-pack of socks at Walmart for a few dollars?
Quite simply, that isn’t always a possibility.
We never know how life will unfold, and the more skill sets we have under our belts, the better prepared we may be for unexpected circumstances. I know people who have moved to extremely rural areas and have had to learn how to make all kinds of clothing items simply because local stores didn’t have them available.
If the power or WiFi goes out for a while and you can’t get anything delivered to your house, knowing how to transform yarn into clothing with a few sticks can be immensely beneficial to everyone around you.
A Basic Sock Pattern to Build Upon
The sock pattern I’m sharing here is a really basic top-down pattern but a good foundation. Once you’re comfortable with the basics of sock construction, you can experiment with different stitches for textural effects.
There are a few different ways to make knit socks. Some people like to work from the toe up instead of top-down. Others prefer to use circular needles with the “magic loop” technique. Feel free to experiment with different approaches to see which one you like best!
I find double-pointed needles (DPNs) to be easiest to control, but to each their own ecstasy.
I’m giving the instructions for medium-sized adult socks. A friend wrote the pattern in a journal of mine about 20 years ago, and it has been my go-to ever since. These will fit women’s sizes 8-10 or men’s sizes 7-9. You can adapt the pattern as you go along to make them a bit larger or smaller as needed.
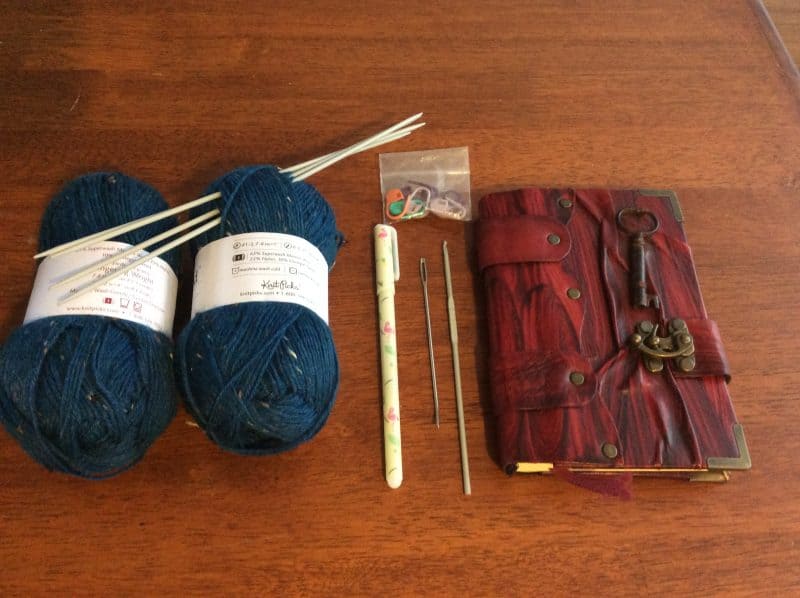
What You’ll Need:
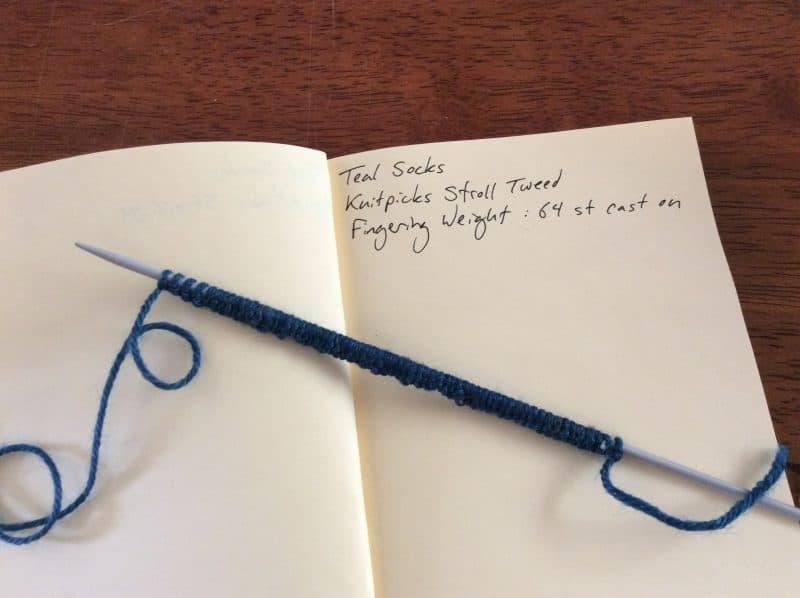
We’re using “fingering” or “sock” weight yarn for this project. If you knit a gauge test swatch ahead of time, you’re aiming for a gauge of seven stitches per inch. I used KnitPicks Stroll Tweed yarn for the photos accompanying this article, but any fingering weight yarn will do.
Washable wool is great for easy care; regular wool will need hand-washing, but is warm and durable. Acrylic is great to practice with but can give you blisters.
- 434 yards/398 meters fingering weight yarn
- Size 1 to 3 (2.25mm to 3.25mm) double-pointed needles – these come in sets of four or five. You’ll need four of them for this project. Be sure to knit that test swatch to make sure you’re using the right needle size for your yarn.
- Stitch markers
- Notebook and pen
- Tape measure or ruler
- Tapestry needle
- Crocheting hook (optional)
Knitting Terms and Abbreviations:
- CO: cast on
- St: stitch
- K: knit
- P: purl
- SL: slip
- SSK: slip, slip, knit (check out this video to create this left-leaning decrease)
- P2tog: purl two together (this is a right-leaning decrease, demonstrated here)
- WYF: with yarn in front
- Rep: repeat
Instructions:
Cast on 64 stitches using a stretchy CO method. If you don’t already have a tried-and-true method that you love, try one of the ones in this video here.
Once those are on, you’re going to need to divide those stitches between three of your DPNs. Since there are 64 stitches, I generally put 20 each on needle 1 and needle 3, with 24 on the middle needle (magical number 2) in between. Make sure all the stitches face the same way, so you don’t create a Moebius infinity circle, and join them.
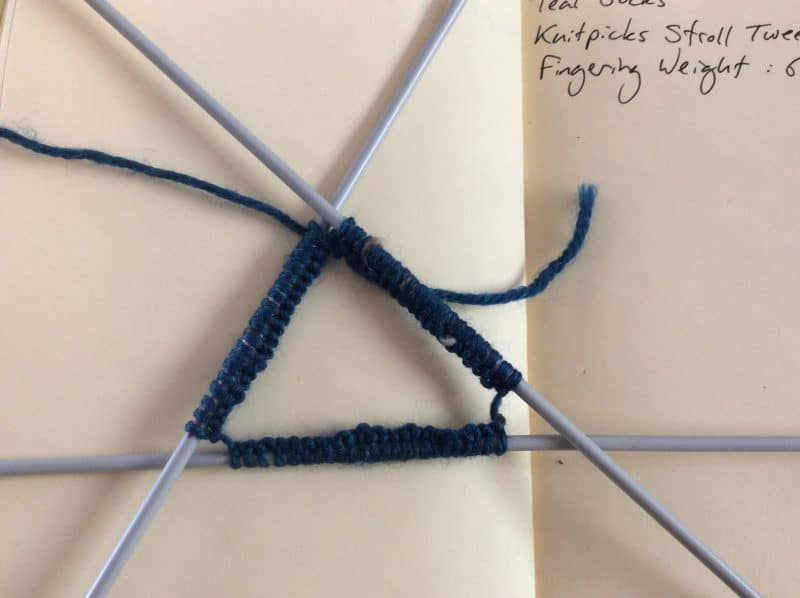
To join your yarn for working in the round, you’re going to use what’s known as a “crossover join.” Slip the first stitch you cast on (which will be on the left needle) onto the right needle.
Then, with that left needle, pick up what is now the second-last stitch on the right needle. Slip it over the one you just switched over and onto the left needle instead. Follow this video tutorial if you need visual help with this method.
Basically, you’ve just invited the first and last stitches to switch places on the needles you’re working with. This creates a smooth transition, so there isn’t a gap in your work as you knit.
Time to Knit Socks!
In your notebook, mark down every row you knit so you can count how many rounds, rows, and stitches you have going on, depending on what part of the sock you’re constructing. For now, write down that you’re working on the cuff.
Keeping track of how many rows you’ve knit can help to ensure that you create socks that match (approximately).
Work the cuff in a basic K2, P2 rib until it measures about an inch to an inch and a half in length. I do 24 rows to create a cuff that’s slightly more than an inch. This helps to keep the sock in place without looking weird.
Once that’s done, switch over to stockinette stitch (which is just knitting plainly continuously) until the leg of your sock is seven or eight inches long. If you write down how many rows you’ve written, you can make sure that the other sock will match. Otherwise, you can estimate it with a ruler later.
When you’re ready to knit the heel, K16. Then, turn the sock around and K32 onto a single needle. Transfer the rest of the stitches onto one of the other needles, and put the unused needle somewhere safe so you don’t lose it.
Knit the Heel Flap
Instead of working in the round as you have up until this point, you’ll be knitting back and forth like any other flat project. You can use just about any knit stitch you like, but the Eye of Partridge stitch below is really handy. It needs to be done with an even number of stitches, so count again to make sure you have 32 stitches.
Row 1: (right side) SL1, K1, repeat all the way across, ending with K1.
Row 2: and all even rows: SL1, then purl all the way to the end of the row.
Row 3: SL 2, *K1, SL1,* repeat from * to * across the row to the last two stitches. End with K2.
Row 4: Repeat Row 2.
Repeat these four rows 9 times (until 34 rows have been worked in total). This will have created about 17 selvage stitches, which you’ll pick up later to knit the gusset.
Turn That Heel!
To make the heel fit snugly, you need to knit what’s known as “short rows”. These help to create the little rounded bit that will hold your heel in the sock’s cuddly embrace.
Row 1: (right side) K18, ssk, K1, turn your work around.
Row 2: (other side) Sl1 purlwise, P5, P2tog, P1, turn work around.
Row 3: Sl1 purlwise, then knit to the stitch before the little gap left on the row you just knit. SSK, taking one stitch from either side of the gap. Then K1, and turn your work around.
Row 4: Sl1 purlwise. Do the opposite of the row you just knit, purling to the stitch before the gap. Then P2tog (yes, taking one stitch from either side of the gap), P1.
Repeat rows 3 and 4 until you’ve worked every single row. At this point, you should have 18 stitches to work with. If not, don’t panic. You can always P2tog if you have an extra stitch at the end, or make an extra stitch by knitting into both the back and front of a single stitch as needed.
All Gusseted Up
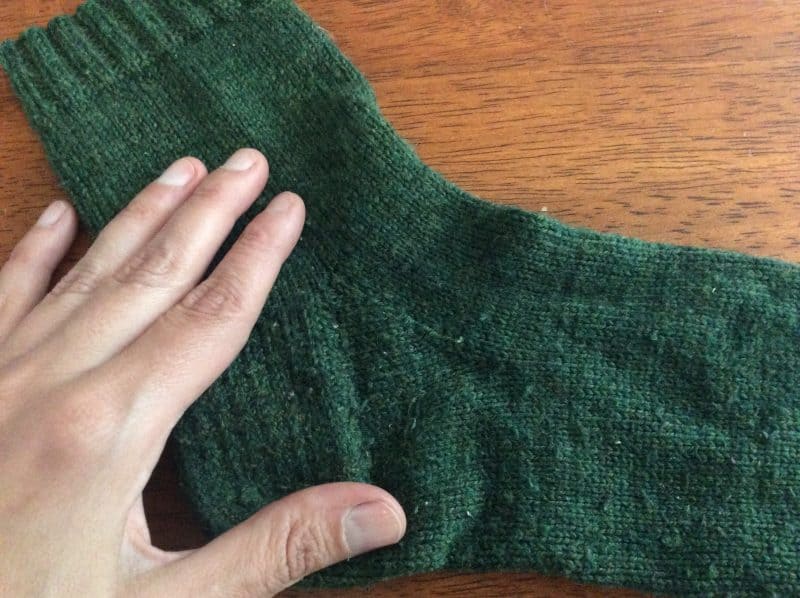
The gusset is the triangular shape that’s created between the heel and the foot. To create this, you’ll pick up the selvage stitches that were created when you worked that lovely heel flap. Be sure to pick up an extra st or two as you work your way along: this will prevent you from creating a wide hole at the gusset’s base.
You’ll be working in the round again from here on, rather than knitting back and forth, so get that extra DPN back out from its hiding place.
Round 1: Knit across the 18 heel stitches, then use it and your fingers to pick up and knit 17 or 18 selvage stitches. This will all be on the same needle (#1) and might be a bit awkward, but that’s okay.
Then, grab another DPN and knit 32 stitches. This is now needle #2.
Using needle #3, pick up and knit another 17 or 18 selvage stitches along the other side. With that same needle, knit 9 stitches off needle #1. Place a stitch marker between the last stitch you knit and the first stitch on needle #1. This is the center of the heel, for sake of reference.
Keep Working!
At this point, you should have approximately 84 stitches in total, with 26 or so on needles 1 and 3, and 32 stitches on needle 2. If there are more than this, again: don’t worry. You can always decrease here and there as necessary. These socks are meant to be functional rather than aesthetic masterpieces of awesomeness.
Round 2: Knit to the last 3 st on needle #1, then K2tog, K1. Knit across all stitches on needle #2, then K1, ssk, and knit to the end on needle #3. This reduces 2 gusset stitches so you’ll have 82 instead of the 84 you began with.
Round 3: Just knit all the way around.
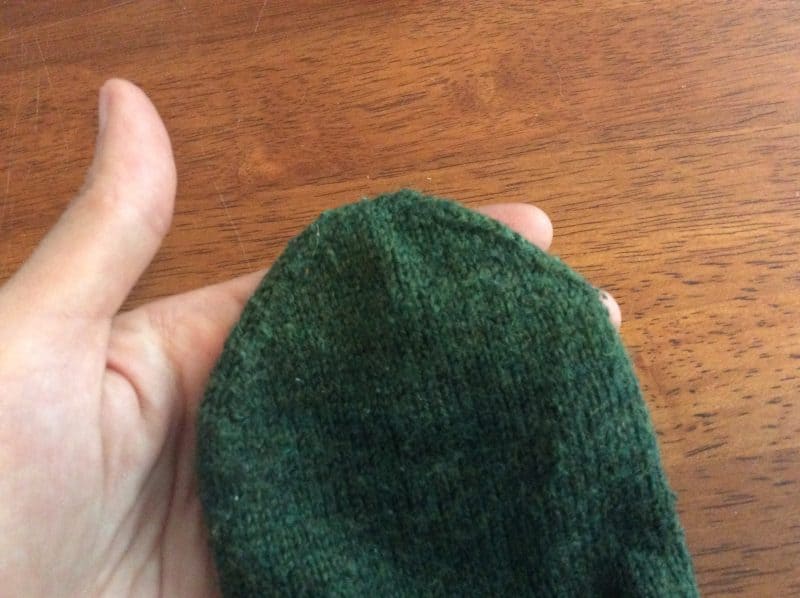
Toe Formation and Finishing
Repeat rounds 2 and 3 until you only have 64 stitches remaining. There should be 16 stitches on needles #1 and #3, and the same 32 st on needle #2. Keep knitting in the round until the sock’s foot is about 6″ long. Measure it up against your foot at this point, and keep knitting until the length from the back of mid-heel to the needles is about 2 and 1/4″ from the tip of your toe.
Time to start decreasing.
Round 1: Knit to the last 3 st on needle #1, then K2tog, K1. Pick up needle #2, K1, SSK, knit all the way over to the last 3 st, then K2tog, K1. Finally, on needle #3, K1, SSK, and knit all the way to the end. This should decrease everything by 4 stitches.
Round 2: Knit.
Repeats
Keep repeating rounds 1 and 2 until you only have 32 stitches remaining in total. Then ONLY repeat round 1 until you’re down to 12 stitches. At this point, you’ll knit all the stitches from needle #1 onto needle #3. This divides the stitches evenly so you have 6 st on 2 needles.
At this point, cut the yarn, so you have a tail that’s about 20″ long. Get that tapestry needle out and thread this tail through it. You’re going to use a Kitchener stitch to bind these last stitches together. It’s difficult to explain this one, so check out the tutorial below.
Once you’ve finished this, turn the work inside out and trim the yarn, so there are only a few inches left. Weave the end into some stitches and remove the needle. If there’s still a long bit left from where you cast on initially, use the needle to weave that in as well. If it’s too short to thread onto the needle, use a crocheting hook instead.
Then, of course, repeat this entire process for the second sock!
Some Final Notes About Knit Socks
The instructions here are for fingering weight yarn, but you can, of course, use any gauge you have available. For example, if you unravel a worsted/Aran knit sweater, then you’ll be looking at 5 stitches per inch instead of 7. These will require larger needles (3.5 to 5mm in size), and you’ll cast on fewer stitches (44 instead of 64).
I’d recommend checking out some different yarn pattern websites for sock patterns that you like. Then print them out, slip those printouts into plastic sleeves, and keep them in a binder. This way, you’ll have them on hand as needed pretty much forever. Plus, you’ll have access to sock patterns that you actually like rather than just what’s available.
Another quick tip? Take advantage of yarn sales whenever possible. Socks take a beating, and you’ll either have to darn them on a regular basis to keep them in good repair, or knit new ones. I always have at least one pair of socks on DPNs at any given time, since I knit for several family members as well as for myself.
Build your library, stock up your yarn stash, and get a few sets of DPNs in various sizes. You’ll inevitably break or lose a few, trust me. Then get creative, and have fun!
