
My husband and I had made the decision to branch out from chickens and buy our first goat. Obviously, we were a little green about the whole thing because we only purchased one (and 1 goat quickly turned into 3.)
Nevertheless, we made our journey to the farm where our precious Nanny goat (yes, I named her Nanny. Original, I know) resided. And just like that, my goat family was born. She and I immediately connected, and I have loved her ever since.
When my husband was building a bigger barn for them, he asked if I’d like them to have a loft bed. My eyes lit up, and I was so excited. However, not nearly as excited as my goat children were. They have enjoyed it daily ever since.
This leads us to this post. I’m going to share with you how we built a small ‘goat cabin’ with a loft bed for absolutely no money.
Hopefully this post will inspire an original masterpiece of your own.

Materials Needed:
- Slabs
- Recycled Wood
- Nail Gun (Or Hammer and Nails)
- Metal Posts
1. Collect Slabs

Naturally, we built our goat cabin out of slabs. If you see my house you would quickly realize almost everything is built from pallets or slabs because we can usually easily gather them for free.
Who doesn’t like building stuff for free?
We have a sawmill up the road from our house that we often haul trailer loads of free slabs from. Our goat cabin was no different. We dedicated a whole day to hauling slabs for this project.
Plus, whatever we didn’t use we could turn into firewood.
So if you have an opportunity to get free slabs, jump on it. They make great siding for projects like these.
2. Clear the Area
When we got our first goat I was totally unprepared. I was new to the whole homesteading thing and wasn’t exactly sure what to do.
I did a lot of research, and I was more concerned about proper fencing.
Here is my embarrassing confession. I thought I was going to get a miniature dwarf goat. I imagined I could have this goat like I would a dog in my backyard.
After all, where I grew up lots of people had goats in their fenced-in backyards. Why couldn’t I do the same?
Well, the goat was happy in the backyard, but she was lonesome for the first week. I would keep my kitchen window open and talk to her all throughout the day.
Then the next Friday, we went and purchased a second goat. However, neither of my goats were mini dwarf goats.
One is a full-sized Boar goat and the other a Pygmy. Then I had 2 goats in my backyard. Two goats that were on my back deck, standing on the railings, and laying on my nice outdoor furniture!
Though I loved my goats, I didn’t like them being on my furniture. My dreams of having goats in my immediate backyard faded, and I realized it was time to give them their own pasture area.
Needless to say, my husband is a patient man who puts up with my lofty dreams until I realize that he was right.
However, if you are able to purchase small goats and keep them in your backyard, then that’s good. Nothing makes me happier than seeing little goats running around in the yard like small dogs. It just didn’t work out for me.
He quietly built me a pasture area for my goats which meant that some of the land had to be cleared because he was kind enough to put them close enough to the house that I could step outside on the back porch, and the goats and I could still see each other.
You might be wondering why I wanted goats if I knew so little about them. I originally got them as a dairy source, but I also think they are precious and funny animals.
To be honest, whether they gave me milk or not, I’d probably still keep them around just because of how happy they make me and my family.
3. Frame Up the Cabin

Once the land was cleared and the fence was up around their area, my husband began framing up their cabin.
We did our cabin a little differently than some. We backed our goat area right up against our taller woodshed. You probably guessed that our woodshed is built from old wood and slabs too!
The woodshed took care of the backside of the goat cabin. Then my husband just had to frame up the rest of the cabin using old 2×4’s that we had from remodeling our house.
Our design was to use the woodshed as the back of the goat cabin. Then two walls on either side and a half of a wall on the front side. That way it would leave an entryway for the goats and still block the wind.
If you have any old wood around that you could stick in the ground to serve as posts for a goat cabin, it will probably do. You’ll place a post at each corner of the cabin and then connect them with another piece of wood at the top and the bottom to ensure the structure is sturdy.
Then you cover the walls with slabs. This works as siding. It helps the stability of the structure while also providing wind protection too.
4. Add the Roof
My husband had an old roof that he got from one of our neighbors. The neighbor tore down an old building and wanted the roof gone.
Obviously, we were more than happy to take it off of his hands. We ripped that roof down and made multiple roofs for small structures around our farm. The goat barn was one that we built from it.
He placed the old roof on top of the barn, but we did have to replace the metal. We have a carport factory in our area that sells metal roofing for very little money. My husband had purchased some metal not long before when he was building our woodshed. The scraps were used as the roof for the goat barn.
5. Insulate the Goat Cabin
We had a canvas tarp that we used to cover the walls in the barn. This worked for a while as a great wind blocker.
However, we got a baby billy goat a few months after we purchased our girls. He is still one of the nicest goats and also a great protector for our girls.
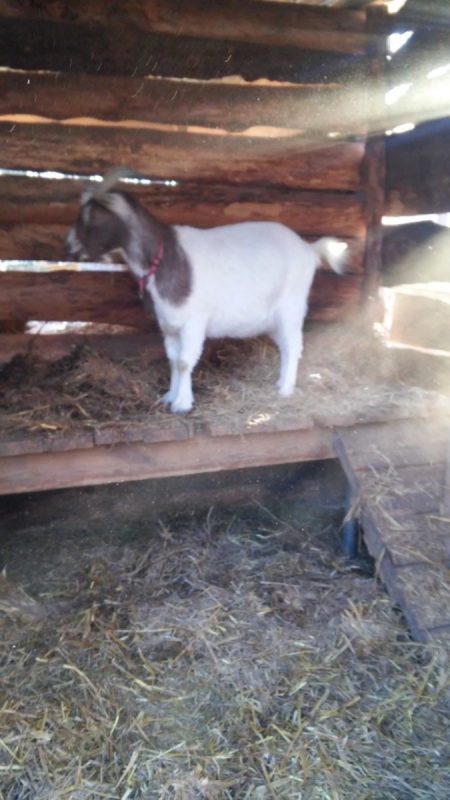
Well, baby billy goats don’t stay babies, and he now has a huge set of horns. He likes to lay up in the loft bed and look out of the barn, and I guess the canvas walls were blocking his view.
So he used his horns to remove the canvas, and we stopped bothering putting it back. The goats seem warm and our boy is happy.
Even so, if you’d like to insulate your walls, nailing an old tarp up over the walls should do the trick. We also put a straw at the bottom of the cabin so they have something between them and the ground. Our goats usually all 3 sleep on the loft bed.
However, when they kid, the mama usually sleeps on the ground under the bed with the babies. Unless both girls kid at the same time and then both girls snuggle under the bed with their babies, while our male sleeps on top guarding them.
6. Build the Loft Bed Base

Our loft bed is actually built from old metal poles my husband found and the wood from a remodel project on our house. Our house was a major fixer-upper project, and the front porch that was on it when we purchased our home was falling down.
When we built a new one, we saved the wood and put it to good use with this project.
When building the loft bed, you’ll begin with 4 posts. You could use wood posts if you desire, but if you have the round metal posts then use them. Use post hole diggers to place them in the ground.
Also, you could concrete around them or just put them far enough into the ground that when you place the dirt back around them they are sturdy. The idea is for this to be a sturdy bed.
You’ll be the judge on which is going to work best for your budget and your goats because you do want this project to last.
7. Build the Top of the Loft Bed
After the posts are in the ground, measure the distance between each post, and cut your recycled wood to length.
Then connect the wood to the post by using an impact and screws. After the base of the bed has been fully established, it is time to build the top of the loft bed.
Again, you need to measure the length you need the recycled boards to be in order to fill in the gap in the middle of your base. We laid the wood vertically instead of horizontally.
However, if you have fewer pieces of recycled wood, and they happen to be longer, then you might want to consider laying your wood horizontally.
After the wood has been cut to size, we used a nail gun (a hammer and nails will work fine too) to secure the boards to the base of the bed.
8. Build the ramp

Our final step was to build a ramp so the goats could climb up on the bed. We had an old wooden walk that was connected to this rickety front porch that we dismantled.
Obviously, the wooden walkway had to go too because every time it rained we almost fell walking on it.
My husband cut the wooden walkway down to size with a Sawzall. Then dug the ground out beneath it so the ramp had a way of being sturdy at the base.
Then he attached the top of the ramp to the loft bed with a nail gun but again, a hammer and nail could do the same job. Just be sure to use longer nails.
Our goats have been happily sleeping on this bed for about 2 years now, and have thoroughly enjoyed our upcycled project.
Now, I understand that not everyone has the same materials on hand and this is just a simple tutorial on how we were able to build our goat bed.
However, I do hope that it inspired you to look around and see what materials you can come up with to build a similar project if you’d like. Your steps might look a little different if you are working with different materials.
Just remember to be safe while building and also to make sure that your structure is sturdy for the safety of your goats.


