
Have you heard the meme about the $64 homegrown tomato? Well, that came from a book by William Alexander. From the way I understand it, he’s a gardener who spent a vast amount of money constructing his garden and then had a pretty “meh” tomato yield his first year. (I think his garden got better after that though).
I haven’t actually read the book. But the title is so catchy that fears of the $64 tomato actually deterred many new gardeners from trying to grow their own food. Even though the book came out in 2006, someone I know recently brought up this idea again. So, this time I had to do some research and figure out how in the heck that guy managed to grow a tomato that cost so much.
Turns out the author spent about $300 on garden design, $8500 on
After reading that list, it became abundantly clear to me that William Alexander was not a homesteader. Otherwise, he would have realized he could have done that work himself for almost free!

Garden Hacks for Homesteaders
If you want $64 tomatoes, I recommend you use Mr. Alexander’s method. But if you want nearly free tomatoes (and all sorts of other delicious fresh veggies), read on to learn about low to no cost garden hacks you can use to cut your grocery bill!
Pest Prevention
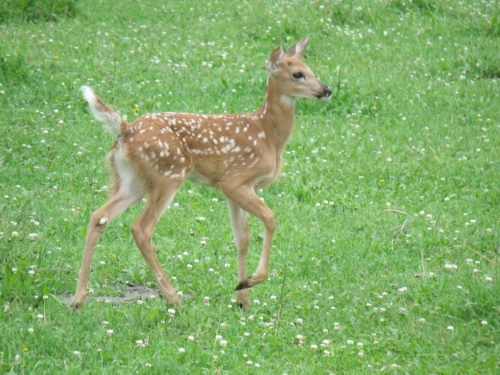
Just about every gardener has some kind of pest problem to work around. I have deer, voles, and chipmunks to contend with in my garden.
I can tell you from experience that having a regular fence is not entirely effective against these determined garden grazers. So sometimes a series of clever, low-cost tricks works even better than expensive fences.
1. Fishing Line Deer Fence
Instead of buying rolls of expensive, heavy fencing materials. You can make a deer fence using fishing line. You’ll also needs posts. But you can cut those yourself from trees that need thinning or bamboo if you want to.
I use this method around my new orchard areas to keep the deer from eating the bark of my young trees. I recommend you run the lines every 12 inches and go up to 8 feet tall.
Every so often a determined deer jumps or breaks the line. So I also run a few overhead lines that they get tangled up in when they do. The experience is so horrifying, they don’t even try again for months.
The deer do break the lines by running into them occasionally. So you’ll have to re-run the lines once in a while. Overall though, this is a low labor,
2. Blood Barrier
I know it doesn’t sound appetizing, but if you butcher animals on your homestead, that blood can be used to discourage rabbits from entering your garden.
Personally, for poultry processing, I put a straw bale under my kill cone. The blood mixes with the straw. Then I spread the straw around the perimeter of my garden.
I grow flowers around the perimeter of my garden. So, the straw acts as mulch and the blood acts as fertilizer for the flowers too. But the smell of the blood discourages rabbits from crossing my line of flowers into the vegetable garden.
You can also save the blood in a bucket with water and then pour a blood barrier around your garden. You will need to refresh this about every 4 weeks during the growing season.
3. Flower Powered Fence
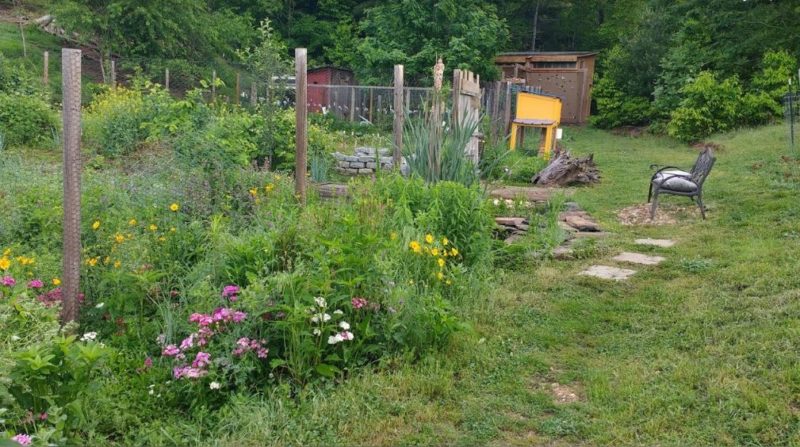
Those flowers I mentioned in point 2 are also natural deterrents for plant-eating garden pests. I grow things like marigolds, sweet alyssum, snapdragon, many mints, salvia, alliums, hydrangea, perennial garlic, chives (allowed to flower), and other strong-smelling natural furry garden pest deterrents.
I grow about a 4 foot side swath of these plants, thickly planted, all around my garden. They effectively create a fence of flowers that are toxic and irritating to rabbits and not so much fun for voles to eat the roots of either!
4. Soap on a Rope
Soap on a rope was a bad idea in the gift giving realm. But, it works great for deterring deer!
The stronger, more artificially smelling the soap, the better. Irish spring is a classic favorite. But all those perfumy, 3 for $1 kinds that make your nose hairs curl and your throat clench are great options too.
Tie the soap to posts or plants, about every 5 feet around and in your garden. The smell is so revolting it sends pests bolting! (Unfortunately, it does the same to me, so I prefer my flower-powered fence.)
5. Noise Makers
Another great way to discourage deer, and other sneaky garden thieves, is to cause them to make noise. Tie a bunch of tin cans together. Set them up on a fence post or wall. Then run a trip line across part of your garden.
When deer or other critters walk into the trip line, it pulls down the tin cans. They make noise by clanging together. The frightened, furry offenders, race away from the sound.
If your garden is close to your home, the noise maker idea can be a bit disturbing to you as well. So, I like this next option as an alternative.
6. Let There Be Light!
Deer and digging animals do a lot more damage at night when there’s no one to chase them off. So, installing battery-operated, motion-sensing spotlights, strategically around your garden can scare off night eaters.
Now, deer and other night roving animals are smart. They quickly get that the light is automated. To be effective long-term, you’ll need to move the lights around periodically and point them at different angles.
Raised Beds
Raised beds are pretty popular right now. You don’t even need a garden to use them. You can just set them up in the middle of your lawn, fill them with soil, and start growing food.
If you need more than a bed or two, though, it can get pretty expensive to buy the materials to make your beds. Luckily, there are some homestead alternatives that work like a raised bed, but give you even more growing power for less money.
7. Raised Keyhole Bed
Raised keyhole beds are one of the foundation tools in permaculture gardening. They work particularly well in places with toxic soil or vole issues.
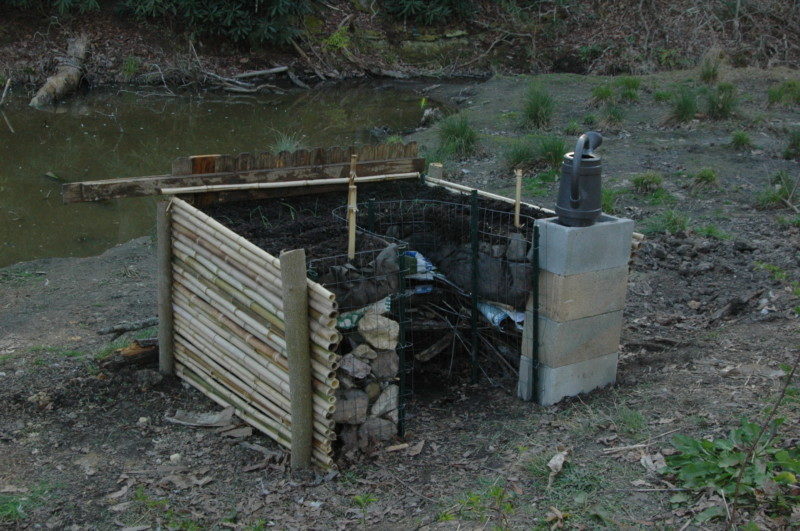
If you wanted to put one up in a parking lot, over blacktop, you could. You can even raise them up to your waist level so you don’t even have to bend down to garden! You just have to source your materials and get creative on your construction.
I made mine, shown above, by scavenging a broken picket fence, some wire fence materials from other projects, and cutting some bamboo and poplar. I set the base on feed bags and branches and rocks.
8. Hugelkultur

A hugelkutur is basically a mound of yard debris. You start with the largest logs you can find, top them with branches, then fill them in with lawn clippings, leaves, and kitchen scraps. Finally you cover them with top soil and plant them up.
The yard debris underneath eventually decomposes into compost and makes the best garden soil you can image. I have several hugels on my homestead. They stop soil erosion, feed the soil all around them, and never have to be watered the way traditional raised beds do.
9. Fresh Cut or Fallen Trees
There is no reason you need to use milled lumber for your raised beds. Forest fresh wood adds a rustic look and works just as well.
Also, since this wood isn’t treated, it improves your soil as it decays and holds a lot of moisture in your beds. That means you can fertilize and water less!
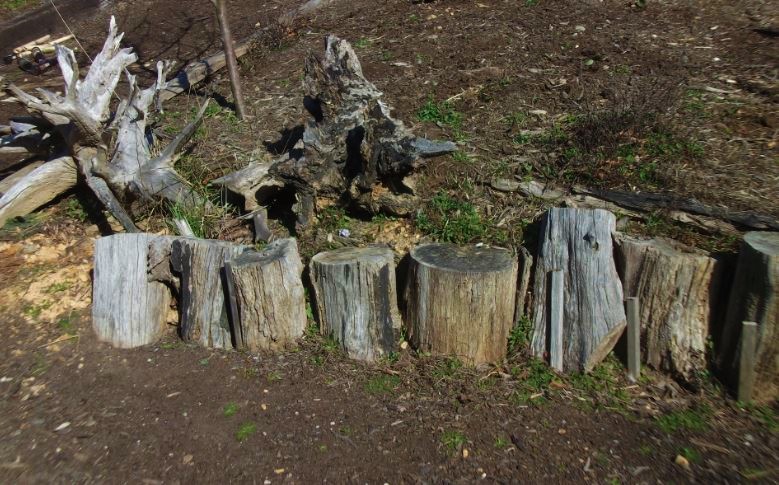
I make a lot of beds using young poplar and pine. These grow prolifically in the woods near us and need to be thinned anyhow. You can stack them between garden stakes if you need to make a taller bed.
We also have some older trees that come down on their own. Those big trees are too heavy to carry as 8 foot lengths, so instead I use them as 18-24 inch stumps to create a bed base.
10. Reverse Raised Beds
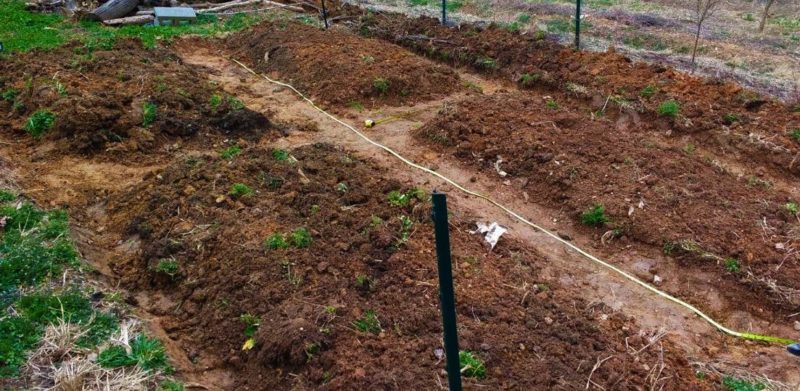
Another really easy way to create something like a raised bed is to make what I call a reverse raised bed. In all my gardens, I dig out my pathways and flip that extra topsoil on top of my beds. Then I back fill the paths with grass clippings, rotted hay, livestock litter, leaves, and hardwood mulch.
All that stuff in the paths decays and feeds the garden beds. But it also catches water to hold for when plants need it. Your garden paths effectively become swale that help you grow more vegetables and make more soil for less work and money.
Also, because you have increased your soil mass on top of your beds, they stand out in the landscape like raised beds do. You don’t need to add sides for this as long as you back fill your paths and keep compost on your beds.
Compost Tools
As a new gardener, I spent almost $100 on one of those fancy compost tumblers. It was a pain to turn and made far less compost than I needed for my garden. Then it broke in less than a year. Now though, I know there are much easier and more effective ways to compost.
11. Trench Composting

Trench composting is an easy way to make compost right in your garden. All you need to do is dig a trench, throw in some browns and greens, and cover it back up.
Not only is it the easiest way to compost, but it radically increases the life and fertility in your soil while it composts.
12. Vermicomposting

Vermicompost, also called worm castings or worm poop, is one of the best organic fertilizers you can apply to your garden. It’s incredibly expensive to buy. But, a one time purchase of a pound of worms can get you a life time of worm turds!
You can make your own vermicompost bin using totes. Or if you happen to know someone who has cats, those plastic kitty litter pails make perfect worm bins for free.
13. No Bin Compost
Many people think you have to have a bin to make compost. However, all you really need is a large pile of organic material. You can use a few garden stakes to mark out the corners of a 4 x
Even the posts are optional. But they do may finding your pile easier! If you live in a wet climate, you may need to cover your pile with a tarp or a plastic paint drop cloth to keep it from becoming
14. Free Pallet Compost Bin

If you like the look of a compost bin, you can make your own using free pallets. You’ll just need 4 pallets and some
Homemade Fertilizers
Growing an organic garden is very different from growing a conventional garden. We can’t just apply a cheap 10-10-10 fertilizer from the hardware store. It will ruin our soil!
So, we have to use a lot of different organic matter amendments. Luckily, as homesteaders, some of our other activities tend to produce good, free or nearly free, soil amendments.
15. Calcium
Calcium is absolutely critical to many plants’ development process. Tomatoes, for example, will not grow well without lots of it. One of the easiest ways to add calcium to your garden is to grind up egg shells.
If you have a good blender, you can actually run your egg shells through that with water. Then use the resulting calcium loaded liquid to fertilize your garden.
If you prefer to apply dry shells, you can grind them in your food processor. If you want to be totally low-tech, just crush them by hand.
16. Potassium
Potassium can be hard to come by in the garden. But, if you are a banana eater, all you need to do is mince your peels and spread those in your garden beds. The soil life will decompose the peels and release the potassium as a slow-release fertilizer.
17. 3 for 1 Mineral Source
If you burn wood, you have a great garden resource to work with. Wood ash is high in calcium, potassium, and phosphorous. It may also contain all sorts of other trace minerals.
You need to be cautious when using wood ash in the garden though. Similar to using pulverized lime, it can quickly change your soil pH. Apply only a transparent dusting to the top of beds for plants that benefit from extra P, K and calcium or if you suspect deficiencies.
18. Compost Tea
If you make compost, you can also make compost tea as a fast-acting fertilizer for plants. Start by making a tea bag of compost with a thin towel or old pillow case.
Soak the bag in a drum of water in a warm location. Several times a day, swirl and dip the compost tea bag to move the water and enliven the bacteria.
After 7-10 days of doing this, remove the bag, and spread it on your garden. Then, use the liquid to spray the undersides of your plant leaves every 5-7 days to provide an instant nutrient and beneficial bacterial boost.
Garden Tools
In general, I recommend buying simple, high-quality hand tools for the homestead garden. However, there are a few things you need multiples of for easy access. You can make your extras for free to save money.
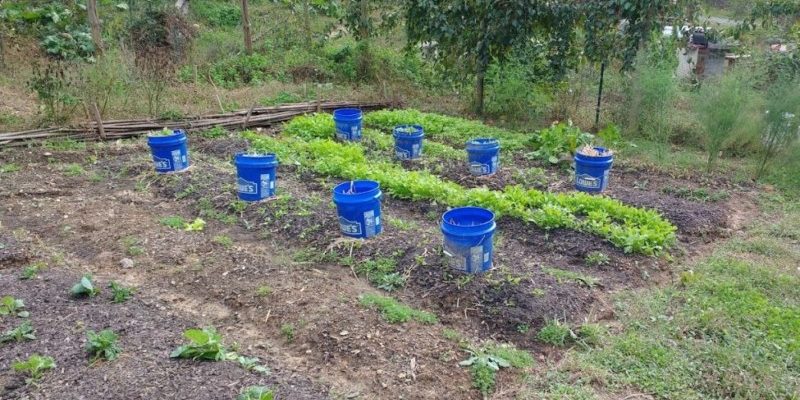
19. Watering Cans
Any plastic container with a twist lid will work as a watering can. Simply drill a few holes in the cap. Then put a hole in the corner opposite the cap as an air release valve.
Open the cap to fill or dip water. Tip to water your plants. I fill these up weekly and leave them standing next to each of my plants in containers. Then I give my plants a drink whenever they seem thirsty.
20. Measuring Cups
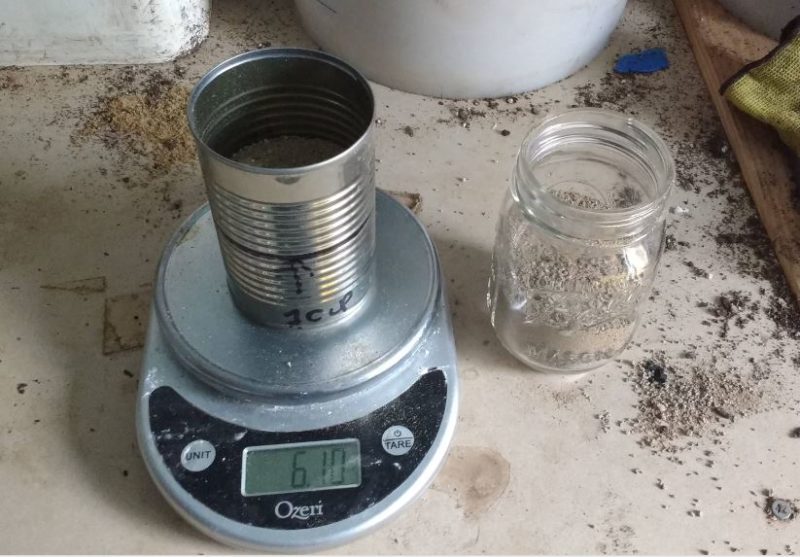
If you buy commercial grade soil amendments, they tell you application rates in pounds. But just about any backyard-sized bag of soil amendments (e.g. from the hardware store) tells you to apply things by the cup.
It used to make me so frustrated to have to run around looking for a measuring cup. Now though, I just measure out a cup of something into a tin can and mark the cup level. I make myself about 10 of these to keep in the potting shed, greenhouse, or other
You can also use a mason jar as a measuring cup. Personally though, I prefer those for indoor use since glass can shatter with freeze/thaw cycles.
Conclusion
I personally think that gardening should be a basic human right. It shouldn’t be reserved for people who can afford a garden that costs $64 for each tomato.
As long as you are resourceful and willing to find ways to garden smart instead of expensive, there is no reason you can’t garden for almost free. I give you my wholehearted encouragement to grow a productive and beautiful garden on a budget of much less than you’d spend on veggies at the store.
No $64 tomatoes on my homestead (and hopefully not yours either). No thank you!


