
Did you know that every time you open your fridge and choose to put cottage cheese with fruit or vegetable, you are actually helping your body fight breast cancer? Or every time you choose to eat some cottage cheese as your bedtime snack that you are providing your body with a wide array of vitamins and minerals it needs such as Vitamin B?
Well, you are!
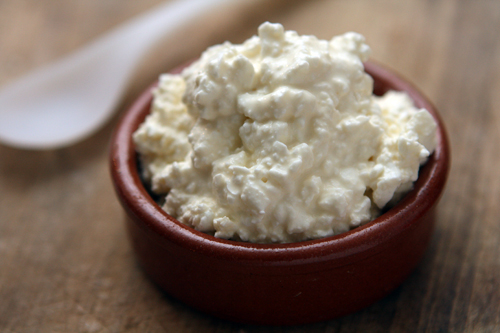
So with all of those benefits, wouldn’t you like to know how to make your own cottage cheese? That way you can make it from the freshest of ingredients as well as save yourself some money in the process.
You are in luck because that is what I’m sharing with you. There are multiple different ways to make cottage cheese, and we are going to cover each one.
Let’s get rolling:
Option #1: Cottage Cheese for Days
This option requires nothing special besides patience. However, you will need a few items to work with.
Ingredients:
- Raw Milk
- Kitchen Gadgets:
- A glass bowl
- Cheese Cloth
- Strainer
- A pot to heat the milk and a pot for straining
- A Turkey Baster (optional)
1. Remove the Cream
We will begin the process of making cottage cheese by removing any cream that is left on the raw milk. This is where the optional turkey baster comes in to play.
However, if you don’t have one, you can always just skim the top of the milk with a spoon. You’ll need to get as much cream off of the milk as you can.
But if you don’t get it all, don’t worry. We’ll revisit the cream again in a later step. Just take what you were able to skim off and store it in the fridge. You’ll use it later.
2. Pour and Wait
Next, you’ll want to pour the milk into the glass bowl. Then you’ll cover the milk with the cheesecloth. You will let the milk sit out on the counter for two days.
Pay attention to the milk as the days pass. When it begins to look like white Jell-O, then you’ll know that you are ready to carry on with the process.
However, do not wait until the curds and whey separate. Two days is about the average amount of time it takes, but your waiting period can vary depending upon the freshness of the milk.
3. Skim Again
When the milk is ready, you’ll need to skim off any excess cream you may have missed when you started the process. Since you already saved some cream from the beginning you won’t need to save this to use later in the process.
However, I do encourage you to save the cream. You can use it to make your own homemade sour cream.
4. Warm the Milk
You’ll want to take the thickened milk and dump it into a large pot. Then you’ll warm on low for around ten minutes.
When you see that the milk is separating it is time to turn off the heat. Now you are ready to move on to the next step in the process.
5. Line and Pour
You will need to line a strainer with a dish cloth or a fine cheesecloth. Then you’ll pour the curds and whey into the strainer from the pot. Be sure to place a clean pot under the strainer so it will catch what is being strained.
Next, let the milk strain through the cheese cloth. You’ll find that the curds will remain in the cheesecloth within the strainer while the whey will strain into the pot beneath the strainer. Let the milk strain for anywhere from one to three hours.
6. Use the Whey While You Wait
While you are waiting on the curds and whey to separate, you can start glancing over these ideas at how you can utilize the whey so it won’t be wasted.
Here are a few ideas and the links to the tutorials on how to use the whey:
- Make ricotta cheese
- Soak your beans in it to degas them.
- Make homemade dog treats
- Make healthy lemonade
- Make homemade mayo
7. Voila! Cottage Cheese
After the curds have drained, you’ll want to remove them from the cheese cloth. Place them in a bowl and add a little salt with some of the left over cream. You can add these ingredients to taste.
However, you’ll want to break down the curds to the size you prefer them. Then you simply stir it all together and enjoy it. If you don’t want to enjoy it then and there, place it in a container and put in the fridge.
Option #2: Cottage Cheese with Rennet

Ingredients:
- Whole Milk
- Heavy Cream
- Salt
- Rennet
- Kitchen Gadgets:
- Bowl
- Pot
- Strainer and Cheesecloth
1. Heat the Milk
You will begin making the cottage cheese by pouring the milk into the pot. This recipe is assuming that you aren’t using raw milk but rather store bought. If you are using raw milk, be sure to do as shown in the previous method by removing the cream.
Then you’ll want to place the pot on the stove over medium heat and heat the milk without scorching it or bringing it to a boil.
2. Add the Rennet
Next, you’ll want to add the rennet. Rennet is basically an agent that is going to cause the milk to form a gelatin. It is just a faster method than leaving the milk on the counter for two days.
You’ll want to add 4 drops of rennet per 1 quart of milk. But please do read the instructions. This is just a generalization. Different brands may call for different amounts. After you’ve added the rennet, then stir it into the milk for a few minutes.
3. Cover and Let Stand
Now that the rennet is all stirred into the milk you will simply cover it with a cheesecloth and allow it to stand for about 4 hours or so.
Basically, you are looking to see when the milk is in a gelatin state. When it reaches that state you are ready to move on.
4. Slice It
After the milk reaches the gelatin state, you will take a knife and chop it up. You are just breaking up the curds is all.
When this is done, you are ready to move on. As you can see this method moves right on along.
5. Cook It
Now that the curds are broken up, you are ready to cook the mixture again. You’ll want to add your salt in this step.
So what you are doing is cooking the mixture in order to separate the curds and the whey. You’ll want to heat it over medium heat so you don’t scorch or boil the mixture. You will stop heating it once the curds and whey are separated.
6. Strain and Serve
Now that the curds and whey are separated, you will want to place a strainer over a pot with a cheesecloth lining the strainer.
Then you’ll pour the heated mixture into the strainer and allow it to strain. This process will take a few hours.
So while you wait, start considering how you are going to use the whey. If you don’t feel like making anything out of it you can always feed it to your livestock as they think it is a tasty treat.
After the curds have finished draining, you’ll want to place them in a bowl. Add some cream to them and extra salt if it suits your taste buds. Then you are ready to enjoy your homemade cottage cheese!
Option #3: The Vinegar Method

Ingredients:
- Milk
- Heavy Cream
- Salt (if desired)
- White vinegar
- Kitchen Gadgets: Same as other methods
1. Heat the Milk
You’ll begin this method by heating the milk as well. You don’t want to boil it or scorch it during this process so try heating it on medium and stirring as needed. Remove the milk once it is heated through.
2. Add the Vinegar
After the milk has been heated through, you are ready to add your vinegar. You will need to add a ½ teaspoon of vinegar per 1 quart of milk.
When the vinegar has been added stir the mixture slowly for 2 minutes.
Next, you’ll want to cover the pot with a cloth and let it sit for 30 minutes.
3. Strain the Curds
After the pan has rested for 30 minutes, you will need to put a cheesecloth inside your strainer. Then place the strainer over a second clean pot.
Now, you are ready to pour the milk and vinegar mixture into the strainer. You will need to let it drain for about 5 minutes.
4. Rinse the Curds
Obviously, you are working with vinegar so the curds will have a pretty potent taste. That is why this step is so important.
So you’ll want to begin by taking the whole strainer that is lined with cheesecloth and rinsing it under cold water.
Then you can either press the curds down to squeeze them, or wrap them up in the cheese cloth and squeeze in order to fully squeeze the curds.
However, you decide to squeeze the curds, you’ll want to rinse them again. Then squeeze them again until you feel certain that they are thoroughly rinsed and cooled off.
5. Enjoy
After you have completed the squeezing, cooling, and rinsing process, you are almost ready to eat them. You just need to place the curds in a bowl, add a little cream, and a little salt to them. Then you enjoy them or place them in the fridge to enjoy later.
Option #4: The Lemon Juice Method

Ingredients:
- Milk
- Lemon Juice
- Salt (optional)
- Kitchen Gadgets: The same as other methods
1. Heat the Milk
This our final method. You will see it is very similar to method 2 and 3. So it shouldn’t surprise you that it all begins by heating the milk.
Again, this method is assuming that you are using store bought milk. If you are in fact using raw milk, then you’ll need to be sure to pull the cream from the top before we begin.
2. Add the Lemon Juice
You will want to add the lemon juice to the heated milk. You’ll need about ½ teaspoon to 1 quart of milk. Stir the lemon juice into the milk for a few minutes.
3. Let it Sit
After the lemon juice has been stirred into the milk, you just need to cover the pot and let it sit for about an hour. While the pot is working, you’ll notice that the curds and whey will begin to separate.
4. Strain It
After the hour has passed, place a cheesecloth into a strainer. Then place the strainer over a fresh pot. You’ll then pour the lemon and milk mixture into the strainer and allow it to strain for 5 minutes.
5. Rinse It
Then you’ll want to thoroughly rinse the curds as mentioned in method 3. Again, since you are working with lemon juice it is important to make sure that the curds are thoroughly rinsed so you don’t end up with odd tasting cottage cheese.
6. Enjoy It
Finally, you’ll place the curds in a bowl. You’ll need to add a little cream and a little salt to taste. Then you can enjoy them or place them in the fridge to be enjoyed later.
As you can tell, making cottage cheese doesn’t take a ton of ingredients and it isn’t difficult either. It is also good to know that you can use any kind of milk to make it.
So if you raise goats for dairy purposes, you can use goat milk to make cottage cheese. You can use raw cow’s milk, buttermilk, sour milk, and store bought milk.
But I want to hear from you. Do you make your own cottage cheese? Which method do you use? Do you have a different method that you’d be willing to share with us? What kind of milk do you use?


