Sourdough bread is a delicious treat, and it makes the best grilled cheese you will most likely ever eat! I could go on and on talking about it.
The only problem is that it’s tricky to get started.
It isn’t like plain white bread that you whip it up in a day. Sourdough takes at least 7 days to get the starter going.
However, don’t let that deter you from making one of the tastiest loaves around.
Read on and discover how you can make a delicious sourdough starter in 4 (yes, only 4!) simple steps.
Ingredients:
- 10 cups of all-purpose flour (whole wheat can be used on Day 1 if you choose.)
- 5 cups of water
Equipment:
- 2-quart container (non-metal)
- A scale or measuring spoons
- Whisk or wooden spoon
- Plastic wrap or lid to the container
Instructions for your Sourdough Starter:
Making a sourdough starter is usually a 7-day process. If your starter does not take off in 7 days, it’s okay. Just keep feeding it until it gains strength.
Day 1:
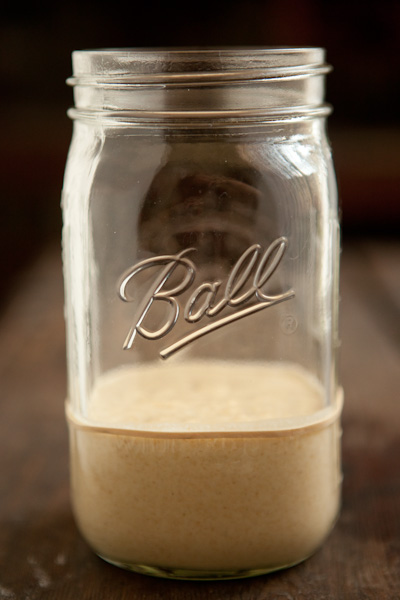
You will begin your sourdough starter journey by pouring 1 cup of flour in a non-metal container. If you want to make your own flour, read our reviews for the best grain mills and how to make flour.
It can be glass, plastic, or stone. Then pour half a cup of water in the flour and mix it up well.
You have two options for the flour today:
You can use plain, all-purpose flour and allow wild yeast to do its job. Or, you can use whole wheat or rye flour. This flour is known to have nutrients and microorganisms in it that seem to spur on the fermentation process a little easier.
It is up to you which one you use.
The room temperature is what is important. Keep the starter between 68-70°F.
If your home stays cooler than this, then consider starting your sourdough starter in a warmer area such as on top of your refrigerator.
You can also purchase a bread proofer like this one.
The temperature matters because the colder the area the starter is in, the slower it grows.
Just try to choose an ideal method, so you don’t have to wait too long for that first delicious loaf of sourdough bread.
Be sure to cover the starter with either plastic wrap or the container lid. Let it sit until the next day around the same time.
Day 2:
Today, you might see some small bubbling activity. Or you may not, it doesn’t really matter.
You are going to take half of your starter and dump it.
“What!?!”
Yes, dump half of it.
The reasons for doing this are:
- You’ll have way too much starter.
- Less starter helps to balance the pH in the sourdough starter.
- Less starter means fewer cells fighting over food that feeds the starter.
So as wasteful as it seems, toss it.
You should have 4-ounces of starter left. Use a scale to measure it, like this one.
If you don’t have a scale, you can always use good, old fashioned measuring cups and make sure you have a heaping half cup remaining.
At this point, add 1 cup of all-purpose flour to your remaining starter. Remember, from now on you will use only all-purpose flour (even if you opted to use whole wheat for the first step.)
Then follow it up with half a cup of water and stir.
The trick to the water temperature is this: if your house is closer to the 68°F mark, you need warm water. If it is closer to the 70°F temperature, you need to use cool water.
The water temperature will help the starter stay around the desired temperature.
After your starter has been thoroughly mixed up, cover it again and place it back in its warm nesting spot.
Day 3:
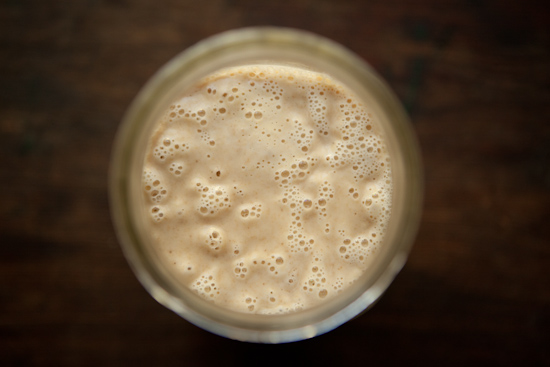
By today, you should start seeing some serious bubbling activity.
Today is the day your sourdough starter will begin needing a little more attention. You will need to start feeding it twice a day.
The trick is to try and space them out as evenly as possible. So about every 12 hours should do the trick.
Start today like the rest:
Measure out 4-ounces of sourdough starter, this equates to about a heaping half a cup. Then toss the rest of the starter.
Add 1 cup of all-purpose flour and half a cup of water to the remaining starter. Mix thoroughly and cover the starter until you check on it again in 12 hours.
When you return, repeat the same process.
Days 4-7:
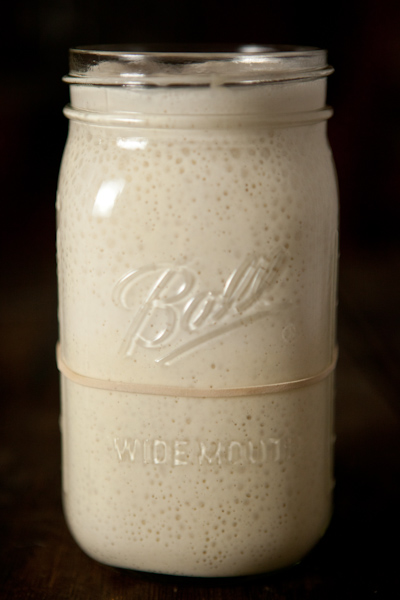
Follow the same steps as you did on Day 3.
Continue feeding your starter twice daily until you have a strong, active starter (hopefully) on day 7. If your temperature has remained consistent, then your starter should be ready to go by Day 7.
If not, don’t grow discouraged. As I said before, just keep feeding it until it gains strength.
You know that your starter is ready when it is really bubbly and has a fruity or slightly tangy aroma.
Once your sourdough starter is complete, pour off all but 4-ounces and give it one last feeding. Stir it thoroughly and cover it for 8 hours before using it.
Now What?
You have many options for what you can do with your starter once it is complete.
Option A: Bake with it.
After the 8 hour resting period, you can use your starter to bake a fresh loaf of sourdough bread. We have a great selection of 75 sourdough recipes, so as you can see there’s plenty to do with your starter.
Option B: Continue To Feed Your Starter
If you baking with your starter is an ongoing process, then you’ll need to continue to save 4-ounces of your starter after baking each time.
Continue twice-daily feedings of the starter to keep it fresh and growing, and be sure to discard half of the starter before each feeding.
Option C: Refrigerate it.
If you aren’t going to bake with your sourdough starter on a regular basis, refrigerate it.
This will keep it fresh.
Be sure to pull it out once a week and feed the starter. You’ll need to leave it out on the counter overnight the day you feed it to give the yeast an opportunity to work.
Option D: Make A Thicker Starter
If you’re planning on going long periods between baking but still would like to have a sourdough starter for those times when you want to bake, you can do that too.
Start by creating a thicker starter.
All you have to do is double the amount of flour that you are feeding your starter.
It will help protect the yeast during those long breaks in the fridge.
Option E: Dry your sourdough starter.
If you have a starter going but know you won’t be using it for quite a while, this is a great option.
After you have successfully started your sourdough starter, spread it on a Silpat.
If you are like me and are thinking, “What in the world is that?”
They are basically just a silicone, flexible baking sheet and are fairly inexpensive. The first time I saw one, they reminded me of the flexible cutting boards.
You can get one here.
After you smear the starter on a non-stick surface of some kind and let it dry, you should be able to peel it off and crumble it up.
Store it in an airtight container. It will keep your sourdough starter for months.
When you’re ready to use it again, take a ¼ cup of your dried starter and dissolve it into 4-ounces of water and 4-ounces of flour.
You need to feed the starter again afterward.
Final Tips:
Some say that if you’d like to give your starter an extra boost, it is best to use an older starter that was handed down.
You can do these multiple ways.
- You can purchase a starter from a local bakery if they sell it.
- You can ask around to see if any local, baking friends have some starter to share.
- You can actually purchase a starter from Amazon.
Some bakers also use special items when making sourdough bread.
Here is a Danish whisk that comes highly recommended and a crock that is great for storage of your sourdough starter.
