Gardening is hard work, so it’s always a welcome break when you can do a project that’s fun for a change. Learning how to make a scarecrow is one job the kids won’t try to avoid, especially if they have a hand in the design as well as the build.
On top of being entertaining, it’s a practical project. Birds and other critters can wreak havoc on your crops, whether it’s a small herb garden or a much larger plot. You can’t be there 24/7, so make it look like you are with a scarecrow.
If you don’t have trouble with birds, have a go anyway. Scarecrows give a cool, retro feel to your property and you can be as much of a garden ornament as a statue or fountain. They’re particularly fun to have around during Halloween and fall.
If you want to have some extra fun, you can theme your scarecrow and change its clothes depending on the season or holiday. You could even dress up your scarecrow in your favorite football team’s jersey to celebrate a game.
Can’t wait to get started? You’re seven steps away from a fabulous scarecrow.

Supplies You’ll Need
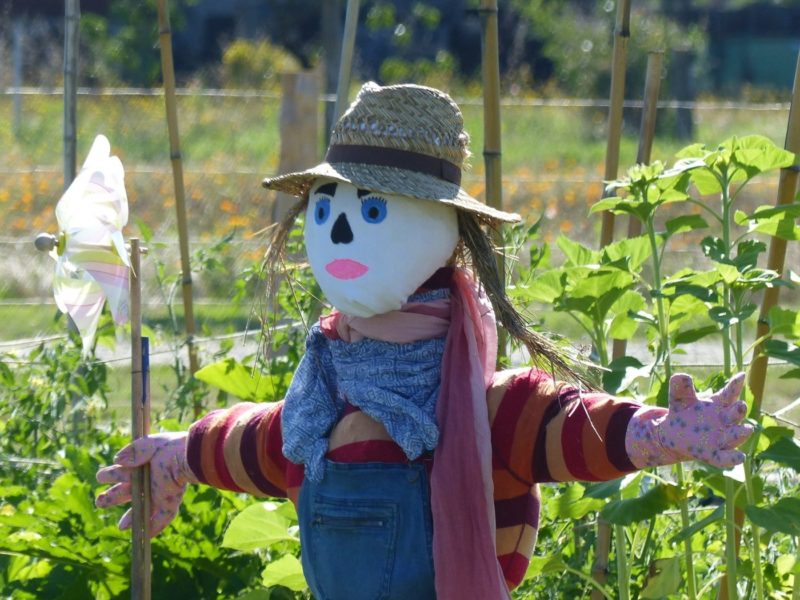
Gather everything you need before starting the project. You can skip some of these items and add others as you see fit. You can also get creative with your choices: use a tree branch or a broken shovel handle for the arms. Use old rusted garden cultivators for hands. The options are limitless.
- Wood stick approximately 6-8 feet long for the body
- Shorter wood stick about 5 feet long for the arms
- Old clothes – pants/jeans, old shirt, bib overalls, old coat, etc.
- A hat or wig
- Burlap sack or pillowcase for the head
- Hay, straw, rags, or newspaper to build the body and head
- Gloves or other “hands”
- Colored felt or marker pens for the face
- A post to secure the scarecrow to
Putting Your Scarecrow Together
You can make the scarecrow by laying the wood down on the ground. Make sure the construction it’s solid before getting your scarecrow assembled. You don’t want to have everything in place and get ready to sink your scarecrow in the ground only to discover that your frame is wobbly and you have to start over.
Step 1: Put on the Shirt
The first thing you want to do is thread the smaller piece of wood through the arms of your shirt. Trust me, you don’t want to get your wood all assembled and then discover that you can’t get the shirt on. Leave the shirt open and unstuffed.
Step 2: Assemble the Body

Form the two stakes into a cross and lash them together where they join. You want the smaller wood with the shirt on it to sit about 1/3 down from the top of the longer piece. This will create the body and arms. I use a strong twine or wire to bind the wood together, but if the wood you are using is flat, you can use nails or screws.
If you’re going to secure the scarecrow by digging the vertical post into the ground, you need to eave sufficient length at the bottom to do so. In that case, use an 8-foot piece of wood. I prefer to use a separate post (see step 8). If you go this route, use a 6-foot piece of wood instead.
Now you have the body on which you’ll build the rest of your scarecrow in any design that you fancy.
Step 3: Dress it Up
Now you can button the shirt and secure it to the wood at the waist and arm cuffs using nails, twine or wire. Place gloves on the ends if you want. I’ve used old leather gloves or even dishwashing gloves when our scarecrow was an old maid.
For the bottom half of your scarecrow, you need some pants. Slide the pants up the vertical post just past the shirt. Tuck the shirt into the pants and secure everything with a belt. I also like to add a nail on the backside of the pants to make sure they don’t slide down.
This method looks too thin for me. It gives the scarecrow an unnatural hourglass look. There are two ways to address this:
The first method is to use overalls. That way the overalls sit over the shirt and the pant legs hang down naturally.
Alternately, you can secure the pants at the bottom with twine and stuff them with straw, newspaper or hay.
Step 5: Stuff It
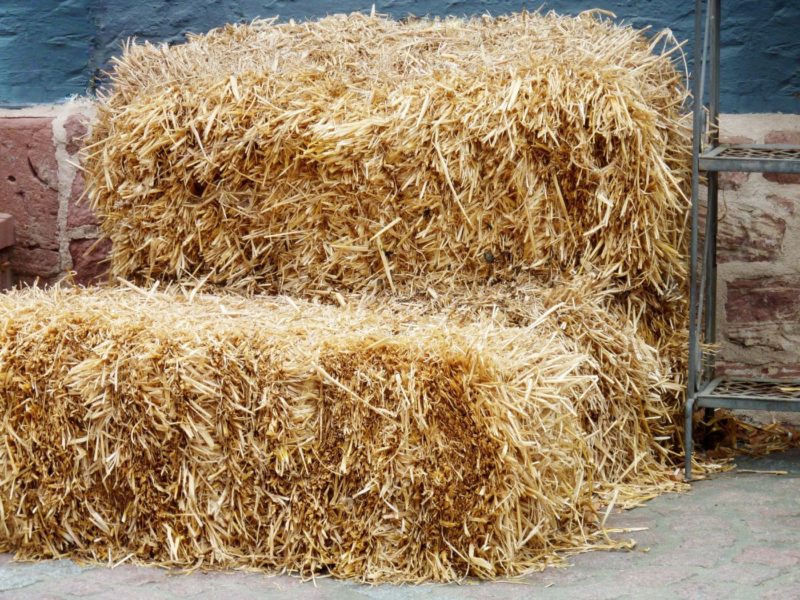
Stuff the shirt and pants with hay, newspaper or straw. You can be creative here by making your scarecrow fat or thin, you can have hay sticking out of the sleeves for that retro look, or you could have it all tucked tidily into the shirt.
Make sure to stuff plenty of stuffing into the waist area and secure the belt around that.
Step 5: Add Shoes
Now it’s time to decide on shoes or boots. I keep work boots and shoes after they have become too old and use them for projects like this.
I’ve found the easiest way is to have the pants or coveralls touch the ground at the bottom of the pant leg. This way I can simply put the pant leg in the boot sitting on the ground and fill it with rocks for stability.
Or, for the retro look, have the pant legs off the ground and have hay sticking out the bottom.
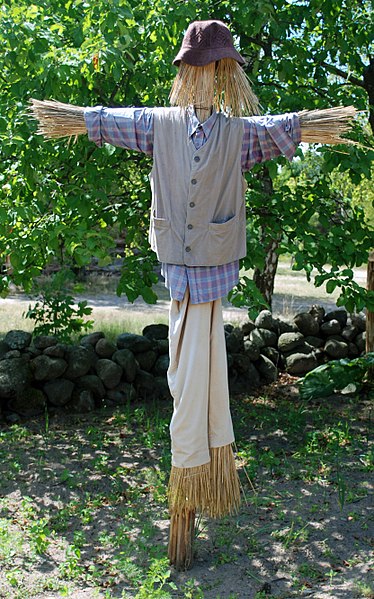
Step 6: Make the Head
It’s time to give your scarecrow a head. I prefer to use an old burlap sack so I save them when I buy trees from the nursery. You can also use old coffee bean sacks, wheat grain bags, or a pillowcase.
Fill the sack with hay, straw, newspaper, old plastic bags, or rags. Gather the end and place on the top of the post and tie off as tight as you can with wire or twine.
This is where your creativity can shine, or the kids can really go to town. Draw on a face with good quality markers. We’ve ended up with pirates, ladies with lipstick, monsters, zombies and all manner of characters.
You could even sew buttons for eyes and fabric for the other facial features. It all comes down to your preference and time.
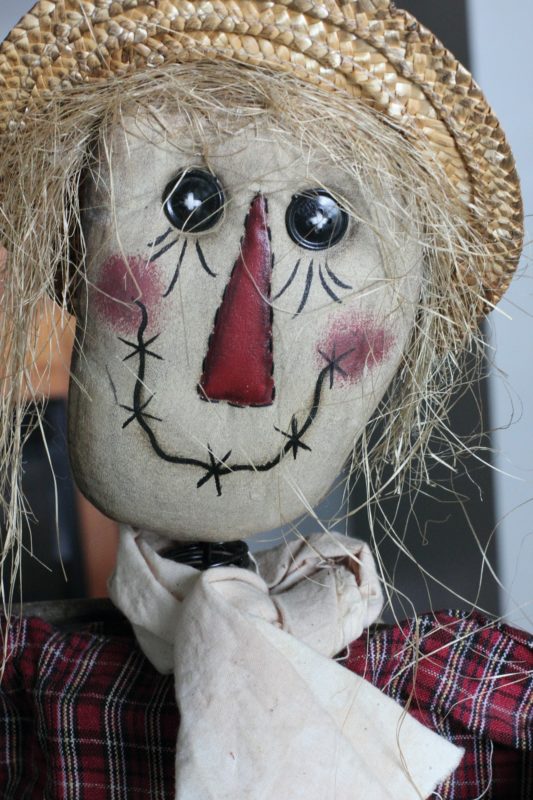
You can also add a hat or a wig at this point. Secure it with a few safety or hat pins. For a retro vibe, take fine straw and glue it to the head to create hair.
Step 7: Secure
Now is the time to secure your scarecrow into position. I get a lot of wind in my area, so I prefer to secure it to a post in the ground, like a fence post, or use the trunk of a small tree to tie the wood frame to.
Alternatively, dig a deep, narrow hole and put the bottom of the vertical post into the ground. Tamp it securely.
If your scarecrow is heavy, I recommend the post or tree method. Otherwise, you may find your new friend facedown in the dirt.
Other Scarecrow Options
- Haybale Scarecrow- You can turn a haybale onto its end and dress it like a scarecrow. This is perfect for themes like minions.
- Scarecrow Families – Try a family group made up of one or two big scarecrows for the parents and smaller ones for the children.
- Themed Scarecrows – Here your choices are endless. Consider the time of year like Halloween, Christmas, someone’s anniversary, or Independence Day and dress your scarecrow up accordingly.
- Stick Figure- I’ve seen wooden crosses dressed in clothes and a hat without the stuffing. It was a little bit scary and just as effective as a traditional hay-filled scarecrow. Not to mention a lot less work.
Your choice is endless when it comes to making a scarecrow. It’s one of those gardening jobs that’s actually fun, so rope in the kids and make an afternoon of it.
Make Your Scarecrow Effective
Scarecrows are a fun decorative element for the garden, but they can also be an effective deterrent to pesky birds and deer trying to eat your crops. Animals will quickly realize that your scarecrow isn’t an actual human, so the key is to make changes often. To make your scarecrow as effective as possible, try these tips:
- Move your scarecrow around
- Attach reflective elements to the arms
- Attach noise-making things to the arms
- Change your scarecrow’s wardrobe
We’d love to hear about your scarecrow making adventures, so let us know what you came up with in the comments.


