No herb garden is complete without growing marjoram. It adds flavor and scent to your garden (not to mention your kitchen). Butterflies and other helpful insects flock to marjoram, making it a great companion plant.
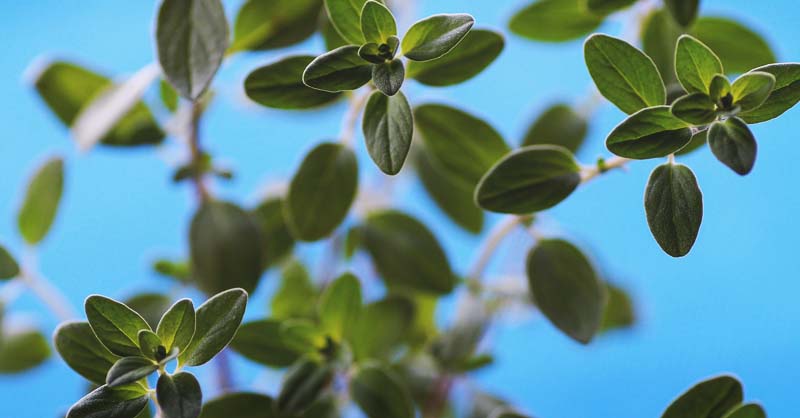
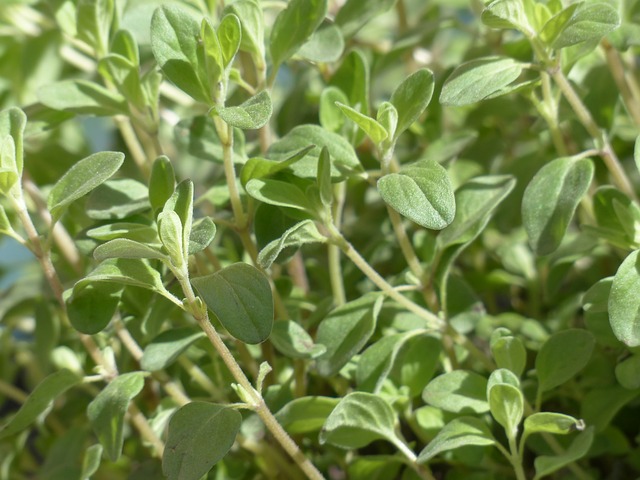
You can quickly pinpoint marjoram in the garden. It reaches 1-2 feet tall with square stems and grey-green leaves. Small, white flowers grow in clusters over the plant. Not only does it make a great culinary herb, but it also works as a beautiful outdoor ground cover throughout the summer.
Bottom line? Marjoram (Origanum majorana) is an easy-to-grow herb that all gardeners need to try!
Before you ask: yes, oregano and marjoram are different plants. They both belong to the mint family and they look similar, but one bite and you’ll know that they’re not the same. Technically, marjoram is a sub-species of oregano, but marjoram is milder, sweeter and more floral.
Oregano has a pungent, spicy flavor.
The Best Marjoram Varieties
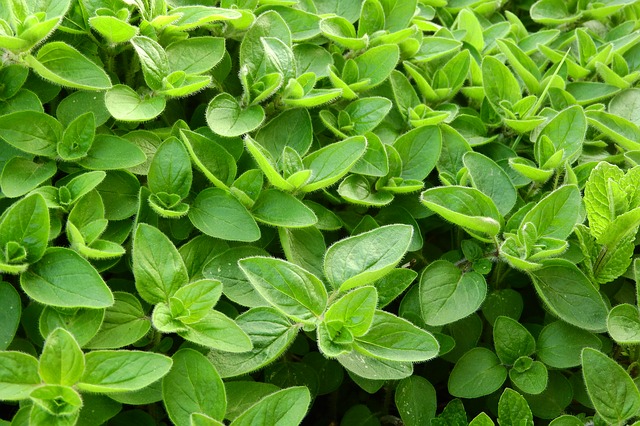
Marjoram comes in three varieties: sweet marjoram, pot marjoram, and wild marjoram. Wild marjoram is known as common oregano. You can use any of the variations in the kitchen as a seasoning for thousands of dishes, and all varieties have a beautiful scent. Centuries ago, marjoram was used to flavor beer before the discovery of hops.
A few varieties you might want to try include:
- French Marjoram: Origanum onites – This is hardy marjoram with mid-green leaves that turn to gold in the summer. It produces pink-white flowers. Add to pasta and meat dishes for more flavor.
- Gold Tipped Marjoram: Origanum vulgare – As the name implies, this type features green leaves with gold tips and pink flowers. It tastes excellent in pizza and vegetable dishes.
- Sweet Marjoram: Origanum majorana – This is a plant with silky green leaves and pink flowers. Use it in salads, sauces, and soups.
How to Grow Marjoram
Growing Zones
Marjoram is a tender perennial, but most gardeners grow it as an annual because it isn’t capable of handling cold and freezing temperatures. It grows well in zones 6-11.
Sun Requirements
Pick a location in your garden that receives full sunlight. Marjoram can handle partial shade, so long as the area gets at least six hours of sunlight each day.
Soil Requirements
Marjoram needs to be in a location that has well-draining soil. Standing water is a quick way to kill off your plants. It also prefers plenty of organic matter.
To prepare the soil, test the pH level. Growing marjoram needs a pH level between 6.5 and 7.5, which is close to neutral. If you find that your soil is too acidic, try adding some lime to bring the acid levels down towards neutral. On the other hand, if your soil is too alkaline, you can try adding some grass clippings or peat moss.
Once you have the pH level fixed, mix in some compost or aged manure to add nutrients to the soil.
Starting Marjoram from Seeds
Marjoram can’t handle cold temperatures. It’s best to start seeds indoors during late winter or early spring, 6-8 weeks before your final frost date.
In a container with potting soil, sow the seeds below the soil surface. Seeds germinate in about ten days, so be patient, they’ll sprout right when you think you did something wrong. Keep your seedlings moist and under a grow light until it’s time for them to put them outside.
Planting Marjoram Outside
Once the threat of frost has passed, it’s time to move those seedlings outside for planting. Transplant 2 weeks after the last frost day, and be sure to give them 7-10 days to harden off before putting them in the ground permanently.
Spacing
Marjoram plants should be placed 8-12 inches apart with 18-24 inches between rows. If you live in an area that has high humidity levels, space the plants further apart to encourage better air circulation.
Taking a Cutting from Marjoram
If you live in an area that receives frost every year, it will be hard, if not impossible, to succeed at growing marjoram as a perennial in the ground. You can take a cutting from late spring to the middle of the summer to grow in pots inside throughout the winter. Another choice is to dig up the plants every fall.
Taking a cutting from marjoram is easy. It propagates well if you take a cutting from the softwood and semi-hardwood cutting.
Take the cuttings in the morning when the weather is dry, but make sure you water the plant the day before. Pick a new side-shoot and take more cuttings than you think you’ll need. Cut them down to 2-4 inches, cutting beneath a leaf node where the leaf joins a stem. Cut the stem at an angle and put in potting soil. Keep the new planting moist until it forms roots.
Growing Marjoram in Containers
Don’t have a place for a garden bed? Don’t worry! Growing marjoram in containers is easy. You can grow it indoors as a houseplant or outside on your patio. If you do decide to grow it in a container, make sure you remember to move the plant indoors, or to a sheltered location once the temperatures drop in your area.
Pick a pot that is at least six inches wide and has drainage holes at the bottom. If the container doesn’t have drainage holes, you’ll need to make some with a drill. Pick a windowsill that faces south so that your plants receive enough sunlight. If you opt to put your plants outside, pick a spot that has full sun.
How to Care for Marjoram
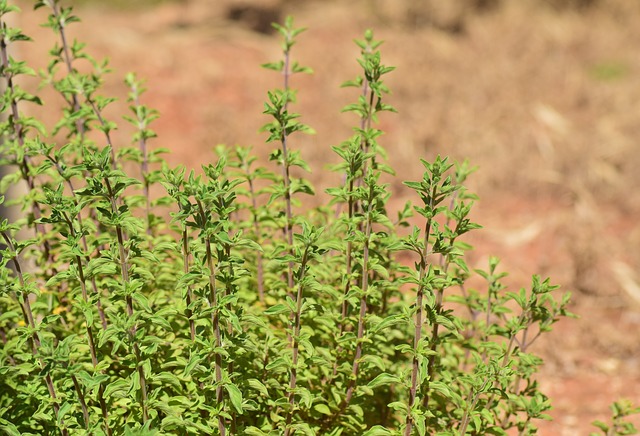
Marjoram is a reasonably hardy plant, so care is relatively easy. Once marjoram is established well in your garden, it doesn’t require much maintenance when compared to other plants.
Watering
Marjoram is drought tolerant, so if you tend to forget to water your plants often, this herb might be for you. Give transplants plenty of water at first, then allow the soil to dry between watering once plants are established.
Fertilizing
In general, you don’t need to worry about feeding your marjoram. It’s hardy and takes care of itself for the most part. However, you may want to provide half-strength fertilizer every few weeks during the early part of the growing season.
Pruning
Keeping your marjoram plant pruned helps to encourage new growth throughout the season. Cut the leaves back when the plant is too large, and when flower buds appear, make sure to cut the plant back low to stimulate new growth. Plus, cutting the plant back gives you more to harvest.
For indoor plants, pinch back plants before they start to bloom in mid to late summer, around July to September. You want to keep the potted marjoram down to a manageable 12 inches. Try to eliminate the woodiness of the indoor marjoram plant.
Common Marjoram Pests and Diseases
A few common garden pests like to give marjoram a hard time. Watch your plants carefully and always take the least-toxic approach to handle the diseases and pests on your herbs.
Aphids
Aphids are soft-bodied insects that stick to the underside of leaves. An infestation of aphids causes leaves to become yellow and distorted. Aphids release a sticky, sugary substance that causes mold on the plants.
If the plant is sturdy, you can use a strong jet of water to knock the aphids off the leaves. Use insecticidal soaps or oils, such as neem oil, to control the infestation.
Spider Mites
Spider mites cause growing marjoram leaves to become stippled with yellow, and the leaves may appear with a bronzed color. You might be able to see mites as tiny moving dots on the underside of the leaves.
Use a jet of water to spray off the spider mites from the leaves. For bad infestations, you can use insecticidal soap to kill off the mites, but be careful because some soaps will kill off mites’ natural enemies.
Mint Rust
Mint rust displays with small, bright orange or yellow pustules on the underside of the leaves. It causes large areas of the leaf tissue to die or drop off the plant. This disease affects mint and other plants. You need to remove infected plants to reduce the spread.
Cutworms
Cutworms attack the stems of young seedlings at the soil line. It might eat holes through the surface of fruits. They’re more active at night and hide during the day in the soil.
To treat cutworms, remove all plant residue from the soil after harvest, and fit a foil collar around plant stems to cover the bottom 3 inches above the soil line and a few inches into the ground. You also can hand-pick larvae after dark.
Botrytis Blight
Also known as gray mold, botrytis blight is a fungus that attacks growing marjoram plants. You’ll first notice soft brown spots on leaves, followed by gray mold. Make sure plants have plenty of air circulation, and avoid overhead watering. You can also try spraying plants with a copper fungicide.
Whiteflies
These tiny flies suck the sap out of your herbs and can spread disease. Use yellow sticky traps, encourage beneficial predator insects, and spray plants with neem oil.
Companion Plants for Marjoram
Wondering what you should plant with marjoram plants? Picking companion plants for your marjoram helps to improve its performance. You want to make sure you choose companion plants with similar growing requirements.
Here are some of the best companion plants for marjoram.
- Celery
- Corn
- Eggplant
- Onions
- Peas
- Potatoes
- Radishes
- Squash
- Beans
- Cabbage
- Broccoli
- Thyme
- Oregano
- Pepper
- Pumpkin
Harvesting and Storing Marjoram
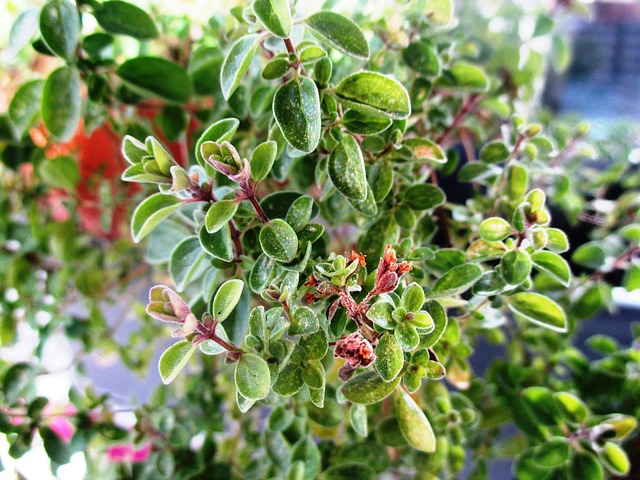
The best part has arrived – harvesting your marjoram. It’s a flavorful herb that makes your dishes unique. When harvesting marjoram, pick the shoots before the flowers start to open. Choosing at this time ensures the best flavor because fully opened blooms create a bitter taste that isn’t so appealing. That said, you can snip off marjoram branches any time you need them. You can begin to harvest 5-6 weeks after transplanting outside.
Once you have all of your herbs clipped, bundle them together and hang them upside in a dark, dry area to dry. When you’re ready to use marjoram, remove the leaves from the stems and store whole. You can crush or grind the leaves before adding to dishes.
When you’re storing marjoram, make sure you pick an airtight container and keep it in the dark, dry area.
Marjoram is an excellent herb for gardeners of all experience levels to try. Due to its hardiness and tolerance to neglect, even those with black thumbs can enjoy growing marjoram. It adds a unique flavor to dishes, and you can grow it year-round, whether it’s outside as a perennial or inside as a houseplant.

